
WR China Meta
Meta, tier list & top-player builds from the China server · live
Meta, tier list & top-player builds from the China server · live

安妮 · 黑暗之女 Mage B
✅ Patch 7.2e · stats updated 2026-09-12 · real builds of 23 top-ranked China server players captured 2026-09-11
Difficulty Damage Toughness Utility
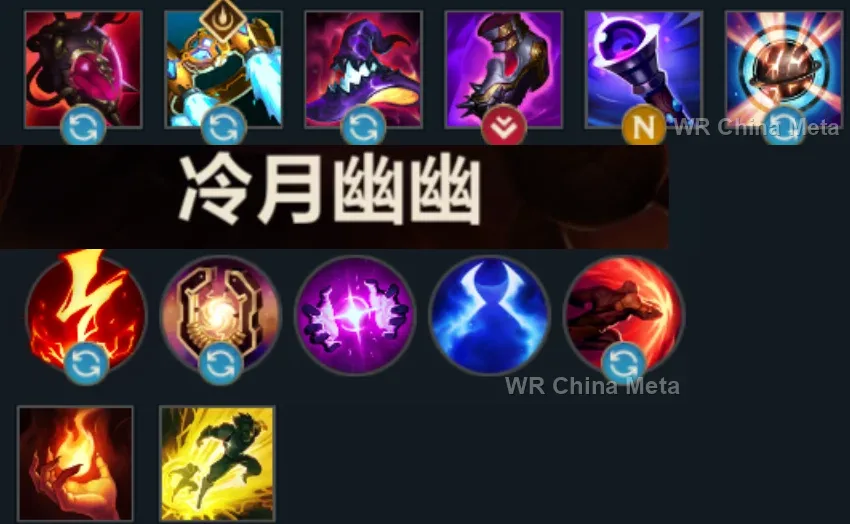
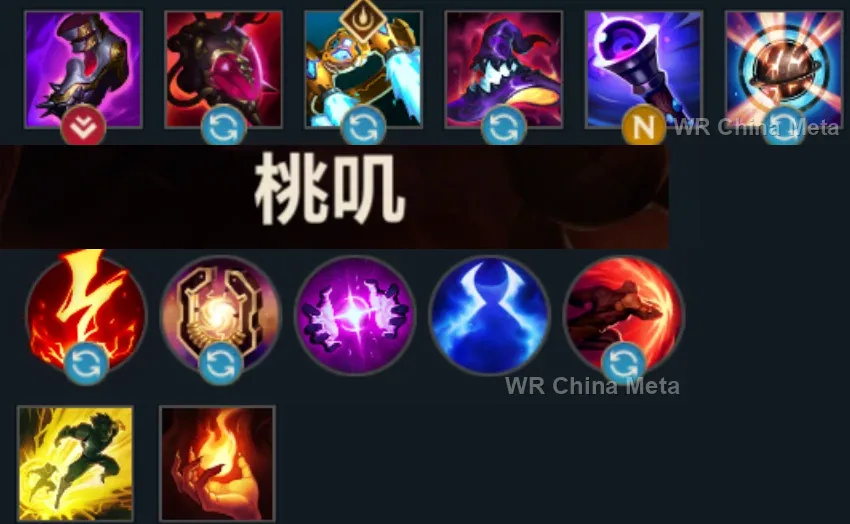
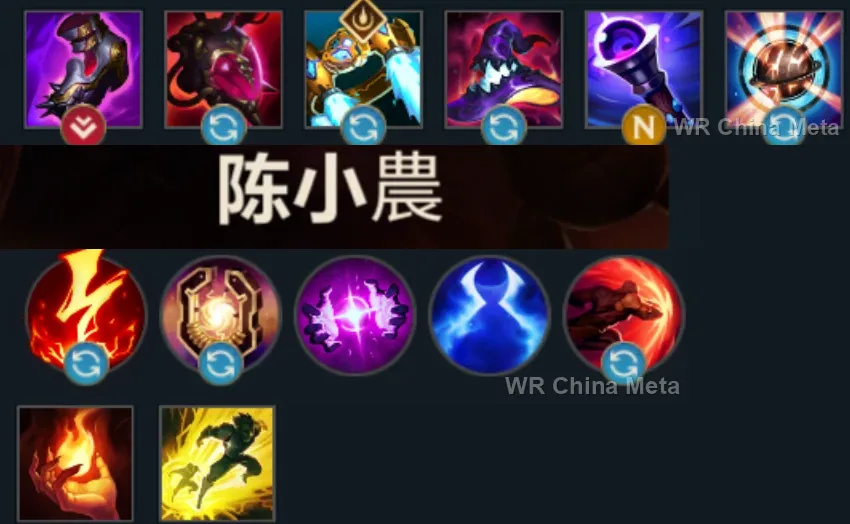
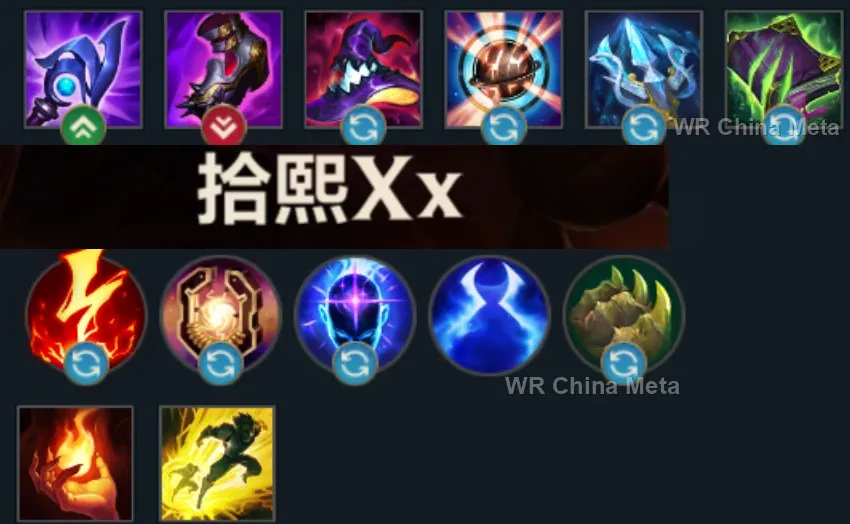
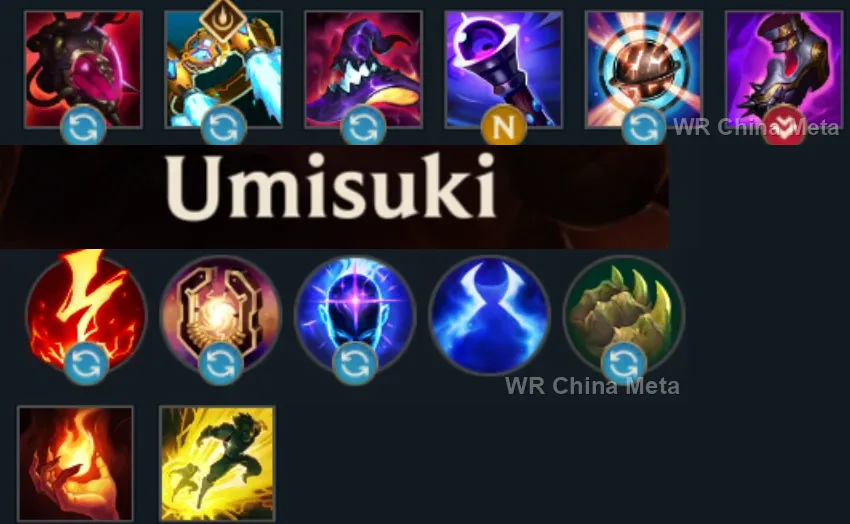
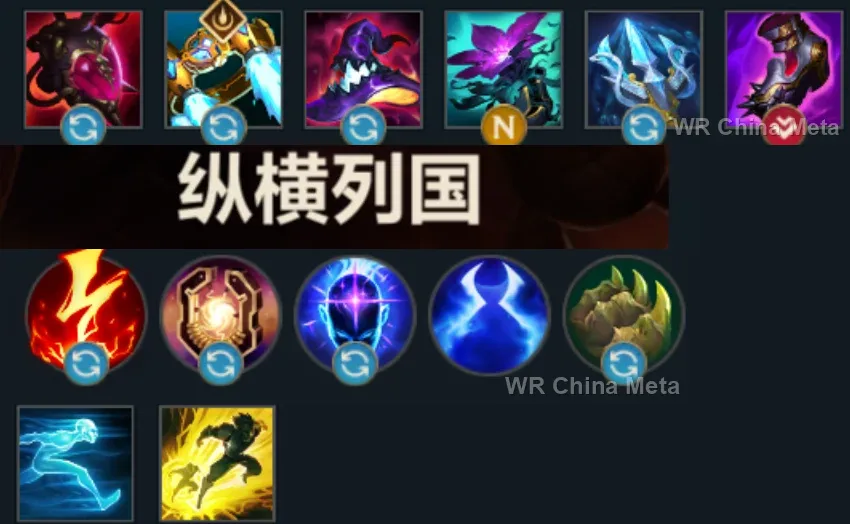
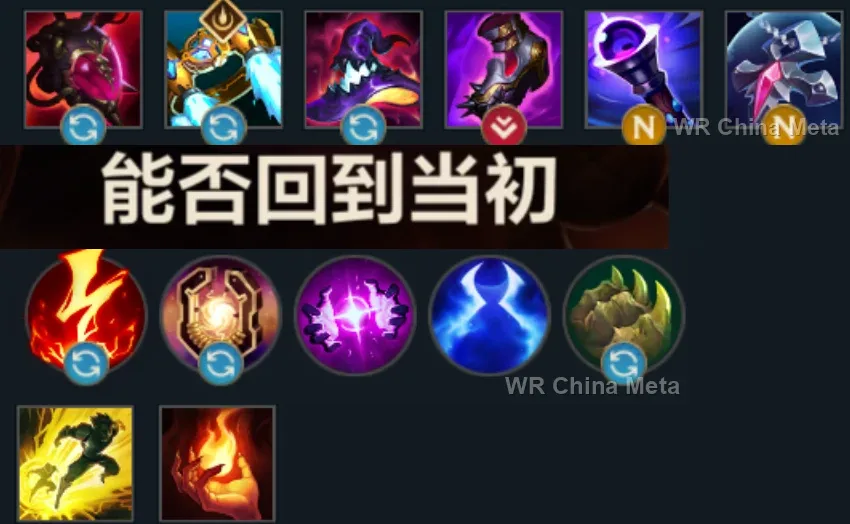
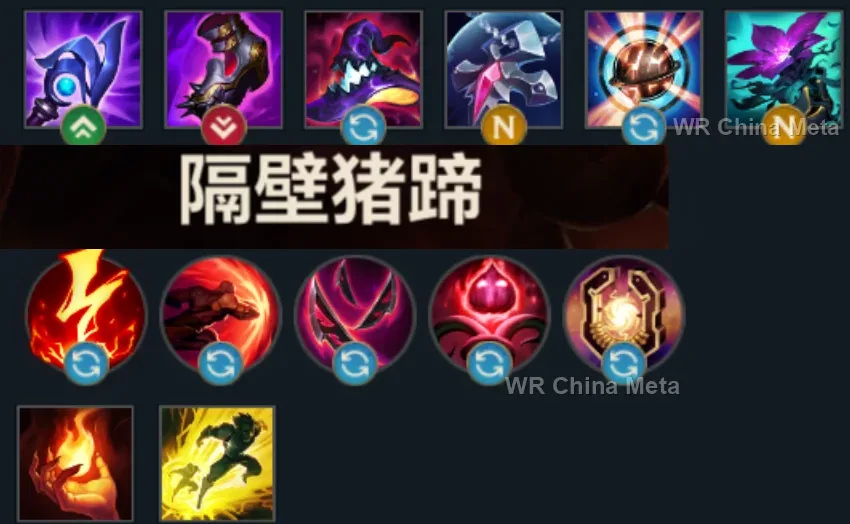
How the strongest players on the Wild Rift China server (国服) build Annie: live win/pick statistics by rank bracket, the most-used item and rune sets, and the real loadouts of the top ranked Annie players, captured in-game.
📖 How to play Annie






Counted on 25 real builds captured from the Chinese client, player by player. Independent from the official API above.


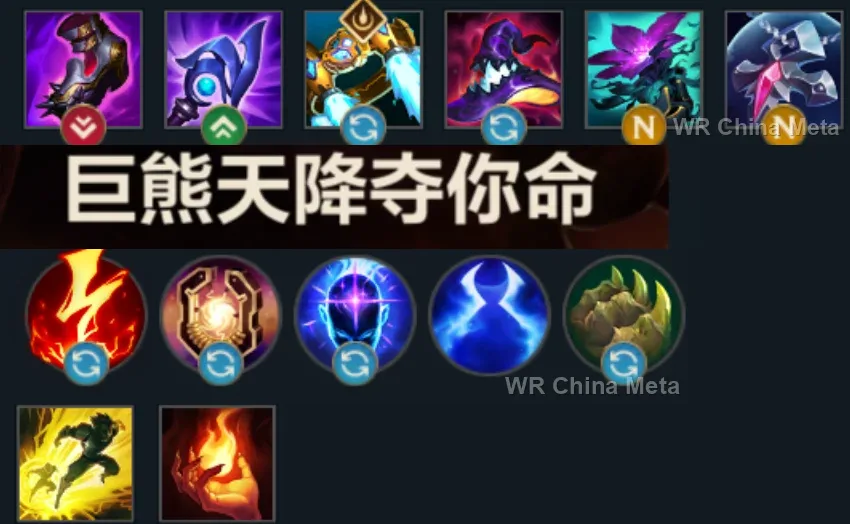
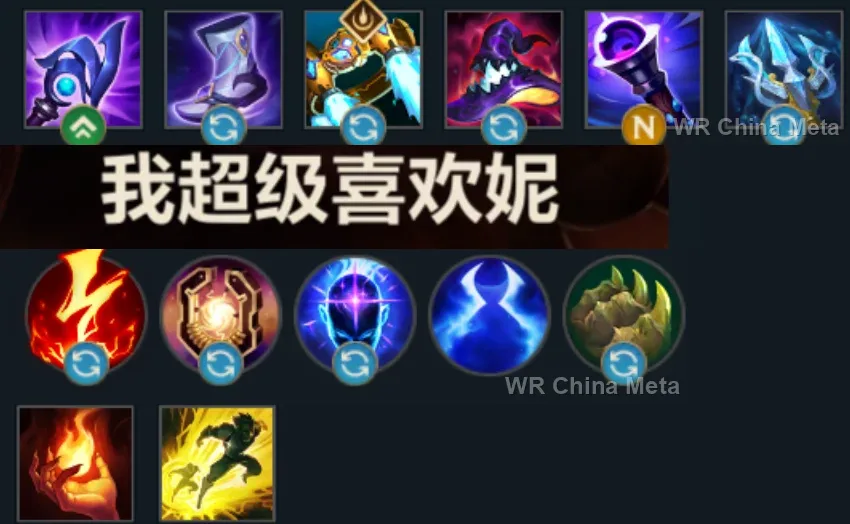
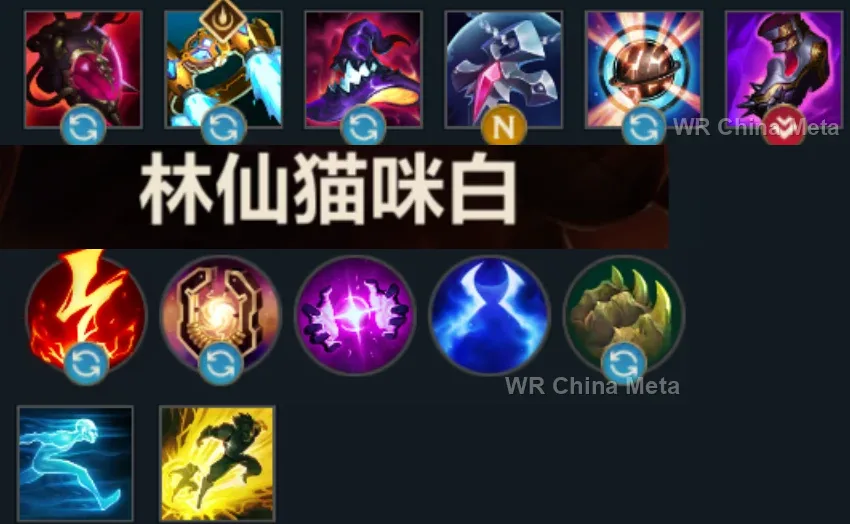
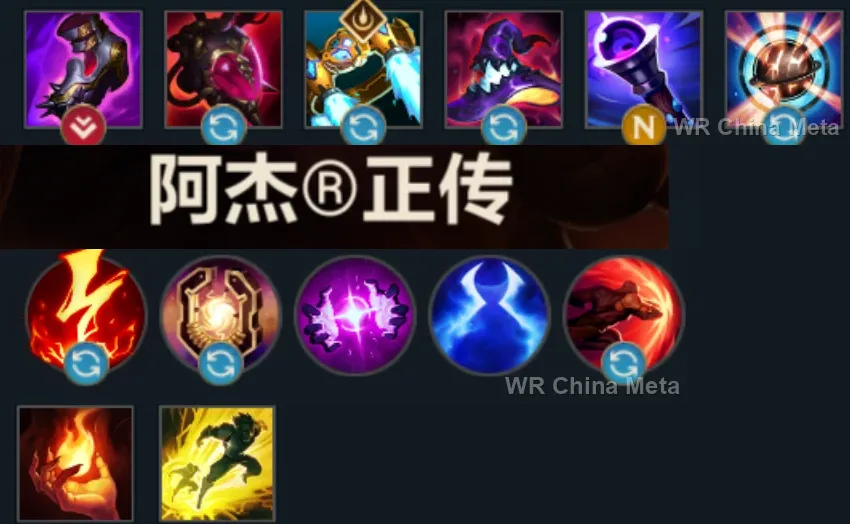
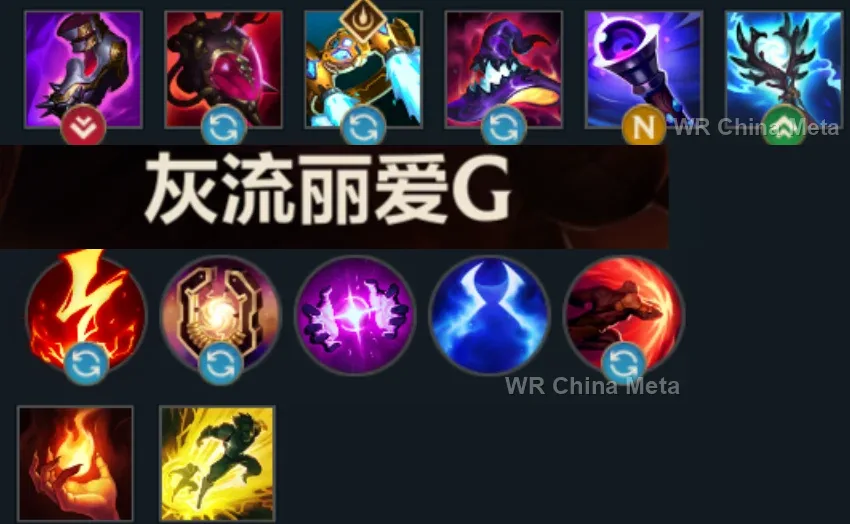
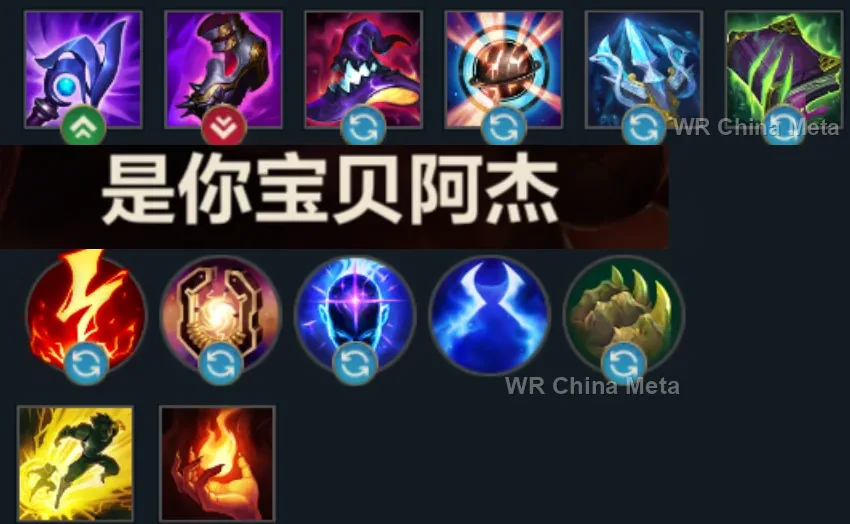
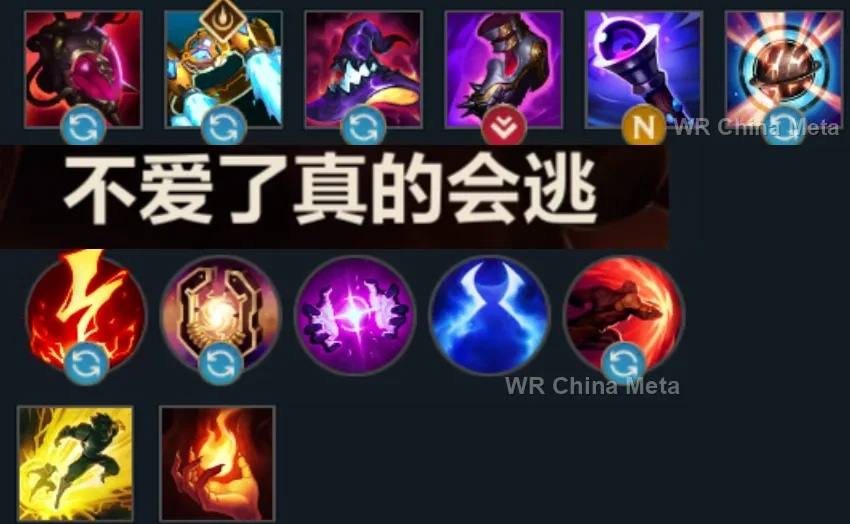
Taken from the official in-game China leaderboard. Spells, runes and items of every public top player.
23 of the top 30 players have a public match history; the others keep theirs private.
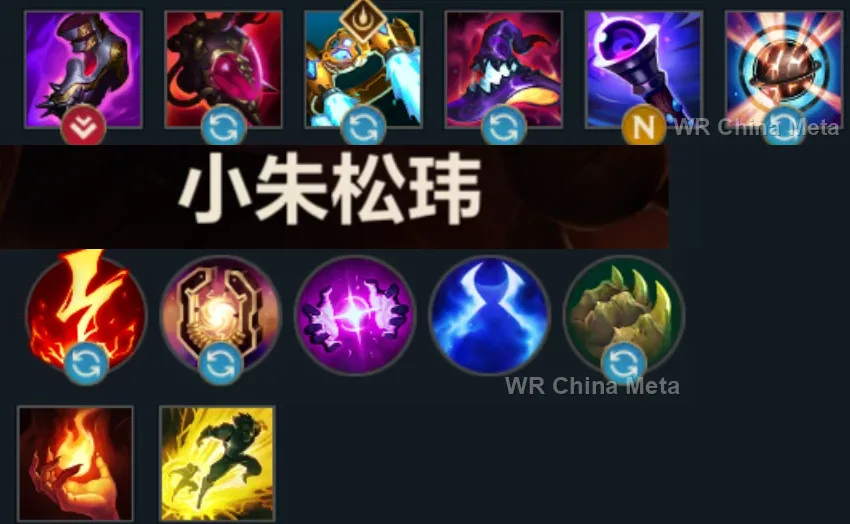
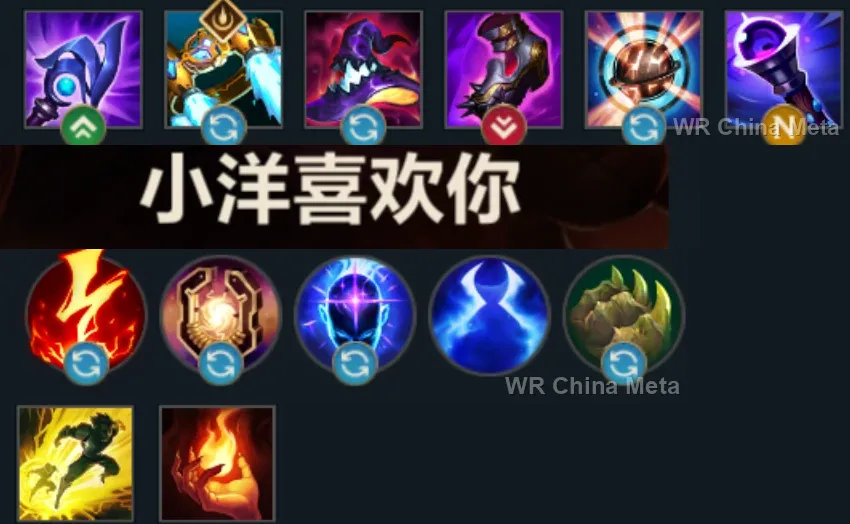
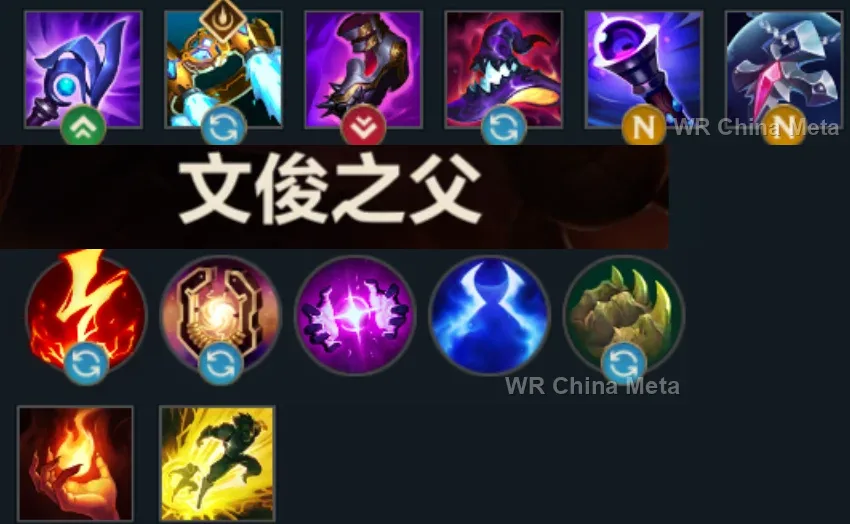
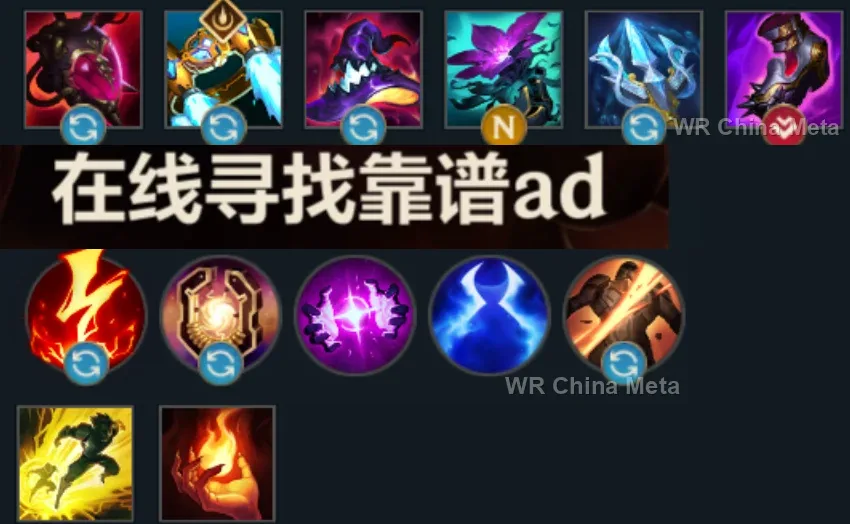
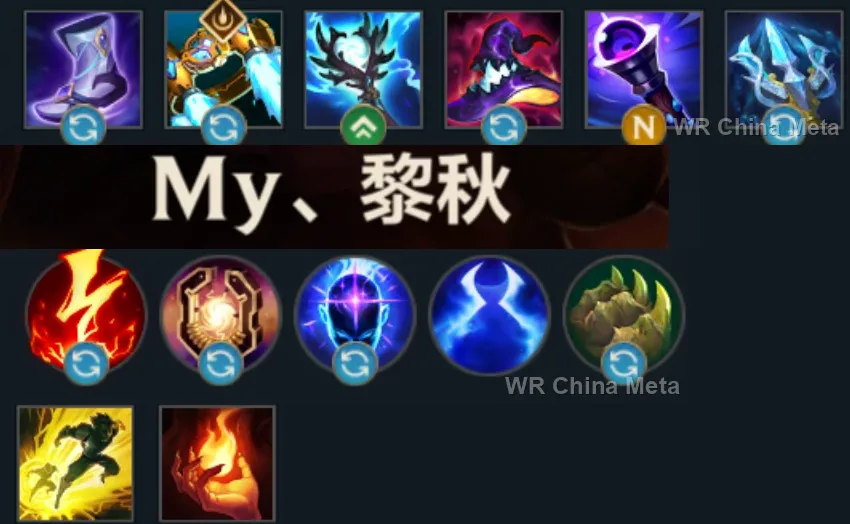
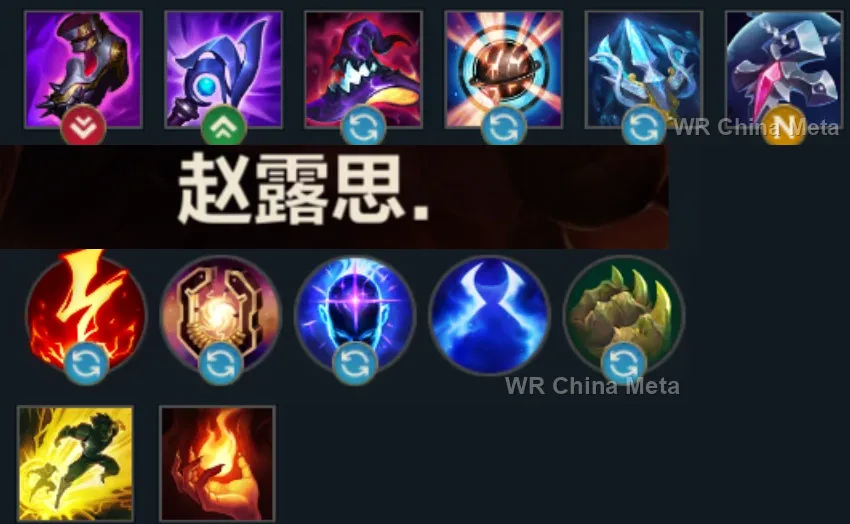
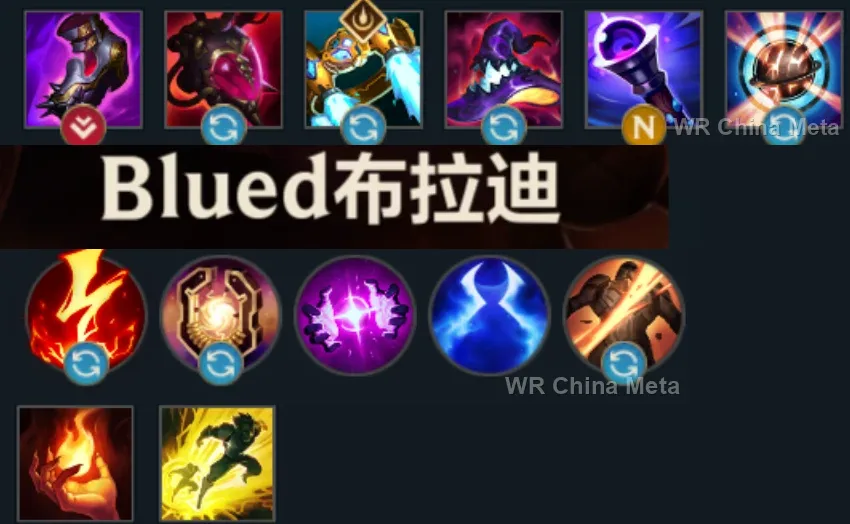
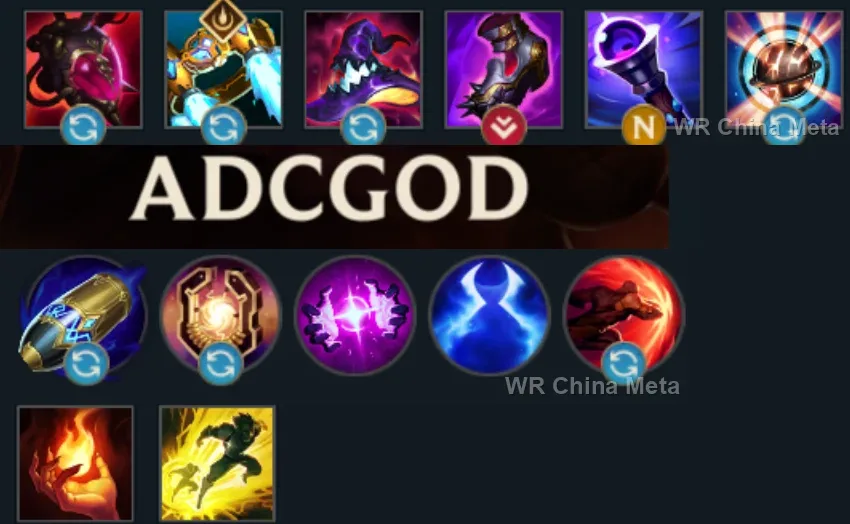
The toughest lane matchups for Annie on the Wild Rift China server, with why each is hard and exactly how to play it.
 Annie vs Kassadin Unfavorable
Why Kassadin counters Annie: Magic shield on his Q and an anti-magic passive: your stun-burst does little to him, and his scaling overtakes you after 9.
How to play Annie into Kassadin: Keep your stun visibly charged before 5 to zone him off minions. Use your mid-game window: after his 3 items the 1v1 no longer exists.
→ Kassadin Annie vs Lissandra Unfavorable
Why Lissandra counters Annie: She beats you at the CC game: her root outranges your stun and self-R cancels your Flash engage.
How to play Annie into Lissandra: Never Flash first. Trade at Q range and keep your stun as defense for when she comes in.
→ Lissandra Annie vs Galio Unfavorable
Why Galio counters Annie: His passive magic shield eats your Qs and his taunt punishes the short range of your flash-engage.
How to play Annie into Galio: Poke only right after his passive shield has been consumed. In teamfights ignore Galio: your one-shot belongs on his carries.
→ Galio Annie vs Orianna Skill matchup
Why Orianna counters Annie: A game of distances: the ball keeps you out, but one moment of the ball out of position and your Flash+R deletes her.
How to play Annie into Orianna: Track the ball's position at all times. Flash-engage only when the ball is far from her and your stun is charged.
→ Orianna Annie vs Ahri Skill matchup
Why Ahri counters Annie: A skill matchup: her dash dodges the bear, your point-and-click stun punishes her short Charm. Usually whoever engages first wins.
How to play Annie into Ahri: With your stun charged, YOU are the threat: walk forward and make her miss minions. The only real danger is a Charm thrown from fog of war.
→ AhriThe champions Annie works best alongside on the Wild Rift China server, lane by lane, with the reason each pairing works.
The short range on your damage spells forces you to walk in: Unstoppable Force (R) removes the problem by piling half their team in front of you, knocked up and bunched, where Incinerate (W) and Summon: Tibbers (R) hit three bodies instead of one.
With the speed boost from Molten Shield (E) on cooldown you have no way out of a dive, and your page says so plainly: Shadow Dash (E) taunts the diver before he ever reaches you, and Stand United (R) shields you from half a map away.
Fling (E) throws a target behind Singed, so with him standing between you and them it delivers them inside the short range of Disintegrate (Q) and Incinerate (W). Mega Adhesive (W) roots them there, and with Pyromania (P) charged it is over.
Volcanic Rupture (Q) into Searing Charge (E) against the wall is worth a 1.25-second knock-up, and Call of the Forge God (R) adds another one on a group: two windows where you do not spend Pyromania (P) and can bank it for later.
Only worth it where walls are close by: GNAR! (R) into terrain turns into a full stun and Wallop (W) adds 1.25 seconds of area stun, which is a group held still for your Incinerate (W) cone. In open ground it is half an ultimate.
Cursed Touch (P) makes every point of magic damage they take carry true damage with it, and you are magic from the first spell to the last: it amplifies the whole rotation. Curse of the Sad Mummy (R) buys the 1.5 seconds you need to walk in.
His page says Absolute Zero (R) simply gets walked out of without setup: the guaranteed stun from Pyromania (P), or the knock-up from recasting Summon: Tibbers (R), is the lockdown he is missing. Everything he freezes sits inside your cone.
Frenzying Taunt (E) nails the enemy carry a couple of steps from you for the full duration: your short spell range stops being a problem when the target cannot move. And he is the body that intercepts whoever would dive you.
Crescent Guard (R) knocks back everyone except his marked target and blocks ranged damage: it is the peel an immobile mage needs at the exact moment an assassin lands on her, the situation your page calls fatal.
Moonfall (R) gathers nobody, but it slows and re-marks whoever is already on her: your cone lands on the pile you hold in place. But you are both magic damage: against a team that buys magic resist early the pairing loses a lot, so take it when the rest of your team is physical.
Her page says Bullet Time (R) is a stationary three-second channel that anyone with a dash simply walks around: the stun from Pyromania (P) and the knock-up from recasting Summon: Tibbers (R) take that option away from all of them.
Enchanted Crystal Arrow (R) opens from off-screen and lets you walk into a group that is already frozen, which for a mage with no dash is the only way in. Frost Shot (P) slows on every hit, and a slowed target never leaves your cone.
Deadly Flourish (W) roots anyone an ally has just hit, and a Disintegrate (Q) from range is enough to arm it: you bank Pyromania (P) for the area stun and spend Jhin's root on your single-target rotation instead.
Her page says enemy crowd control shuts her down and that she has to reach point-blank range: your one-second stun on the whole group is the window where Wild Rush (E) gets in for free and all ten Inferno Trigger (R) shots land.
It needs the enemy grouped, but when they are, Chain of Corruption (R) roots the whole cluster from off-screen: with no dash you have no other way to land your cone and your bear on more than one body without burning Flash.
Dark Passage (W) is the dash you do not have: the lantern shields you and pulls you out when they dive you with Molten Shield (E) down, or throws you in at useful range. And Death Sentence (Q) brings the target to you instead.
Rocket Grab (Q) solves your problem backwards: instead of you walking into your own short range, the carry arrives already isolated and Static Field (R) silences their answer. Miss the hook, though, and you are an immobile mage with no engage.
Crescendo (R) stuns the enemy line and slows everyone caught inside: that is the lockdown where you land a full rotation without spending Pyromania (P). Song of Celerity (E) gives you the speed your kit never produces outside Molten Shield (E).
Your page says that with the boost from Molten Shield (E) down a diver simply kills you: Whimsy (W) polymorphs him the instant he lands and Rampant Growth (R) knocks him off while adding bonus health. Two answers to the very same death.
You are completely combo-dependent and a single crowd control effect cancels it: Black Shield (E) absorbs that. And Dark Binding (Q) roots for two seconds, twice your own stun, so you only spend Pyromania (P) when it really counts.
| Lane | Tier | Win% | Pick% | Ban% | Pos. |
|---|---|---|---|---|---|
| Mid | C | 49.51% | 1.95% | 0.12% | #29 / 39 |
| Lane | Tier | Win% | Pick% | Ban% | Pos. |
|---|---|---|---|---|---|
| Mid | B | 49.69% | 1.97% | 0.13% | #24 / 38 |
| Lane | Tier | Win% | Pick% | Ban% | Pos. |
|---|---|---|---|---|---|
| Mid | B | 50.51% | 2.07% | 0.13% | #17 / 39 |
| Lane | Tier | Win% | Pick% | Ban% | Pos. |
|---|---|---|---|---|---|
| Mid | B | 53.35% | 2.37% | 0.14% | #18 / 41 |


Annie is a mage in Wild Rift built around a single devastating rotation: once her passive, Pyromania, is fully charged, her next damaging spell stuns everything it hits, turning Disintegrate (Q), Incinerate (W), or Summon: Tibbers (R) into a guaranteed pick tool. She's a pure burst mage rather than a poke or control pick — almost all her damage is magic, and her win condition every fight is to land that stun and follow up before the target can react. She's one of the simplest champions in the game to pick up, but that ease comes at a cost: she has no escape tools and folds instantly if her combo doesn't land first.
Skill order: Q > W > E, taking a point in R (Summon: Tibbers) at every level it's available.
Play the poke game: Disintegrate has solid range for a low mana cost, so use it to chip your opponent's health and last-hit at the same time — a kill refunds the cost and halves the cooldown, so good wave management snowballs into even more poke. Avoid committing to a full trade until you've quietly built your passive stacks on the wave; once the stun is loaded, adding Incinerate to a short trade can win the exchange outright. Level 5 is your first real spike — Summon: Tibbers turns almost any trade into a potential kill, so look to all-in or call a gank the moment it's up. Keep Molten Shield's speed boost in reserve for escaping a jungler's dive rather than spending it just for poke, since it's your only mobility tool until items.
From the mid-game on, look to open fights by getting Tibbers onto a priority target — Flash, a teammate's CC, or, once built, Hextech Rocketbelt's dash all work to close the distance her kit otherwise lacks. Drop Tibbers for the initial hit and, if your stun is charged, a team-wide stun, then chain Q and W to burst down whoever you hit before they can peel. If you can't safely reach the backline, play the poke war instead and only commit your full combo when you can guarantee it lands. Remember that Molten Shield protects Tibbers as well as you, so use it to keep the bear alive if someone turns to burst him down mid-fight, and don't be afraid to trade your life for a completed combo — his rage windows mean he can keep swinging the fight even after you're gone.