
WR China Meta
Meta, tier list & top-player builds from the China server · live
Meta, tier list & top-player builds from the China server · live

奎桑提 · 纳祖芒荣耀 Fighter C
✅ Patch 7.2e · stats updated 2026-09-12 · real builds of 22 top-ranked China server players captured 2026-09-11
Difficulty Damage Toughness Utility
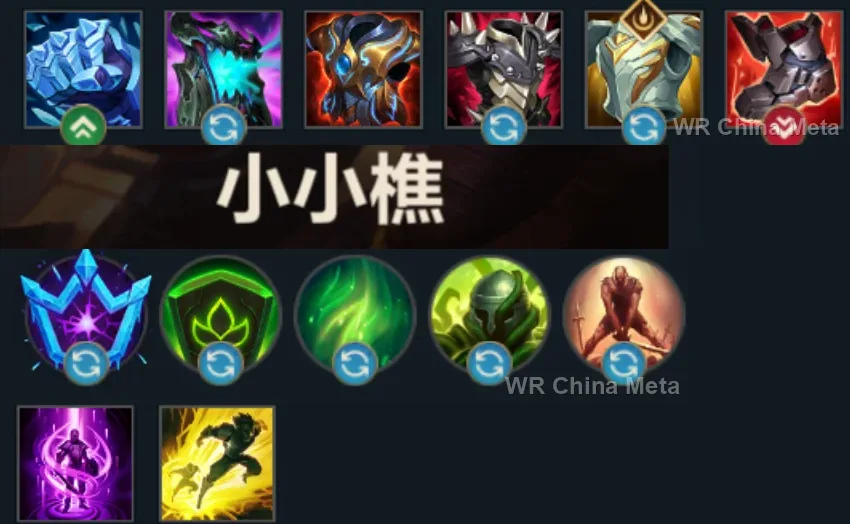
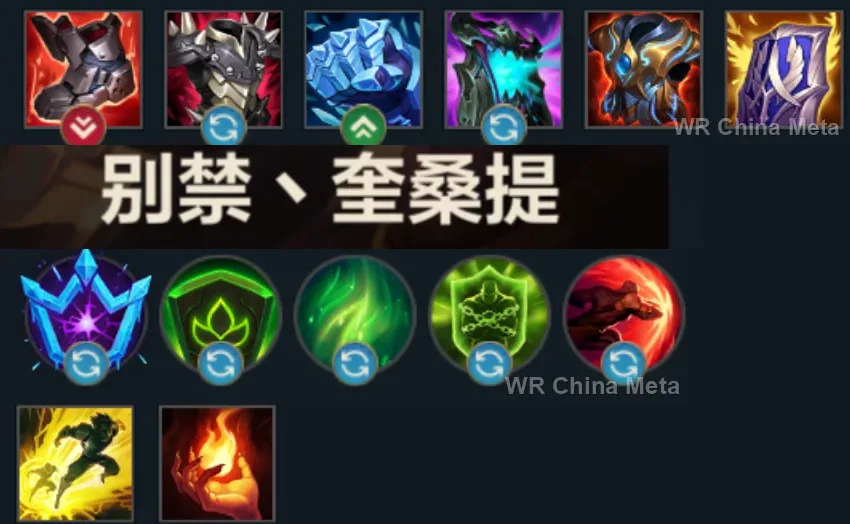
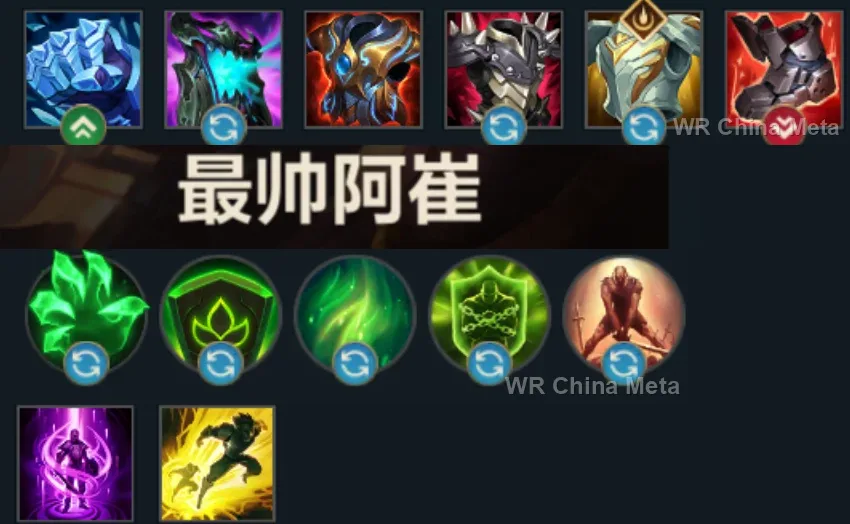
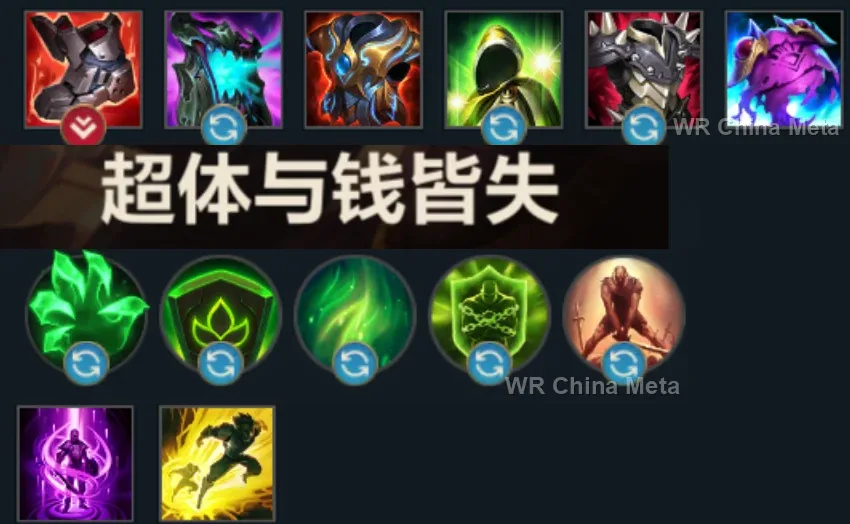
How the strongest players on the Wild Rift China server (国服) build K'Sante: live win/pick statistics by rank bracket, the most-used item and rune sets, and the real loadouts of the top ranked K'Sante players, captured in-game.
📖 How to play K'Sante


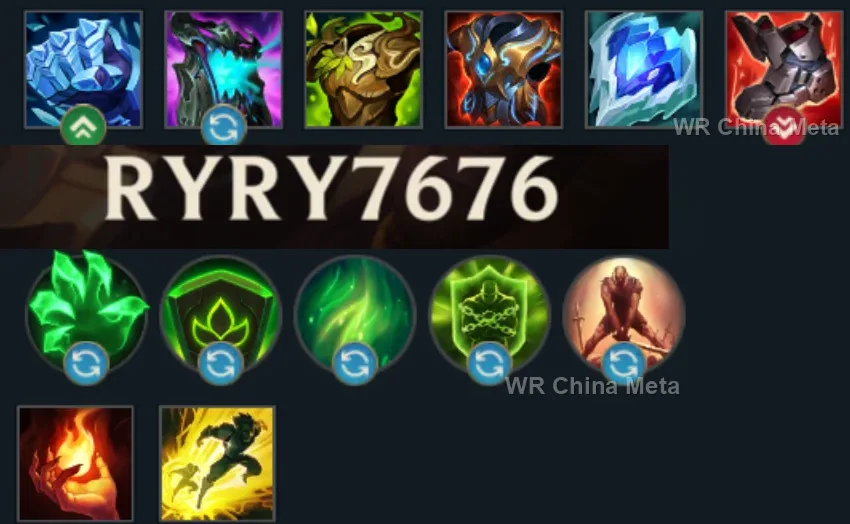
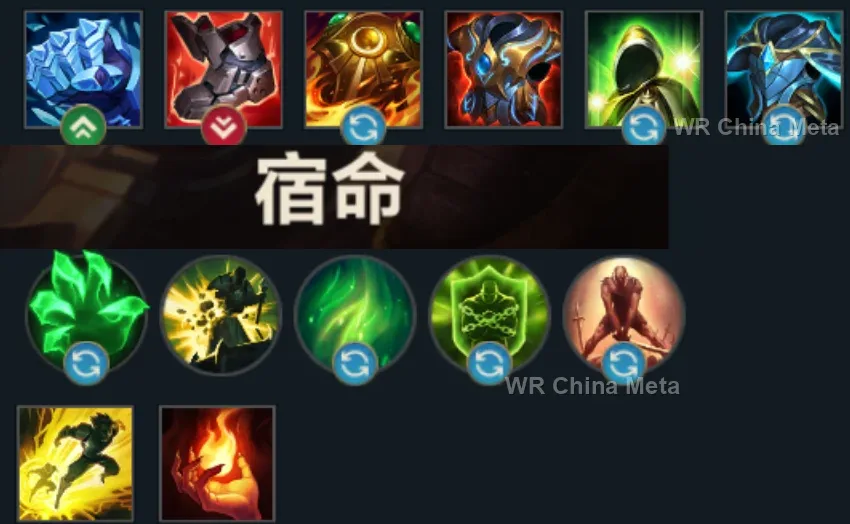
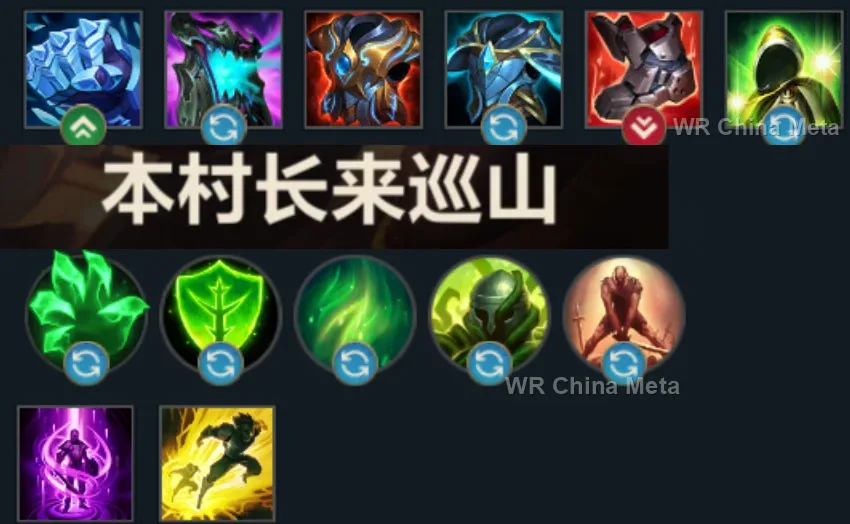
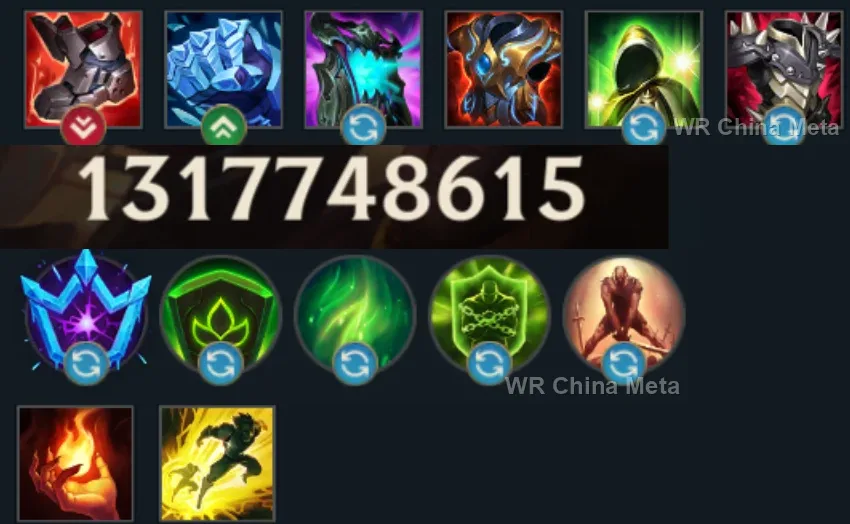
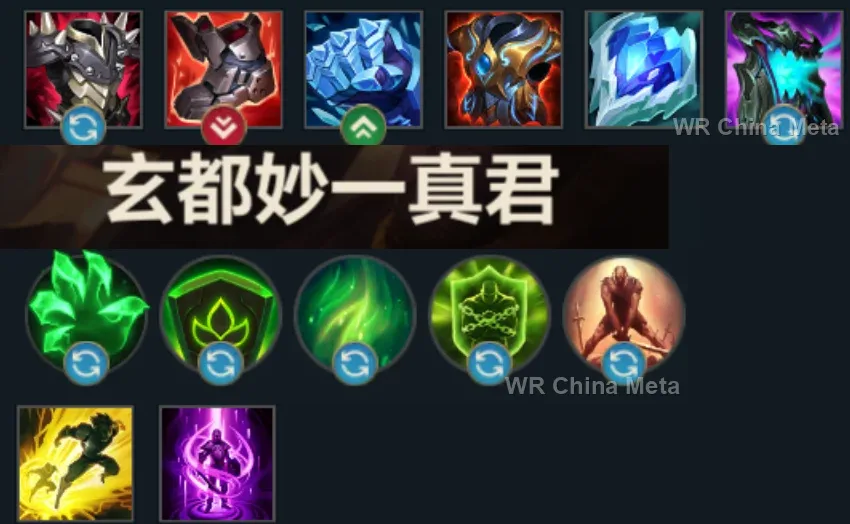
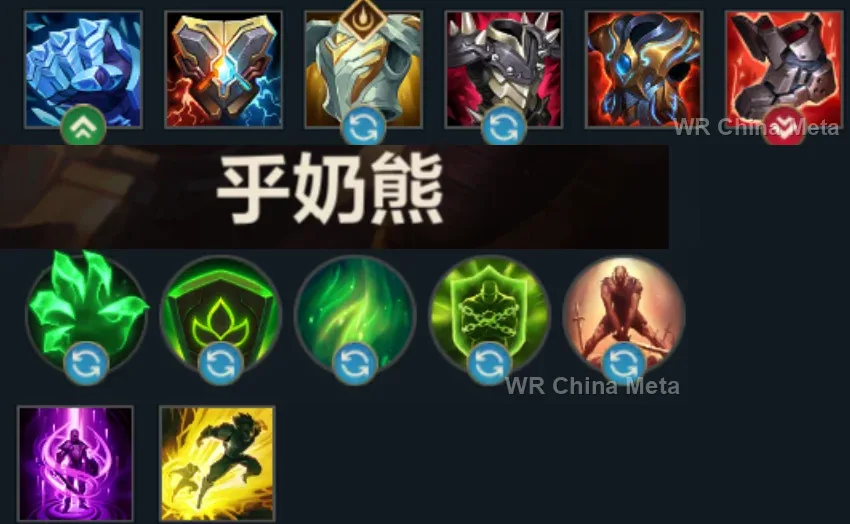
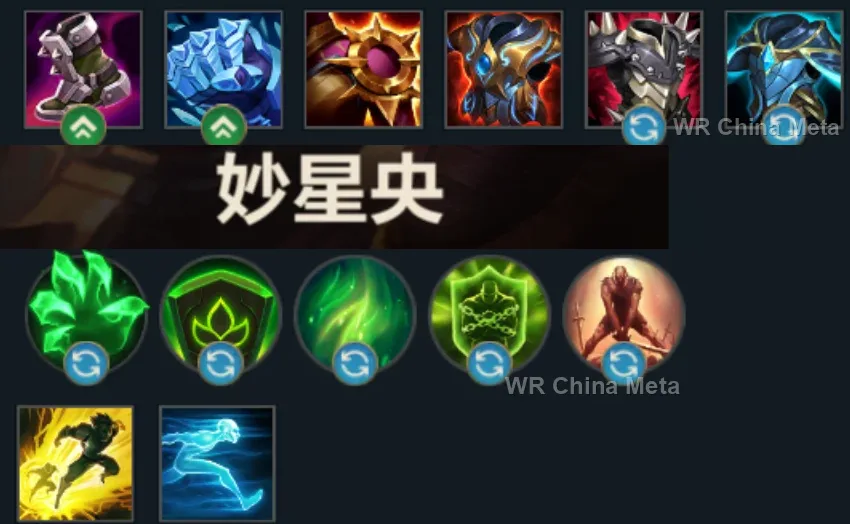
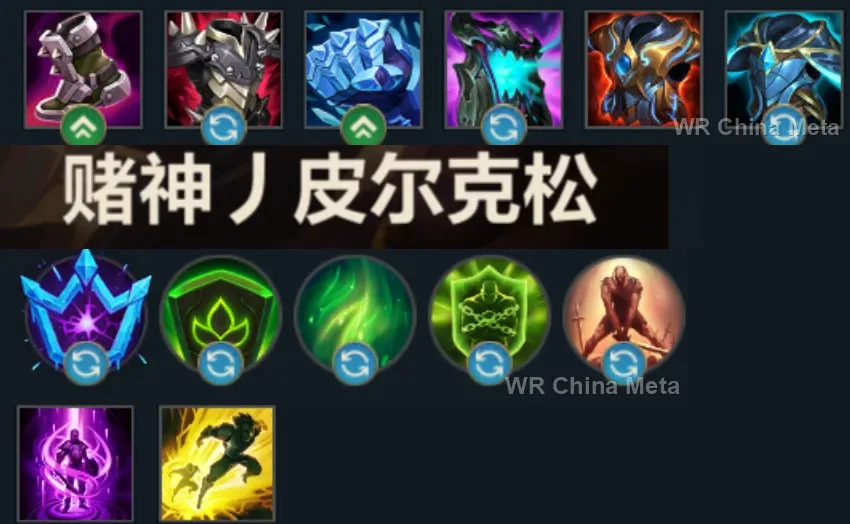
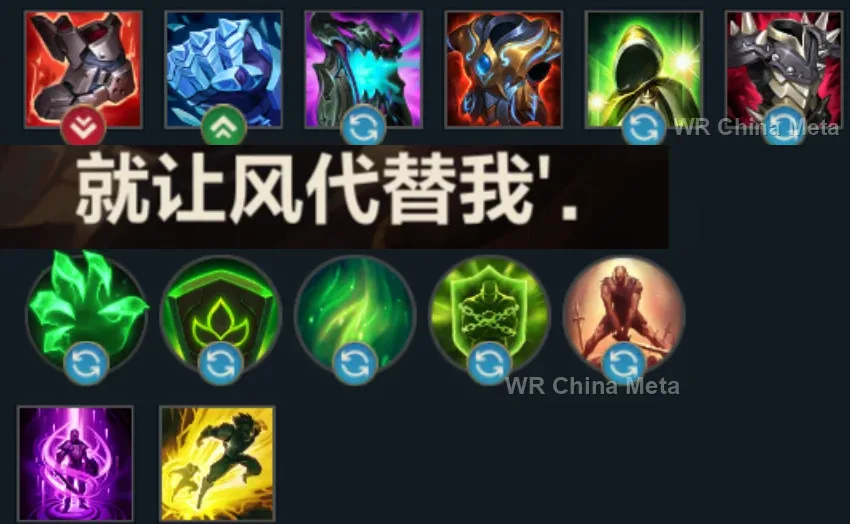
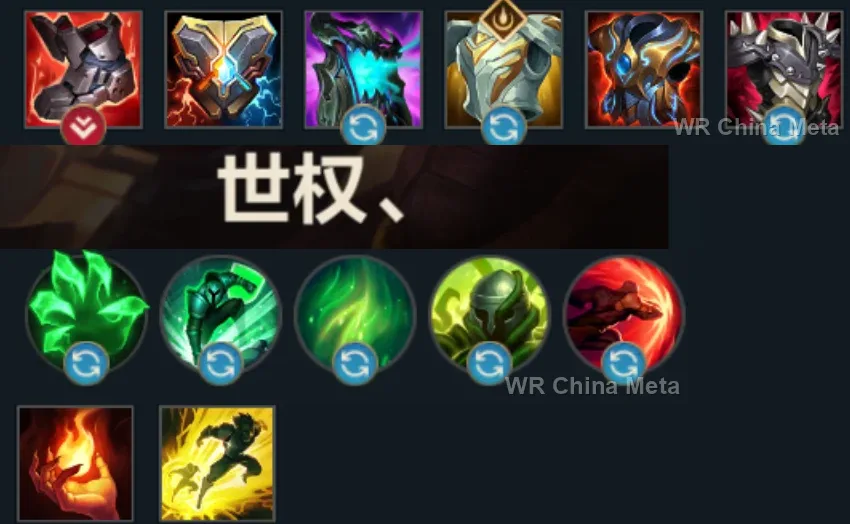
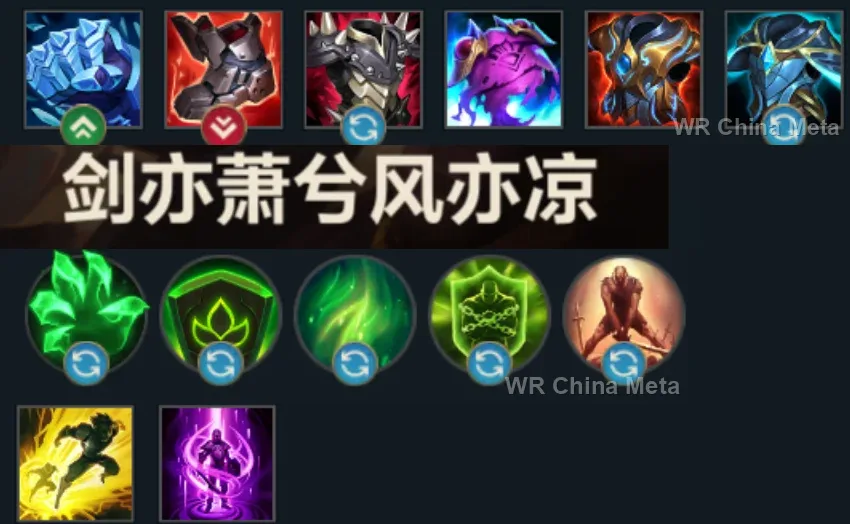
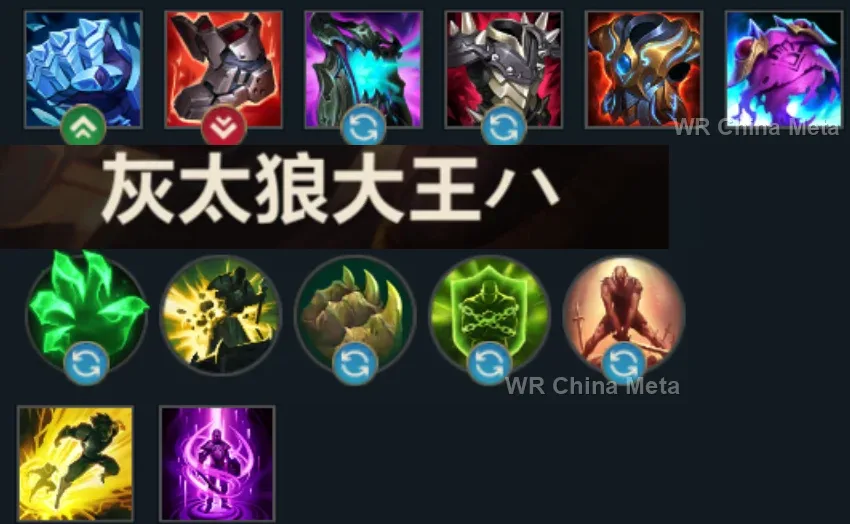
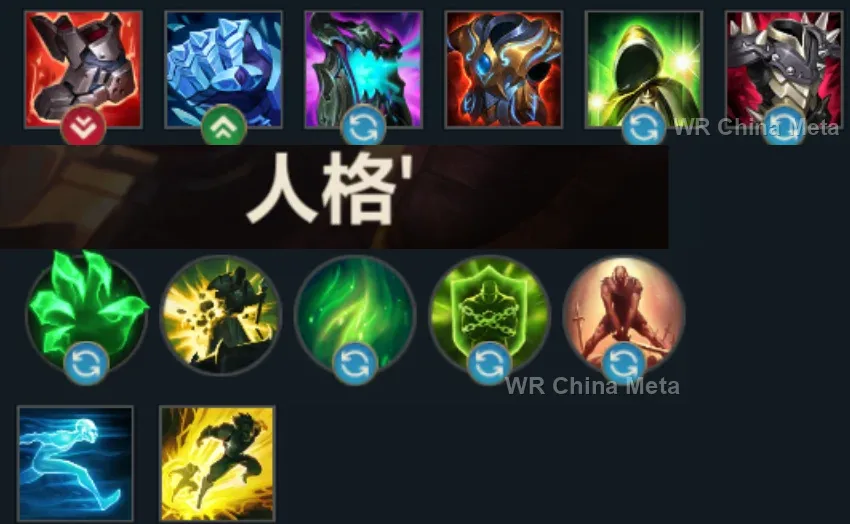
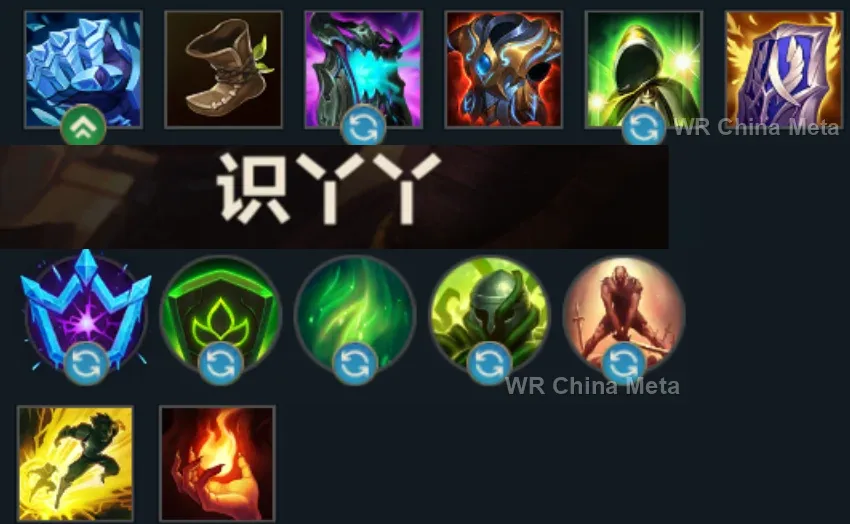
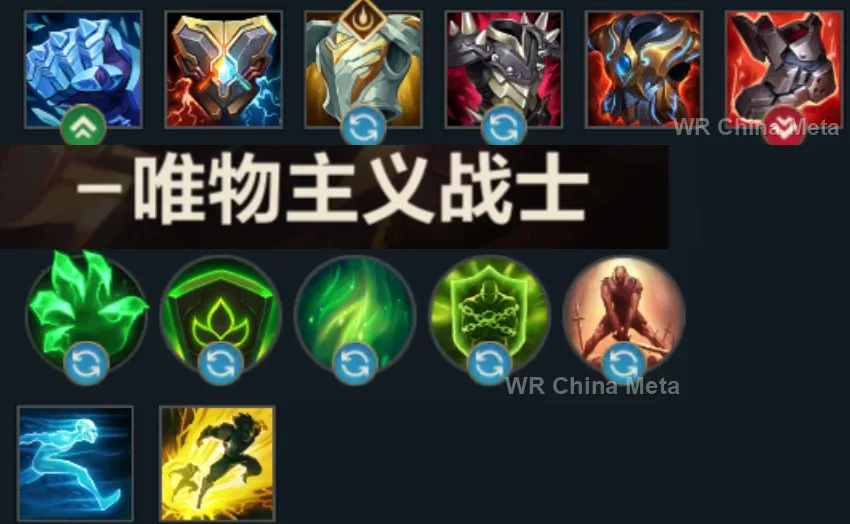
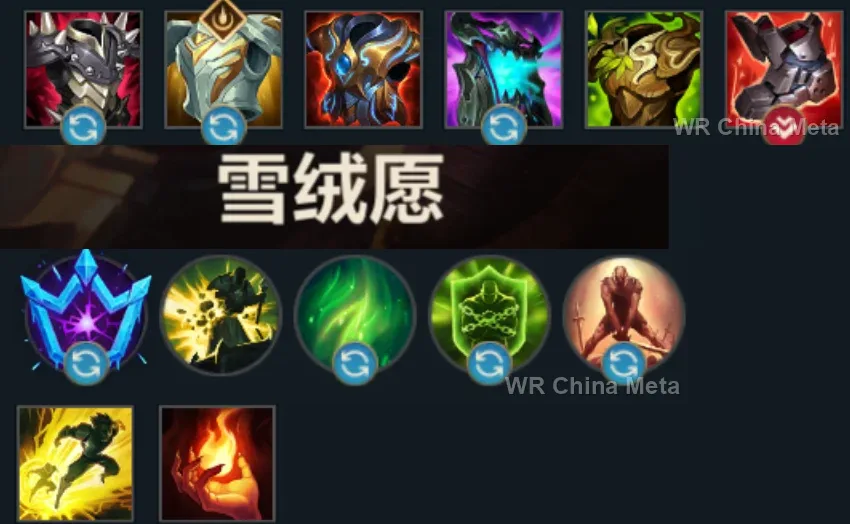
Counted on 23 real builds captured from the Chinese client, player by player. Independent from the official API above.


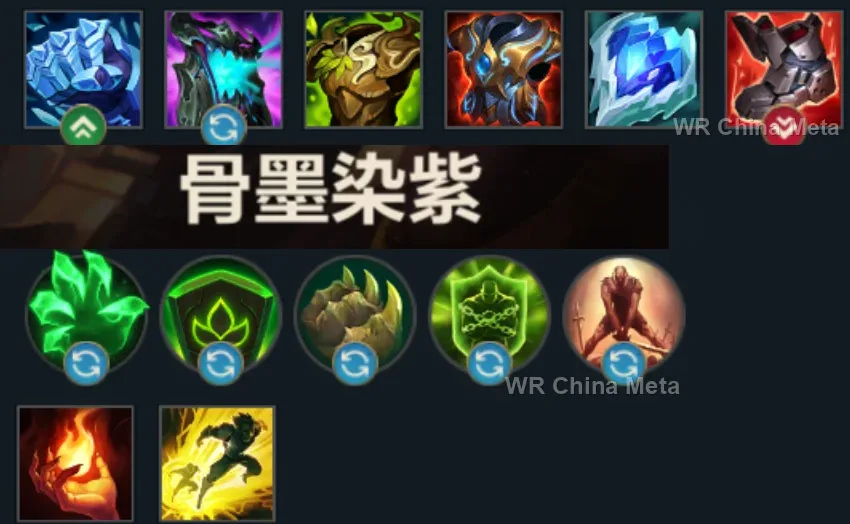
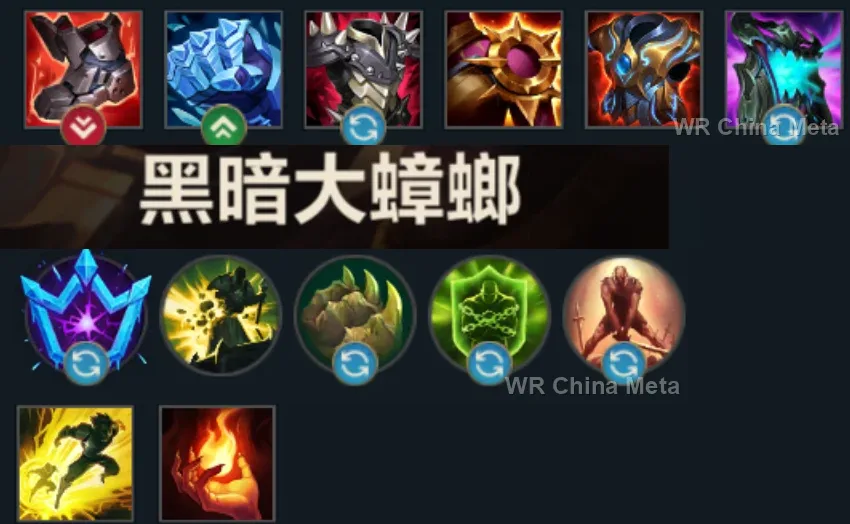
Taken from the official in-game China leaderboard. Spells, runes and items of every public top player.
22 of the top 30 players have a public match history; the others keep theirs private.
The toughest lane matchups for K'Sante on the Wild Rift China server, with why each is hard and exactly how to play it.
 K'Sante vs Gwen Unfavorable
Why Gwen counters K'Sante: Percent magic damage on your HP and Mist on your picks: she consumes you without ever touching your tank half.
How to play K'Sante into Gwen: Trade outside the Mist with Q3 and W. Your R on her is a gift: if you must use it, take her INTO your team, never isolate yourself with her.
→ Gwen K'Sante vs Fiora Unfavorable
Why Fiora counters K'Sante: Vitals on your huge frame and Riposte on your stun: the worst nightmare of your side lane.
How to play K'Sante into Fiora: Charge W AFTER her Riposte is spent. Use All Out only to execute, never to trade: you drop your defenses against the better duelist.
→ Fiora K'Sante vs Vayne Unfavorable
Why Vayne counters K'Sante: Percent damage and kiting: turning into a duelist does not solve the problem of never touching her.
How to play K'Sante into Vayne: Q3 stun on her Tumble cooldown, then choose: R to isolate her from her team, or stay tank. Never chase her past the wave.
→ Vayne K'Sante vs Jax Skill matchup
Why Jax counters K'Sante: Duel scaling against your double role: his Counter Strike denies your attacks but not your picks.
How to play K'Sante into Jax: Q passes through his Counter Strike. Go All Out while his E is on cooldown: for 15 seconds you are the bully.
→ Jax K'Sante vs Darius Skill matchup
Why Darius counters K'Sante: His stacks open you up in long trades, but your W denies his best moment.
How to play K'Sante into Darius: Charge W into his pull (E): you deny it completely. Short trades with Q3 and never past the third bleed stack.
→ DariusThe champions K'Sante works best alongside on the Wild Rift China server, lane by lane, with the reason each pairing works.
Cataclysm (R) raises a ring of terrain around the target: you slam the carry into it with All Out (R) and trigger Wall Shatter for the second hit. Then they are sealed in there with you in Prime Form, the one place where your 15 seconds actually pay.
All Out (R) knocks a carry away from their team and roots it: that is the isolated, motionless target Thrill of the Hunt (R) is built for, and an empowered Bola Strike (E) roots it again if it survives the leap. You catch, he kills - and killing is the half you are missing.
Cease and Desist (R) is point-and-click and unstoppable: when your All Out (R) is down, she is the one dragging their carry out from behind the front line. And Denting Blows (P) shreds 20% armor on the same target you are already marking with Dauntless Instinct (P).
In Prime Form you are down 30% max HP and three quarters of your bonus resistances: that is exactly the window where you get deleted. Lamb's Respite (R) covers all of it - three seconds where nobody inside can die - and you calmly finish the target you already caught.
Your third Ntofo Strikes (Q) pulls the group together and stuns it: that is the instant for Curse of the Sad Mummy (R) to land on three targets instead of one. It only counts in grouped 5v5s though: if you open with All Out (R) on an isolated carry, his ultimate is irrelevant.
Unraveled Earth (E) stuns anything forcibly displaced through the rubble field, and All Out (R) is exactly a forced displacement: you throw the carry in and get it back stunned. Weaver's Wall (R) meanwhile is the terrain that gives you Wall Shatter where there was none.
Prime Form strips 75% of your bonus armor and magic resist, and that is precisely what Command: Protect (E) hands back, shield included, by attaching to you as you go in. Then Command: Shockwave (R) fires from there and pulls everyone in around the target you caught.
Vision of Empire (W) deals 50% bonus damage to anything already locked down, and All Out (R) guarantees a root: that is not a coincidence to hope for, it is a condition you produce on demand. Nevermove (E) then holds back whoever tries to reach the carry you isolated.
Slicing Maelstrom (R) pulses every half second and reapplies Mark of the Storm (P), so anyone who stays inside gets stunned again: the pull from your third Ntofo Strikes (Q) is what keeps them inside. Two overlapping area lockdowns freeze the whole group.
Riftwalk (R) is the only way to reach the carry All Out (R) just dumped behind your team in an instant, and Null Sphere (Q) silences their escape. He is a late-game champion though: before two or three items this synergy simply does not exist.
He has no dash and no blink, and he dies in exactly one way: when the diver reaches him. Footwork (E) dashes to him and leaves him the same shield, and Path Maker (W) is an unstoppable wall you plant between him and whatever is coming - the exact peel his card asks for.
Bullet Time (R) only pays against grouped or crowd-controlled enemies, and your third Ntofo Strikes (Q) pulls them together and stuns them: you hand her the exact picture she needs. Make It Rain (E) keeps that same pile slowed while you stand in front of it.
All Out (R) hands her a rooted carry cut off from its team: Wild Rush (E) dashes onto it and resets on the takedown, so the chain keeps going by itself from there. And Inferno Trigger (R) demands she stands in the middle of them, which only becomes possible with you in front.
Curtain Call (R) wants a target that cannot dodge, and the guaranteed root from All Out (R) is exactly that. Meanwhile Deadly Flourish (W) turns into a root on anyone you just touched with Ntofo Strikes (Q): every poke of yours switches it on for him.
Fate's Call (R), when you are her Oathsworn, launches you into their team knocking up whoever you hit, and above all it yanks you back out if a Prime Form dive goes wrong - which, at 30% less health, happens often. You already own the engage: what you are buying is the exit.
All Out (R) cuts 30% of your max health the moment you commit: Rampant Growth (R) hands a chunk of it straight back and knocks up everyone around you, and Help, Pix! (E) shields the burst during the seconds when you have no resistances left.
After All Out (R) you are behind their lines with a third of your health gone: the Dark Passage (W) lantern is the exit when the pick is not enough. And The Box (R) shuts the road on the carry you isolated, who would otherwise simply walk back to her team.
Prime Form gives you 40% bonus attack speed, and Tidecaller's Blessing (E) empowers your next attacks with extra damage and a slow: inside that window you land several in a row and the target never leaves. Aqua Prison (Q) chains straight onto the All Out (R) root.
Beat Drop (E) climbs from slow to root to stun if the target has already been crowd-controlled, and you produce two of those on demand: the stun from your third Ntofo Strikes (Q) and the root from All Out (R). Surround Sound (W) covers the window where you are exposed.
Prime Form costs you 30% of your max health, and Wish (R) puts it back wherever you are, with 50% extra healing under 35%: that is what makes a suicidal engage sustainable. It gives you no way to catch anyone, though, so the lockdown has to come from somewhere else.
| Lane | Tier | Win% | Pick% | Ban% | Pos. |
|---|---|---|---|---|---|
| Baron | C | 48.34% | 5.67% | 23.33% | #29 / 41 |
| Lane | Tier | Win% | Pick% | Ban% | Pos. |
|---|---|---|---|---|---|
| Baron | C | 48.46% | 5.58% | 24.2% | #29 / 41 |
| Lane | Tier | Win% | Pick% | Ban% | Pos. |
|---|---|---|---|---|---|
| Baron | C | 48.78% | 5.59% | 22.64% | #29 / 41 |
| Lane | Tier | Win% | Pick% | Ban% | Pos. |
|---|---|---|---|---|---|
| Baron | A | 50.77% | 6.54% | 22.19% | #13 / 39 |


K'Sante is a durable, high-skill-cap Fighter who spends most of a fight soaking damage and threatening picks, then flips into a genuine duelist for a short window once his ultimate, All Out, triggers Prime Form. Played in Wild Rift's Baron Lane, he deals physical damage through stacked Dauntless Instinct marks and forced positioning from Ntofo Strikes and Path Maker, letting him isolate a single target while his team collapses around it. He isn't the flashiest damage dealer in the game, but few champions match his blend of survivability and game-changing engage.
Skill order: Q > E > W, taking All Out (R) at every chance (levels 5/9/13)
In lane, poke with Ntofo Strikes and weave in autos to cash in the Dauntless Instinct mark for extra physical damage, but hold off on a full trade until you've banked two hits, since the third cast turns Q into a pull that locks your opponent in place. Treat Path Maker as lane insurance rather than a poke tool: the unstoppable, damage-reducing channel can eat a jungler's gank or a tower dive, so save it for the moment you actually need to survive. Farm up through Iceborn Gauntlet and prioritize hitting level 5; All Out is your first real power spike, since even the base cast is a knockback, a guaranteed root, and a free dash directly behind your target. Before five, avoid extended trades against true bruisers and duelists like Darius or Jax, since your job in the early game is picks and disengage, not winning a straight damage race.
Once All Out is up, look for the enemy backline: the knockback, guaranteed root, and dash-behind put you directly on a marksman or mage, and Prime Form's bonus attack speed, armor penetration, and omnivamp let you actually kill what you catch instead of just tickling it. Before the ultimate is ready, play the frontline, soaking cooldowns behind Path Maker's damage reduction and Unending Despair's sustain, and dash to a threatened carry with Footwork so they share your shield. Bait out hard denial tools like Fiora's Riposte or Jax's Counter Strike with a Q or an auto before you commit All Out, since a parried engage burns your one reliable pick for the fight. Respect the cost of Prime Form once it's live: you're missing most of your bonus armor and magic resistance, so commit fully to finishing the target you caught rather than trying to tank a second wave of damage.