
WR China Meta
Meta, tier list & top-player builds from the China server · live
Meta, tier list & top-player builds from the China server · live

奥莉安娜 · 发条魔灵 Mage A
✅ Patch 7.2e · stats updated 2026-09-12 · real builds of 24 top-ranked China server players captured 2026-09-11
Difficulty Damage Toughness Utility
How the strongest players on the Wild Rift China server (国服) build Orianna: live win/pick statistics by rank bracket, the most-used item and rune sets, and the real loadouts of the top ranked Orianna players, captured in-game.
📖 How to play Orianna







Counted on 25 real builds captured from the Chinese client, player by player. Independent from the official API above.


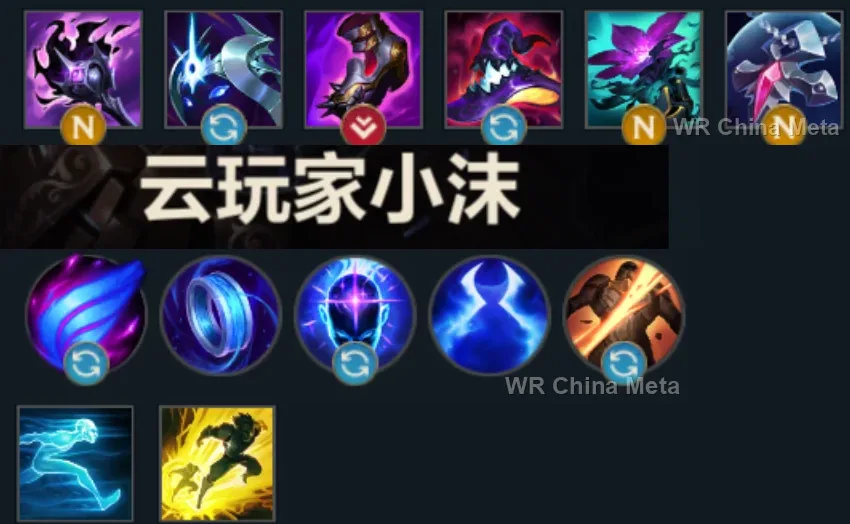
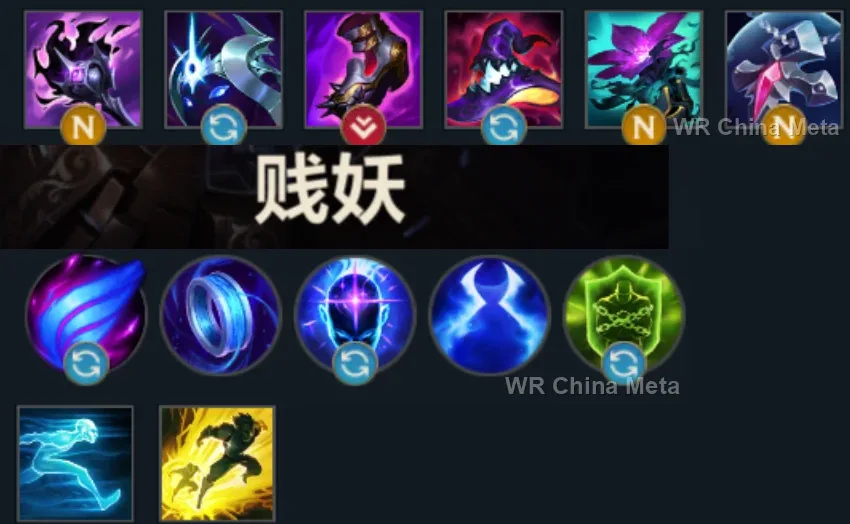
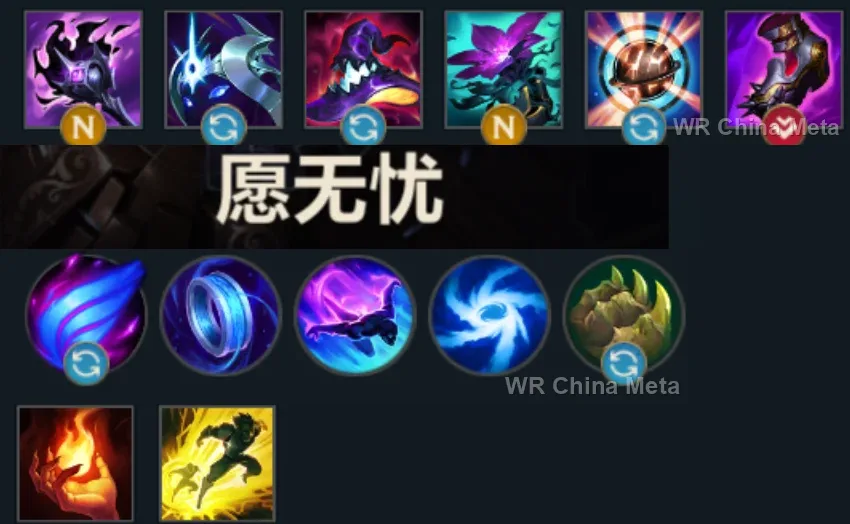
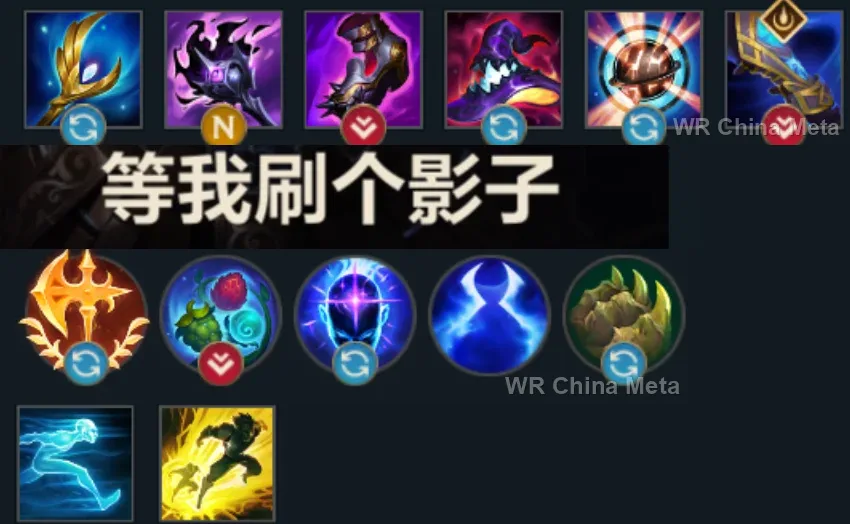
Taken from the official in-game China leaderboard. Spells, runes and items of every public top player.
24 of the top 30 players have a public match history; the others keep theirs private.
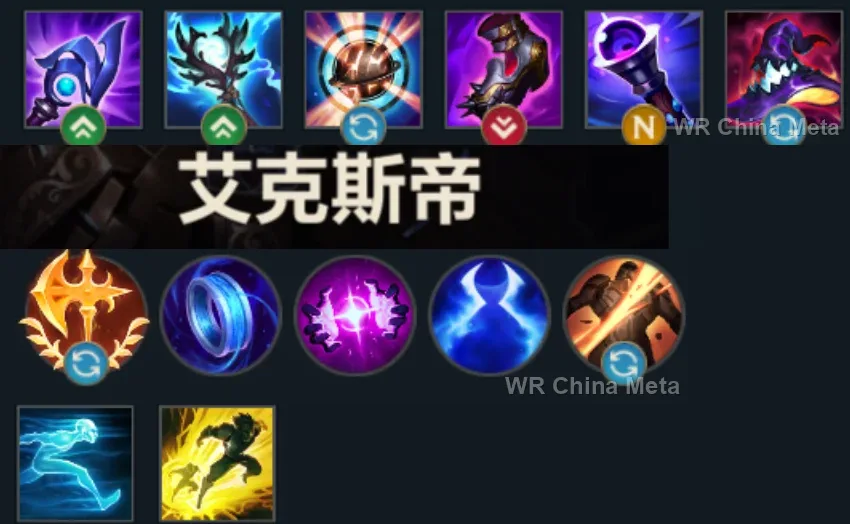
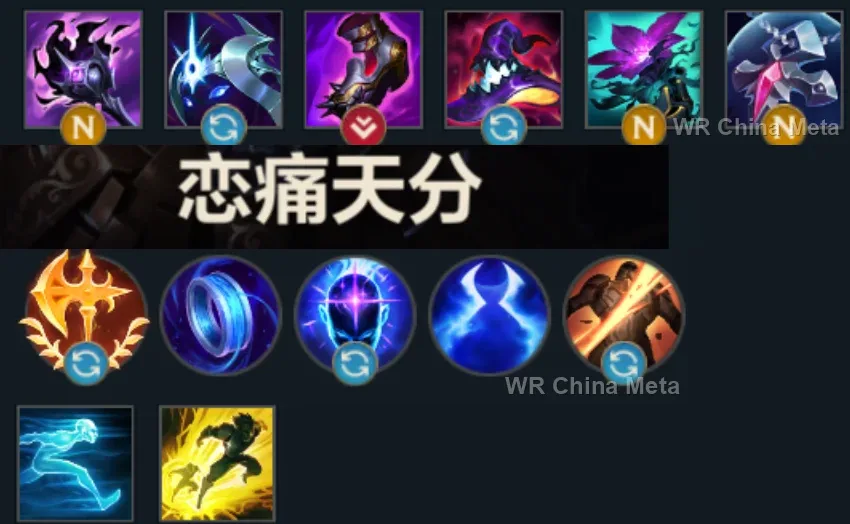
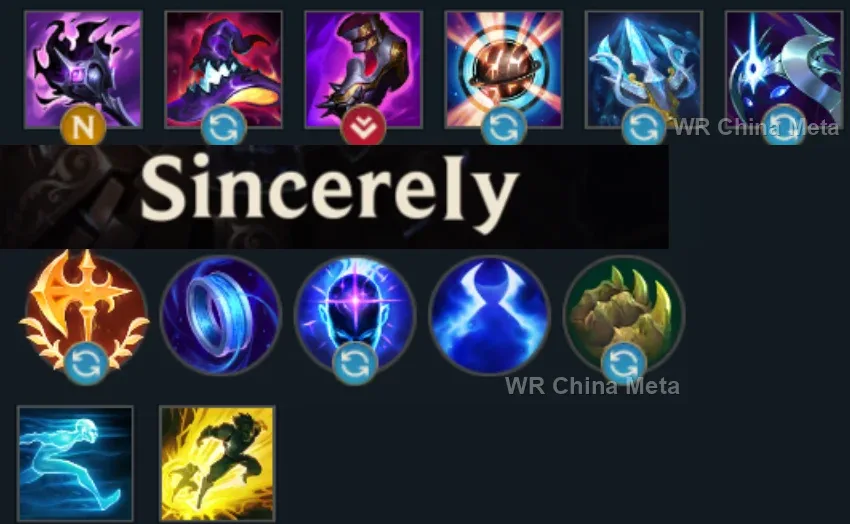
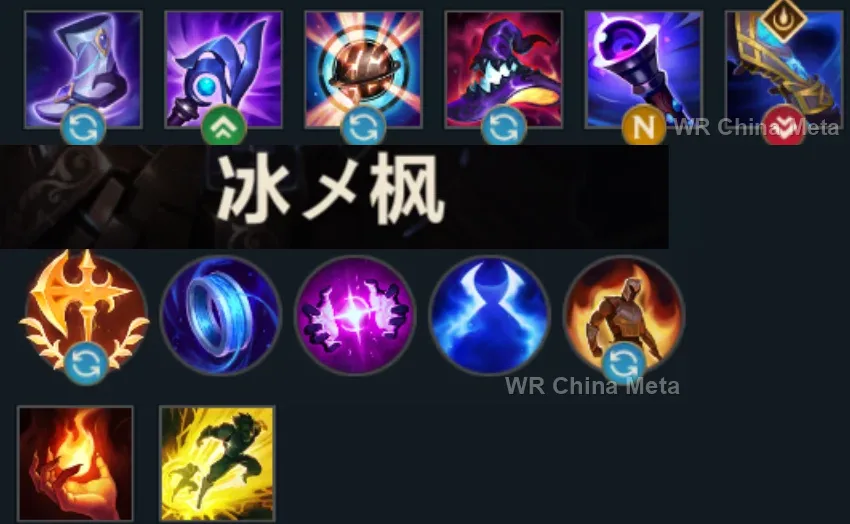
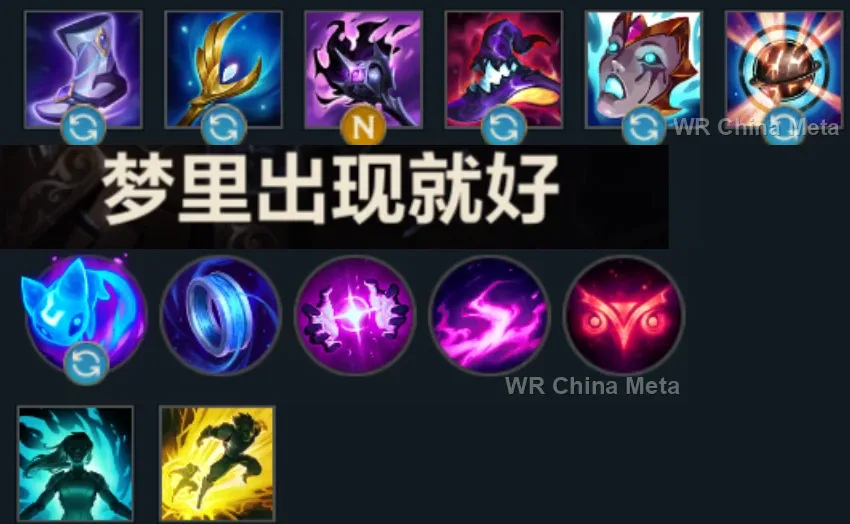
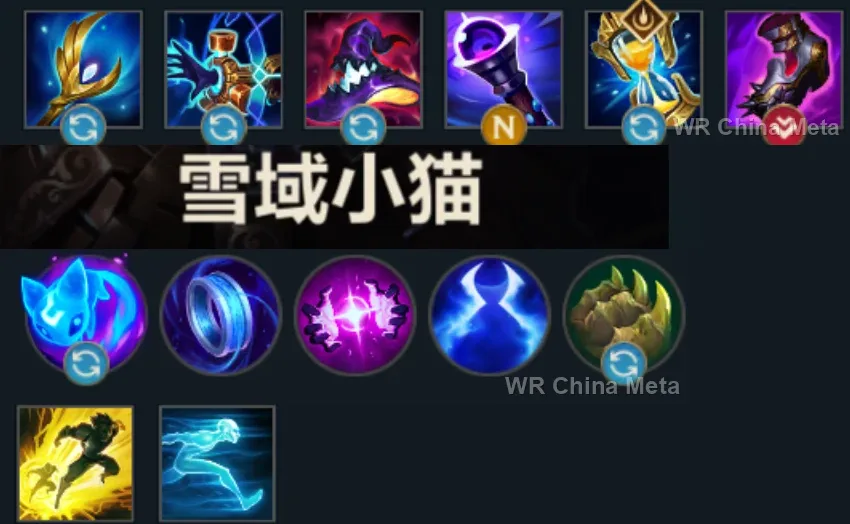
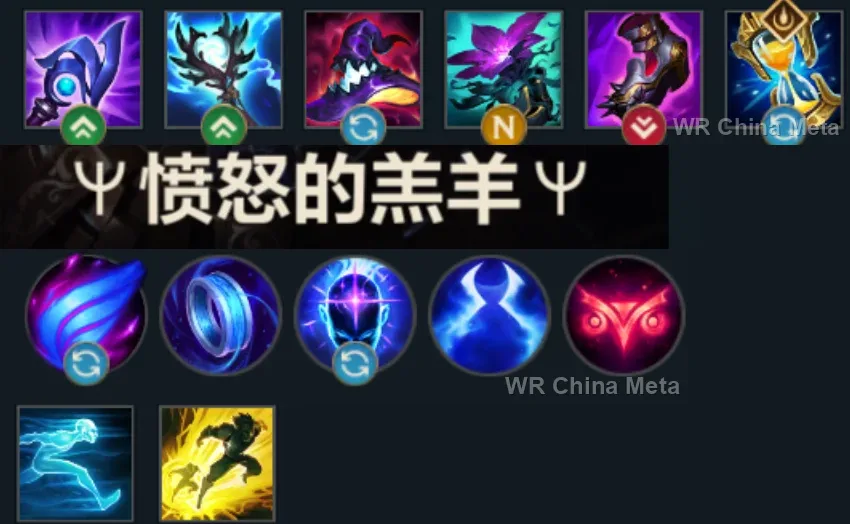
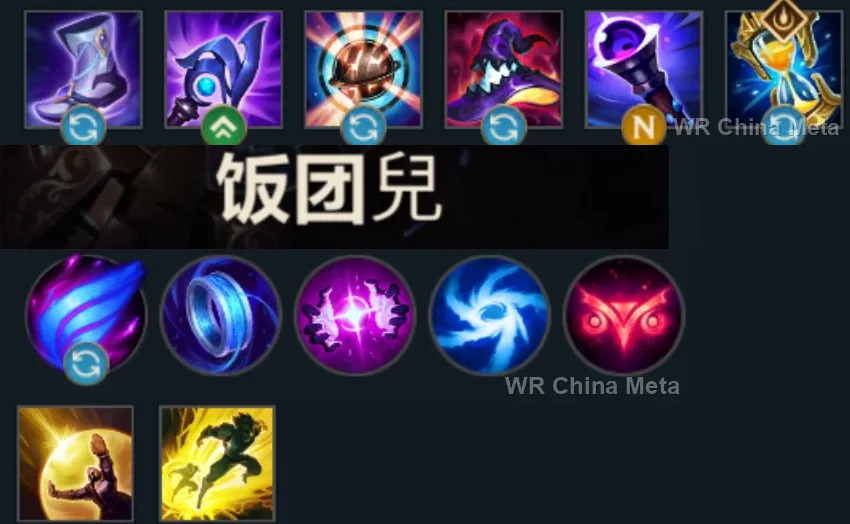
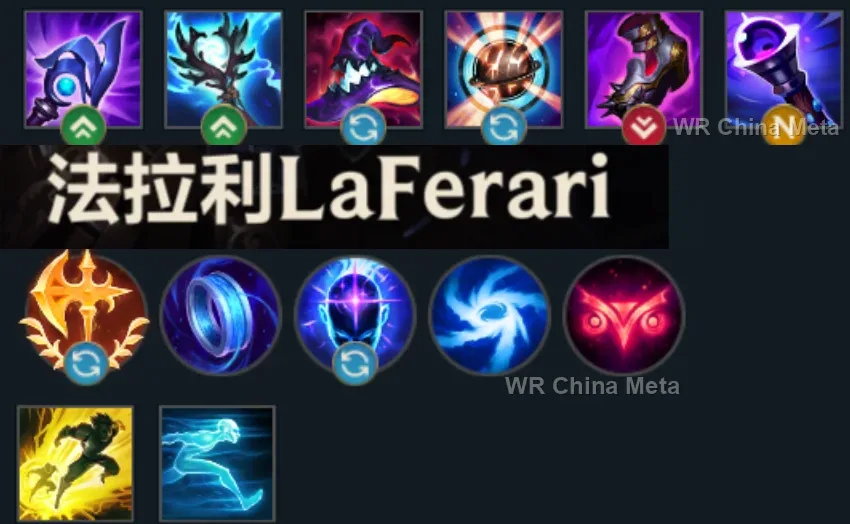
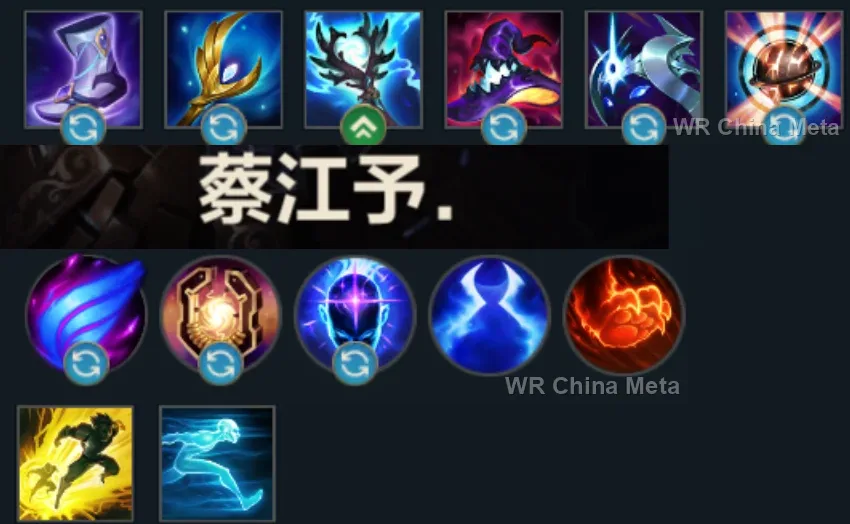
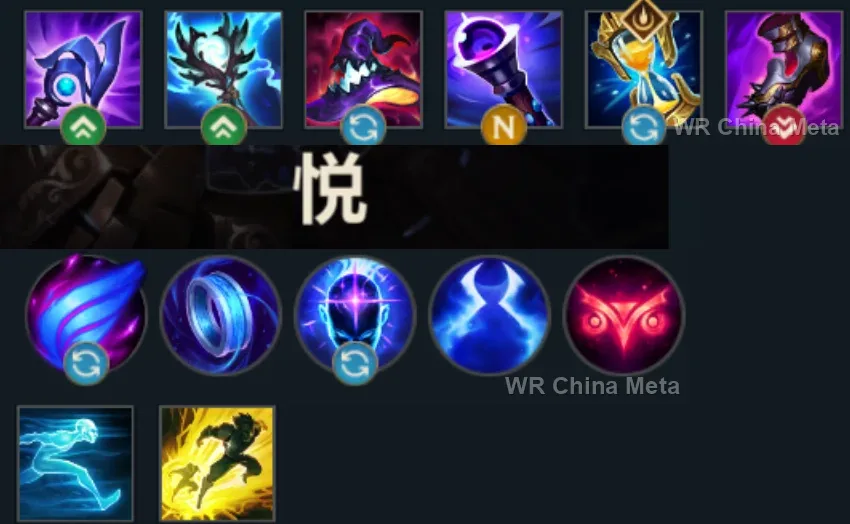
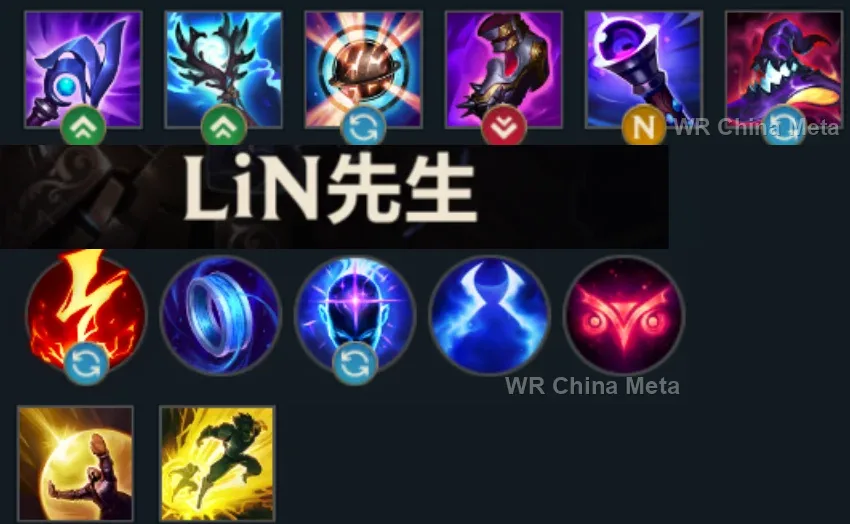
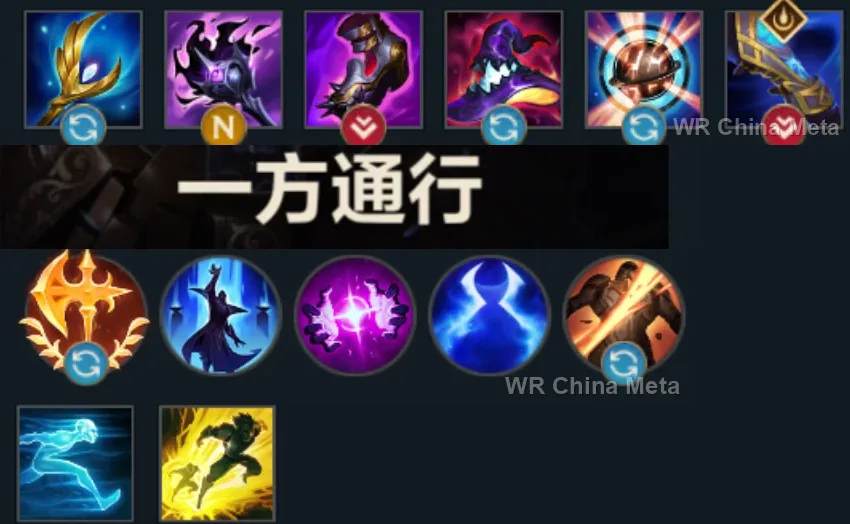
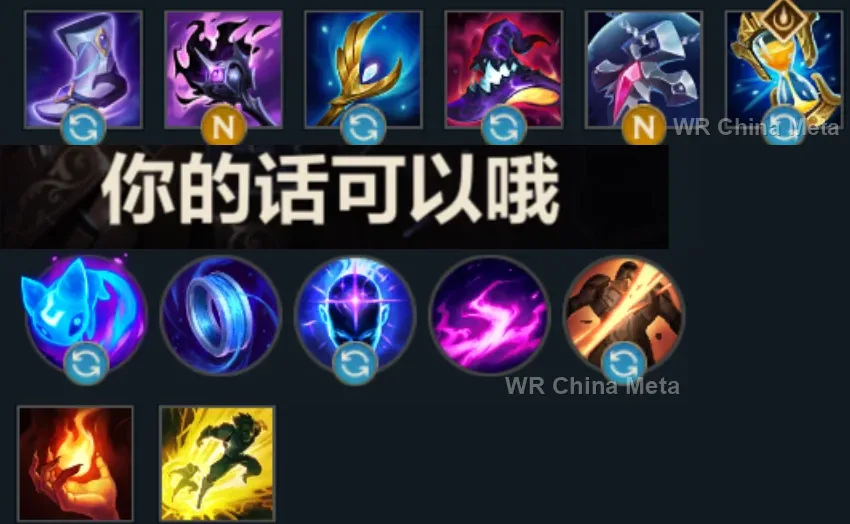
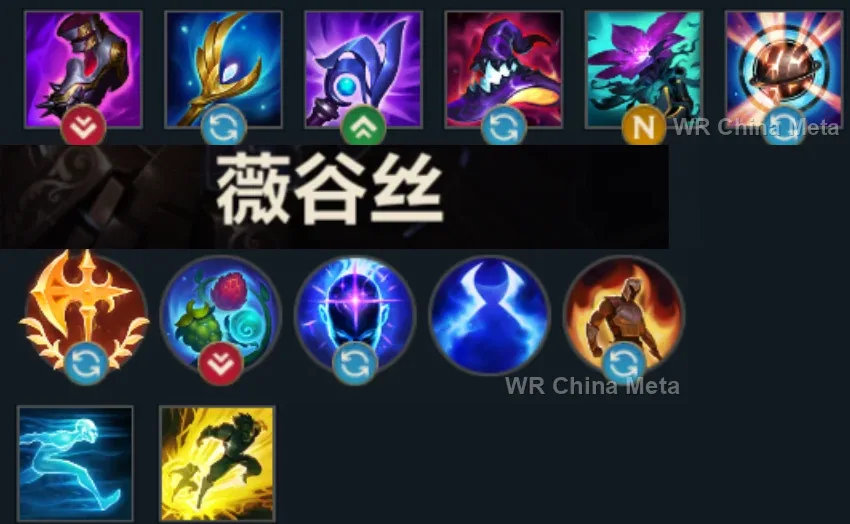
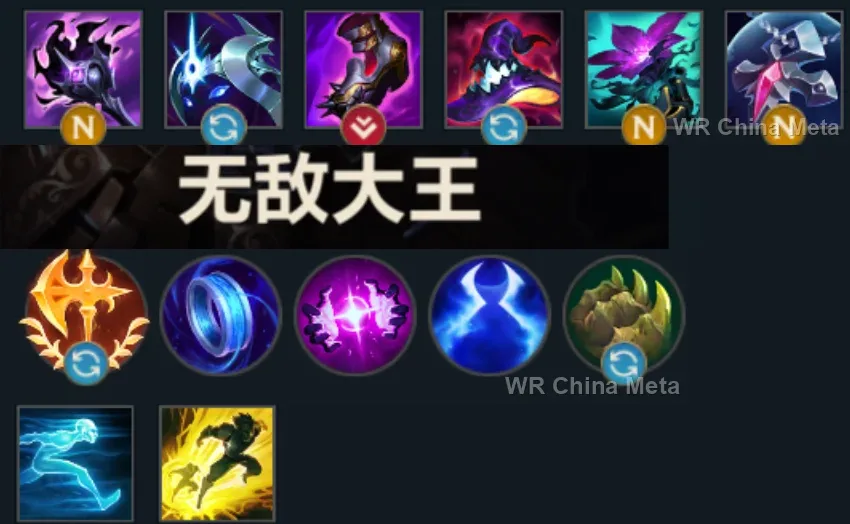
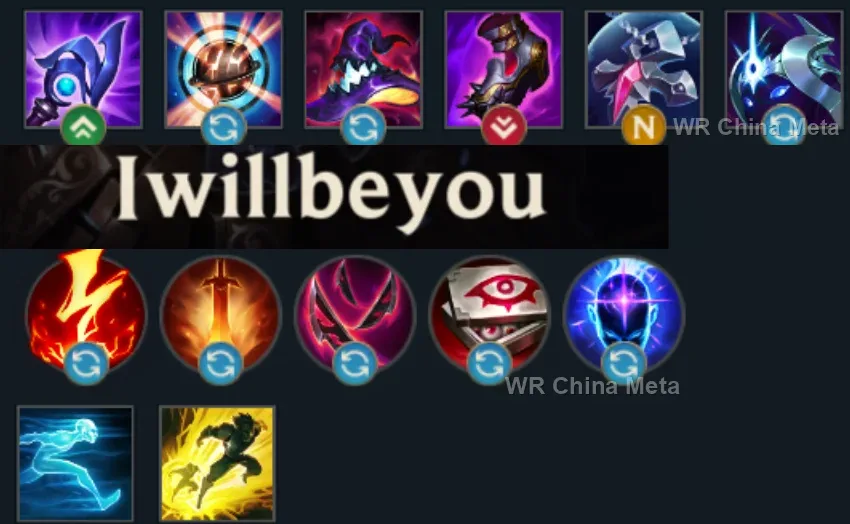
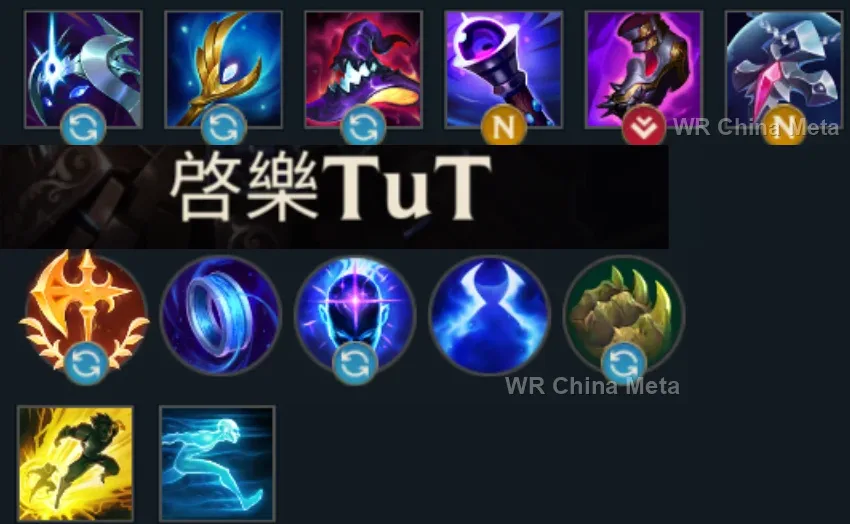
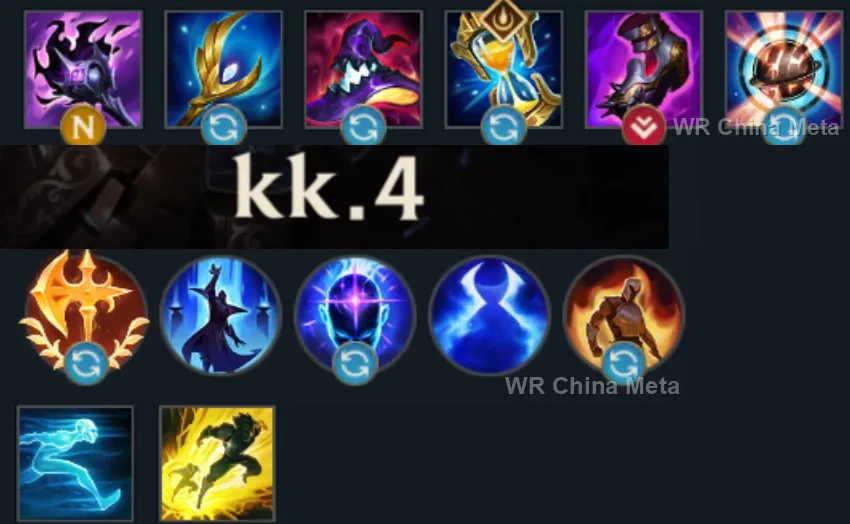
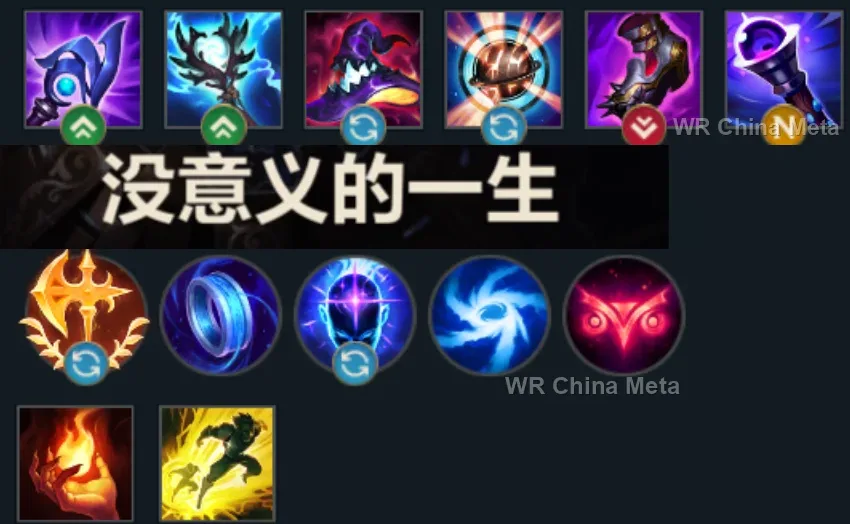
The toughest lane matchups for Orianna on the Wild Rift China server, with why each is hard and exactly how to play it.
 Orianna vs Zed Unfavorable
Why Zed counters Orianna: You stand still through every ball cast — exactly what a physical assassin's R dreams of.
How to play Orianna into Zed: From 5 on keep the ball ON YOURSELF: E plus R punish him as he jumps you. Zhonya's early. Poke only while his W and E are down.
→ Zed Orianna vs Fizz Unfavorable
Why Fizz counters Orianna: He jumps over your ball and his E cancels your R: both your aces fall into the same manhole.
How to play Orianna into Fizz: R when he LANDS from the E, never before. Shield always ready for the shark. Stretch the game: your 5-man utility outweighs his 1v1.
→ Fizz Orianna vs Yasuo Unfavorable
Why Yasuo counters Orianna: The Wall blocks ball and Q, and his dashes turn your zone control into a suggestion.
How to play Orianna into Yasuo: Ball on yourself when he shoves: his dash train stalls on the slow. In fights stay behind your tanks: if his knock-up lands before your R, you lost the exchange.
→ Yasuo Orianna vs Ahri Skill matchup
Why Ahri counters Orianna: Mobility versus control: Charm punishes your stillness, your ball punishes her entry angles.
How to play Orianna into Ahri: Keep the ball between you and her, always. If she dashes in, the full answer is E, Q and R in sequence: prepare it as one package.
→ Ahri Orianna vs Viktor Skill matchup
Why Viktor counters Orianna: Mirrored scaling: he holds ground with the laser, you with the ball. Whoever reaches fights with more farm and fewer deaths wins.
How to play Orianna into Viktor: Do not contest every wave: alternate shove and roam. In 5v5s your multi-man R beats his storm — if you go in second.
→ ViktorThe champions Orianna works best alongside on the Wild Rift China server, lane by lane, with the reason each pairing works.
Unstoppable Force (R) cannot be stopped: attach the Ball to him with Command: Protect (E) and it rides in with the charge, so Command: Shockwave (R) fires from the middle of their team instead of from your backline. He is also the frontline keeping assassins off you.
Searing Charge (E) into terrain is worth a 1.25-second knock-up and Call of the Forge God (R) opens another one across the whole group: those are the two windows where the Command: Shockwave (R) wind-up your page calls its flaw stops mattering.
Your page names Zed and Fizz as the ones who delete you once your shield and Flash are both down: Shadow Dash (E) taunts them from range before they ever reach you, and Stand United (R) shields you from anywhere on the map.
Fate Sealed (R) hits everything along its path: Command: Shockwave (R) lines it up by gathering their team into a single spot. And Command: Protect (E) parked on him is shield and resistances on the most fragile body you have up front.
Only if she fights alongside you: with the Ball attached, The Hextech Ultimatum (R) carries it onto their carry and Command: Shockwave (R) fires from there, collecting whoever comes to peel. If she flanks far away all game, the Ball never gets there.
Cease and Desist (R) is unstoppable and point-and-click: no crowd control can stop it, so with Command: Protect (E) on her the Ball reaches their backline guaranteed, and Command: Shockwave (R) fires from in there instead of from outside.
Curse of the Sad Mummy (R) locks the group for 1.5 seconds, longer than the Command: Shockwave (R) wind-up: the pull lands on people who cannot leave. And Cursed Touch (P) adds true damage to every spell you cast, and all of yours are magic.
Frenzying Taunt (E) nails their carry in place for the full duration, and with the Ball on him Powerball (Q) delivers it into their team, where you would never walk. Command: Shockwave (R) then gathers everyone around the target he taunted.
Absolute Zero (R) hurts more the more targets it catches, and his page says that without setup people simply walk out of it: Command: Shockwave (R) drags them back in. Command: Protect (E) on him is the shield that carries the channel to the end.
The Command: Protect (E) shield goes into the fight with him and holds while Spirit of Dread (W) heals him back. But Onslaught of Shadows (R) fears apart exactly the cluster Command: Shockwave (R) wants: either he ults first, or you cancel each other out.
Bullet Time (R) is three stationary seconds and her page says anyone with a dash simply walks around it: Command: Shockwave (R) gathers them into one spot right in front of her, and Command: Dissonance (W) slows whoever tries to leave the cone.
Chain of Corruption (R) spreads between nearby enemies: on a team just compressed by Command: Shockwave (R) the chain catches all of them instead of two. And Blighted Quiver (W) turns that pile into damage armour alone cannot answer.
She has to reach point-blank and her page says ranged crowd control stops her before she gets there: Command: Protect (E) gives her shield and resistances as she comes in with Wild Rush (E), and Command: Shockwave (R) piles them into her Inferno Trigger (R).
He has no dash and his page says any dive that reaches him ends the fight: with Command: Protect (E) on him he gets shield and resistances, and Command: Shockwave (R) fires from where he stands, sucking in whoever jumped him.
Worth it in long games, once the Dragon Practice (P) stacks are there: MMOOOMMMM! (R) on a group just compressed by Command: Shockwave (R) leaves nobody a way out. Before that he neither protects you nor opens anything for you.
Your page says that with no dash and no blink, once the shield is down you are dead: the Dark Passage (W) lantern is the dash you never had. And The Box (R) holds the people Command: Shockwave (R) just gathered instead of letting them scatter.
The written limit of Command: Shockwave (R) is the wind-up before the pull resolves: the Zenith Blade (E) root into the Shield of Daybreak (Q) stun is over two seconds where nobody can leave, and Solar Flare (R) stretches it further.
Unbreakable (E) intercepts projectiles and cuts the damage that gets through by 35%: the direct answer to the burst your page says deletes you the moment they reach you. And Glacial Fissure (R) knocks up the line you then fire Command: Attack (Q) through.
Crescendo (R) stuns whoever it touches and slows everyone caught inside: that is the lockdown covering the Command: Shockwave (R) wind-up. And Song of Celerity (E) is the only movement speed you will ever get, since your kit produces none.
Build around it only if you both play for picks: Rocket Grab (Q) hands you an isolated target and Static Field (R) silences their answer. But Command: Shockwave (R) wants a group, and if the hook misses neither of you has an engage.
| Lane | Tier | Win% | Pick% | Ban% | Pos. |
|---|---|---|---|---|---|
| Mid | A | 51.4% | 4.58% | 0.37% | #12 / 39 |
| Lane | Tier | Win% | Pick% | Ban% | Pos. |
|---|---|---|---|---|---|
| Mid | A | 51.34% | 4.69% | 0.39% | #12 / 38 |
| Lane | Tier | Win% | Pick% | Ban% | Pos. |
|---|---|---|---|---|---|
| Mid | A | 51.29% | 5.16% | 0.38% | #13 / 39 |
| Lane | Tier | Win% | Pick% | Ban% | Pos. |
|---|---|---|---|---|---|
| Mid | B | 50.37% | 6.09% | 0.52% | #20 / 41 |


Orianna, the Clockwork Sprite, is a control mage who mid-lanes in Wild Rift and builds her entire kit around a single gimmick: none of her spells actually fire from her own position — they all originate from the Ball, a mechanical companion she flings, plants, and detonates around the fight. That setup makes her equal parts poke mage and support-caster: she chips health and clears waves with the Ball's dash, shields and speeds up an ally by attaching to them, and closes out fights with one of the scariest group-pulling ultimates in the game. Played well, she's less about raw damage-per-second and more about deciding exactly where and when the fight actually happens.
Skill order: Q > W > E
In lane, use Command: Attack to poke — it hits everything in a line, so angle it through the wave and the enemy champion together to chip health and clear minions with the same cast, keeping in mind the damage falls off with each target it hits, so line up the champion first whenever you can. Stay close enough to the Ball that your auto-attacks keep stacking Clockwork Windup, and look to trade right after landing a Q rather than starting a fight cold. Because Orianna has no innate escape, treat your E shield and Flash as your entire safety net — if both are down, play the wave passively until they're back up.
From mid-game onward, your job in a fight is simple: land Command: Shockwave on as many enemies as possible, ideally right as they commit to an engage or group around an objective. Use Command: Protect proactively on your frontline or diving jungler before the fight even starts — it shields them and quietly repositions the Ball to exactly where the action is about to happen. The instant R connects, follow up immediately with Q through the grouped enemies and W to slow whoever survives while your own team gets the speed boost to finish. Stay at max range for the whole fight; Orianna brings huge damage and utility, but she folds instantly if the frontline collapses back onto her.