
WR China Meta
Meta, tier list & top-player builds from the China server · live
Meta, tier list & top-player builds from the China server · live

赛恩 · 亡灵战神 Tank B
✅ Patch 7.2e · stats updated 2026-09-12 · real builds of 24 top-ranked China server players captured 2026-09-11
Difficulty Damage Toughness Utility
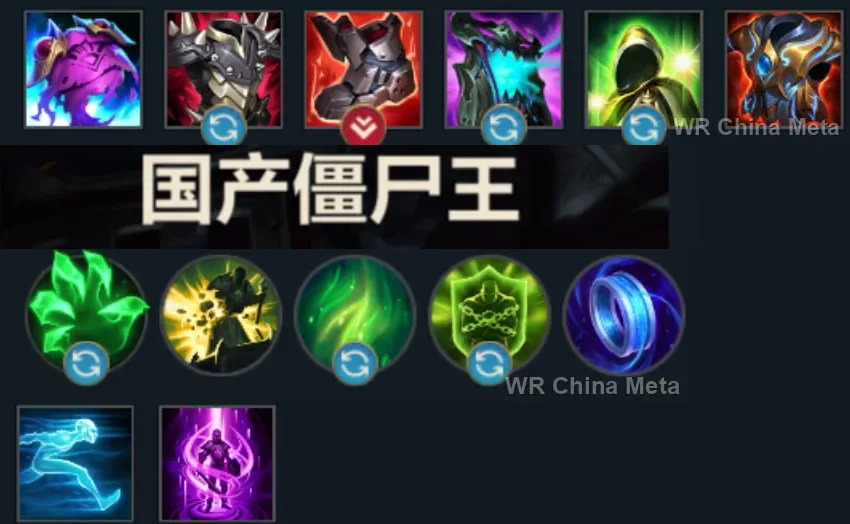
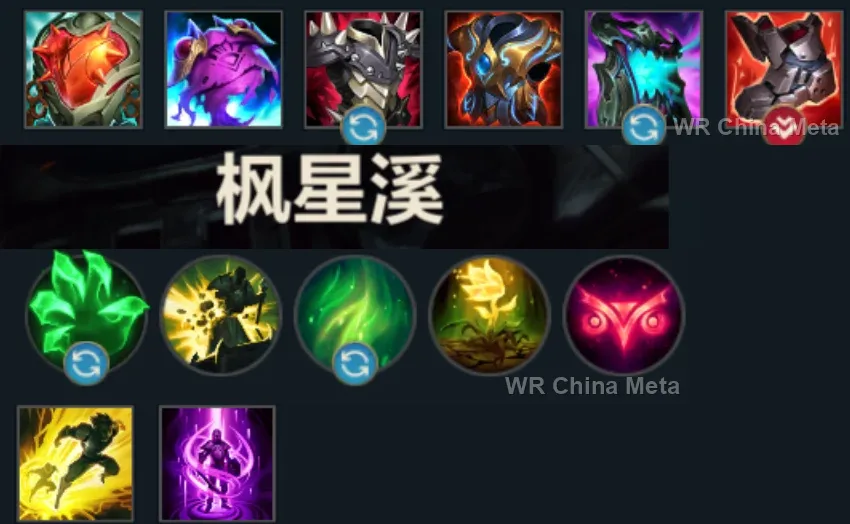
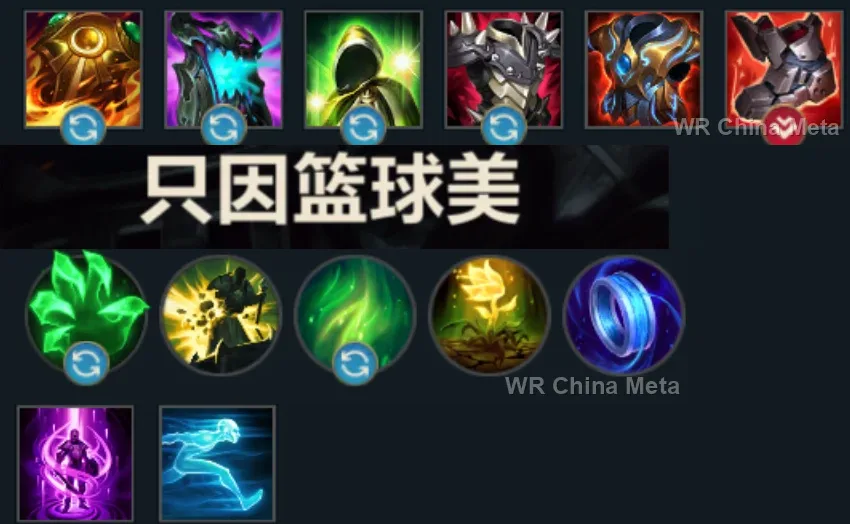
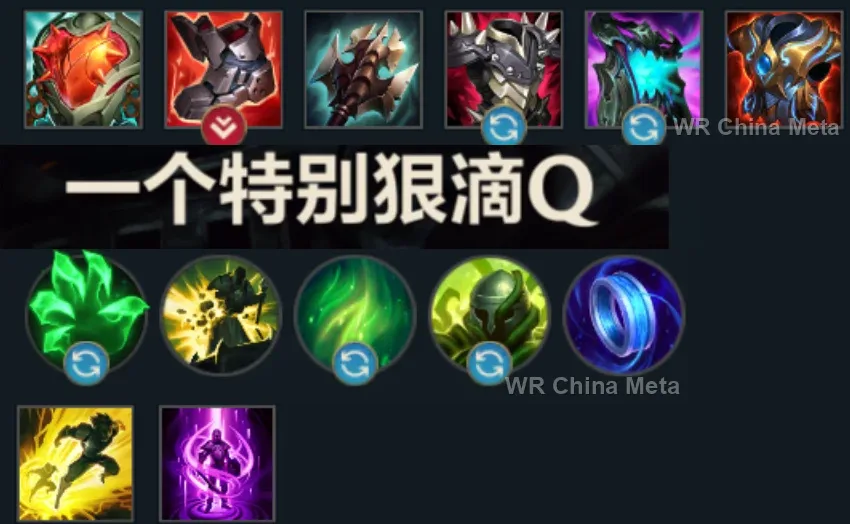
How the strongest players on the Wild Rift China server (国服) build Sion: live win/pick statistics by rank bracket, the most-used item and rune sets, and the real loadouts of the top ranked Sion players, captured in-game.
📖 How to play Sion


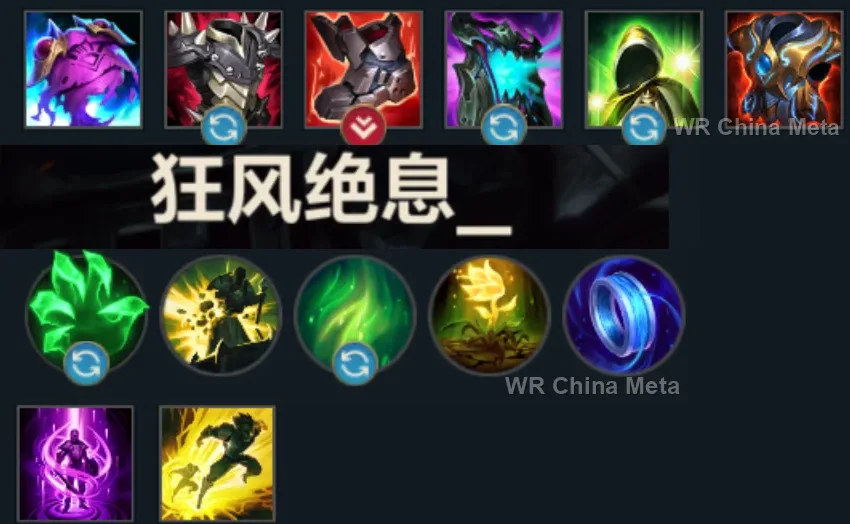
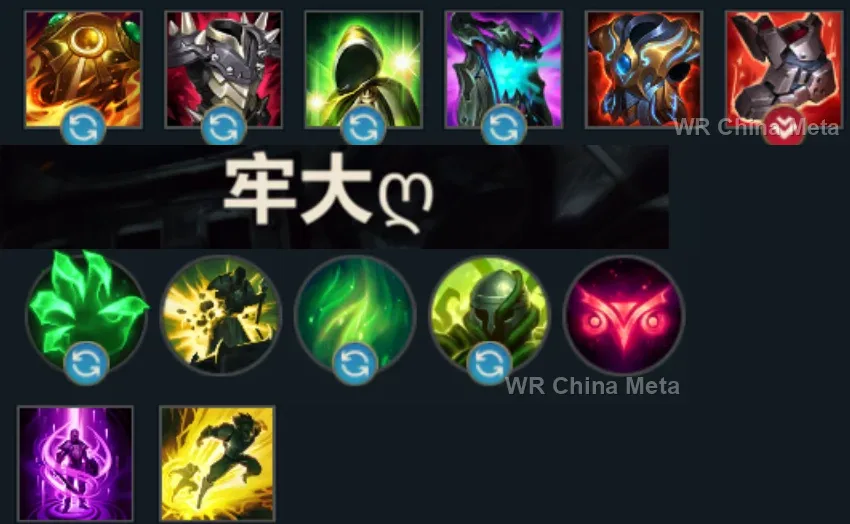
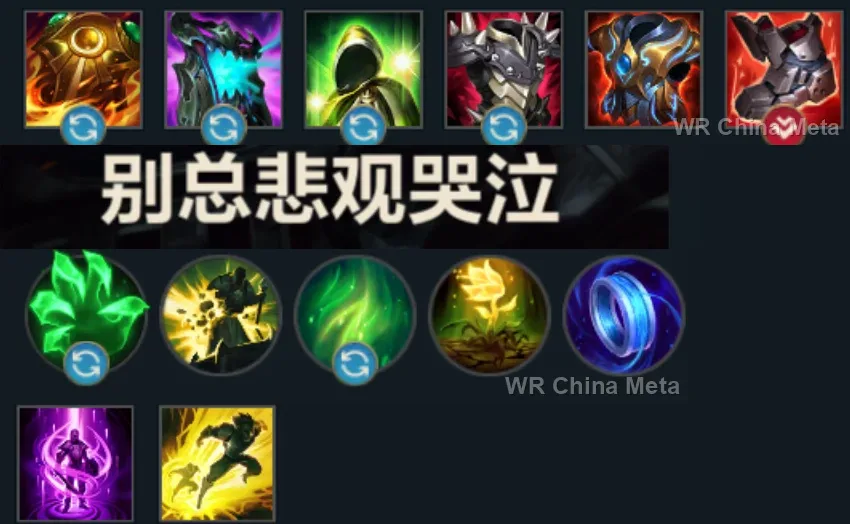
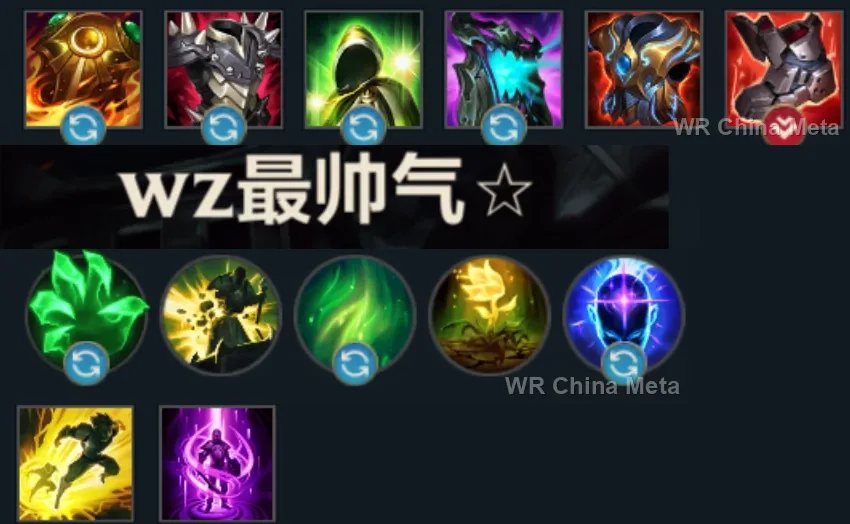
Counted on 26 real builds captured from the Chinese client, player by player. Independent from the official API above.


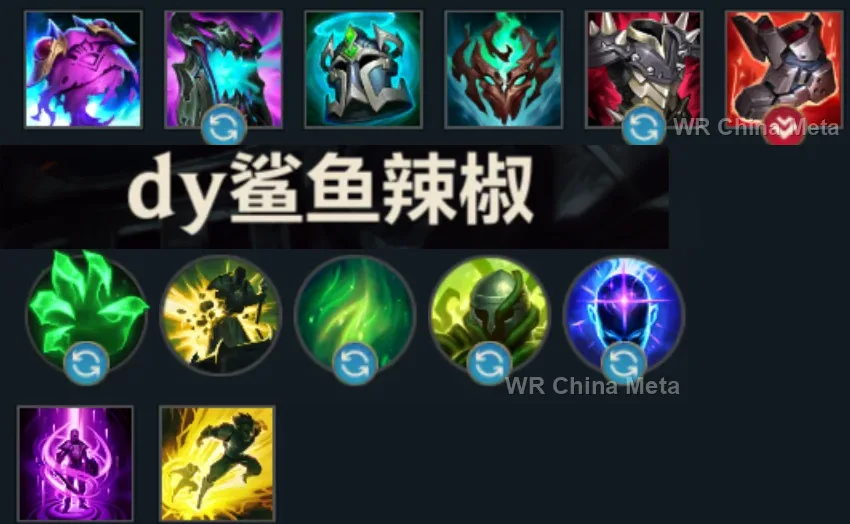
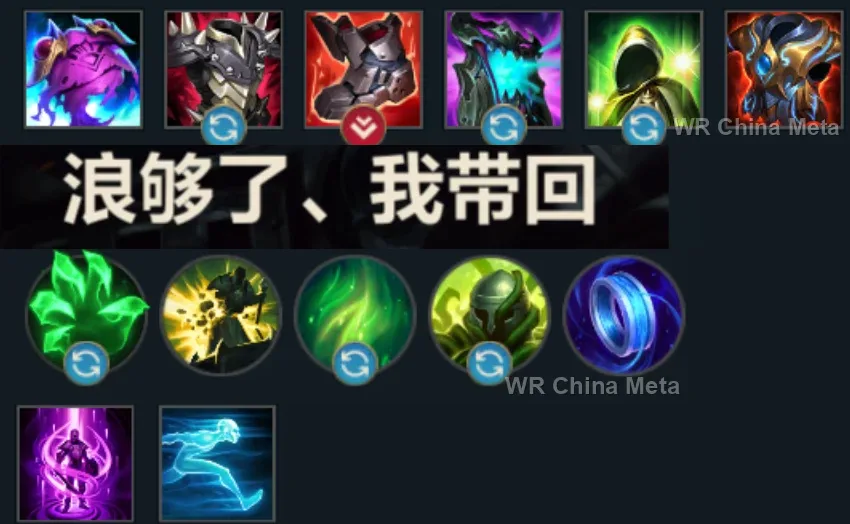
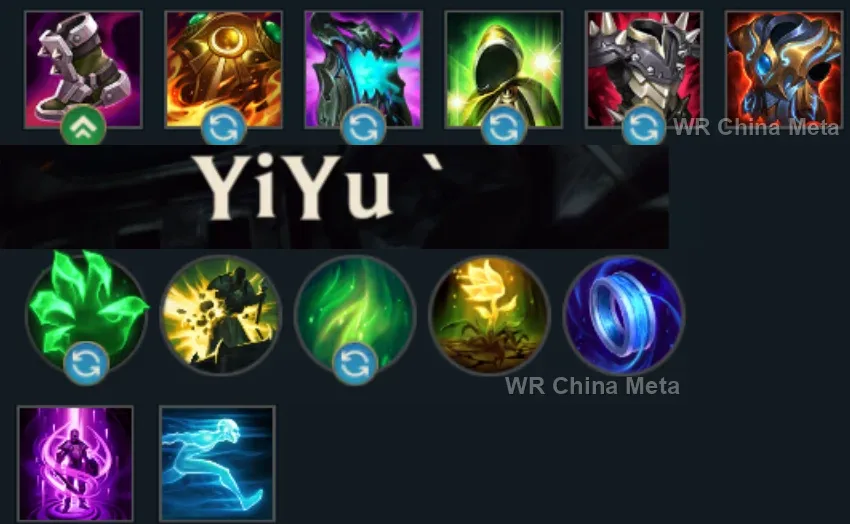
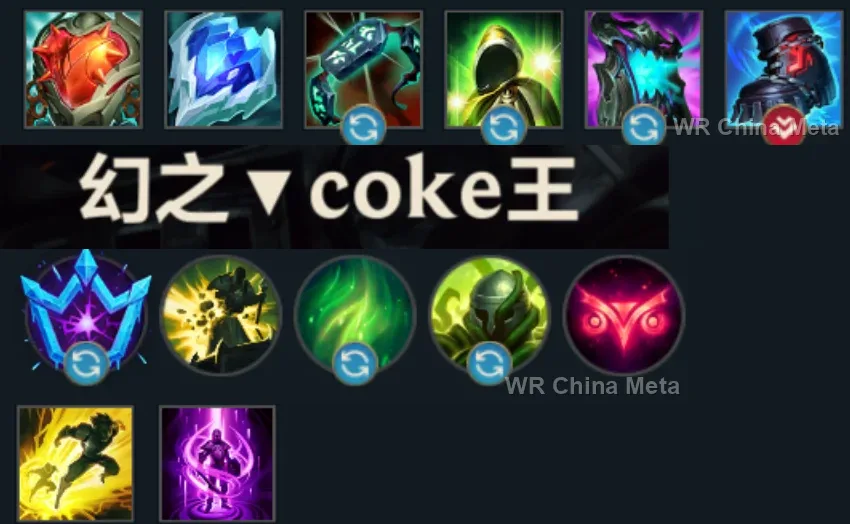
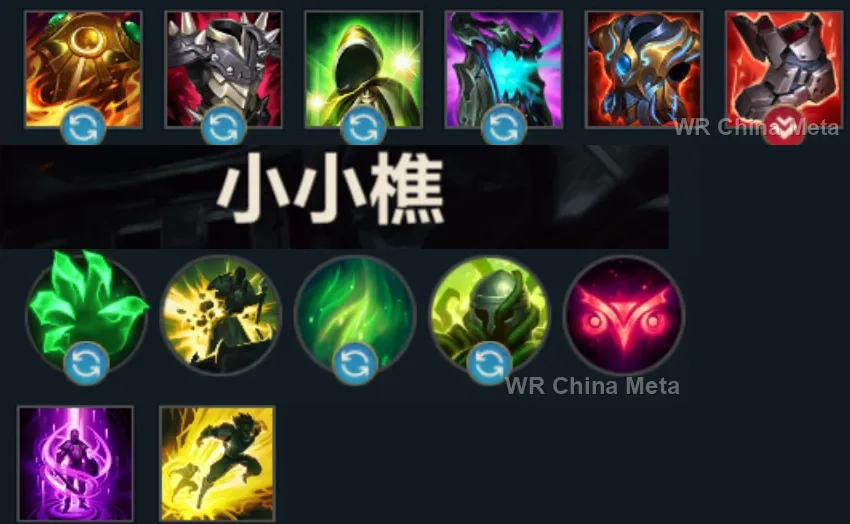
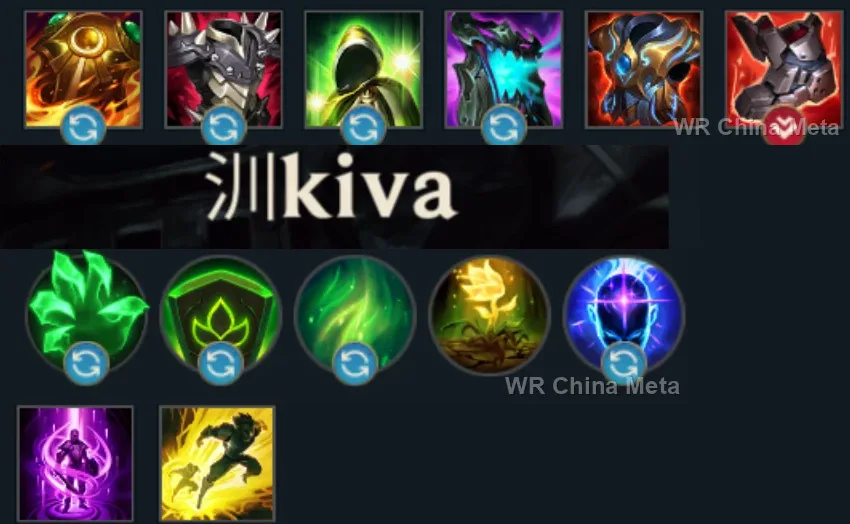
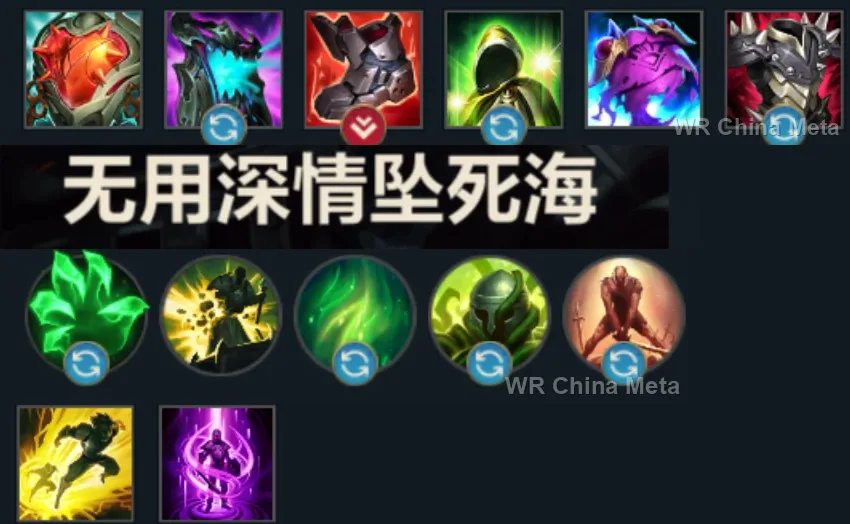
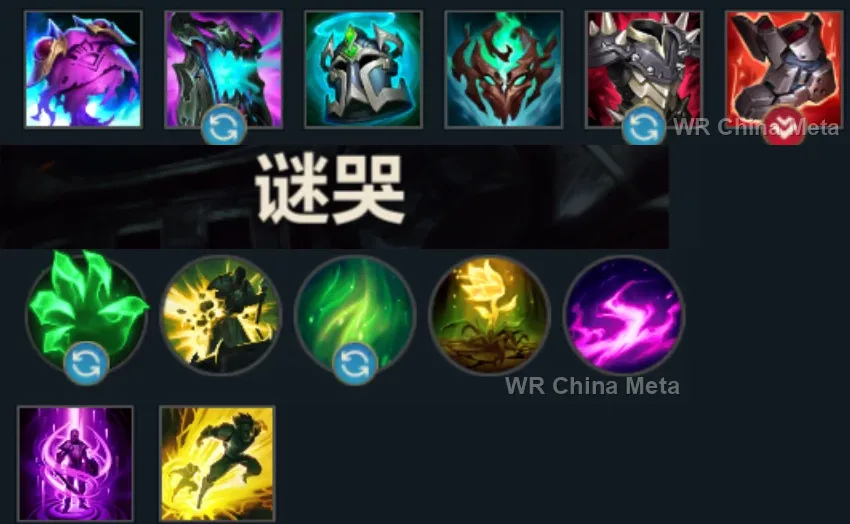
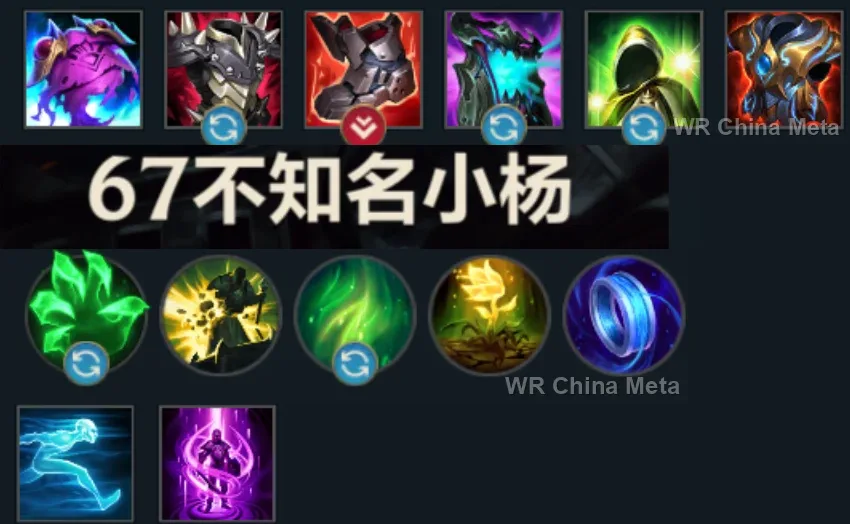
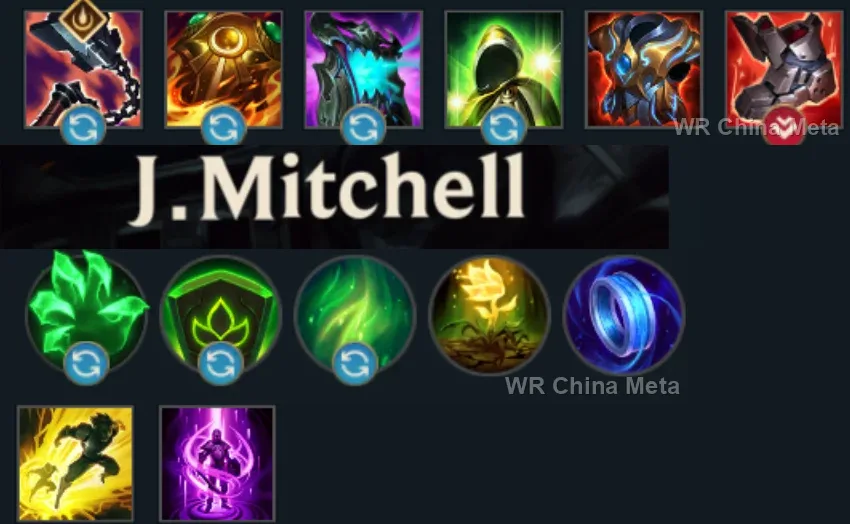
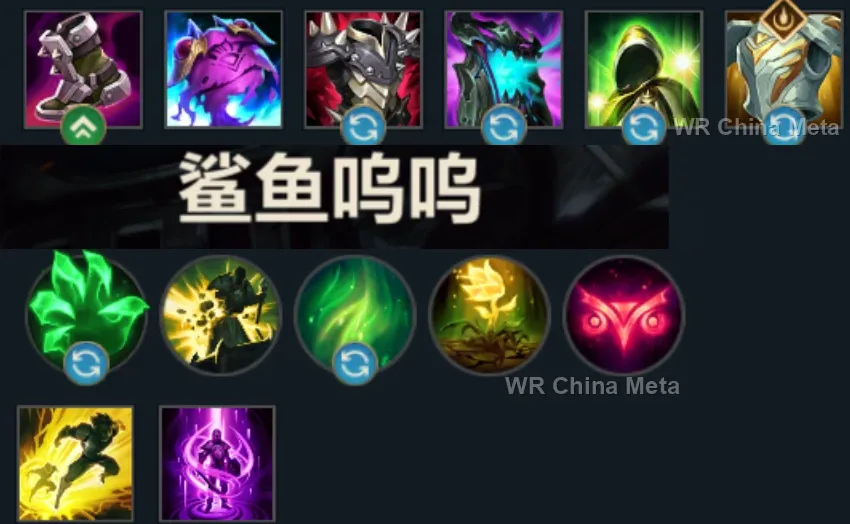
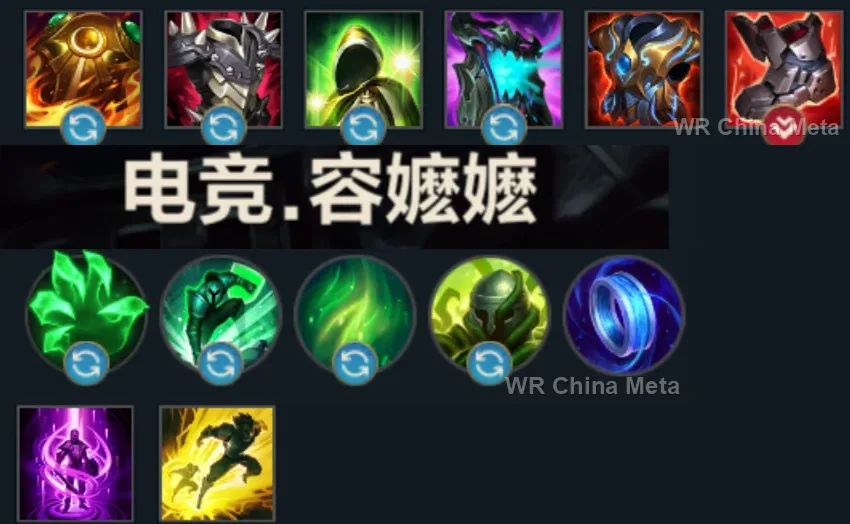
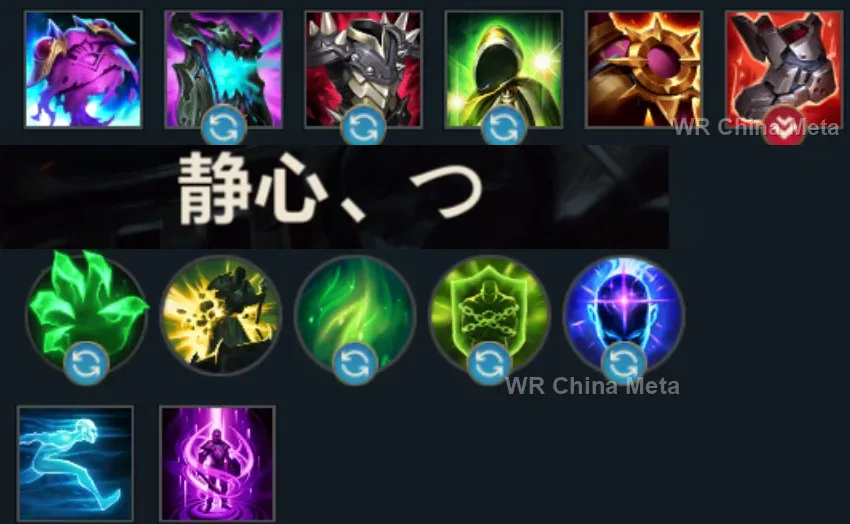
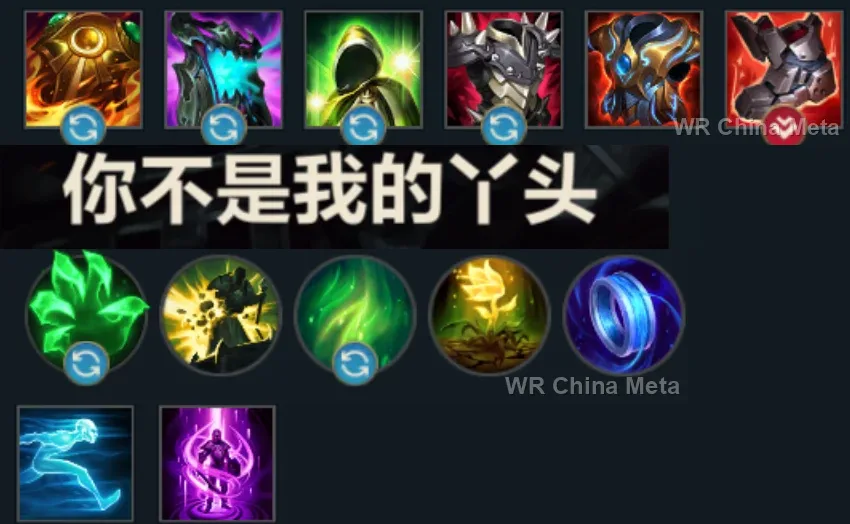
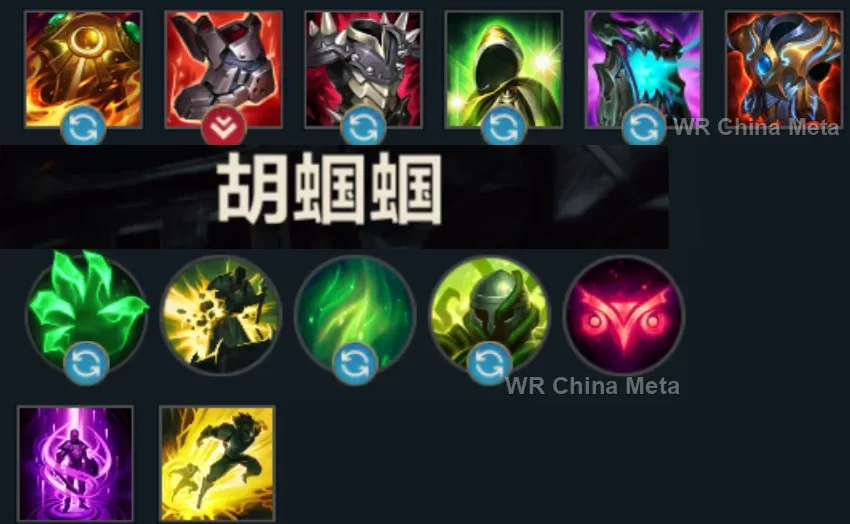
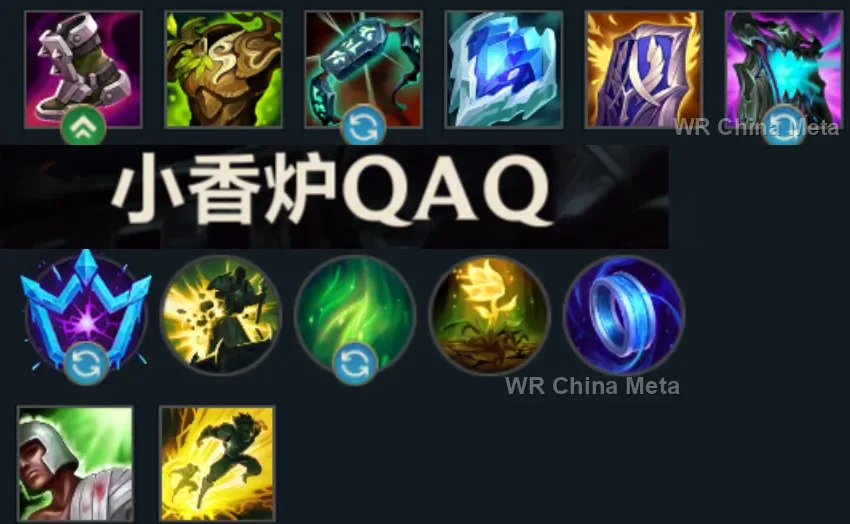
Taken from the official in-game China leaderboard. Spells, runes and items of every public top player.
24 of the top 30 players have a public match history; the others keep theirs private.
The toughest lane matchups for Sion on the Wild Rift China server, with why each is hard and exactly how to play it.
 Sion vs Vayne Hard counter
Why Vayne counters Sion: The biggest HP bag in the game against percent damage: you are literally her training dummy.
How to play Sion into Vayne: Zone her off minions with Q and live off the W shield. Splitpush and trade your life for towers: your passive keeps working even dead.
→ Vayne Sion vs Fiora Unfavorable
Why Fiora counters Sion: Vitals on an enormous body and Riposte on your charged Q: she opens you like a tin can.
How to play Sion into Fiora: Short, uncharged Qs to break her Riposte timing. Back to the wall and fight ONLY with the wave pushing toward you.
→ Fiora Sion vs Gwen Unfavorable
Why Gwen counters Sion: Percent magic damage on your only asset — HP — and Mist on your telegraphed knock-up.
How to play Sion into Gwen: Charge Q from fog of war: she gets no time to arm the Mist. Splitpush the opposite side: your R crosses the map, hers does not.
→ Gwen Sion vs Darius Skill matchup
Why Darius counters Sion: He opens you up with stacks in trades, but he wins duels and loses the map war.
How to play Sion into Darius: Do not trade inside his pull range. Charged Q from behind the wave. Your R travels the map: he stays a pawn.
→ Darius Sion vs Teemo Skill matchup
Why Teemo counters Sion: His blind barely matters to you, but the poke erodes your shield and mushrooms punish a blind R.
How to play Sion into Teemo: Absorb and zone with Q: he cannot stop your push. Fire the R only along paths with vision: one mushroom on the route is half your health.
→ TeemoThe champions Sion works best alongside on the Wild Rift China server, lane by lane, with the reason each pairing works.
Unstoppable Onslaught (R) is only dodgeable if you see it coming, and Paranoia (R) shuts off their whole team's vision. You curve the charge around walls, they have nothing to react to, and Unspeakable Horror (E) pins whoever is left.
Under three quarters of a second Decimating Smash (Q) is just a slow: you need a target that can't step away while you wind up. Frenzying Taunt (E) forces one to stand there hitting Rammus for the whole charge.
Infinite Duress (R) is a one-second suppress nobody dodges: that is exactly the window where you charge Decimating Smash (Q) all the way to the knock-up, instead of telegraphing it and watching it get sidestepped.
Your problem is that everything you do is telegraphed: Cataclysm (R) walls a target into an arena it can't leave, and in there Decimating Smash (Q) can charge all the way with nobody able to step aside.
It works one target at a time: Crescent Guard (R) knocks everyone away except his marked one, turning your charge into a clean 2v1. But if you were winding Q up on a group, it scatters them right as you release.
Command: Protect (E) sticks the ball to the frontliner going in: Unstoppable Onslaught (R) carries it straight into their back line and Command: Shockwave (R) fires from there, not from where she's standing. Your charge becomes her range.
Last Breath (R) can only be cast on airborne targets, and you make them two different ways: the knock-up on Unstoppable Onslaught (R)'s impact and the one on a charged Decimating Smash (Q). Not a stylistic choice, a condition written into his kit.
The risk of your charge is arriving alone on the far side of the map: Hero's Entrance (R) lands on you wherever you are, with a shield and an area knock-up. You pick the angle, he brings the team with him.
Vision of Empire (W) deals 50% bonus damage to anything already locked down, and a fully charged Q locks a target for up to two seconds. It's the most direct multiplier you can hand a mage with no mobility.
Your charge hands him a standing target he would never catch on his own, and Roar of the Slayer (E) strips armor while he grinds Siphoning Strike (Q). In return, Wither (W) pins down anyone trying to walk out of yours.
Deadly Flourish (W) roots anyone who just took ally damage: Roar of the Slayer (E) tags from range, Jhin locks them down, and you charge Decimating Smash (Q) into a target that can't sidestep it. And you already took their armor off.
Bullet Time (R) is a stationary channel that only pays if enemies don't leave the cone. A fully charged Q knocks up and stuns the group she's aiming at for up to two seconds, which is exactly how long she needs to empty it.
With Unstoppable Onslaught (R) on cooldown you're one of the slowest champions in the game: Frost Shot (P) slows on every hit and puts targets back within reach. Enchanted Crystal Arrow (R) also gives you a second long-range engage.
Only worth it if she picks you as her Oathsworn at the start and you can actually stay close: Fate's Call (R) launches you into them with a knock-up on landing and your Q already charging. One more engage on top of your own.
Crescendo (R) stuns the first thing it touches and slows everyone else: that's the window where a fully charged Decimating Smash (Q) actually lands instead of getting sidestepped. Song of Celerity (E) takes the edge off your slowness too.
Magnet Storm (R) vacuums their team into one spot: a charged Q into that pile knocks up three people at once. And Shattering Strike (Q) breaks the shields that would otherwise eat your entire engage.
Glory in Death (P) already brings you back once: with Chronoshift (R) on you, you get to go in twice, which is the only thing that makes a charge that always ends inside their team reasonable. Twisted Timeflow (W) covers your slowness.
Dark Binding (Q) is a two-second root, which is a full Decimating Smash (Q) charge served on a target that cannot take a step. And if you open, Soul Shackles (R) stuns the group you just landed on.
Only in this order: you first, him second. Tempered Fate (R) puts everything it touches in stasis, so if he opens he cancels your charge halfway; fired right after your impact, it freezes their help while you wind up Q.
| Lane | Tier | Win% | Pick% | Ban% | Pos. |
|---|---|---|---|---|---|
| Baron | B | 50.52% | 3.02% | 0.51% | #22 / 41 |
| Lane | Tier | Win% | Pick% | Ban% | Pos. |
|---|---|---|---|---|---|
| Baron | B | 50.45% | 3.16% | 0.54% | #20 / 41 |
| Lane | Tier | Win% | Pick% | Ban% | Pos. |
|---|---|---|---|---|---|
| Baron | B | 49.85% | 3.75% | 0.5% | #18 / 41 |
| Lane | Tier | Win% | Pick% | Ban% | Pos. |
|---|---|---|---|---|---|
| Baron | A | 51.2% | 4.57% | 0.49% | #12 / 39 |


Sion, Wild Rift's Undead Juggernaut, is one of the game's premier Tanks — a slow-looking bruiser who hits far harder than his low difficulty rating suggests. A meaningful share of his damage, from Soul Furnace's detonation to his post-revive auto-attacks, scales off max HP rather than raw AD, so the tankier he builds, the harder he actually hits. His signature tool is Unstoppable Onslaught, a long, steerable charge that turns him into a genuine pick threat and lets him force the fights his team wants, in lane or across the map.
Skill order: Q > E > W (max R whenever it's available)
Lane behind minions and poke at range with Roar of the Slayer rather than committing Soul Furnace's shield early. Hold Decimating Smash's charge as a standing threat instead of firing on reflex — a short tap barely slows, but a near-full charge punishes anyone who oversteps for a creep. Q actually deals reduced damage to minions but bonus damage to monsters, so lean on autos and E to shove waves and save your charged Q for camps or a real all-in. Stack every point of passive HP you can from kills, and treat level 5 as your first real power spike — look for a chance to Unstoppable Onslaught into a side lane or across the river for an unexpected pick before teamfights even start.
From the mid game on, Sion's job is to start the fight on his terms, not deal the most damage. Steer Unstoppable Onslaught around vision to isolate a backline target or split the enemy team, then follow up with a fully charged Decimating Smash on whoever's grouped up. Use Roar of the Slayer at choke points or through a minion to slow and armor-shred anyone diving the backline, and position to soak damage rather than trade evenly. If you drop to zero, don't panic-retreat: Glory in Death's revive window can often net one more stun, one more body block, or one more objective secured before you actually go down.