
WR China Meta
Meta, tier list & top-player builds from the China server · live
Meta, tier list & top-player builds from the China server · live

纳尔 · 迷失之牙 Fighter B
✅ Patch 7.2e · stats updated 2026-09-12 · real builds of 26 top-ranked China server players captured 2026-09-11
Difficulty Damage Toughness Utility
How the strongest players on the Wild Rift China server (国服) build Gnar: live win/pick statistics by rank bracket, the most-used item and rune sets, and the real loadouts of the top ranked Gnar players, captured in-game.
📖 How to play Gnar


Counted on 27 real builds captured from the Chinese client, player by player. Independent from the official API above.


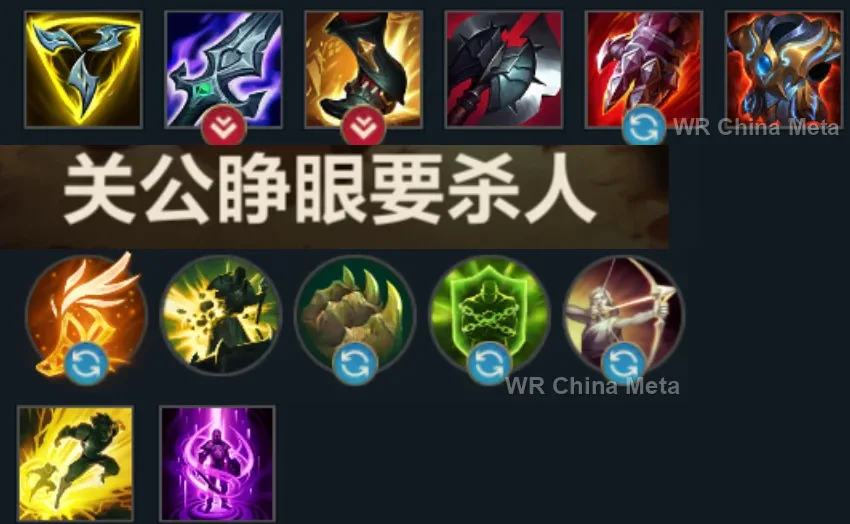
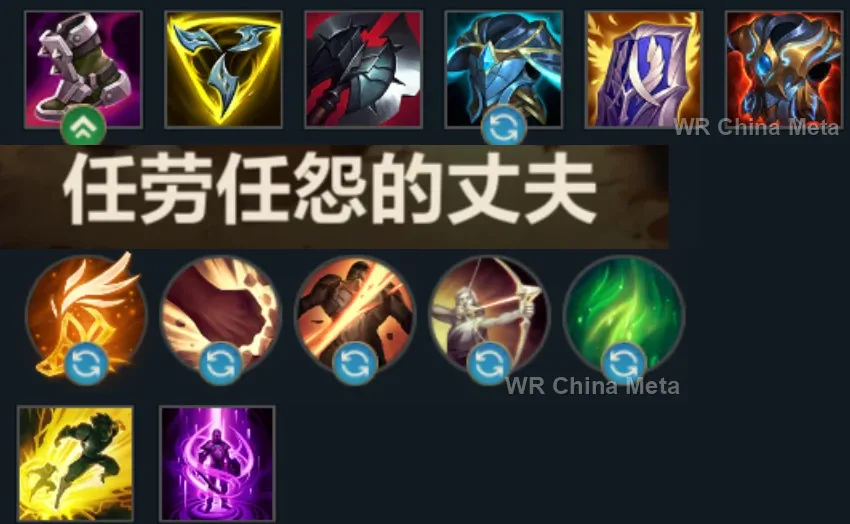
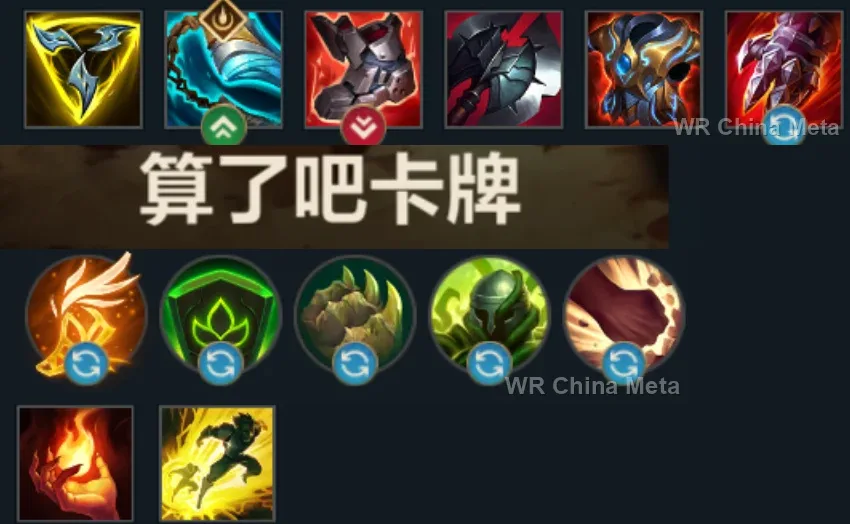
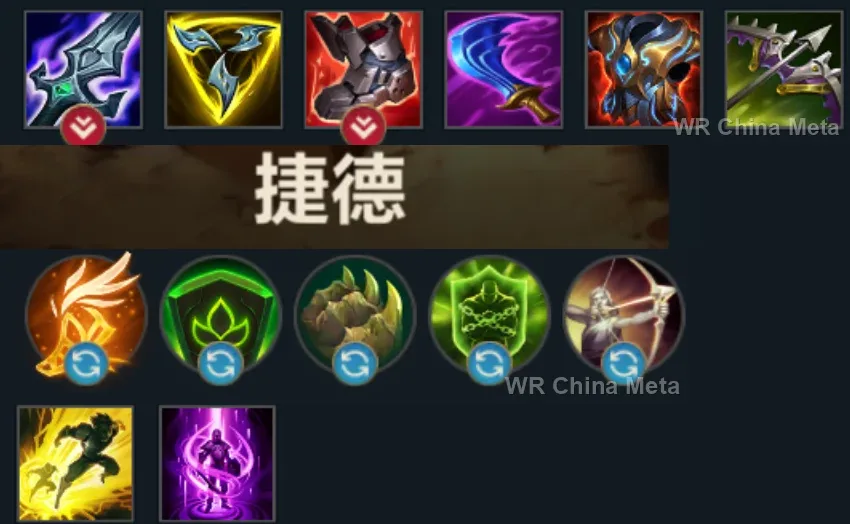
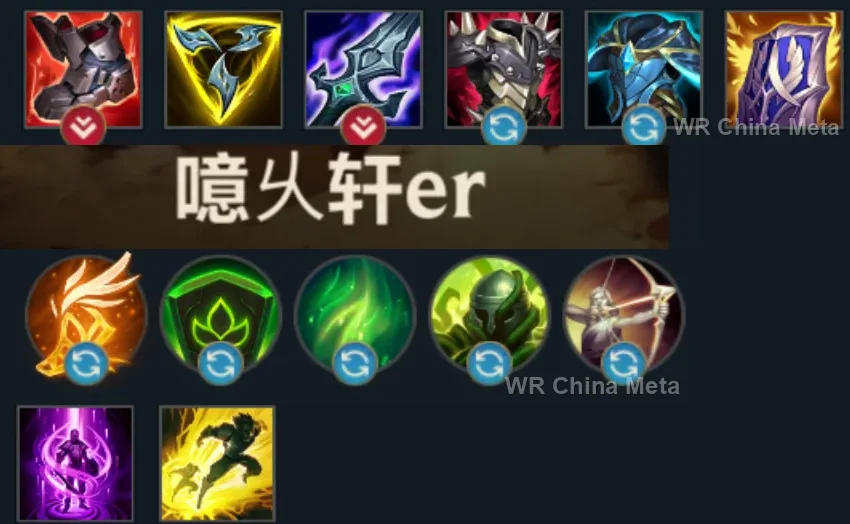
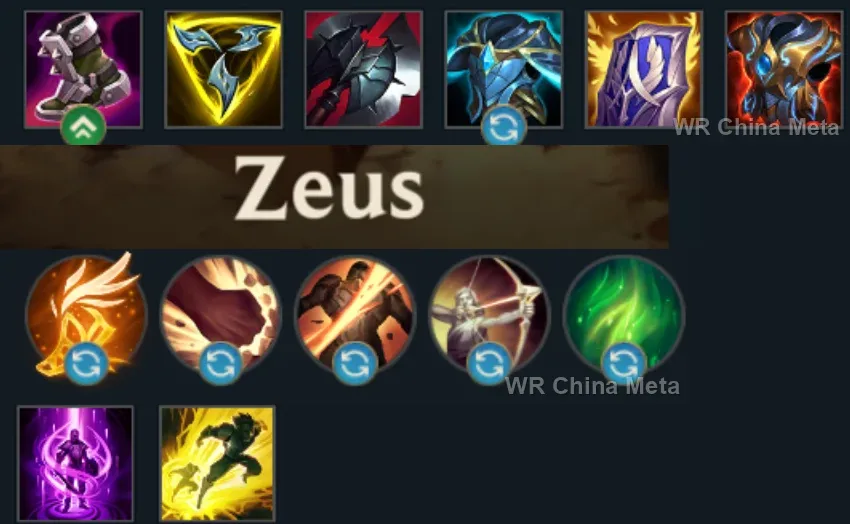
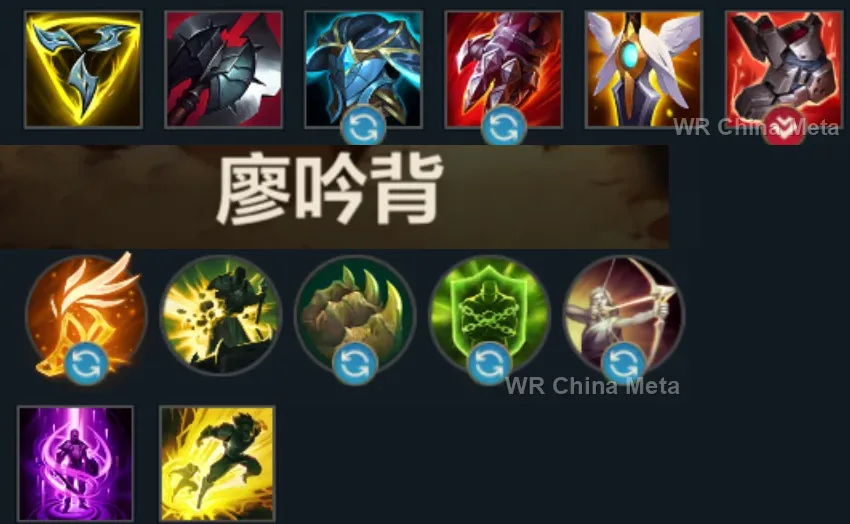
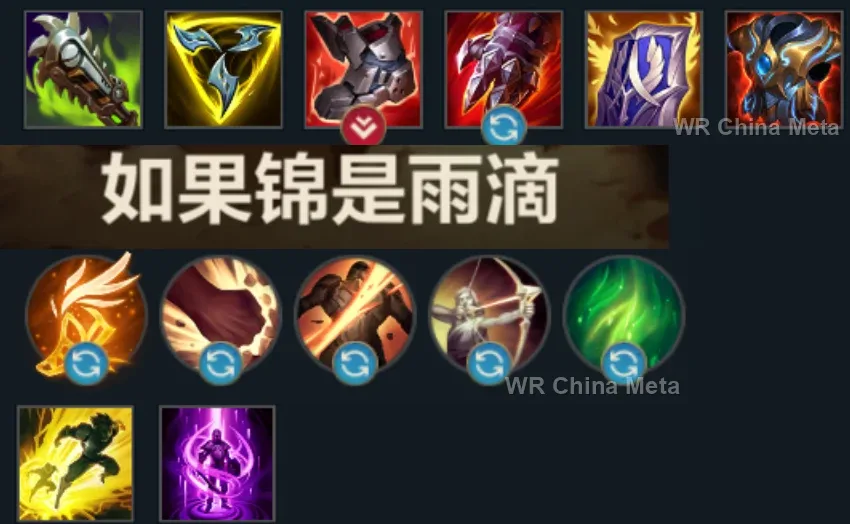
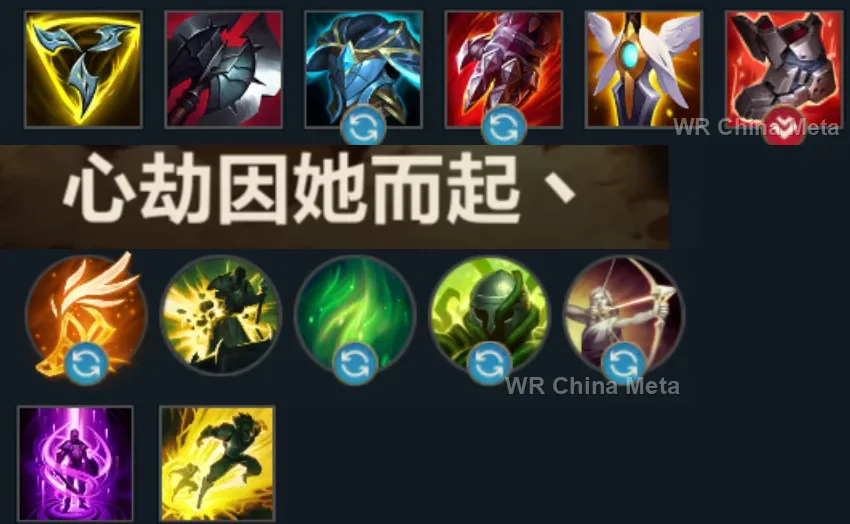
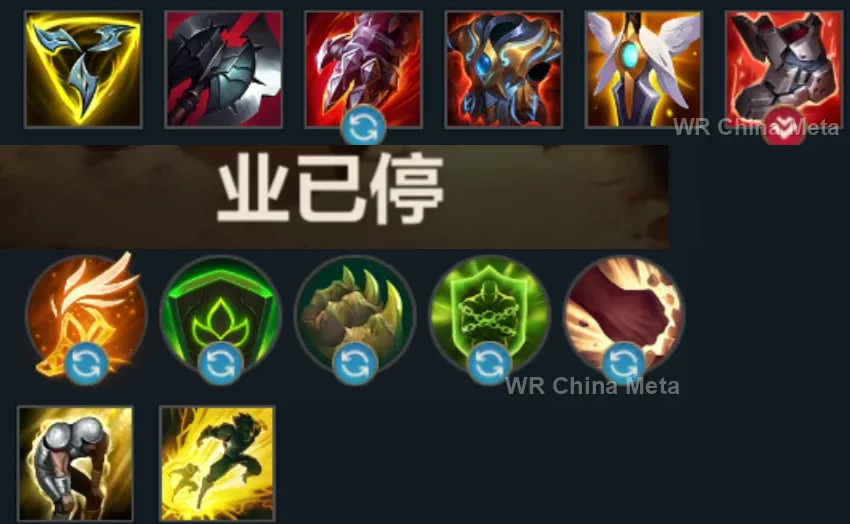
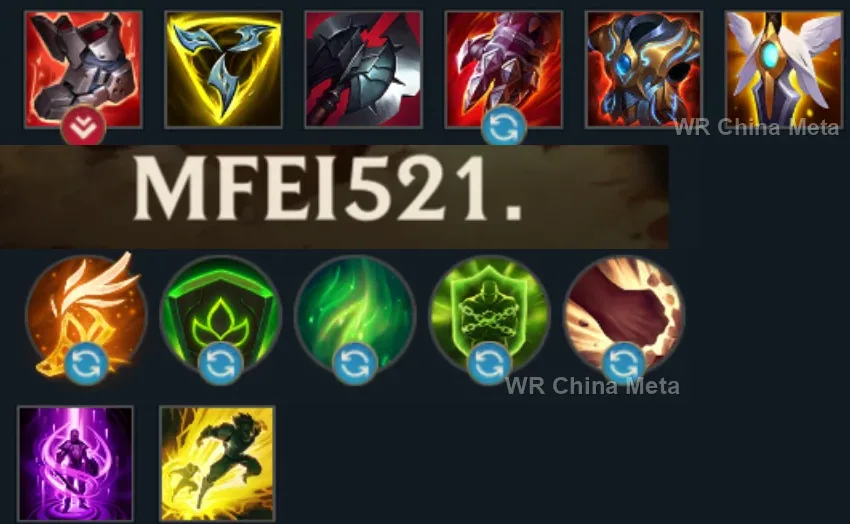
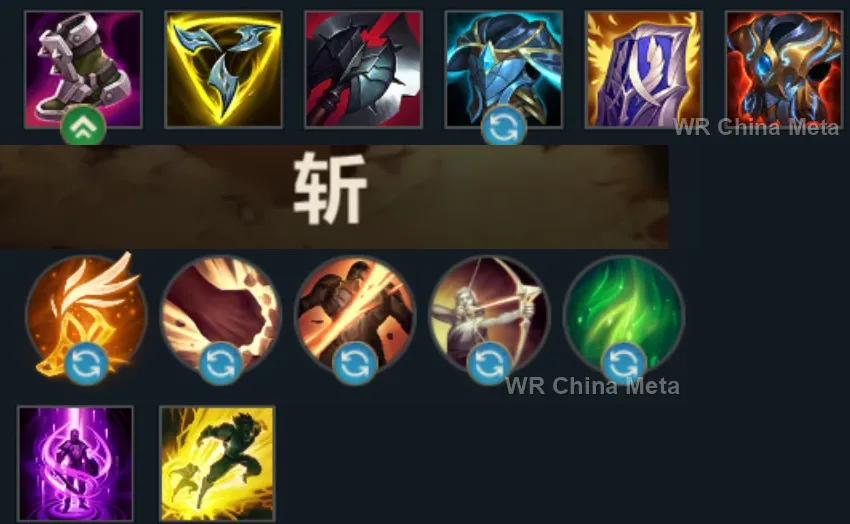
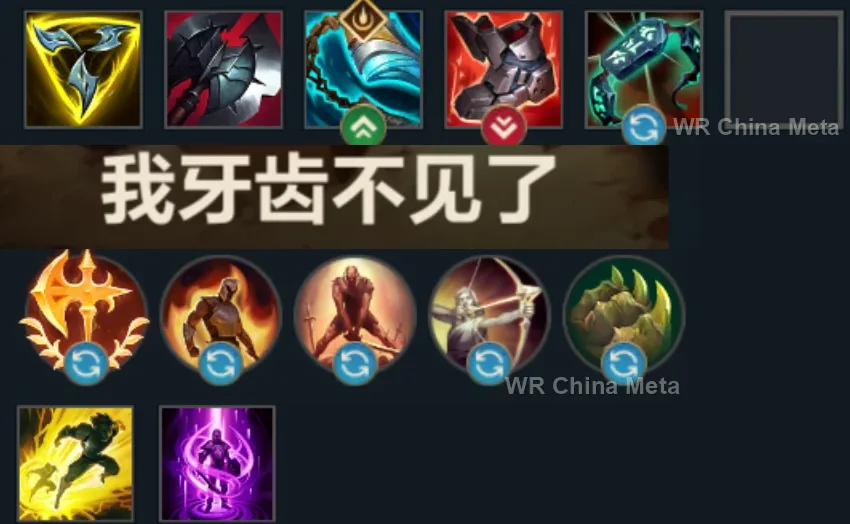
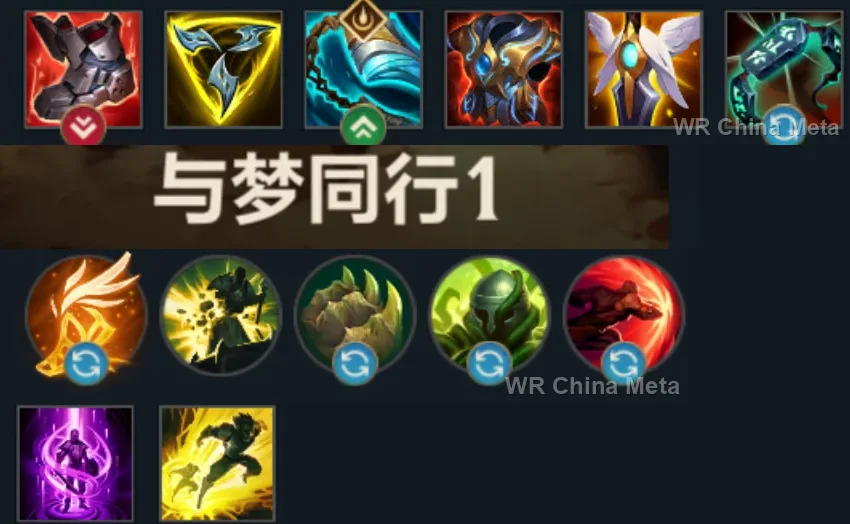
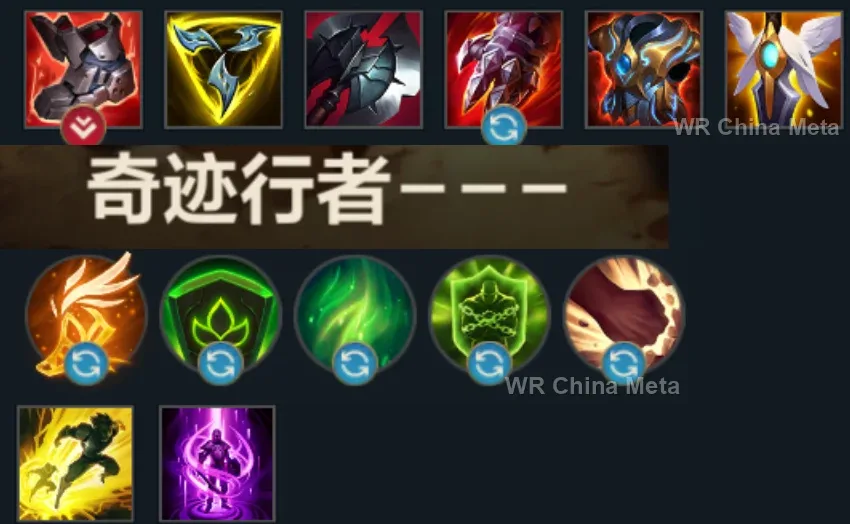
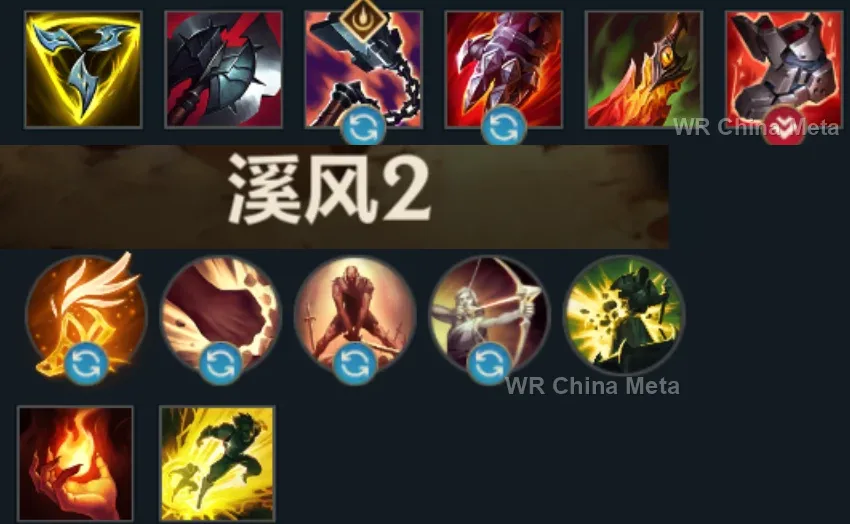
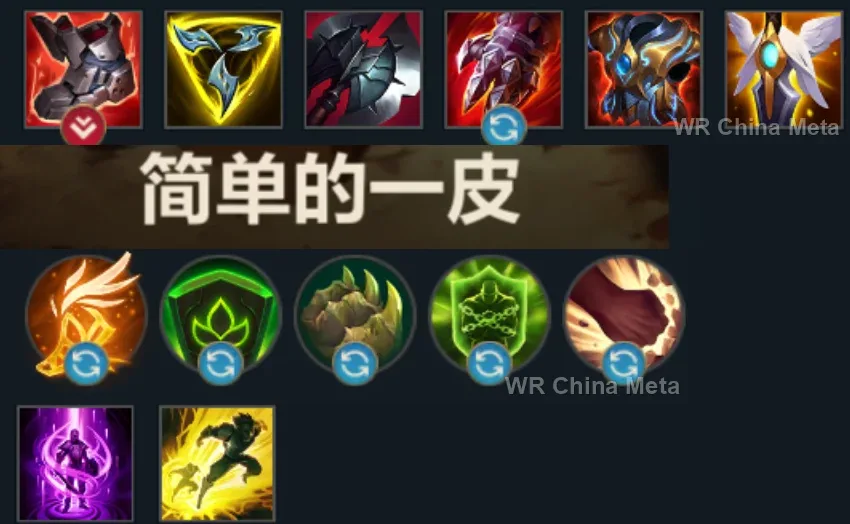
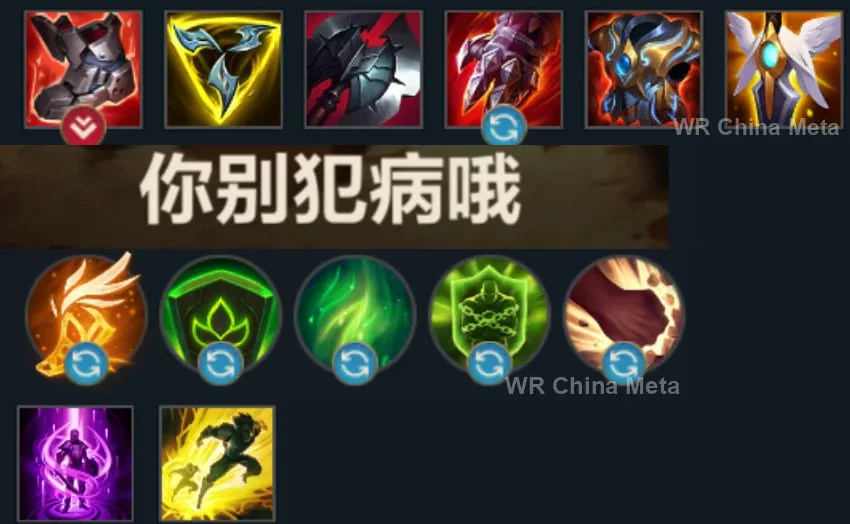
Taken from the official in-game China leaderboard. Spells, runes and items of every public top player.
26 of the top 30 players have a public match history; the others keep theirs private.
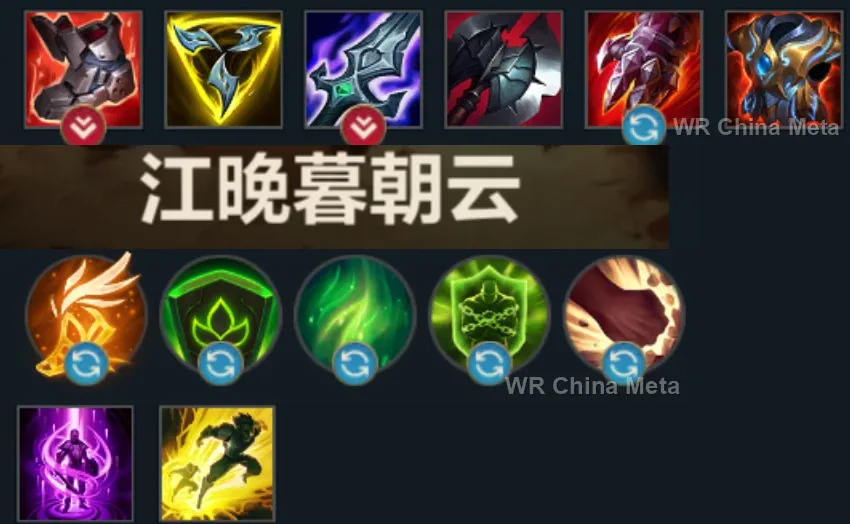
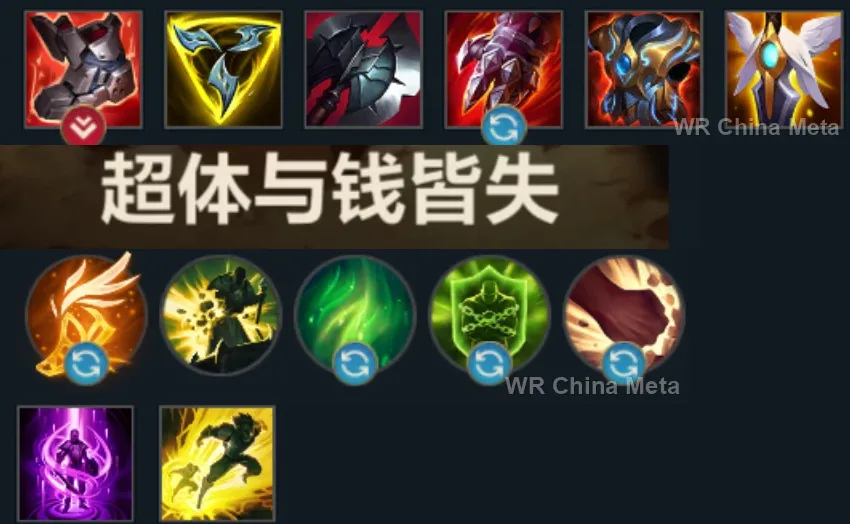
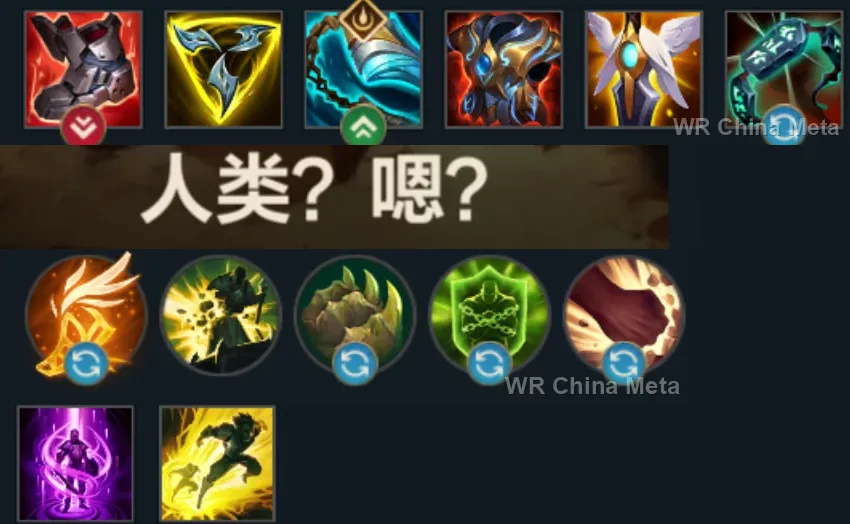
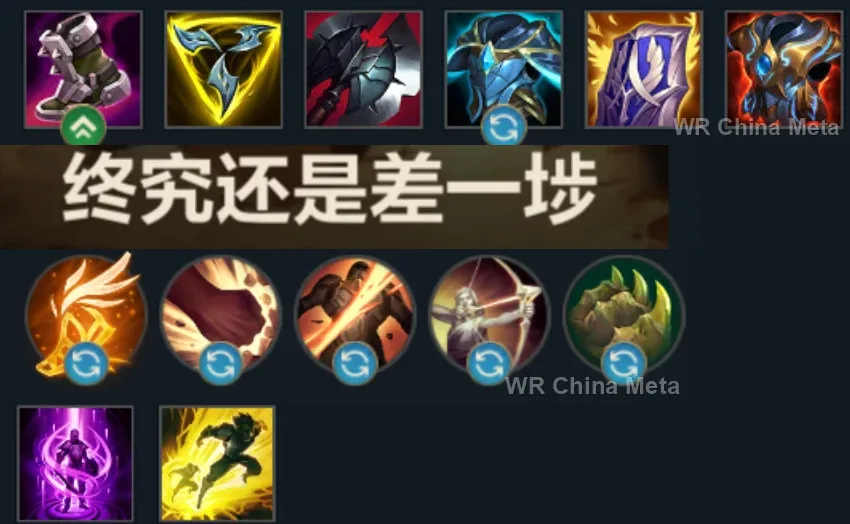
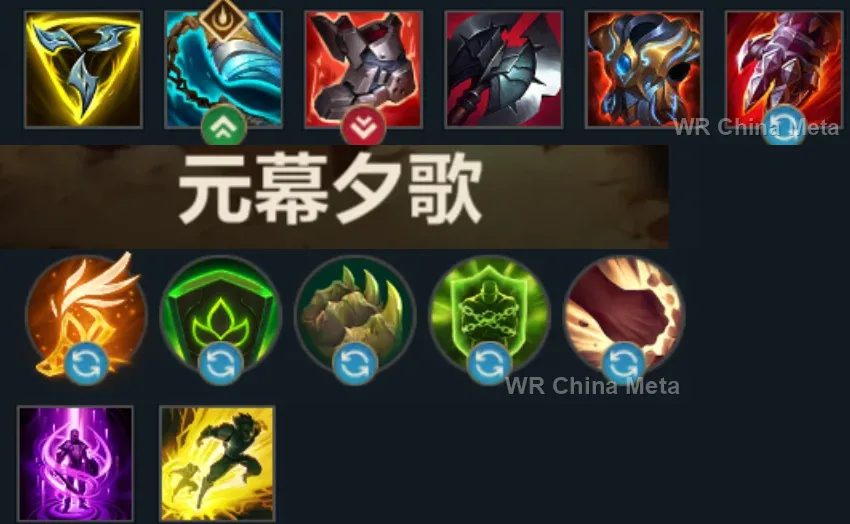
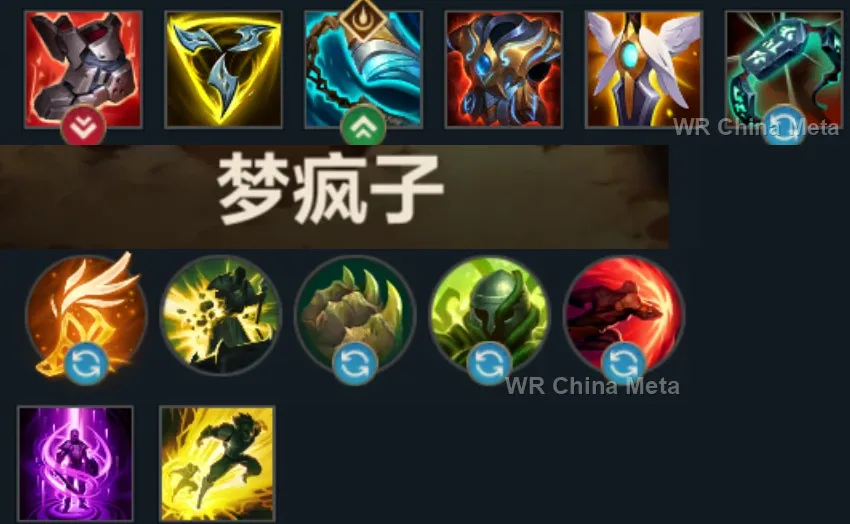
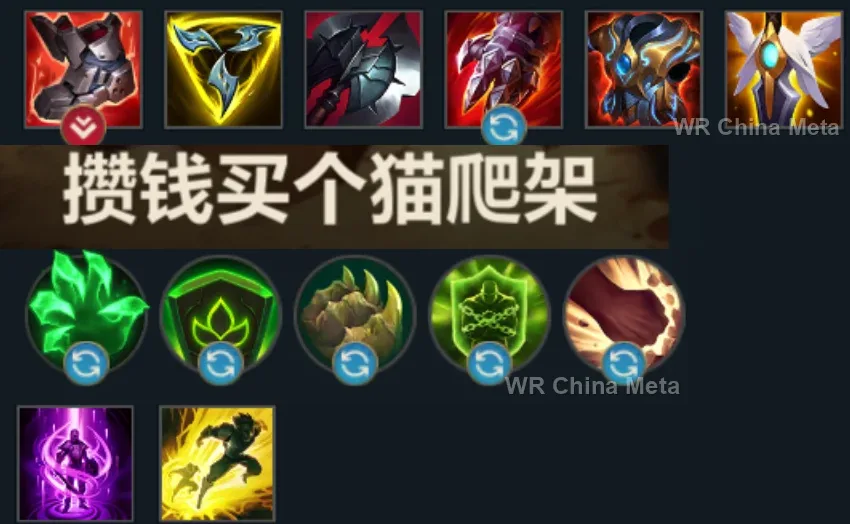
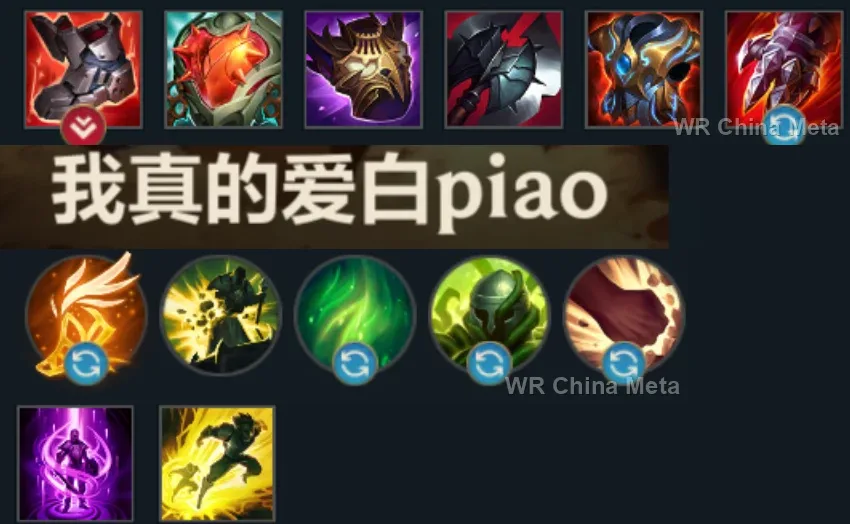
The toughest lane matchups for Gnar on the Wild Rift China server, with why each is hard and exactly how to play it.
 Gnar vs Darius Unfavorable
Why Darius counters Gnar: If he catches Mini you with the pull you are dead, and as Mega, long stacked trades are his trade.
How to play Gnar into Darius: As Mini kite OUTSIDE his E range and hop away at the first sign of risk. Transform onto him only with a clear health lead.
→ Darius Gnar vs Irelia Unfavorable
Why Irelia counters Gnar: Minion resets close Mini's range advantage and her stun punishes your hop: she chases better than you flee.
How to play Gnar into Irelia: Deny her low-health minions: without resets she is nobody. As Mega, wall-stun her engage: your R deletes her from the fight.
→ Irelia Gnar vs Fiora Unfavorable
Why Fiora counters Gnar: Vitals and Riposte against a kit that cannot scratch her as Mini and hands her a giant target as Mega.
How to play Gnar into Fiora: Stay Mini as long as possible: kite and boomerang. Go Mega ONLY with your team around: never accept the pure duel.
→ Fiora Gnar vs Warwick Skill matchup
Why Warwick counters Gnar: He regenerates your Mini poke and his fear answers your Mega all-in: he has a reply for both forms.
How to play Gnar into Warwick: Poke faster than his sustain: never let him sit at full health. Save the hop to interrupt his R mid-air.
→ Warwick Gnar vs Malphite Skill matchup
Why Malphite counters Gnar: His armor absorbs your physical boomerangs: the rock that ignores rocks.
How to play Gnar into Malphite: Farm and accept the stalemate: nobody dies in this lane. As Mega save your R for THEIR carries in teamfights: the real matchup happens there.
→ MalphiteThe champions Gnar works best alongside on the Wild Rift China server, lane by lane, with the reason each pairing works.
GNAR! (R) only stuns and adds 50% damage when it slams enemies into terrain, and mid-lane there is no terrain: Cataclysm (R) raises a ring of it around the target, wherever you are. And nobody walks out of Wallop (W) in there either.
Curse of the Sad Mummy (R) and Wallop (W) are two area stuns back to back: the group stays put well past your own 1.25 seconds. And while you're Mini, Cursed Touch (P) turns part of Hyper (W)'s magic on-hit into true damage.
Moonfall (R) only works up close and only if enemies stay around her: Crunch (E) gathers them and Wallop (W) pins them, which is all she needs. Then Lunar Rush (E) brings her in and turns your engage into the damage you don't deal.
Absolute Zero (R) is a channel enemies cancel just by walking away: after Wallop (W) nobody walks. And when your Rage bar isn't full and you're stuck Mini, Biggest Snowball Ever! (W) opens the fight instead of you.
Unraveled Earth (E) detonates for a long stun on anyone forcibly displaced through it, and GNAR! (R) is exactly a forced displacement: with her on the map that displacement stuns even where there is no terrain. And when you do want a wall, Weaver's Wall (R) builds one.
The worst moment of your game is reverting to Mini in the middle of them: Hero's Entrance (R) lands on you right there, with an area knock-up and a shield. Before that, Winds of War (Q) punishes the group Wallop (W) has stunned.
Vision of Empire (W) deals 50% bonus damage to anyone already locked down, and Wallop (W) is what switches that on. Demonic Ascension (R) then needs him standing inside their team, which only survives while your engage holds them still.
She sticks Command: Protect (E) on you before you go in, so you arrive as Mega with a shield and resistances; then Command: Shockwave (R) drags the group Wallop (W) just pinned into a single spot.
Last Breath (R) can only be cast on airborne targets, and the knockback from GNAR! (R) counts: you open the window on a whole group. You have to already be in Mega form when he needs it, and Yasuo sits below a 49% win rate in China.
Bullet Time (R) is a three-second stationary channel that anyone with legs just walks around: inside Wallop (W) nobody walks, and if GNAR! (R) slammed them into a wall they're still down afterwards. Make It Rain (E) seals the edges.
Almost every source of damage you have is a skillshot you must guess: against a target stunned by Enchanted Crystal Arrow (R) or slowed by Frost Shot (P) you miss neither Boomerang Throw (Q) nor the wall angle on GNAR! (R).
Samira has to get into melee range and climb her style rank before Inferno Trigger (R) even exists, and a group stunned by Wallop (W) is the safest place to do it. Blade Whirl (W) covers projectiles right when you revert to Mini.
Chain of Corruption (R) starts on one target and spreads to whoever stands next to them: Crunch (E) just bunched them up, so the chain takes the whole group and the lockdown restarts exactly as your stun runs out.
Twisted Advance (W) is a targeted root that can't be dodged: it hands you someone standing still, and on a stationary target the GNAR! (R) wall angle never misses. Nature's Grasp (R) roots their whole line and gives you the hits to build Rage.
Magnet Storm (R) drags scattered enemies together, so Wallop (W) catches all of them in one slam instead of just one. And Ferromancy: Crash Down (W) opens the fight with a knock-up while your Rage bar is still filling.
Beat Drop (E) upgrades to a root and then a stun if the target has already been crowd-controlled, so Wallop (W) promotes it two steps. Encore (R) extends every time it clips a champion, and Crunch (E) leaves them stacked together.
As Mini you're fragile with nothing left once Hop (E) is down: Unbreakable (E) eats the projectiles that punish you in exactly that window. Glacial Fissure (R) knocks up their line and holds the group there while your Rage fills.
Depth Charge (R) is targeted and undodgeable: it knocks up their carry and everyone nearby, so it hands you the GNAR! (R) wall angle with no guesswork. On the Chinese server he sits at a 48% win rate right now, though.
| Lane | Tier | Win% | Pick% | Ban% | Pos. |
|---|---|---|---|---|---|
| Baron | B | 50.28% | 3.37% | 0.61% | #23 / 41 |
| Lane | Tier | Win% | Pick% | Ban% | Pos. |
|---|---|---|---|---|---|
| Baron | B | 50.32% | 3.46% | 0.64% | #23 / 41 |
| Lane | Tier | Win% | Pick% | Ban% | Pos. |
|---|---|---|---|---|---|
| Baron | A | 49.85% | 3.48% | 0.6% | #16 / 41 |
| Lane | Tier | Win% | Pick% | Ban% | Pos. |
|---|---|---|---|---|---|
| Baron | A | 50.94% | 3.26% | 0.56% | #15 / 39 |


Gnar is Wild Rift's shape-shifting Fighter, alternating between two kits as his Rage Gene passive fills from dealing or taking damage: Mini Gnar is a nimble ranged poke-and-kite bruiser throwing a boomerang and hopping around the lane, while Mega Gnar is a towering melee brawler who trades range for raw stats, a ground-slam stun, and a wall-crushing knockback ultimate. His damage is almost entirely physical, layered with an on-hit magic damage proc from Hyper that rewards sustained trading, and it spikes hard whenever the Mega transformation lines up with a fight. He's most dangerous when he decides that transformation himself, baiting the flip to land right as the fight starts rather than letting the Rage bar choose for him.
Skill order: Q > W > E
Play Mini Gnar like a mid-range poke champion: land Boomerang Throw from max distance, weave autos to trigger Hyper's bonus magic damage and move speed, and try to catch the boomerang on its way back for the cooldown discount. Avoid extended melee exchanges since Mini Gnar has little health and no hard escape once Hop is spent, so use the jump to reposition or punctuate a poke rather than to start a fight. Watch your own Rage bar as closely as the enemy's health bar and aim to time your first transformation into Mega Gnar around an enemy overextension or a jungler's gank, not randomly mid-poke when you still need the range. Max Boomerang Throw first for trade damage and take GNAR! at level 5 for the wall-stun option the moment it comes online.
From the mid game on, Gnar's job is to hold Mini Gnar's safety until a fight is about to start, then transform into Mega Gnar and lead the engage: Crunch into the backline or a key target, Wallop to stun whoever is caught in the slam, and GNAR! to knock the biggest threat away from the fight, or better, straight into a wall for the upgraded stun and bonus damage. Track your Rage timer during the fight itself; reverting to Mini Gnar mid-teamfight leaves you fragile, so plan the all-in around the window Mega Gnar gives rather than overstaying it. Once you revert, fall back and kite with Hyper's leftover move speed instead of continuing to trade, then look to bank Rage again for a second transformation if the fight drags on.