
WR China Meta
Meta, tier list & top-player builds from the China server · live
Meta, tier list & top-player builds from the China server · live

菲兹 · 潮汐海灵 Assassin C
✅ Patch 7.2e · stats updated 2026-09-12 · real builds of 23 top-ranked China server players captured 2026-09-11
Difficulty Damage Toughness Utility
How the strongest players on the Wild Rift China server (国服) build Fizz: live win/pick statistics by rank bracket, the most-used item and rune sets, and the real loadouts of the top ranked Fizz players, captured in-game.
📖 How to play Fizz








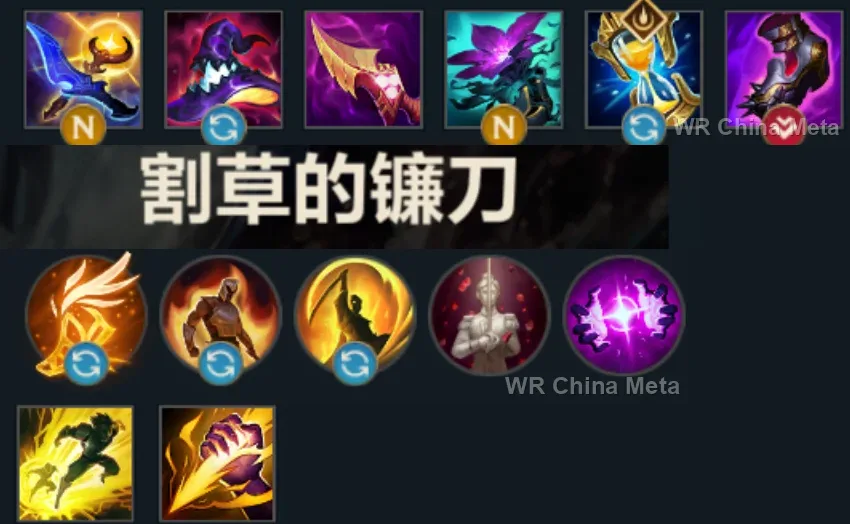
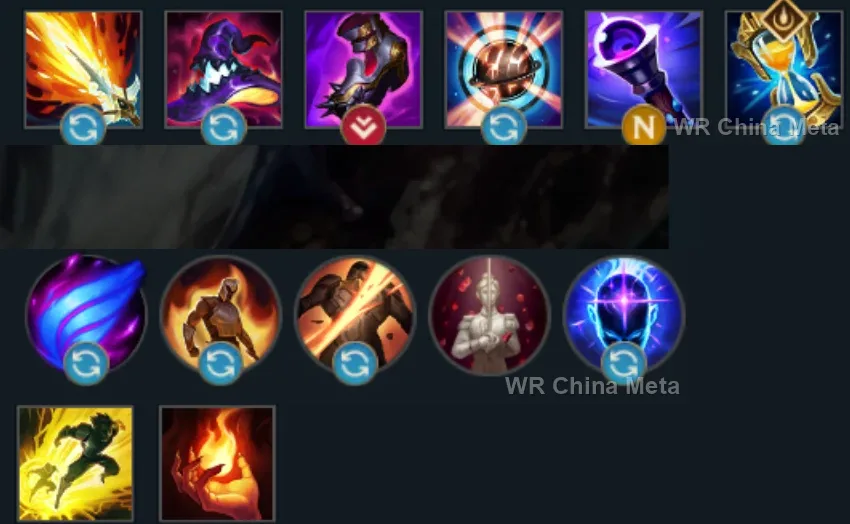
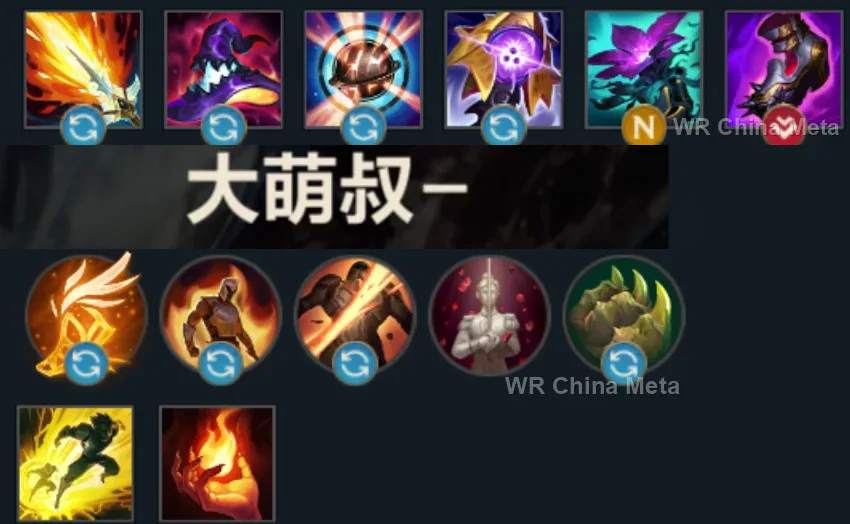
Counted on 25 real builds captured from the Chinese client, player by player. Independent from the official API above.


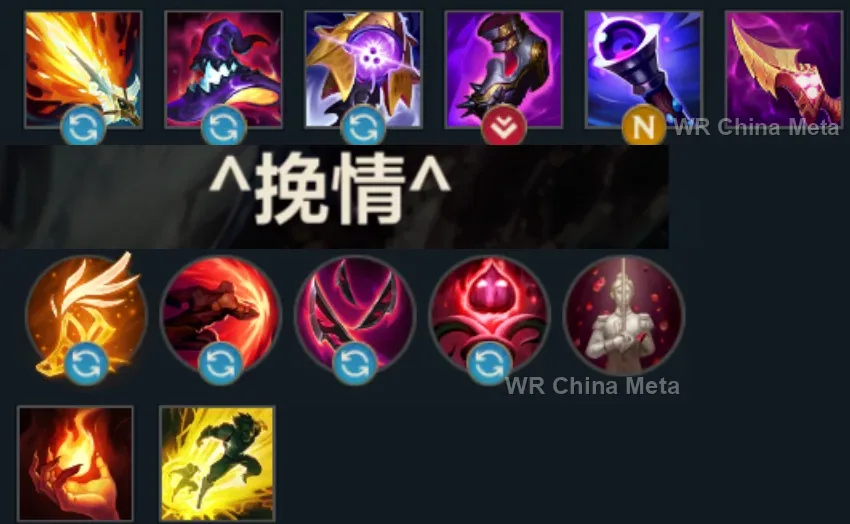
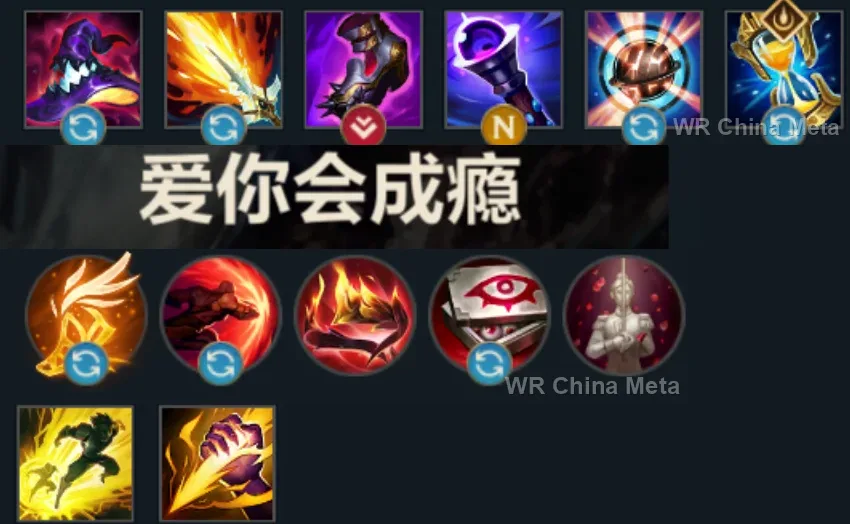
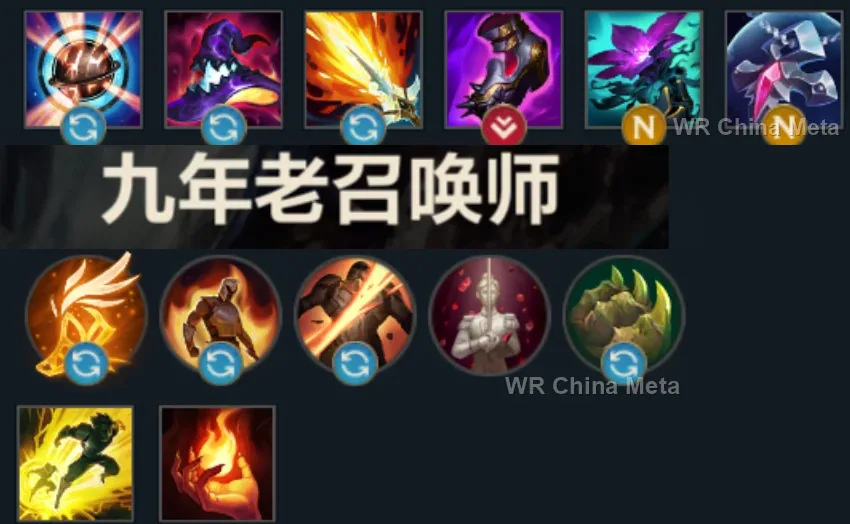
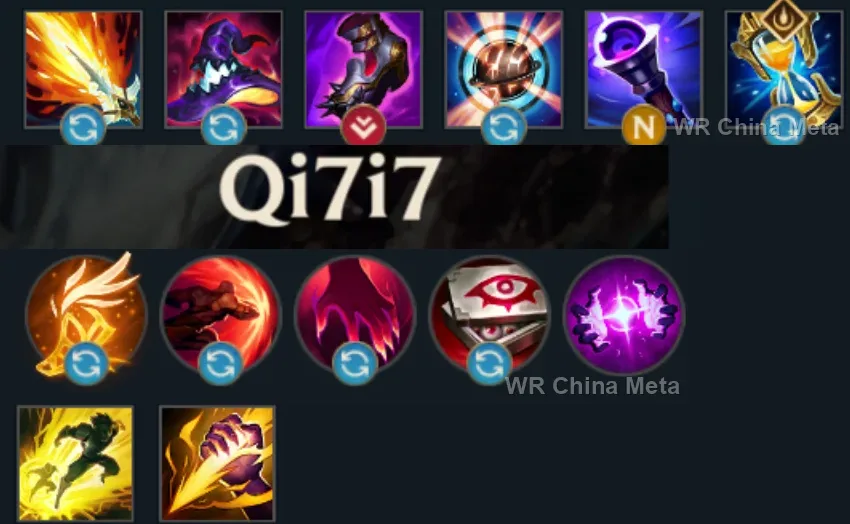
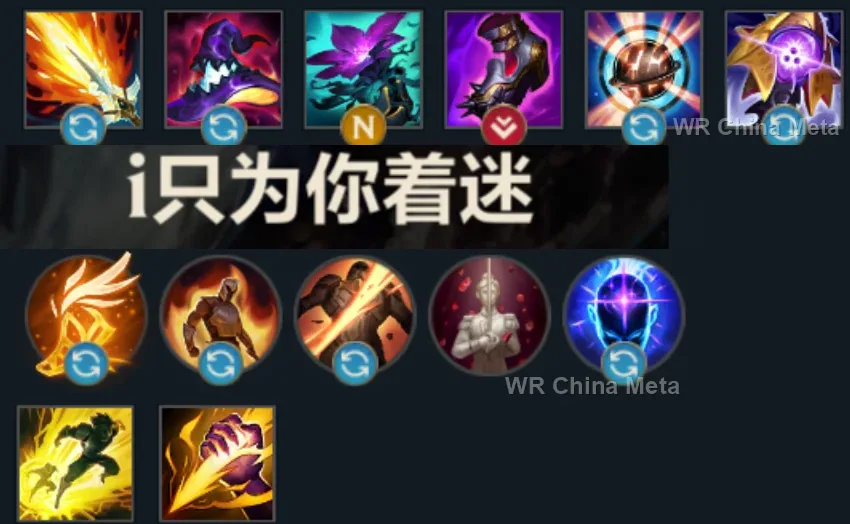
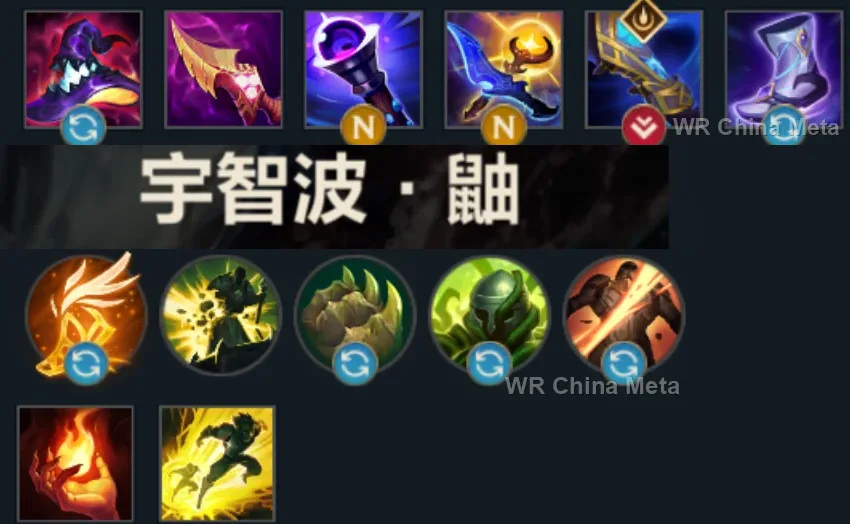
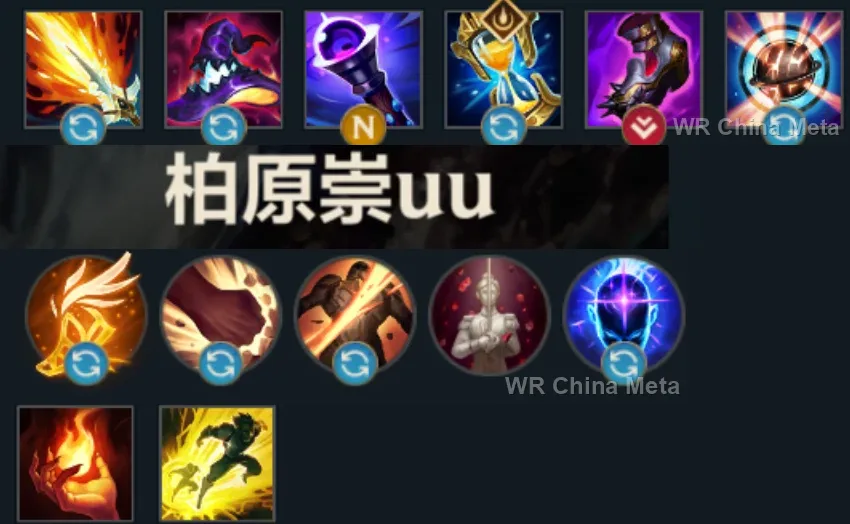
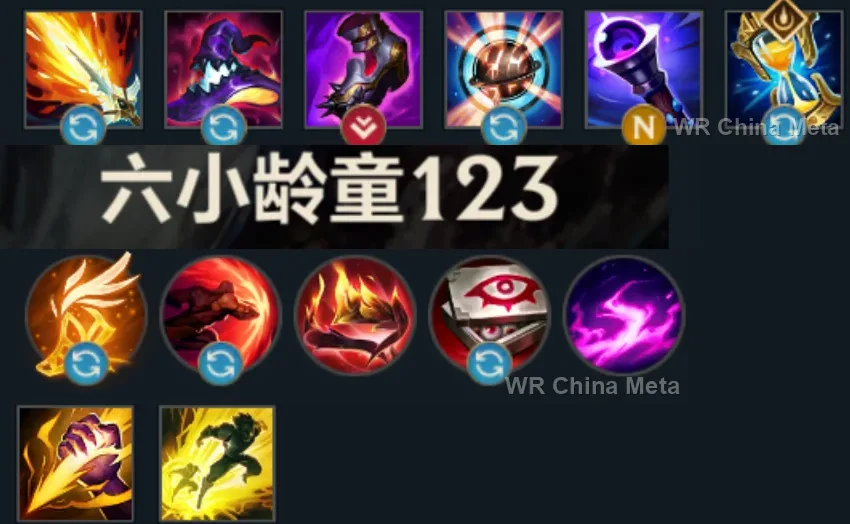
Taken from the official in-game China leaderboard. Spells, runes and items of every public top player.
23 of the top 30 players have a public match history; the others keep theirs private.
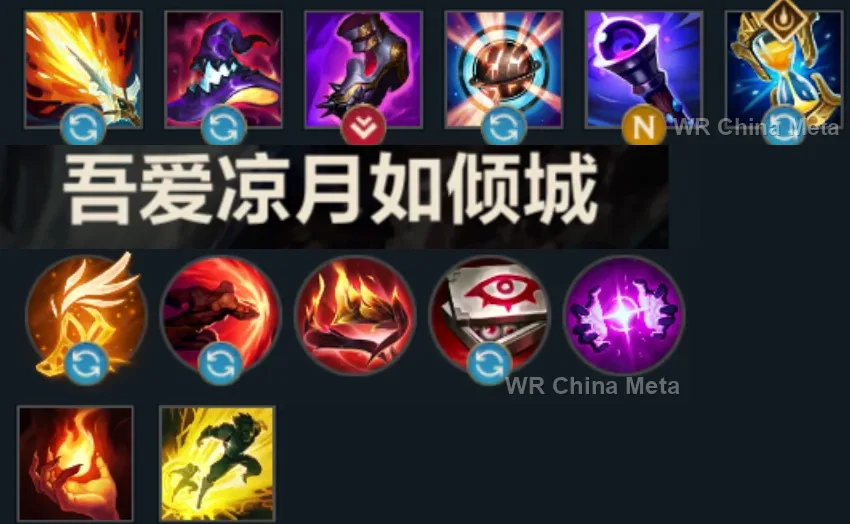
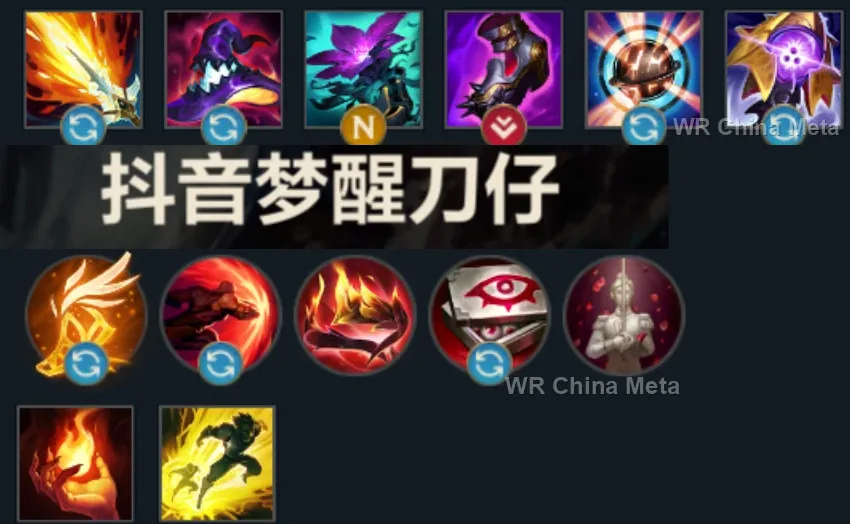
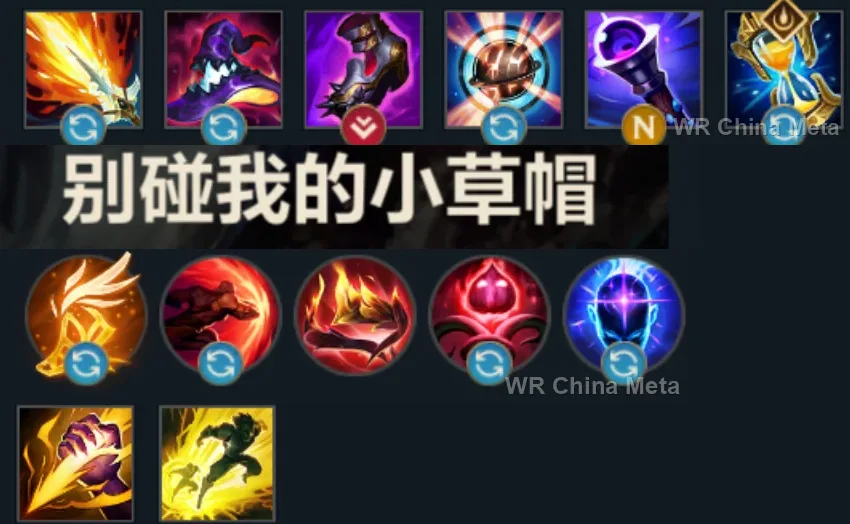
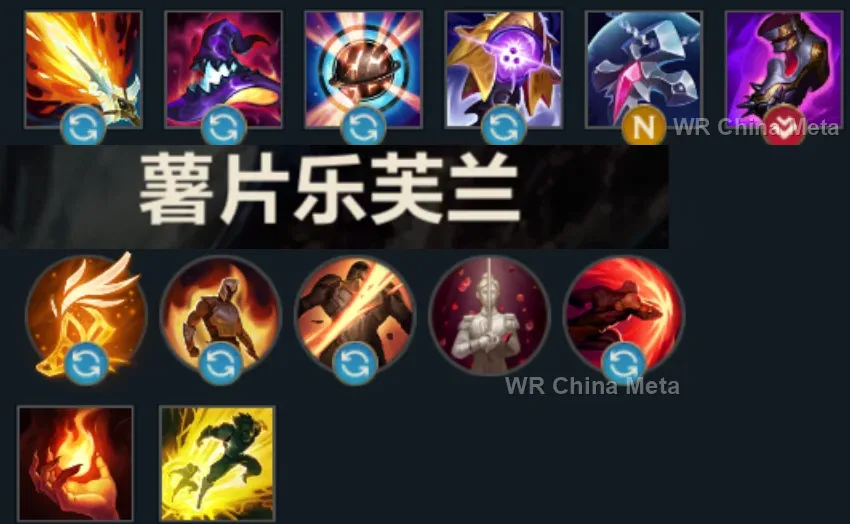
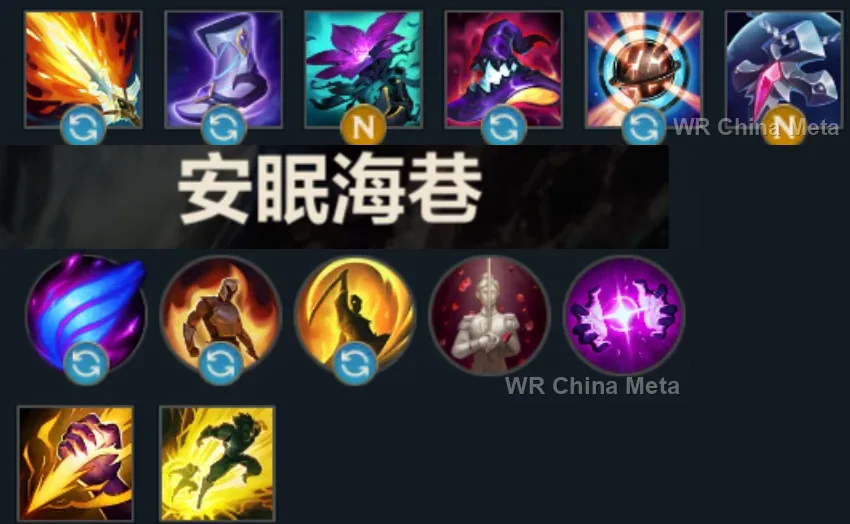
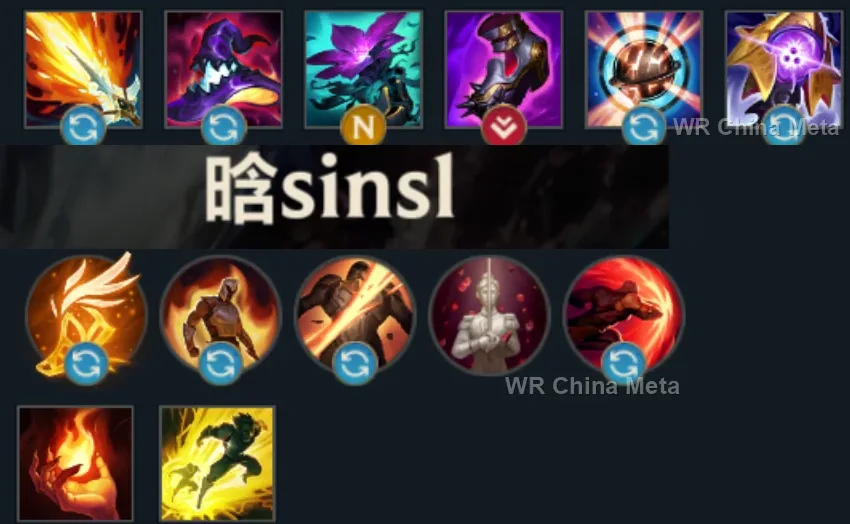
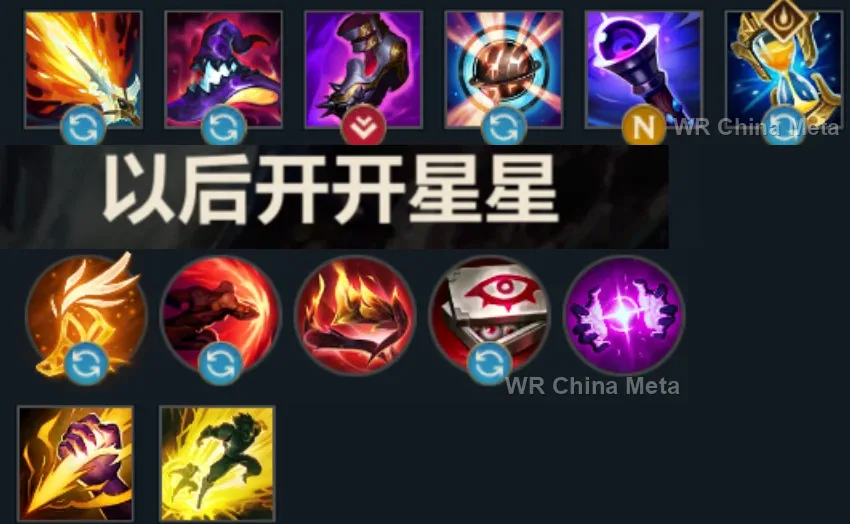
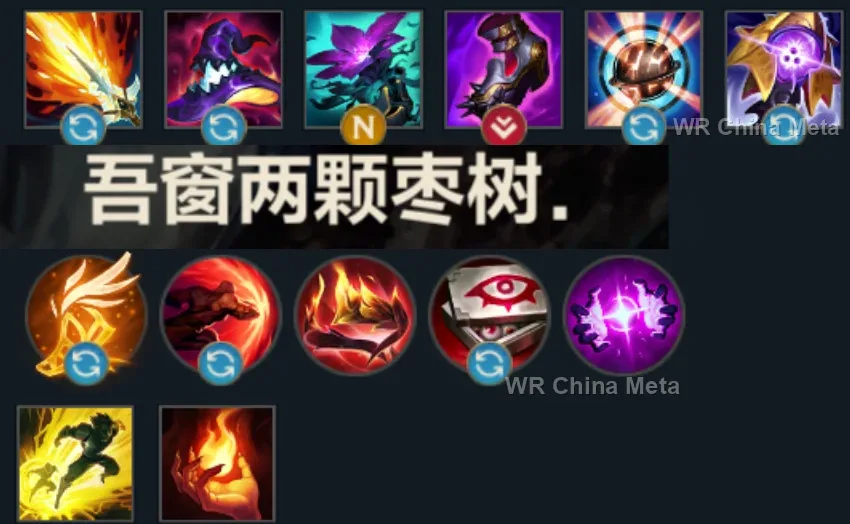
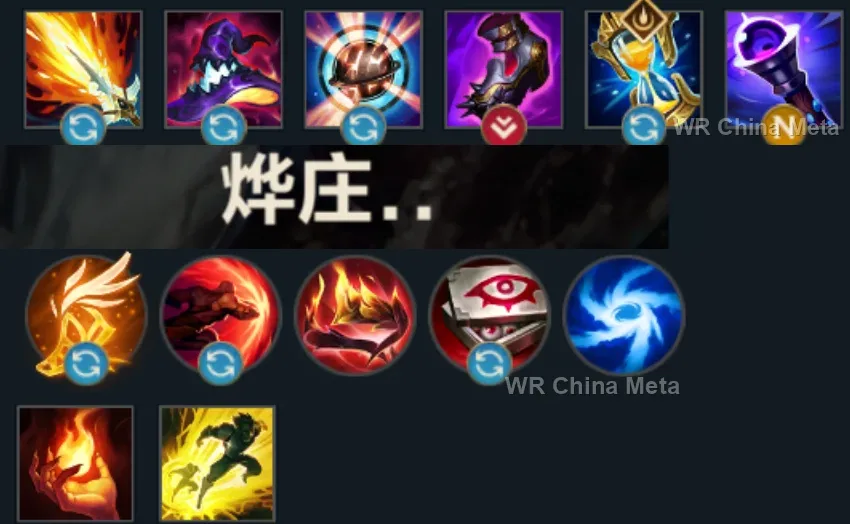
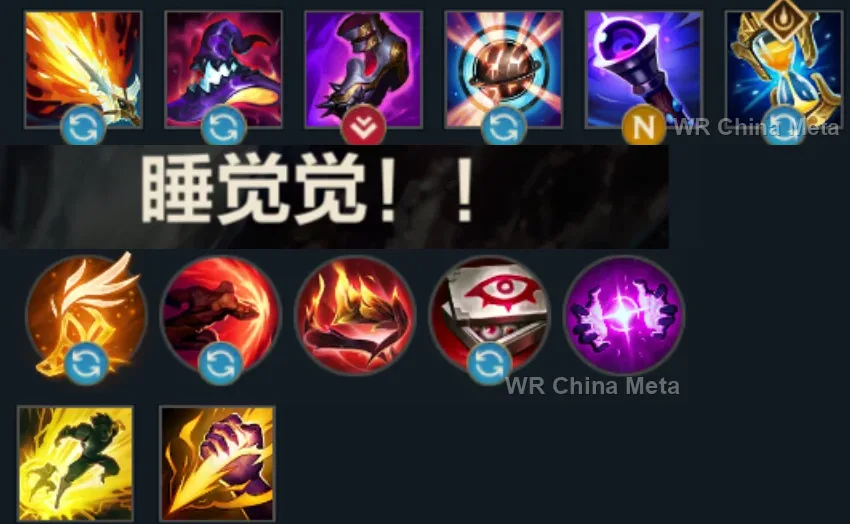
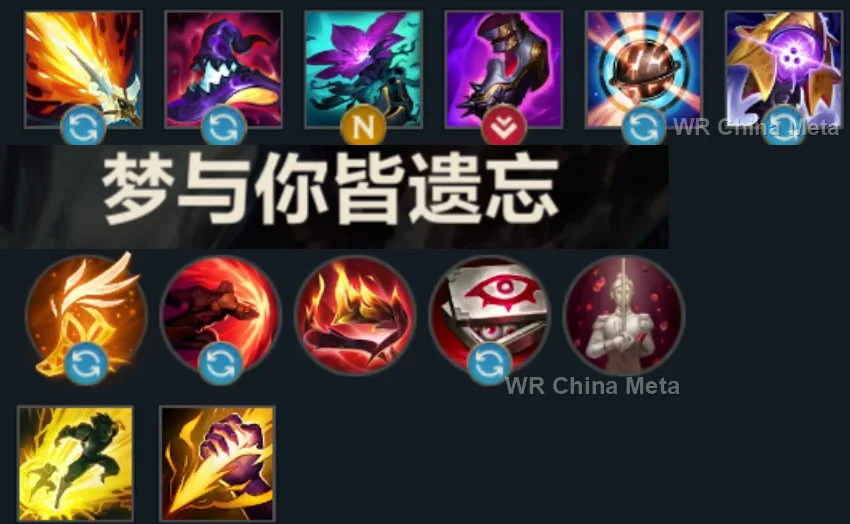
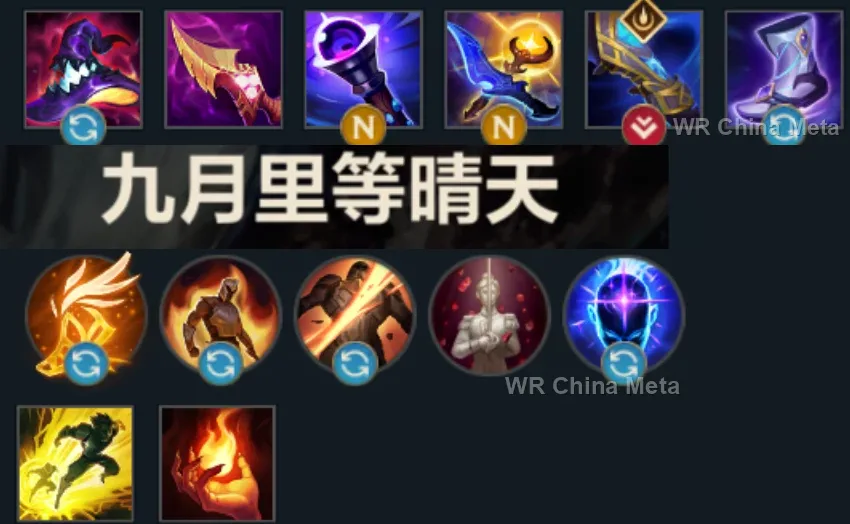
The toughest lane matchups for Fizz on the Wild Rift China server, with why each is hard and exactly how to play it.
 Fizz vs Lissandra Hard counter
Why Lissandra counters Fizz: Her root protects her from your jump, self-R cancels your shark, and her waveclear keeps you off the minions.
How to play Fizz into Lissandra: Never go in with her root up: fake the entry with Q and make her waste W. After 5 your R must come from out of vision, before she can answer with hers.
→ Lissandra Fizz vs Galio Unfavorable
Why Galio counters Fizz: His magic shield absorbs your combo and the taunt locks you the moment your E lands: every aggressive jump becomes a badly priced risk.
How to play Fizz into Galio: Poke with W in short trades and jump ONLY while his taunt is on cooldown. Your R wins fights when it hits two or more: use it to open from afar, not to chase.
→ Galio Fizz vs Annie Unfavorable
Why Annie counters Fizz: Her stun is instant: your E dodges projectiles, not target selection. If she stuns you first, her burst lands before yours.
How to play Fizz into Annie: Keep E in reserve for the bear, not for entry. Trade while her stun is uncharged and finish with R once she has spent everything.
→ Annie Fizz vs Diana Unfavorable
Why Diana counters Fizz: Her shield holds your burst and her all-in mirrors yours but tankier: if your combo does not kill her, her answer kills you.
How to play Fizz into Diana: Wait for her to waste the shield on minions. Go in only with R available and full health. This matchup is won through roams: you rotate faster.
→ Diana Fizz vs Ahri Skill matchup
Why Ahri counters Fizz: A duel of dodges: your E avoids the Charm, her dash avoids the shark. Whoever forces the first mistake wins.
How to play Fizz into Ahri: Move erratically to make her waste Charm, THEN jump. Your kill window is while her dash is on cooldown: count it.
→ AhriThe champions Fizz works best alongside on the Wild Rift China server, lane by lane, with the reason each pairing works.
All Out (R) rips the enemy carry out of their own team and leaves them alone with you: that is the condition your all-in demands, because if the combo does not kill you are left with no cooldowns and no shield. Footwork (E) then dashes to you and shares his.
You are paper-thin and the hard part is getting in: Unstoppable Force (R) knocks up the whole team at once, so Playful (E) takes you in for free and Chum the Waters (R) cannot be sidestepped. He is also the frontline you never provide.
When you jump their backline you are alone with no shield: Stand United (R) drops one on you from across the map and brings Shen with it, while Shadow Dash (E) taunts whoever is finishing you off. The dive becomes a two-man play.
Mega Adhesive (W) into Fling (E) removes one enemy from the fight by itself: on a pinned target every Urchin Strike (Q), Rending Wave (W) and auto lands, and you do not have to spend Playful (E) just to get there.
Worth it where terrain is close by: GNAR! (R) into a wall stuns the whole group, and a stun is the only thing that guarantees your full combo, since you bring no lockdown of your own. In open ground it is worth far less.
Cursed Touch (P) makes every point of magic damage they take carry true damage with it, and you are magic from the first Seastone Trident (P) tick to the last, so all of it gets amplified. Curse of the Sad Mummy (R) hands you 1.5 seconds of a frozen target.
Cease and Desist (R) is point-and-click and unstoppable: it delivers the enemy carry held still and away from her team. Her page says that ultimate only gets her killed without damage behind it, and that damage is you, arriving untargetable with Playful (E).
Your page wants you hovering at the edge of vision: Paranoia (R) blinds their entire team, so nobody sees the jump coming and nobody peels for the target you are opening. And you both hit the same body in the same second.
Your stated weak spot is instant crowd control, the kind Playful (E) cannot dodge: Frenzying Taunt (E) forces the carry to swing at him instead of casting it, and meanwhile he is the frontline you never bring.
A direct answer to your problem, the all-in that kills you when it does not kill them: inside Lamb's Respite (R) nobody dies for 3 seconds, so you can spend everything. It saves them too, so it only pays when you are the one diving too deep.
Chum the Waters (R) is slow to land and Playful (E) gives you no lockdown at all: Frost Shot (P) slows with every single hit, so the fish stops missing, and Enchanted Crystal Arrow (R) opens from off-screen on a target already frozen.
Deadly Flourish (W) roots anyone an ally has just damaged, and a single Urchin Strike (Q) pass or one Seastone Trident (P) tick is enough to arm it: from there the target does not walk out of your combo.
Arc of Judgment (W) leaves a near-total slow that lingers: inside it Chum the Waters (R) cannot be dodged and Rending Wave (W) always finds its hit. She does not cover you and you do not cover her, though: whoever gets reached first dies.
Chain of Corruption (R) roots the first target and spreads to whoever stands next to them: it leaves you a frozen group to jump into with Playful (E) without walking into the instant crowd control that kills you.
Worth it only if you actually rotate early: you are a lane bully and Chum the Waters (R) opens from range, so every trip bot turns into gold through League of Draven (P). But he dies the moment anyone reaches him, and you peel for nobody.
Your page says Playful (E) only dodges what has to target you: against the instant stun that kills you, Black Shield (E) is the answer. And Dark Binding (Q) roots for two full seconds, longer than your entire combo needs.
Rocket Grab (Q) drags a carry out of their own front line and hands them to you alone: that is the one situation where your all-in stops being a gamble. Power Fist (E) knocks them up and Static Field (R) silences their escape.
You jump into the middle of them and often cannot get back out: the Dark Passage (W) lantern is the way home once Playful (E) is spent. Death Sentence (Q) and Flay (E) meanwhile drag the carry out of their front line.
Grand Entrance (W) into The Quickness (R) is nearly two seconds of back-to-back crowd control on the same group: that is the window where your combo meets no answer. Battle Dance (E) then shields you the second you are left exposed.
Worth it if you play early and together: Bone Skewer (Q) into Phantom Undertow (E) is the chain your combo lacks, and Death From Below (R) closes out whoever Rending Wave (W) left under 250 health. Neither of you survives being touched, though.
| Lane | Tier | Win% | Pick% | Ban% | Pos. |
|---|---|---|---|---|---|
| Mid | C | 48.2% | 2.13% | 2.72% | #34 / 39 |
| Jungle | D | 47.92% | 2.4% | 2.72% | #37 / 40 |
| Lane | Tier | Win% | Pick% | Ban% | Pos. |
|---|---|---|---|---|---|
| Mid | C | 48.07% | 2.16% | 2.6% | #32 / 38 |
| Jungle | D | 47.77% | 2.32% | 2.6% | #37 / 40 |
| Lane | Tier | Win% | Pick% | Ban% | Pos. |
|---|---|---|---|---|---|
| Mid | C | 48.53% | 2.04% | 1.68% | #28 / 39 |
| Jungle | D | 47.78% | 2.11% | 1.68% | #42 / 42 |
| Lane | Tier | Win% | Pick% | Ban% | Pos. |
|---|---|---|---|---|---|
| Mid | B | 49.12% | 1.9% | 1.09% | #28 / 41 |
| Jungle | D | 46.49% | 2.12% | 1.09% | #41 / 41 |


Fizz, the Tidal Sea Spirit, is a magic-damage assassin in Wild Rift built to dive backline carries, dodge their answer, and walk away with the kill. His identity comes from stacking on-hit magic damage - his passive, Seastone Trident, and his W both turn ordinary autoattacks into real burst - on top of the untargetable hop of Playful/Trickster (E), which lets him leap straight through skillshots and targeted abilities that would otherwise delete him. He wins fights by choosing exactly when to be unkillable, not by outlasting anyone in a straight fight.
Skill order: E > Q > W (max E first for the untargetable window's lower cooldown and stronger slow, then Q for dueling and wave clear; level R at 5/9/13)
Poke with Urchin Strike (Q) whenever you have priority - the dash-through applies on-hit effects and your passive DoT on top of its own damage, and it doubles as a way to reposition around a minion for a safer angle. Once E and W are online around level 3, start looking for real all-in windows: bait out a cooldown or a skillshot, jump in with Playful (E) for the damage and slow, weave in Q, and pop Rending Wave (W) to convert the trade into a kill. Respect anyone with instant, point-blank CC - your jump only beats abilities that still need to target you, so if their stun or root is already up, wait a beat instead of leaping into a guaranteed lockdown. Keep an eye on wave state too, since Fizz falls behind fast once he's zoned off CS.
By the mid-late game you're a flanker, not a frontline diver - hover at the edge of vision, let the enemy commit their engage or peel formation, then jump the priority target with E, usually the squishiest carry you can reach without dying on the way in. Chum the Waters (R) is strongest either thrown from max range to start the fight on an isolated target as your team arrives, since a longer flight means a bigger shark and more damage, or held back as emergency peel when the enemy dives your own backline. Chain Q and empowered autoattacks onto whoever's lowest to trigger W's kill-reset, so a clean engage turns into two kills instead of one. Always keep the E recast in your back pocket once your damage is spent - it's a full second of extra distance the moment a fight turns against you.