
WR China Meta
Meta, tier list & top-player builds from the China server · live
Meta, tier list & top-player builds from the China server · live

布兰德 · 复仇焰魂 Mage S+
✅ Patch 7.2e · stats updated 2026-09-12 · real builds of 20 top-ranked China server players captured 2026-09-11
Difficulty Damage Toughness Utility
How the strongest players on the Wild Rift China server (国服) build Brand: live win/pick statistics by rank bracket, the most-used item and rune sets, and the real loadouts of the top ranked Brand players, captured in-game.
📖 How to play Brand










Counted on 22 real builds captured from the Chinese client, player by player. Independent from the official API above.


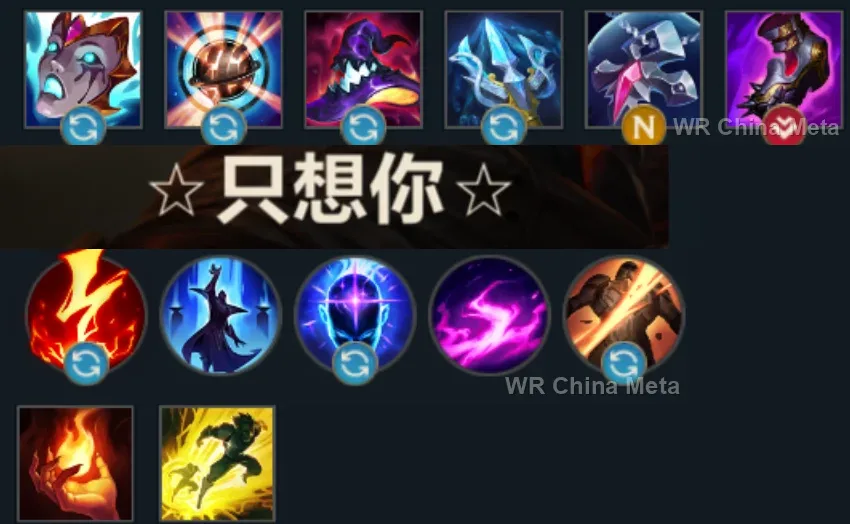
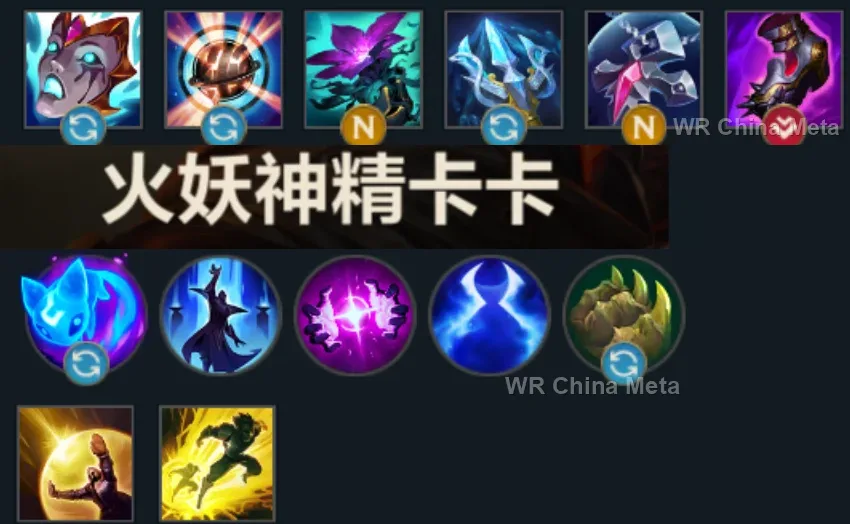
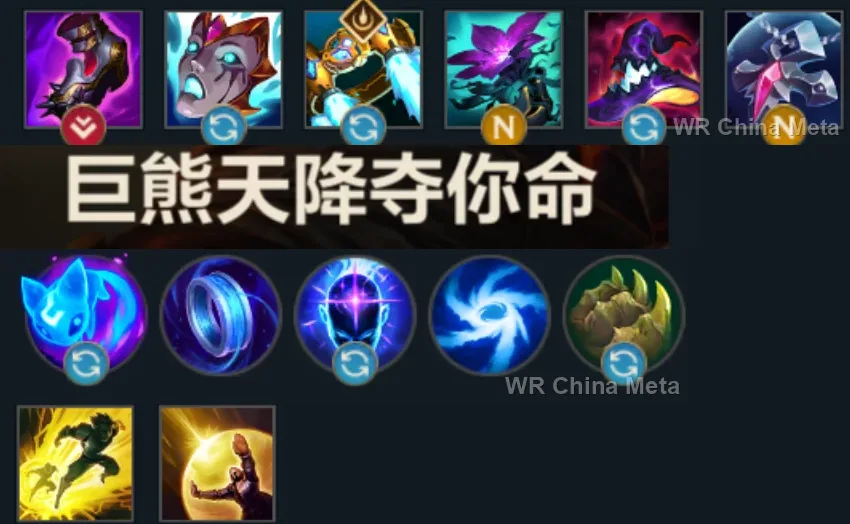
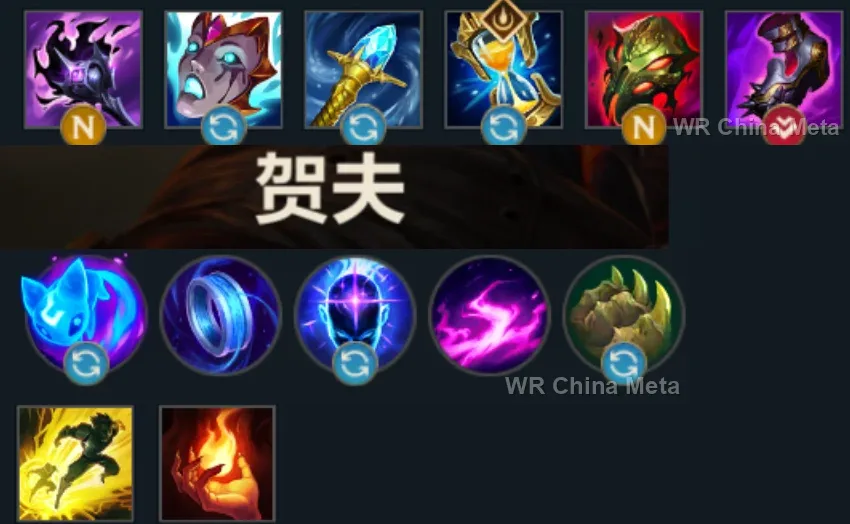
Taken from the official in-game China leaderboard. Spells, runes and items of every public top player.
20 of the top 30 players have a public match history; the others keep theirs private.
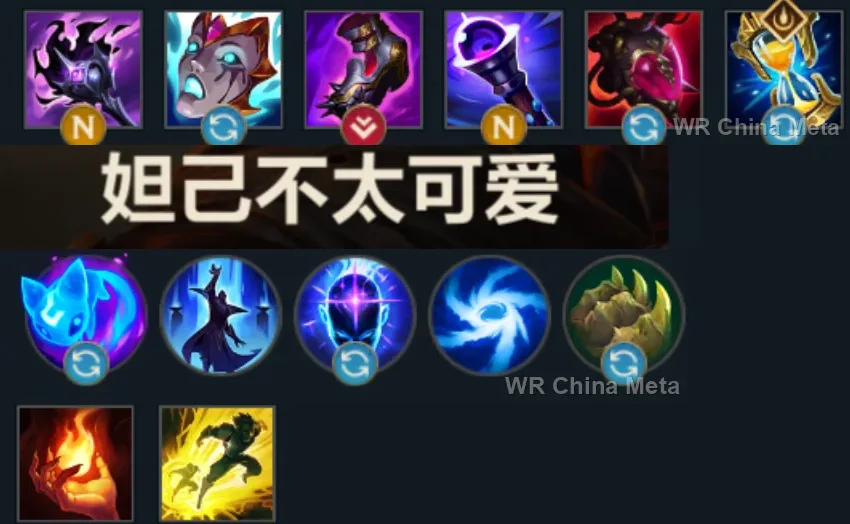
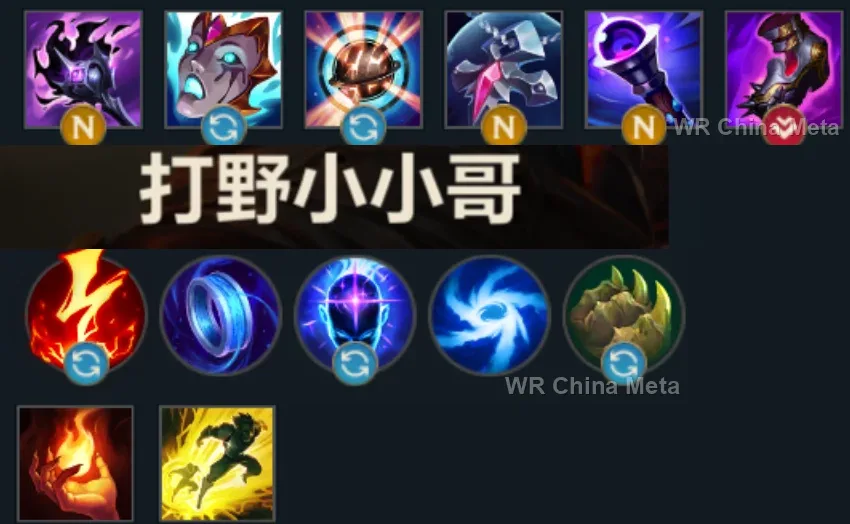
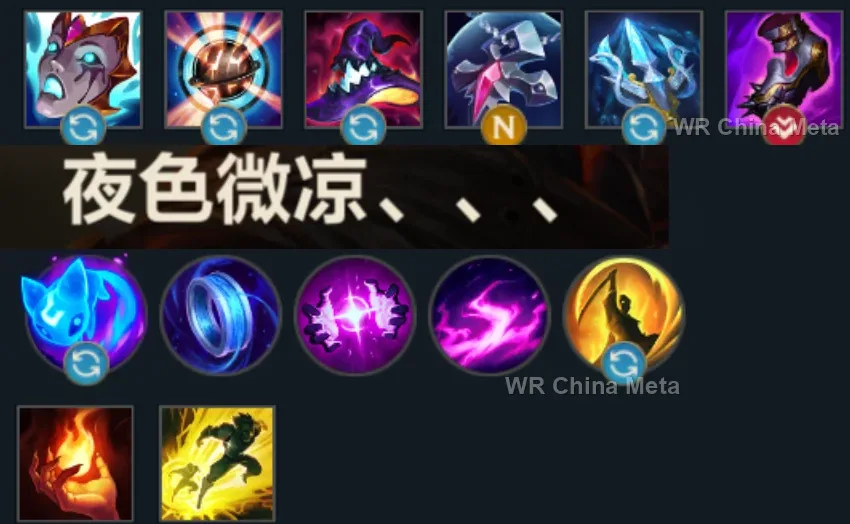
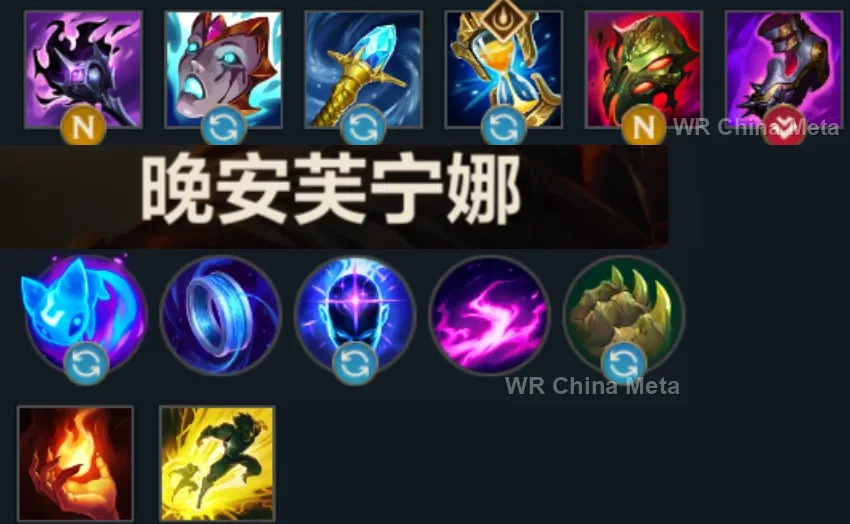
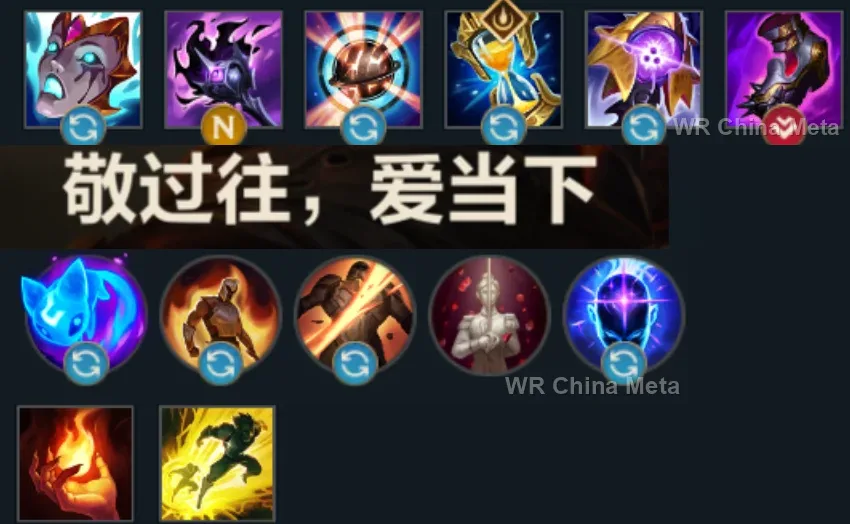
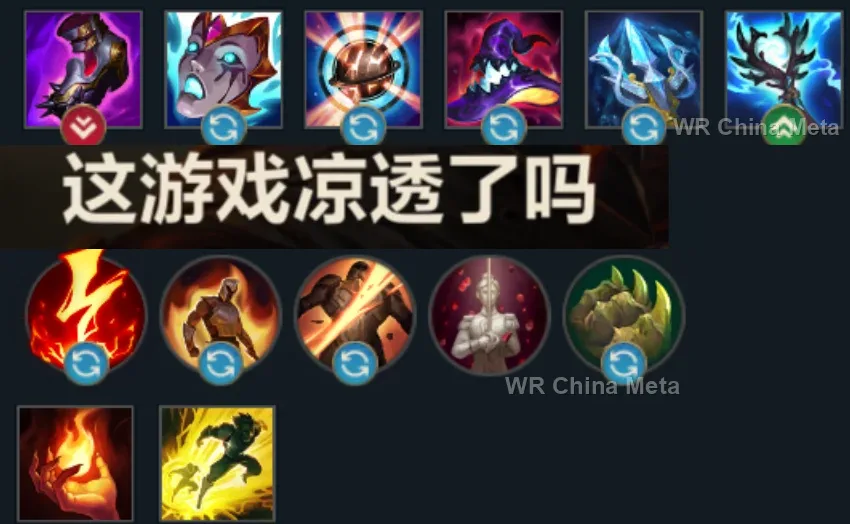
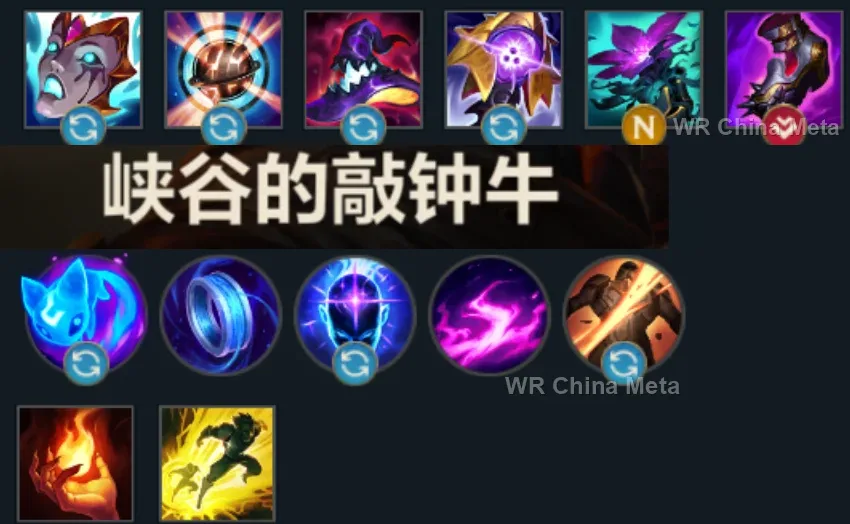
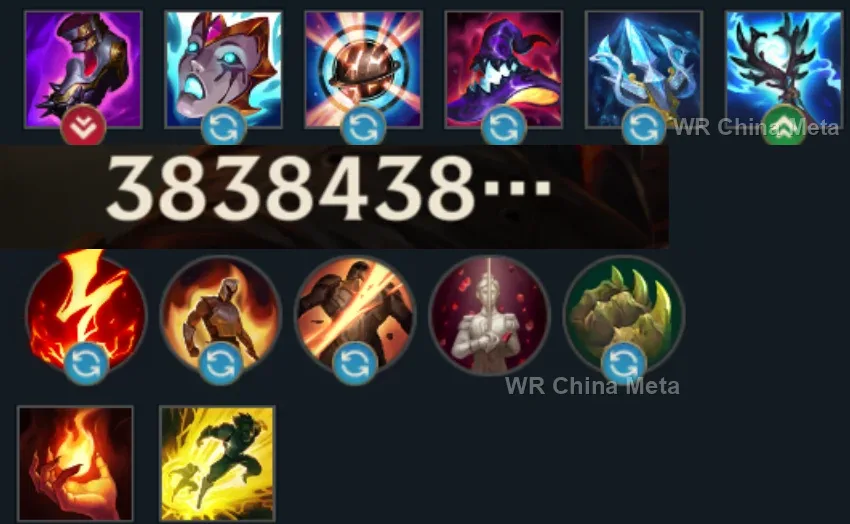
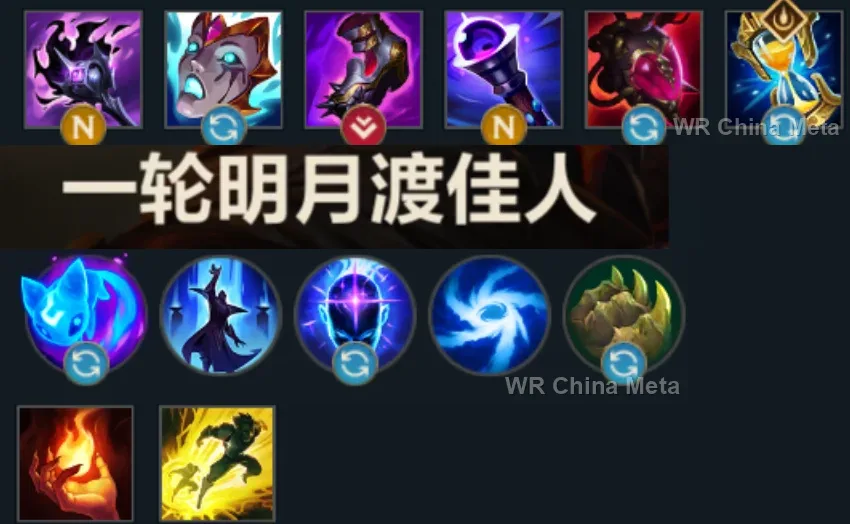
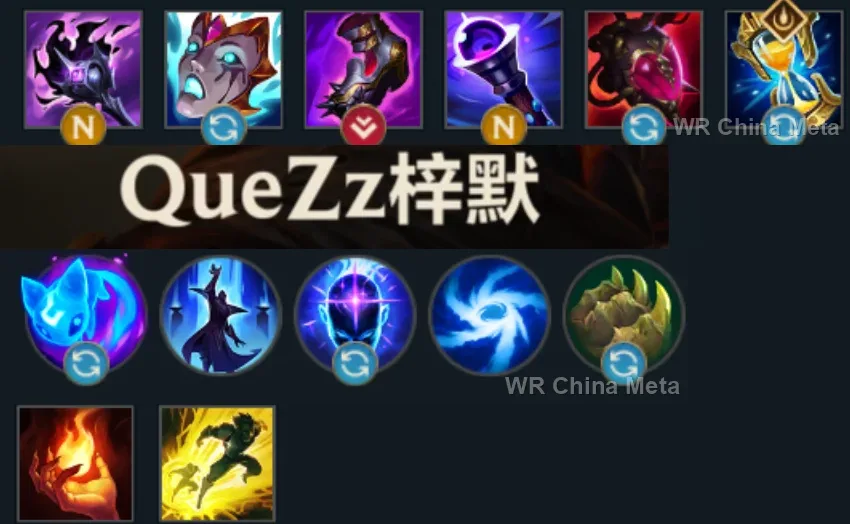
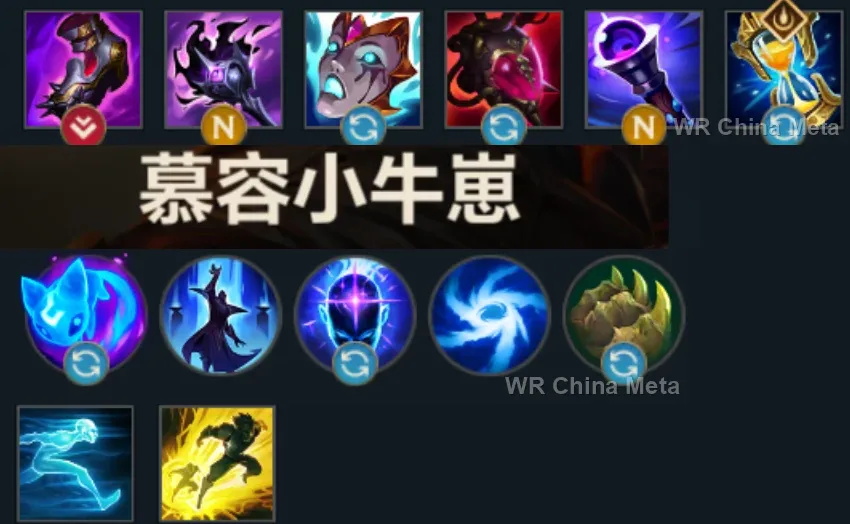
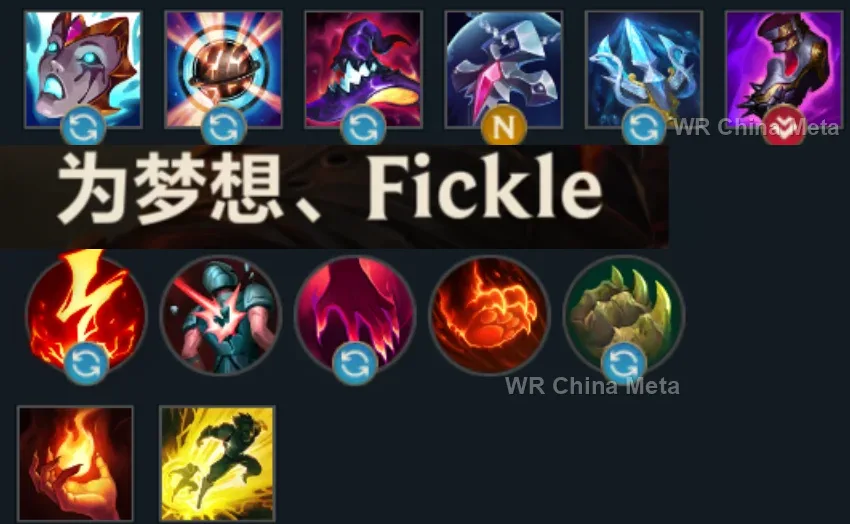
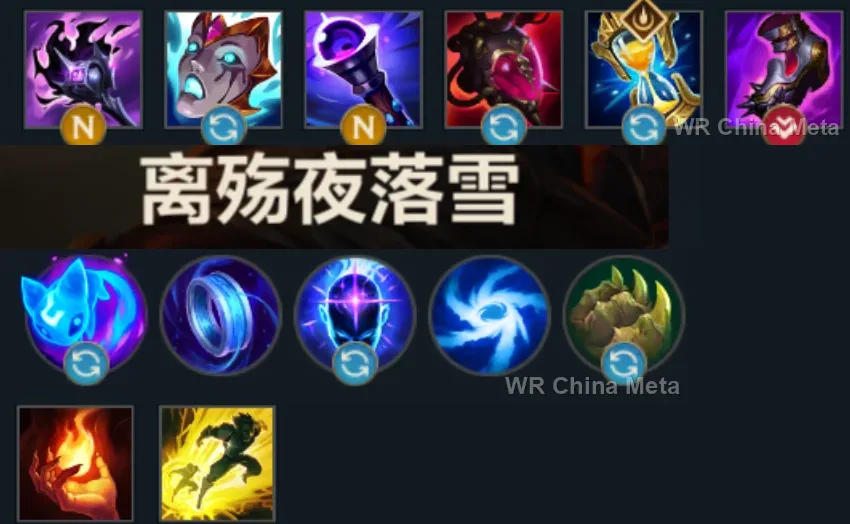
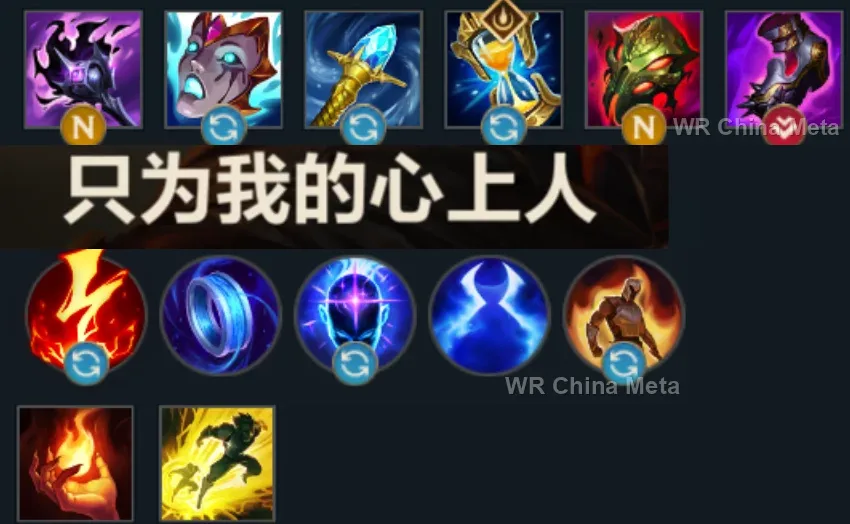
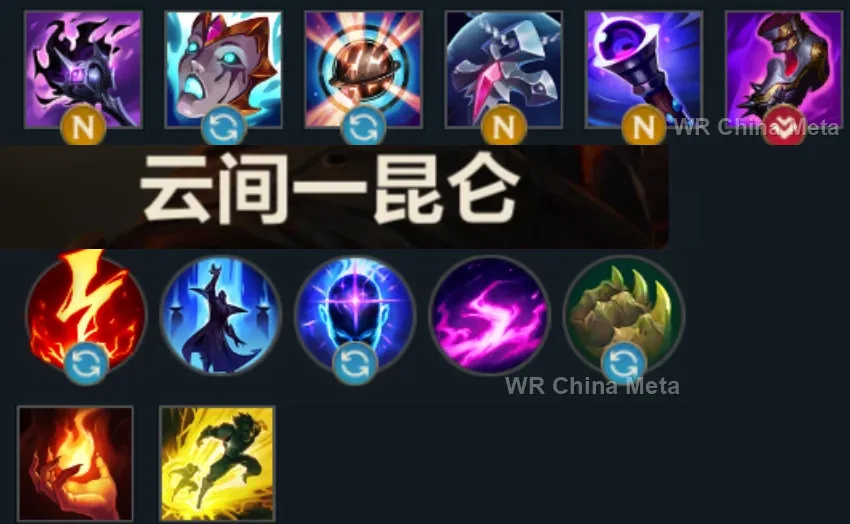
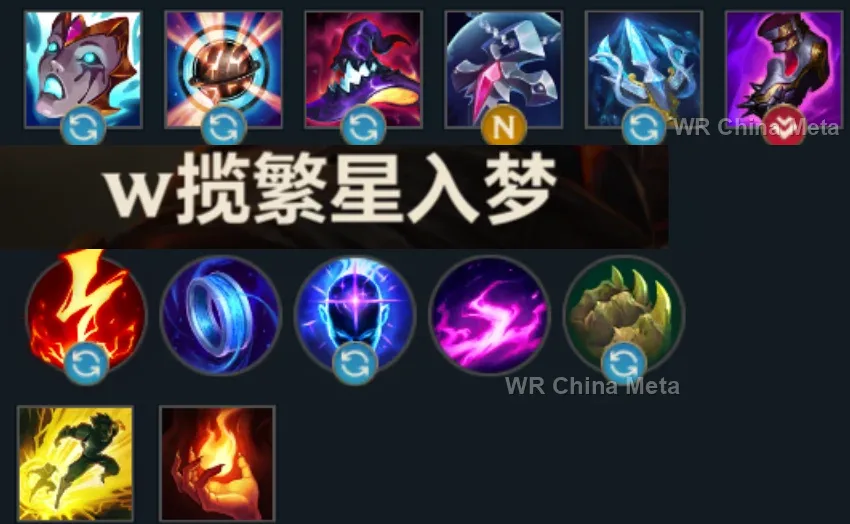
The toughest lane matchups for Brand on the Wild Rift China server, with why each is hard and exactly how to play it.
 Brand vs Fizz Hard counter
Why Fizz counters Brand: Your only CC is a slow skillshot his E dodges effortlessly, and the rest of your kit is just fuel for his snowball.
How to play Brand into Fizz: Throw Q only on his landing. Poke with W at max range and, after his 5, stay out of jump range. Your value is teamfights: get there alive.
→ Fizz Brand vs Kassadin Unfavorable
Why Kassadin counters Brand: His shield absorbs the start of your combo and his post-9 mobility shuts down your chains: damage over time does not kill someone who never stands still.
How to play Brand into Kassadin: Punish him before 5 on every minion he tries to take: W costs little. In fights burn his shield with E before starting the real combo.
→ Kassadin Brand vs Galio Unfavorable
Why Galio counters Brand: A regenerating magic shield against a fully magic kit: your single-spell poke funds his passive.
How to play Brand into Galio: Full combo or nothing: piecemeal poke helps him. In teamfights your R bounces across the team he himself groups up with the taunt: let him engage, then answer.
→ Galio Brand vs Ahri Skill matchup
Why Ahri counters Brand: A skillshot matchup: her dash dodges your Q, your W punishes her fixed positions.
How to play Brand into Ahri: Open with E, which is point-and-click, then throw Q at the same burning target: the stun becomes nearly guaranteed.
→ Ahri Brand vs Orianna Skill matchup
Why Orianna counters Brand: A zone-control duel: her ball against your burning areas. In 5v5s, whoever places their R better decides it.
How to play Brand into Orianna: Do not trade while inside the ball's radius. Your R pays off with 3+ targets clumped: look for fights in chokepoints, not open ground.
→ OriannaThe champions Brand works best alongside on the Wild Rift China server, lane by lane, with the reason each pairing works.
Unstoppable Force (R) knocks the whole team up in one spot: that is the pile Pyroclasm (R) bounces through, and while they are airborne the Pillar of Flame (W) cast delay stops being the flaw your page calls it.
Brittle from Bellows Breath (W) adds 30% to the crowd control that follows, so the Sear (Q) stun goes from 1.75 seconds to over two, and Call of the Forge God (R) knocks up half their team into a single pile for Pyroclasm (R).
Your page says anything that closes the gap punishes you before you react: Shadow Dash (E) taunts the diver and leaves him standing still with a Blaze (P) stack on him, while Stand United (R) shields you from across the map.
Fling (E) and Mega Adhesive (W) pin down the diver who reached you, which is the only way someone with no dash and no shield gets out of trouble. On a stuck target Sear (Q) cannot miss and the stun is guaranteed.
Worth it where terrain is close by: GNAR! (R) does not just stun them, it moves them all into the same spot, which is the setup Pyroclasm (R) demands before it is worth casting. In open ground it is half a stun and no pile.
Cursed Touch (P) makes every point of magic damage they take carry true damage with it, and you are magic from the first Blaze (P) tick to the last bounce. Curse of the Sad Mummy (R) stuns them all for 1.5 seconds, grouped: Pyroclasm (R) served.
Biggest Snowball Ever! (W) knocks the group up and Absolute Zero (R) keeps it slowed right there: nobody escapes the Pillar of Flame (W) delay and Pyroclasm (R) always finds the next target a step away from the last.
Soaring Slam (R) lands in the middle of their backline and leaves a slow zone catching as many of them as it can, so the pile stays inside Conflagration (E), while Frenzying Taunt (E) guarantees the Sear (Q) stun on whoever you want.
Cataclysm (R) throws a wall around whoever is inside: they cannot scatter, and Pillar of Flame (W) covers the whole ring so the cast delay costs you nothing. If two of them end up in the arena, Pyroclasm (R) bounces.
You are as fragile as mages get and you stand at the very back alone: Crescent Guard (R) knocks back everyone except his marked target and blocks ranged damage, clearing your backline the instant they jump you.
Worth it when the enemy does not rush magic resist, since you are two pure mages: Crowstorm (R) lands on a pile that is already burning and Terrify (Q) deals 200% more on anyone already feared. Against a spread-out team, no.
Chain of Corruption (R) roots a group and chains outward to whoever stands close: the pile stays frozen for as long as Pillar of Flame (W), Conflagration (E) and the Pyroclasm (R) bounces need. It makes your ultimate automatic.
Bullet Time (R) and Pyroclasm (R) ask for the same thing, a clumped and locked-down enemy team, so when the window opens you both cash in on it, and the Double Up (Q) bounce leaves that target taking 6% more damage.
Your page says an alert opponent steps out of the Pillar of Flame (W) zone during its delay: slowed by Frost Shot (P) on every hit, they cannot. Enchanted Crystal Arrow (R) opens the Sear (Q) window from off-screen.
Deadly Flourish (W) roots anyone an ally has just damaged, so a single Pillar of Flame (W) is enough to arm it: the root hands you a stationary target that Sear (Q) simply cannot miss.
Worth it against dive comps, since you peel for nobody and he gets himself out with Arcane Shift (E). In return the 1.75-second Sear (Q) stun is all the time Trueshot Barrage (R) needs to travel.
Crescendo (R) stuns the first target it touches and slows everyone else in the wave, leaving them piled and slowed, which is the exact condition where Pyroclasm (R) chains Blaze (P) detonations from one body to the next.
Magnet Storm (R) yanks several enemies out of position and pulls them into a single point: it manufactures on demand the cluster your page tells you to wait for. Ferromancy: Crash Down (W) is the knock-up that opens the window.
The Box (R) is a cage that slows by 99%: nobody runs out of the fire, and anyone who breaks a wall is still inside Conflagration (E) range. Death Sentence (Q) hands you a target held still for Sear (Q).
Glacial Fissure (R) knocks up an entire line of enemies and leaves them queued up, which is gold for Pyroclasm (R), while Unbreakable (E) is the only thing that ever really stands between you and the dive your page says kills you.
Solar Flare (R) stuns whoever it lands on and slows the rest of the group: two or three enemies stuck close together is exactly the count Pyroclasm (R) wants. Earlier than that, Zenith Blade (E) roots a target for Sear (Q).
You want him when they collapse on you: Pulverize (Q) knocks up whoever reached your face and Headbutt (W) shoves them back out. On offence he does little for you, since after the knock-up his kit is all single-target.
| Lane | Tier | Win% | Pick% | Ban% | Pos. |
|---|---|---|---|---|---|
| Support | S+ | 52.14% | 10.34% | 12.17% | #2 / 34 |
| Mid | S | 52.86% | 3.08% | 12.17% | #3 / 39 |
| Lane | Tier | Win% | Pick% | Ban% | Pos. |
|---|---|---|---|---|---|
| Support | S+ | 52.14% | 10.49% | 12.52% | #2 / 34 |
| Mid | S | 52.71% | 3.02% | 12.52% | #3 / 38 |
| Lane | Tier | Win% | Pick% | Ban% | Pos. |
|---|---|---|---|---|---|
| Support | S | 51.46% | 9.72% | 9.97% | #3 / 33 |
| Mid | S | 51.81% | 2.56% | 9.97% | #4 / 39 |
| Lane | Tier | Win% | Pick% | Ban% | Pos. |
|---|---|---|---|---|---|
| Mid | A | 51.6% | 7.64% | 5.44% | #8 / 41 |
| Support | C | 49.38% | 2.14% | 5.44% | #28 / 33 |


Brand, the Burning Vengeance, is Wild Rift's signature burn mage - a mid-lane specialist whose entire kit revolves around stacking a damage-over-time effect called Blaze, then detonating it for a burst of max-health magic damage to everyone standing nearby. Every point of damage he deals is ranged, magical, and area-based, so he farms waves, pokes down health bars, and can threaten to erase a clustered enemy team off a single well-aimed Pyroclasm. He's built for top-end damage rather than survivability, and the whole champion boils down to one idea: stay at range, stack the burn, and let the fire finish the job.
Skill order: Q > E > W (level R whenever it's available)
Play Brand like a ranged siege mage: sit at max distance, use Sear to farm and poke, and avoid trading in auto-attack range since he has no escape if a fight turns against him. Throw Pillar of Flame into the enemy's path to threaten damage and pre-apply a Blaze stack before committing to anything bigger. Once your first item spike lands, look for the W into Q lockdown the moment an opponent misjudges their spacing - but remember a single whiffed Sear removes your entire kill threat for that trade, so farming safely beats forcing fights you haven't set up.
From the mid game onward, Brand's job is to stand at the very back of every fight and wait for the enemy to clump - a dive, a choke point, or a contested objective. The instant two or more targets are close together, Pyroclasm through the group can chain Blaze detonations and end the fight in a single cast. Until that window exists, keep poking with Sear, Pillar of Flame, and Conflagration from max range to wear down health bars and bait bad engages. Save Zhonya's Hourglass for the moment you get dove, and always release your combo before you're forced to disengage - his damage only matters if it lands before he dies.