
WR China Meta
Meta, tier list & top-player builds from the China server · live
Meta, tier list & top-player builds from the China server · live

金克丝 · 暴走萝莉 Marksman B
✅ Patch 7.2e · stats updated 2026-09-12 · real builds of 21 top-ranked China server players captured 2026-09-11
Difficulty Damage Toughness Utility
How the strongest players on the Wild Rift China server (国服) build Jinx: live win/pick statistics by rank bracket, the most-used item and rune sets, and the real loadouts of the top ranked Jinx players, captured in-game.
📖 How to play Jinx


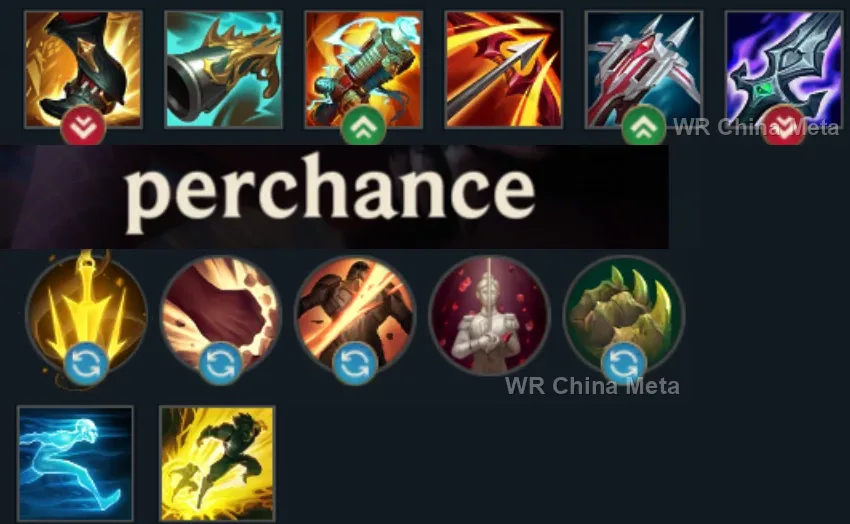
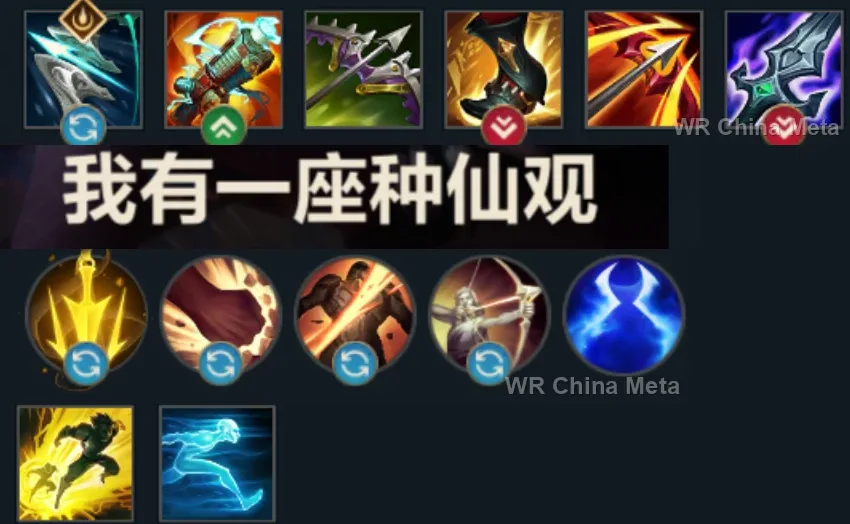
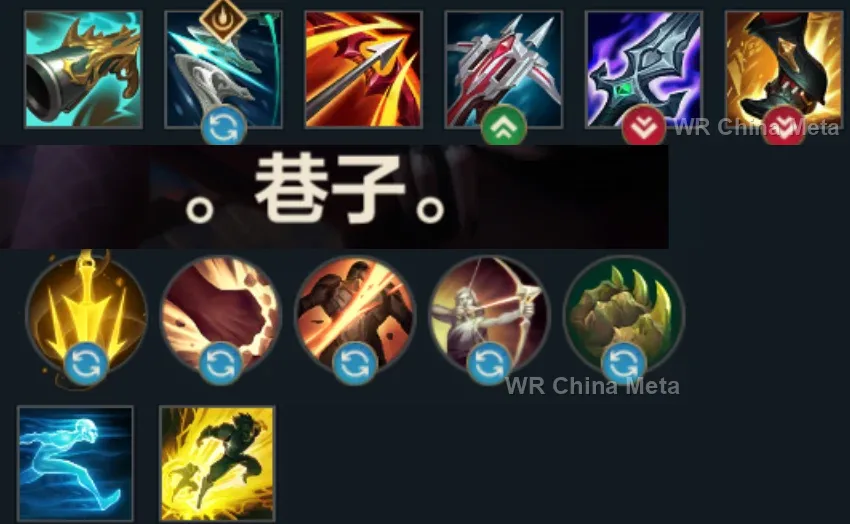
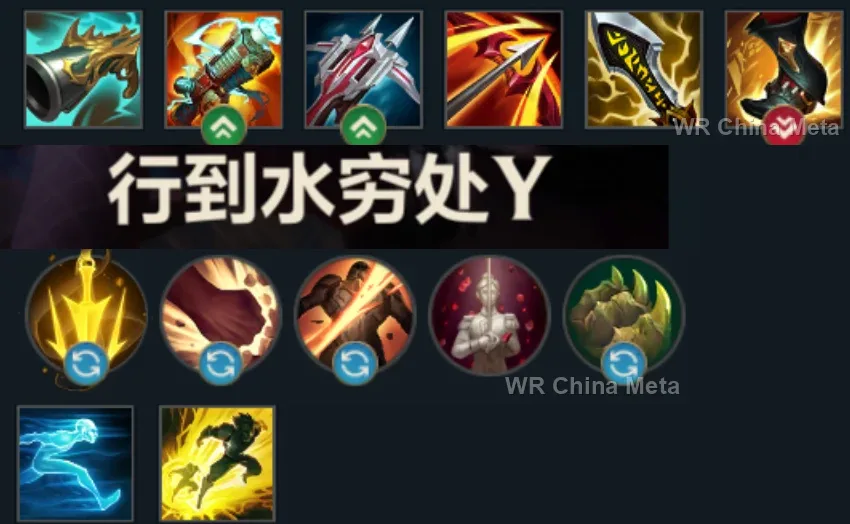
Counted on 22 real builds captured from the Chinese client, player by player. Independent from the official API above.


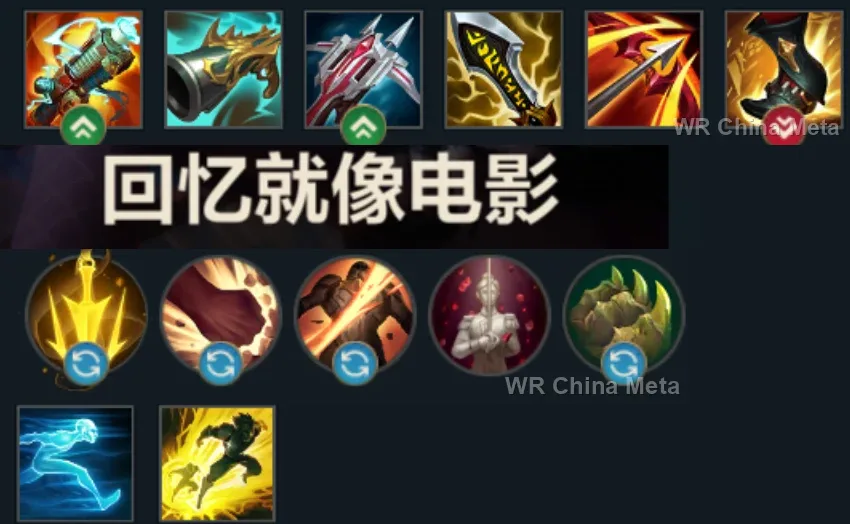
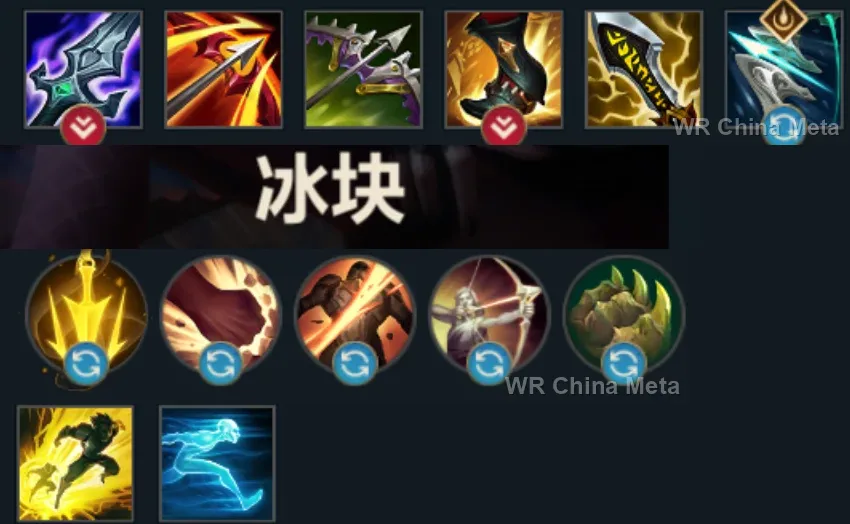
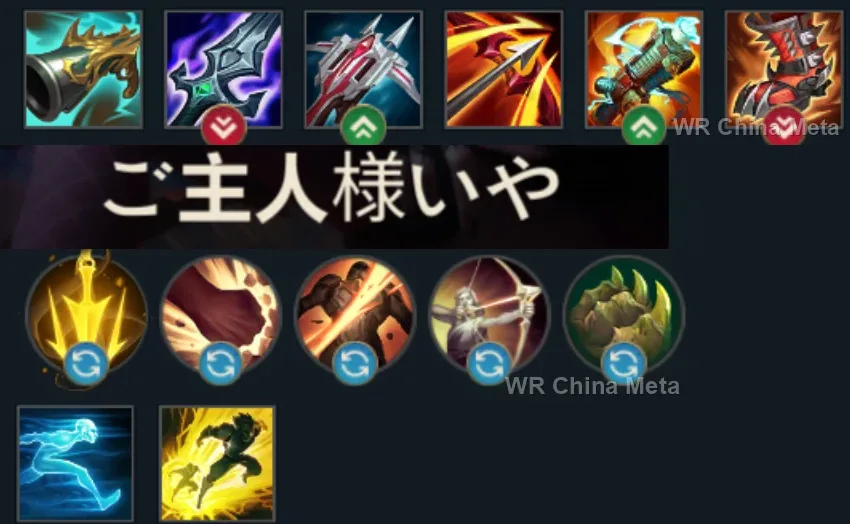
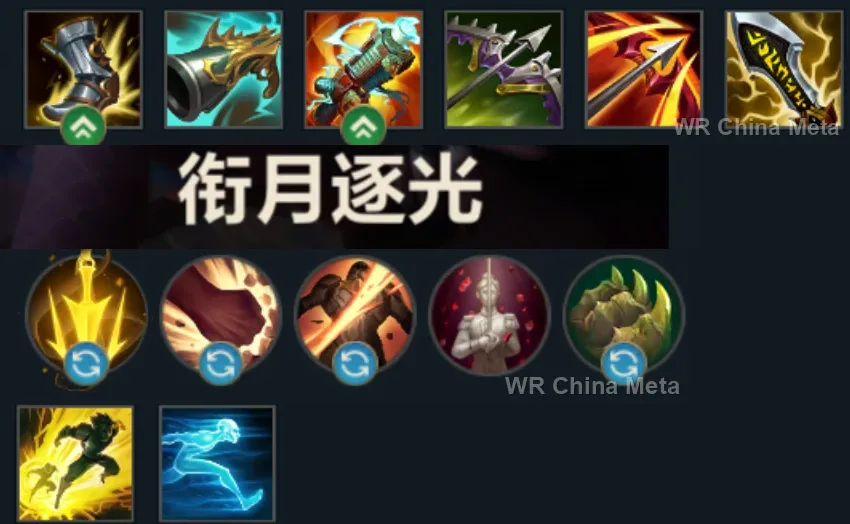
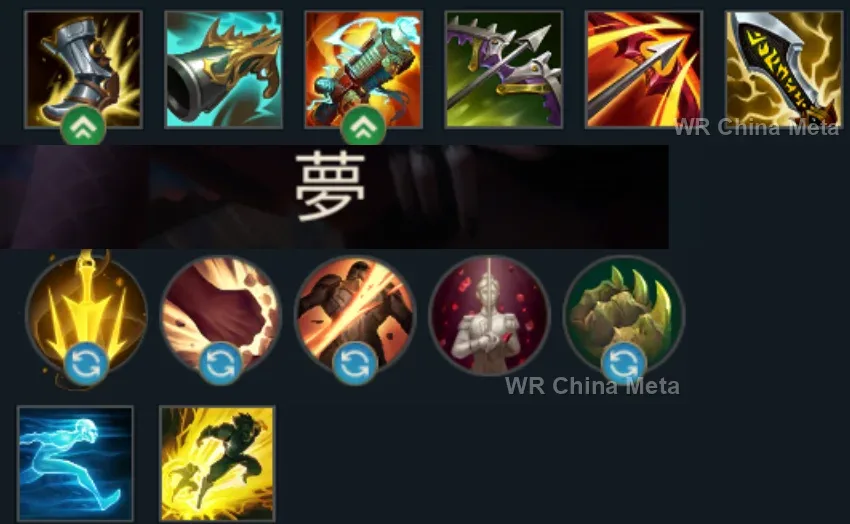
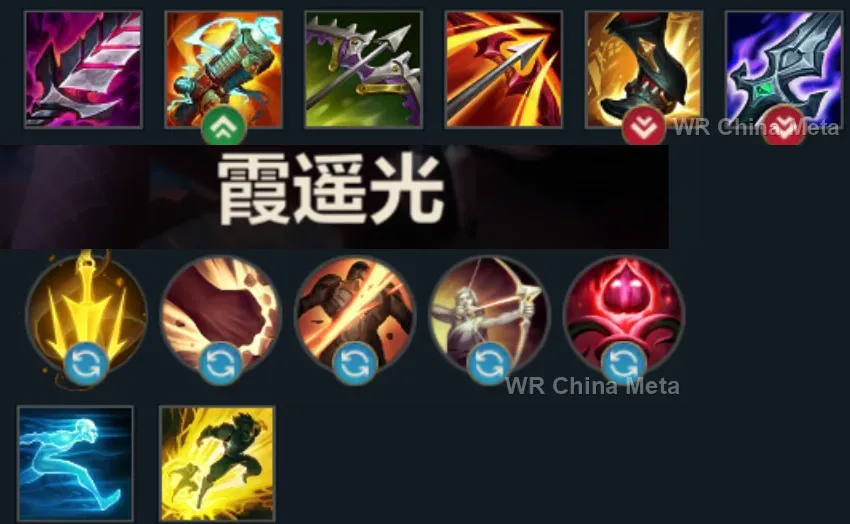
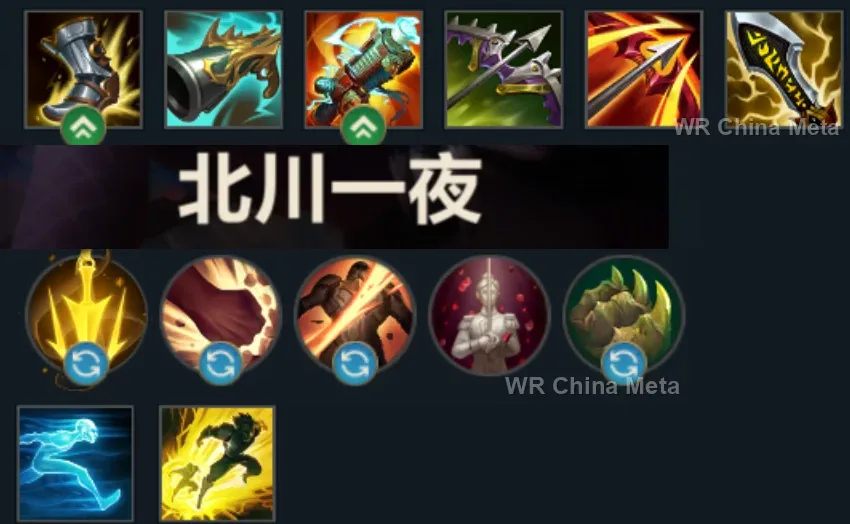
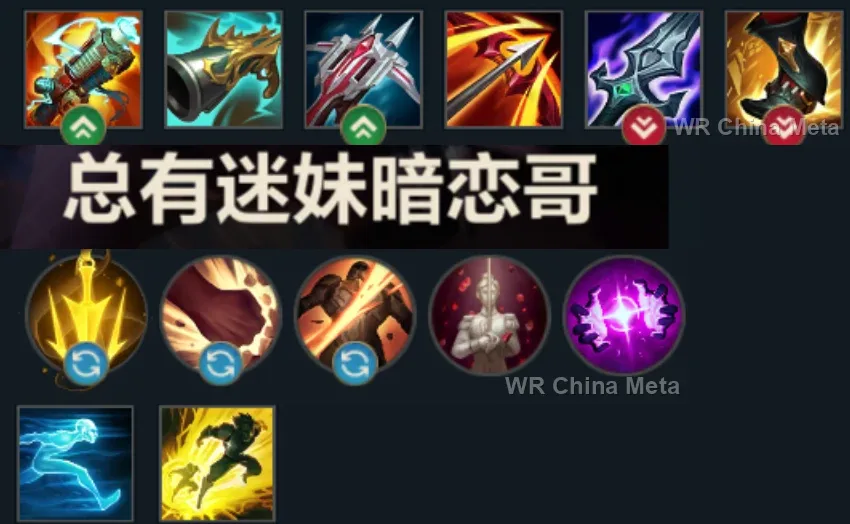
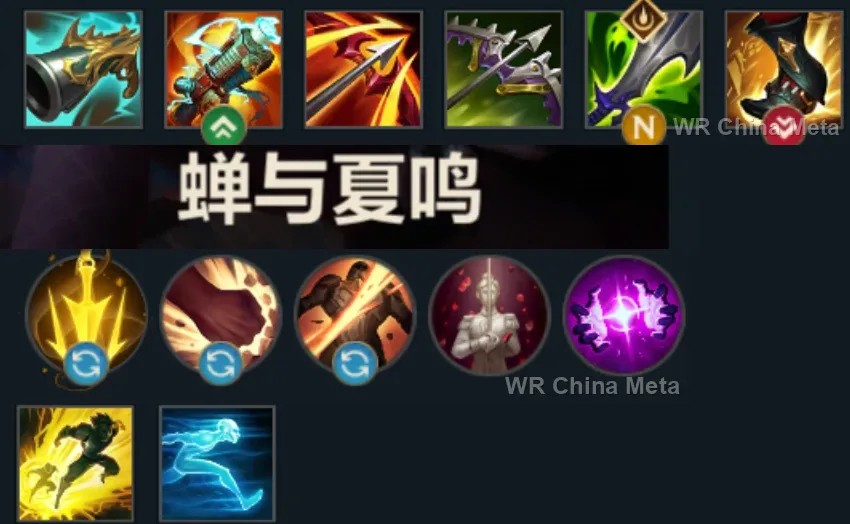
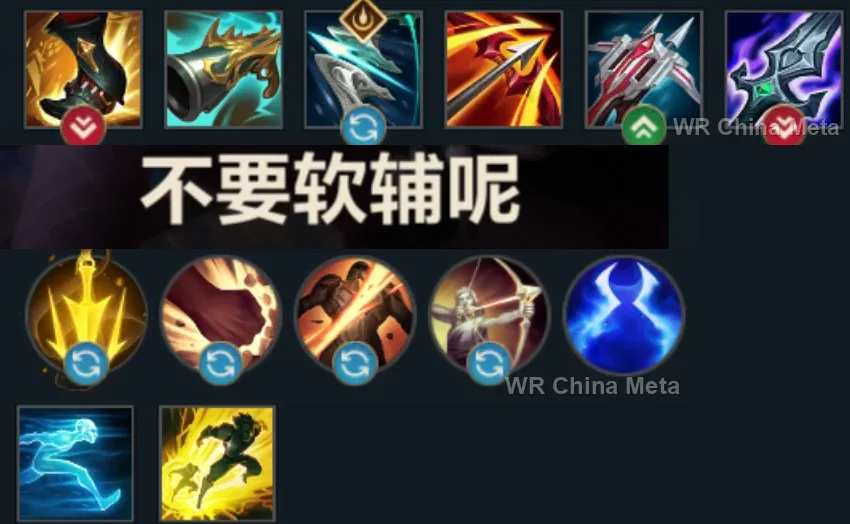
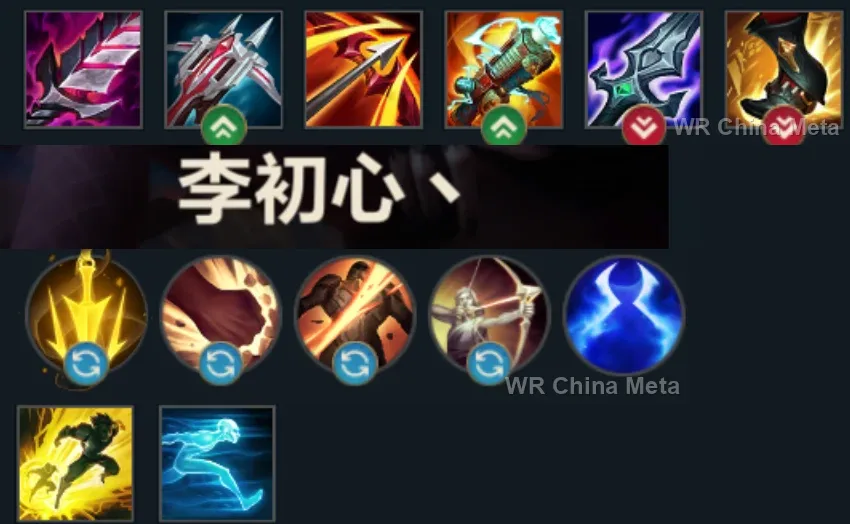
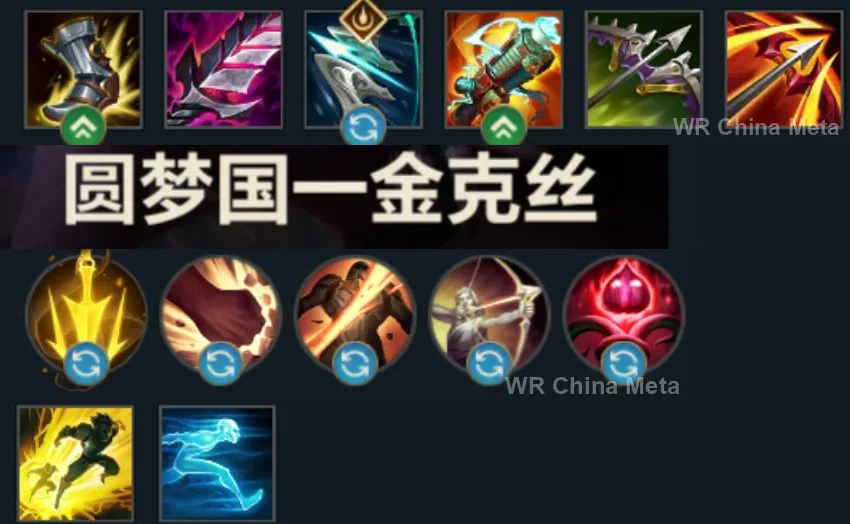
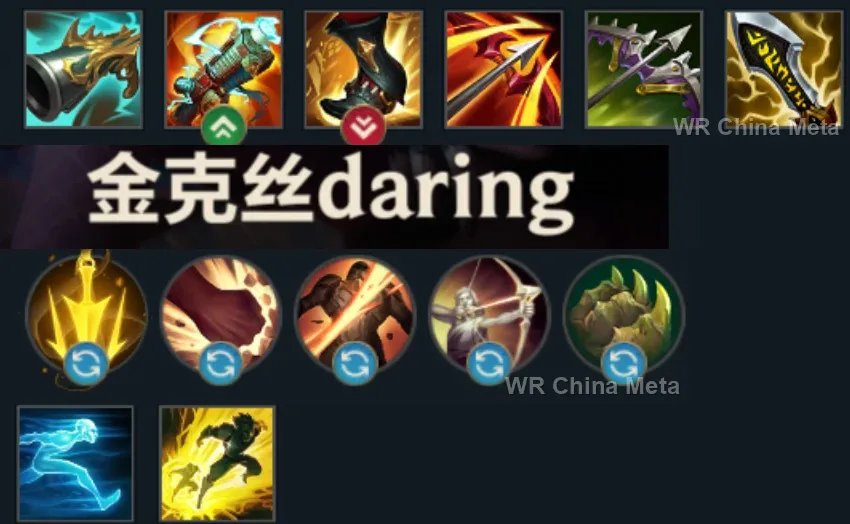
Taken from the official in-game China leaderboard. Spells, runes and items of every public top player.
21 of the top 30 players have a public match history; the others keep theirs private.
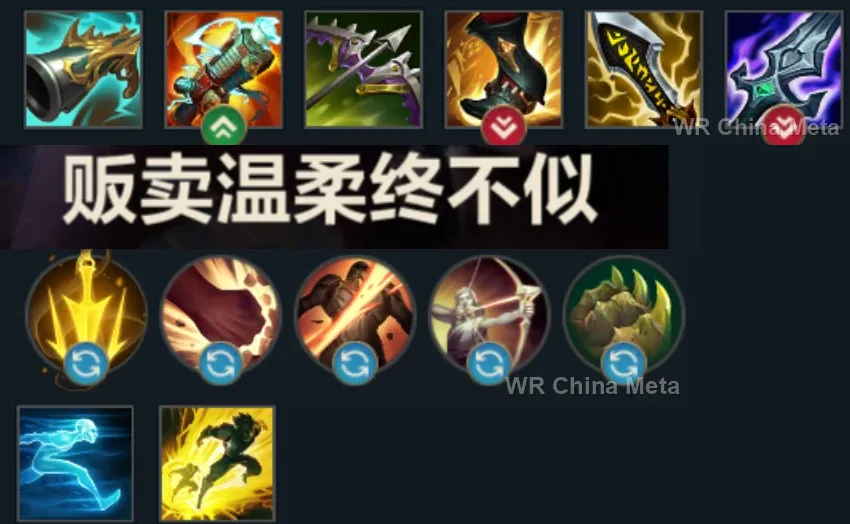
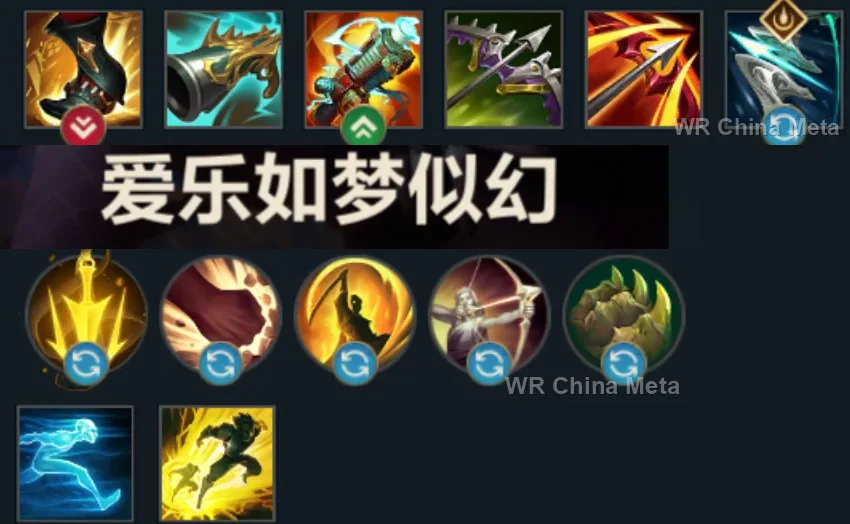
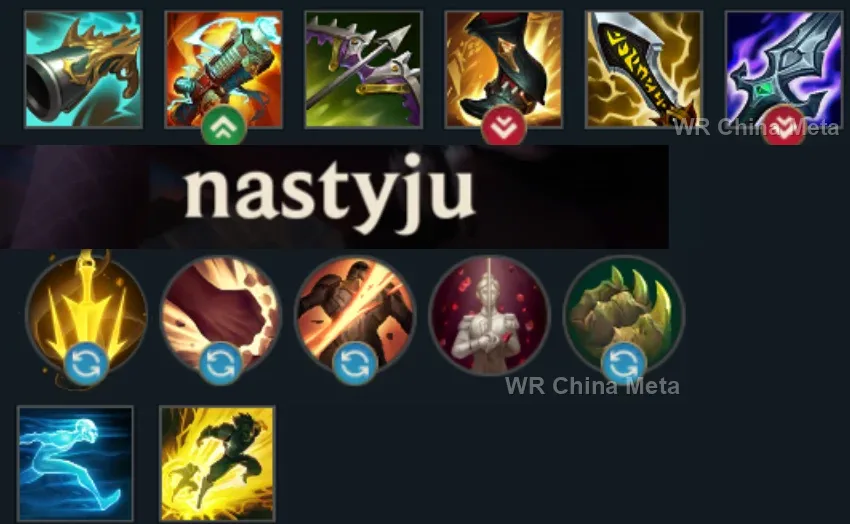
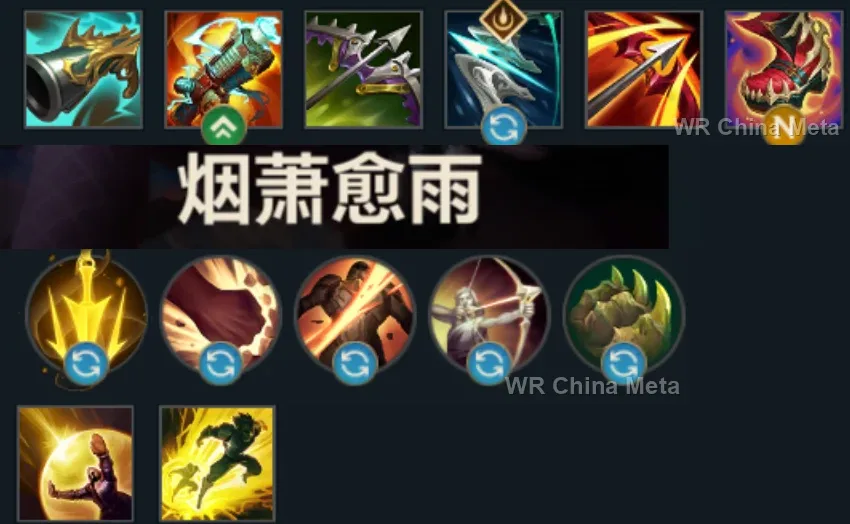
The toughest lane matchups for Jinx on the Wild Rift China server, with why each is hard and exactly how to play it.
 Jinx vs Draven Hard counter
Why Draven counters Jinx: He out-damages you from level 1 and your total lack of mobility is his dream scenario: every extended trade is a sentence.
How to play Jinx into Draven: Farm with rockets from a safe distance and zero trades before 2 items. Traps under his feet during his engage flip the all-ins.
→ Draven Jinx vs Lucian Hard counter
Why Lucian counters Jinx: Double-tap and dash against a slow, stationary target: the lane phase is skeet shooting, and you are the clay pigeon.
How to play Jinx into Lucian: Rockets to farm from afar and traps between you and him on his every advance. Survive: Lucian falls off after 2 items while you take off.
→ Lucian Jinx vs Tristana Unfavorable
Why Tristana counters Jinx: Her jump-plus-bomb all-in beats your output at even strength, and the jump reset lets her leave clean after the kill.
How to play Jinx into Tristana: Traps ALWAYS between the two of you: if she jumps, she lands rooted. Do not push without knowing where her jungler is. Late game your range switches her off.
→ Tristana Jinx vs Miss Fortune Unfavorable
Why Miss Fortune counters Jinx: She wins the poke with the bouncing Q, and at mid game her R sweeps fights before your miniguns reach full speed.
How to play Jinx into Miss Fortune: Never stand in line behind a nearly dead minion. In fights take the side angle: if her R starts, walk out of the cone sideways instead of running backwards.
→ Miss Fortune Jinx vs Ezreal Skill matchup
Why Ezreal counters Jinx: He dodges with the blink, you punish with traps: his poke scratches you, your late game deletes him.
How to play Jinx into Ezreal: Trap on his E landing spot: learn the blink's fixed distance. Farm safe: every deathless minute brings your win closer.
→ EzrealThe champions Jinx works best alongside on the Wild Rift China server, lane by lane, with the reason each pairing works.
Malphite's Unstoppable Force (R) knocks up a whole group at once - that's the window where you swap to Pow-Pow with Switcheroo! (Q) and unload without moving. Ground Slam (E) then cuts the attack speed of whoever gets back up, so nobody reaches you.
Your card says you live or die by your team's peel: Stand United (R) shields you and teleports Shen to your side from anywhere on the map, and Shadow Dash (E) taunts the assassin that jumped on you before he can finish the job.
Your damage stays mediocre until the second item lands: from level 7 Living Forge (P) hands you shopping from anywhere on the map and pulls that spike forward. And Brittle from Bellows Breath (W) adds 30% to any crowd control - more time to shoot.
With no dash you need them to stand still: in Mega form Crunch (E) gathers them, Wallop (W) stuns the whole group and GNAR! (R) slams the target into a wall, where the slow becomes a full stun. Those are the seconds when Pow-Pow does the work.
Worth it against dash-based comps: Steadfast Presence (W) roots the diver the instant he commits, and an uncharged Keeper's Verdict (R) is an immediate knock-up to shove him off you. Against a team that walks at you, though, she does little for you.
Infinite Duress (R) suppresses a target for a full second: no dashes, no escapes, exactly the time for one Pow-Pow rotation. And every takedown you close together lights up Get Excited! (P), which is how you leave the spot where they found you.
Curse of the Sad Mummy (R) is a wide 1.5-second AoE stun: with two or more enemies frozen you can swap to Pow-Pow knowing nobody leaves your range. Bandage Toss (Q) opens that same fight from range, without exposing you.
With no dash you die to the first diver: Frenzying Taunt (E) forces him to hit Rammus instead of you while you keep firing. Powerball (Q) gets him down to bot fast, which is where you are most fragile before level 5.
Crescent Guard (R) knocks back everyone except his marked target and blocks ranged damage: it's the one jungle ultimate that clears your position instead of engaging. When three of them land on you, that's what keeps you standing.
Lamb's Respite (R) is a circle where nobody can die for three seconds: for a carry with no dash that's an extra life, but only if you stay inside it. It matters in games decided by one fight over Baron or Dragon, not in lane.
Hero's Entrance (R) does the two things you need at the same time: it shields you from across the map while you're about to die, and lands a knock-up on everyone who was on top of you. For a carry with no mobility it's the best button in mid.
Command: Protect (E) puts a shield and bonus resistances on you and moves the ball to where you stand, so Orianna's damage zone defends your position. Command: Shockwave (R) pulls them into one spot: stationary and clumped, just what Pow-Pow wants.
With Pyromania (P) charged, Annie's next damaging spell is a guaranteed stun instead of a skillshot the enemy can dodge, so your free second of shooting always arrives. And Summon: Tibbers (R) keeps attacking even after she goes down.
Frozen Tomb (R) freezes the diver who has already landed on you in place: that's pure peel, not engage, and peel is the hole in your kit. Ring of Frost (W) roots the whole group around her, the one condition where Pow-Pow really pays off.
Map synergy rather than fight synergy: Destiny (R) reveals every enemy, so you know where the flank that would kill you is coming from and you always have a target in sight for Super Mega Death Rocket! (R). In a brawl, though, he gives you no peel.
There is no dash anywhere in your kit: the Dark Passage (W) lantern is literally the escape you don't have - it shields you and pulls you out of a dive. On the other side, Death Sentence (Q) hands you a stunned, motionless target to finish.
She has the two buttons your kit is missing: Whimsy (W) polymorphs the diver while you stand still and keep shooting, and Rampant Growth (R) knocks him off you and adds health the instant you'd already be dead. With her you stay on Pow-Pow instead of running.
Unbreakable (E) intercepts projectiles aimed at you and cuts incoming damage by 35% - the answer to the burst combos that kill you before you can even move. And Pow-Pow's attack speed stacks Concussive Blows (P) to four marks fast, so the stun lands early.
Aqua Prison (Q) into Tidal Wave (R) is a chain nobody walks out of: two knock-ups back to back are more than enough for a full Pow-Pow cycle. And Tidecaller's Blessing (E) on your attacks adds damage plus a slow that keeps the target in range.
Song of Celerity (E) is the movement speed that stands in for the dash you don't have, Aria of Perseverance (W) keeps you alive through long trades, and Crescendo (R) stuns and slows a whole group - the exact moment to swap to Pow-Pow.
Pick her against teams that kill you with one hook: Black Shield (E) blanks that grab or stun outright and their whole plan ends there. Against comps with no hard crowd control, though, the shield stays half wasted.
| Lane | Tier | Win% | Pick% | Ban% | Pos. |
|---|---|---|---|---|---|
| Duo (ADC) | B | 49.28% | 10.97% | 0.5% | #12 / 20 |
| Lane | Tier | Win% | Pick% | Ban% | Pos. |
|---|---|---|---|---|---|
| Duo (ADC) | B | 49.31% | 11.1% | 0.49% | #12 / 20 |
| Lane | Tier | Win% | Pick% | Ban% | Pos. |
|---|---|---|---|---|---|
| Duo (ADC) | B | 49.17% | 11.76% | 0.43% | #11 / 22 |
| Lane | Tier | Win% | Pick% | Ban% | Pos. |
|---|---|---|---|---|---|
| Duo (ADC) | B | 49.81% | 10.13% | 0.31% | #13 / 22 |


Jinx is a Marksman in Wild Rift built entirely around scaling and burst execution: every basic attack she lands is physical damage, amplified further by a kit that lets her flip between a long-range rocket launcher and a rapid-fire minigun. She thrives in games that run long, using Get Excited! to snowball off every takedown and Super Mega Death Rocket! to erase low-health targets from clear across the fight. If you want a hypercarry who punishes greedy positioning and rewards patience over a 20-plus minute game, Jinx is one of the best picks in the marksman role.
Skill order: W > Q > E (max Zap! first since the slow is her only real defensive tool with no mobility elsewhere in the kit; take Super Mega Death Rocket! at every level it's available)
Jinx's laning phase is about patience, not aggression - with no escape tools whatsoever, every trade you take needs to already be one you're winning. Stay on Pow-Pow for reliable damage while last-hitting, and only Switcheroo! into Fishbones when the extra range lets you poke or contest a wave safely from outside your opponent's threat range. Avoid committing to full trades before level 5, since your all-in potential is weak until Super Mega Death Rocket! comes online - play for farm and chip damage with Zap!, and lean on your support to peel dive threats. Once you have two items online, typically The Collector plus your first attack-speed piece, start looking for skirmishes: your damage curve turns sharply upward from there.
From the mid game onward, Jinx wants to be the team's primary damage source while standing as far from the action as possible - hug max range with Fishbones for pick potential, and only swap to Pow-Pow once a target is locked down and the fight is guaranteed. Hold Flame Chompers! to zone flanking divers or root anyone closing in on you, and save Zap! to slow priority targets or peel for yourself if you get caught out. Super Mega Death Rocket! is your fight-defining tool - fire it to open on an isolated backline target before the frontlines clash, or hold it to execute a low-health enemy anywhere on the map thanks to the missing-health physical damage. Because you have zero mobility, staying tucked behind your frontline and pre-placing traps before the engage matters more for you than for almost any other marksman.