
WR China Meta
Meta, tier list & top-player builds from the China server · live
Meta, tier list & top-player builds from the China server · live

孙悟空 · 齐天大圣 Fighter A
✅ Patch 7.2e · stats updated 2026-09-12 · real builds of 23 top-ranked China server players captured 2026-09-11
Difficulty Damage Toughness Utility
How the strongest players on the Wild Rift China server (国服) build Wukong: live win/pick statistics by rank bracket, the most-used item and rune sets, and the real loadouts of the top ranked Wukong players, captured in-game.
📖 How to play Wukong




Counted on 25 real builds captured from the Chinese client, player by player. Independent from the official API above.



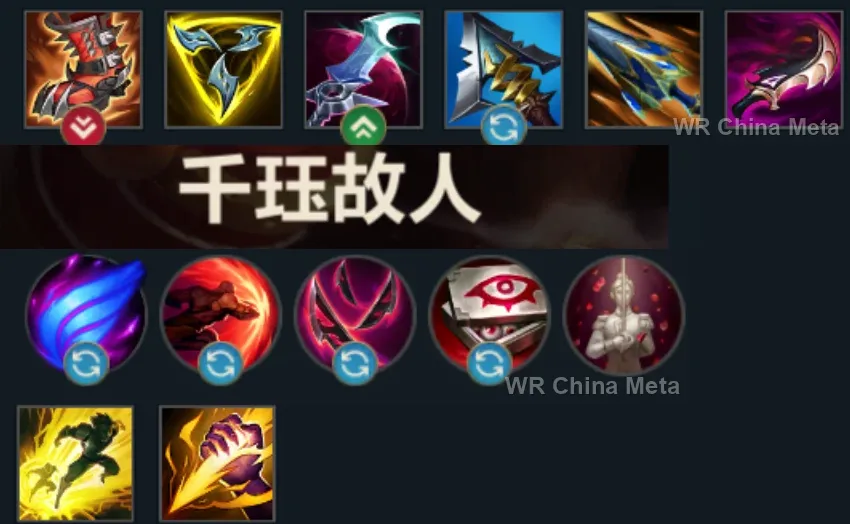
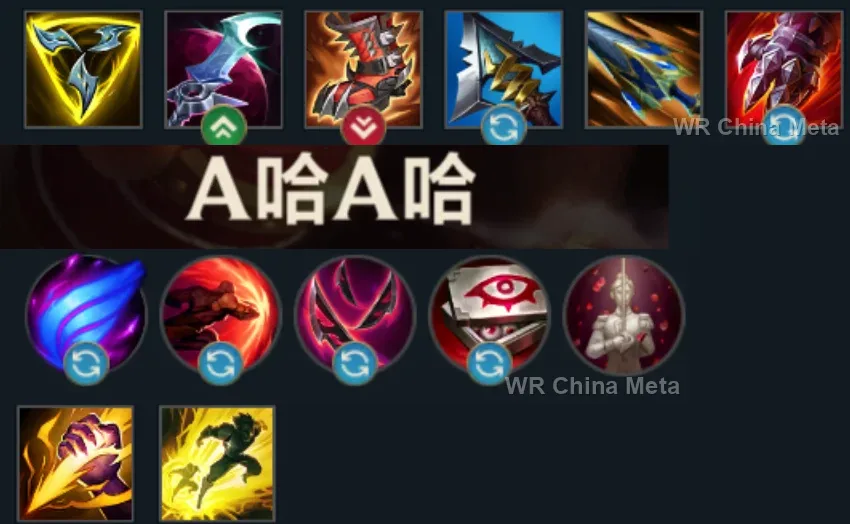
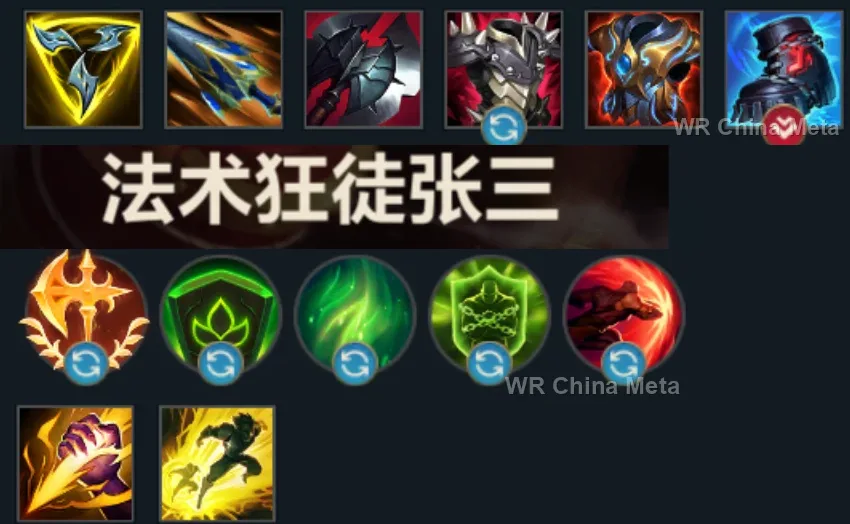
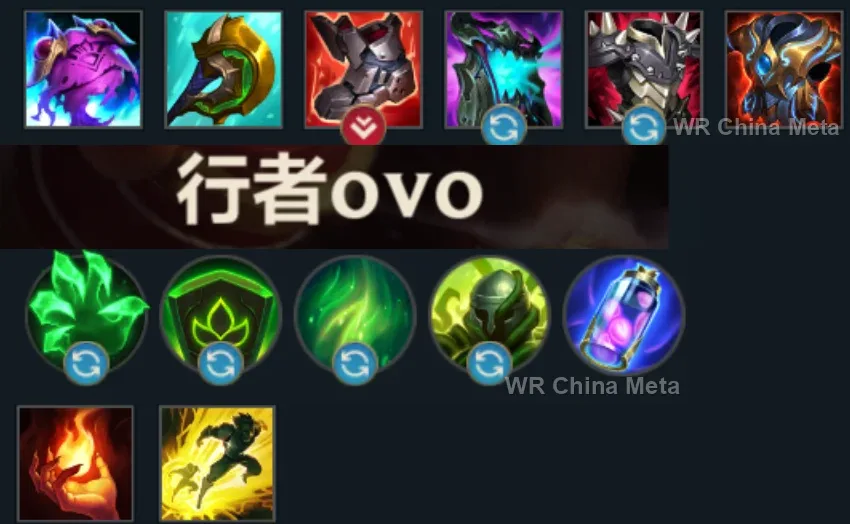
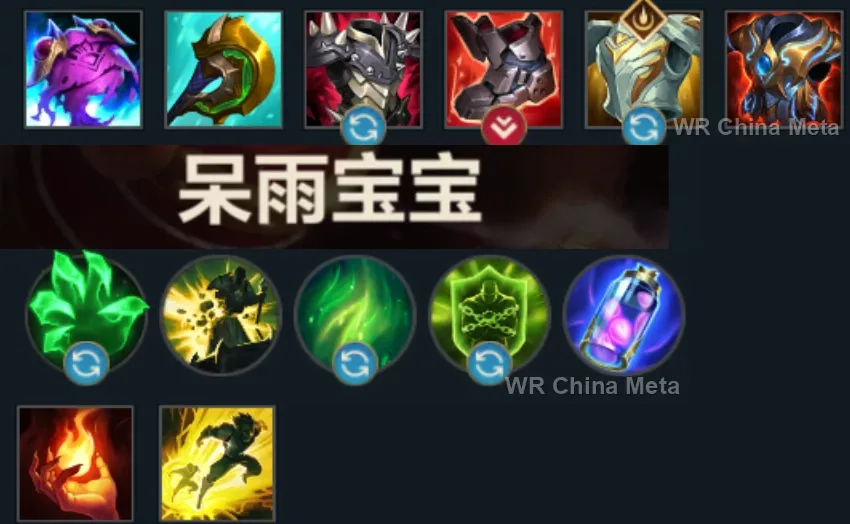
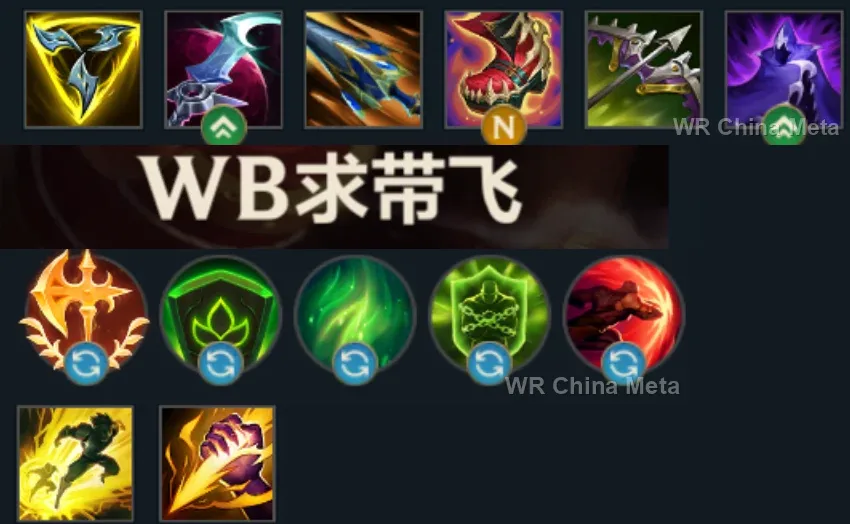
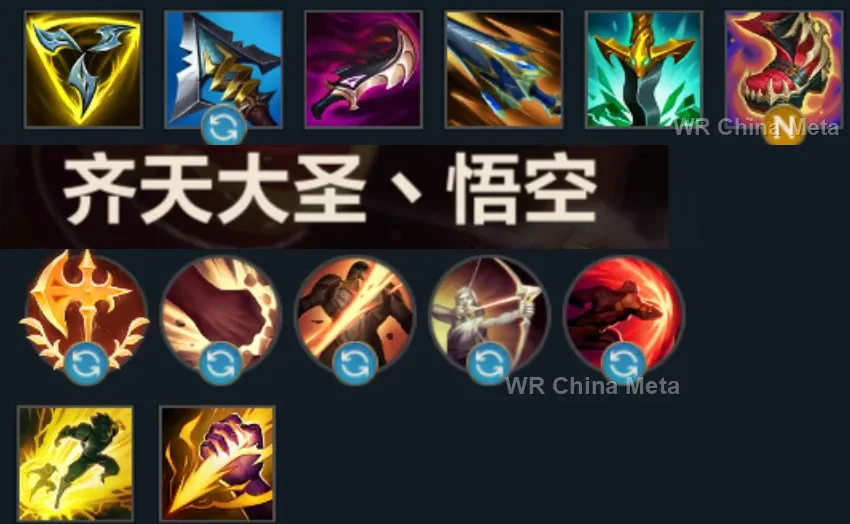
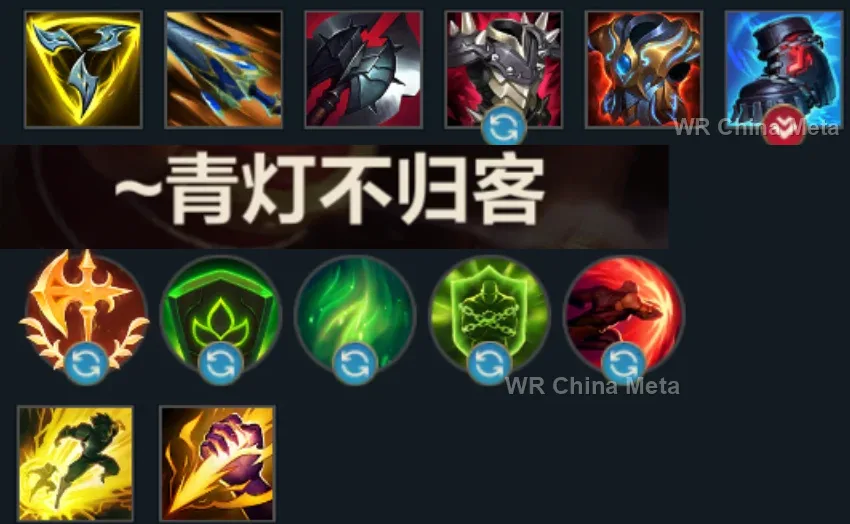
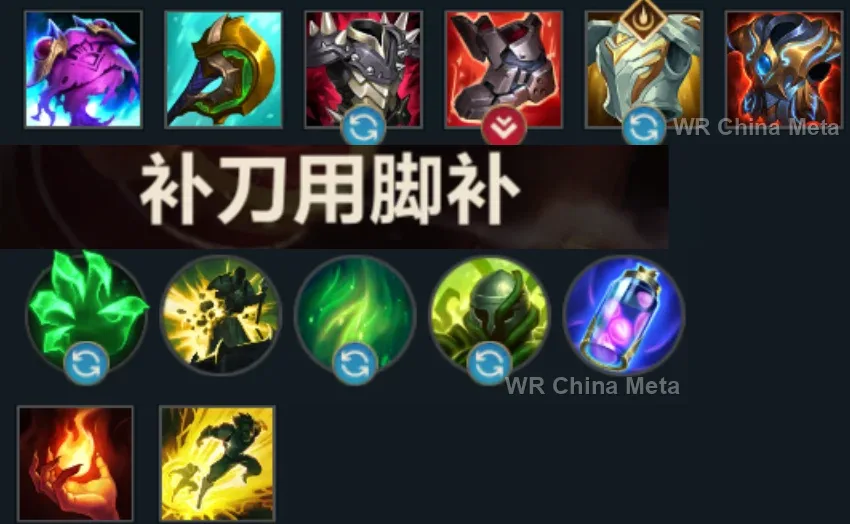
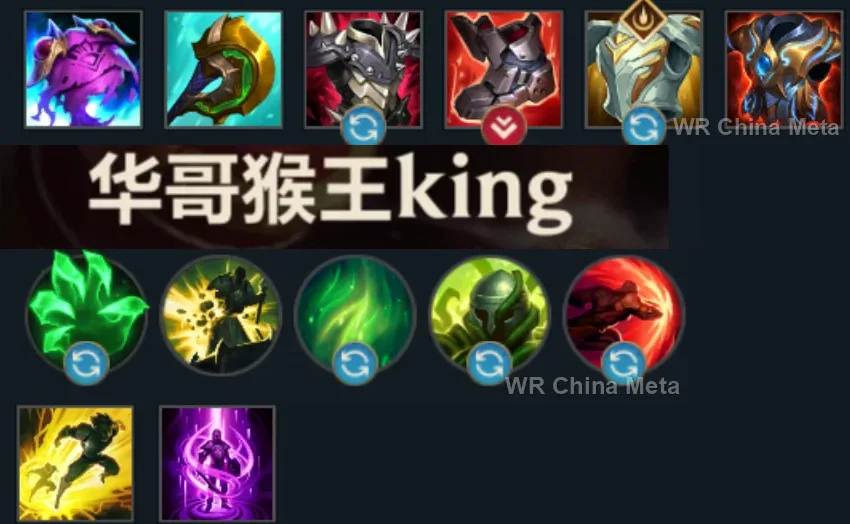
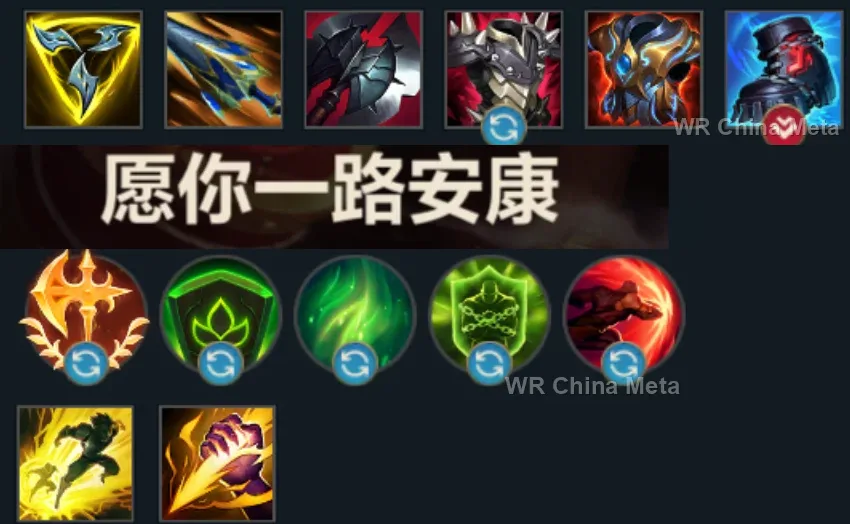
Taken from the official in-game China leaderboard. Spells, runes and items of every public top player.
23 of the top 30 players have a public match history; the others keep theirs private.
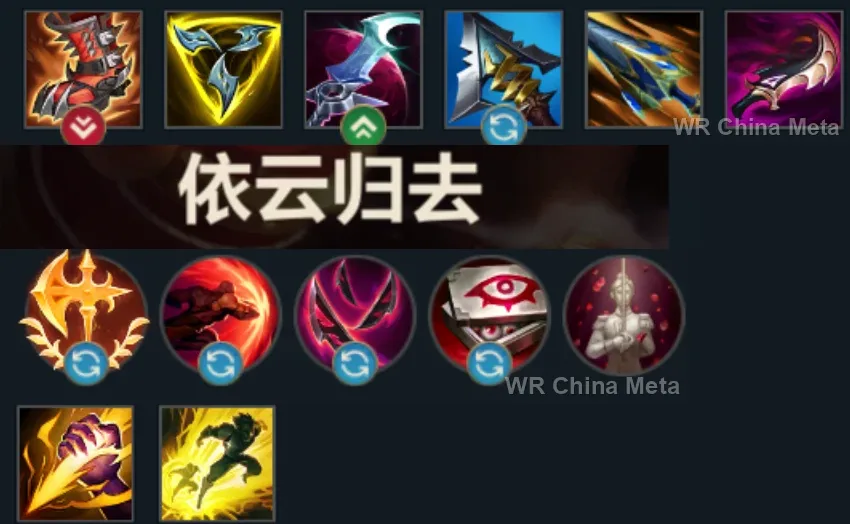
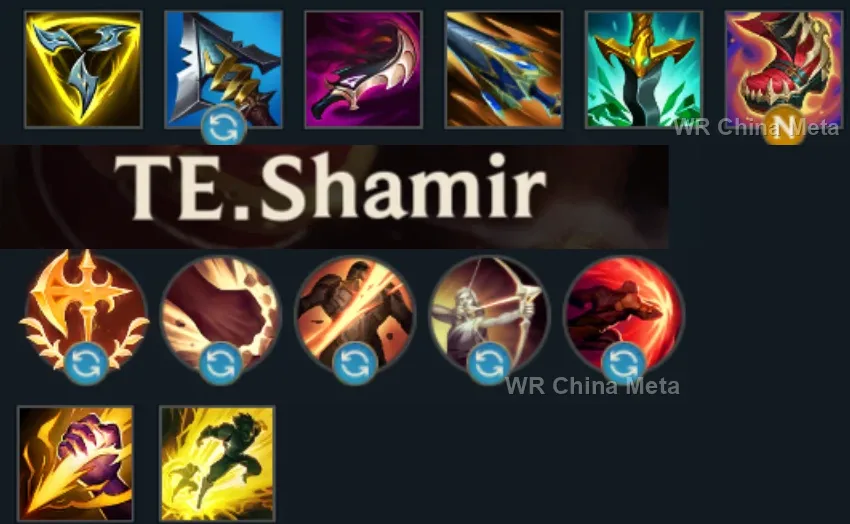
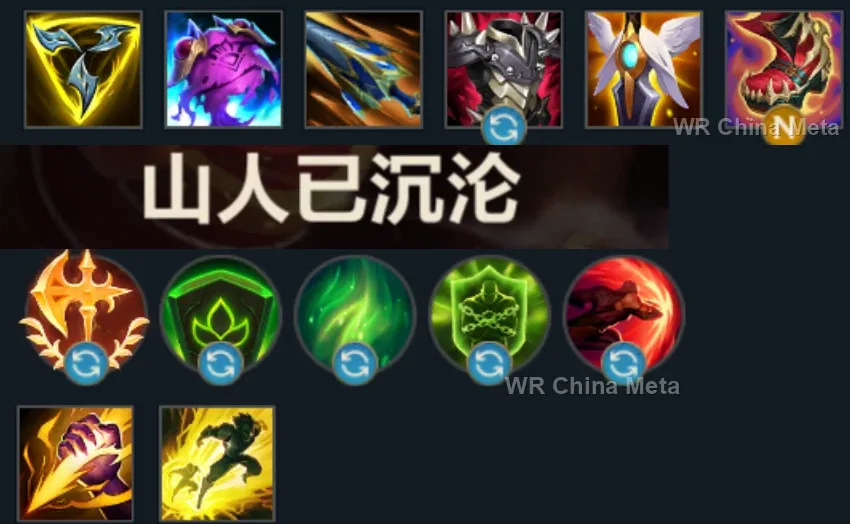
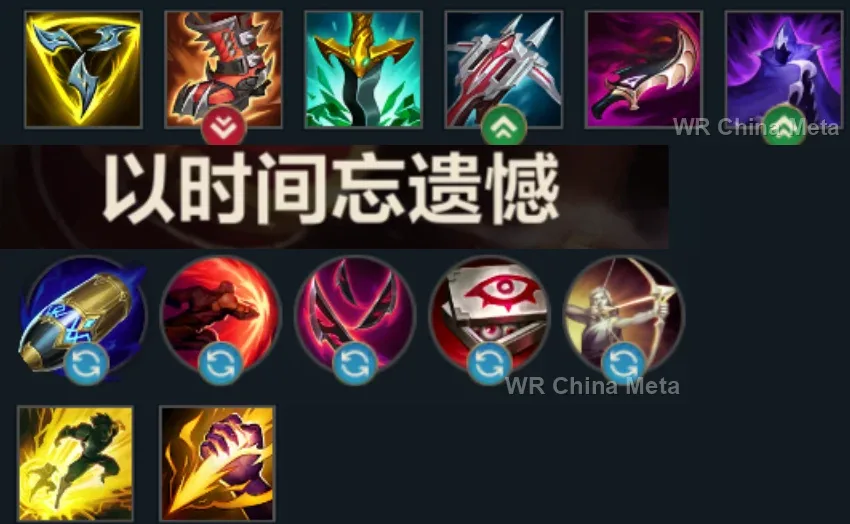
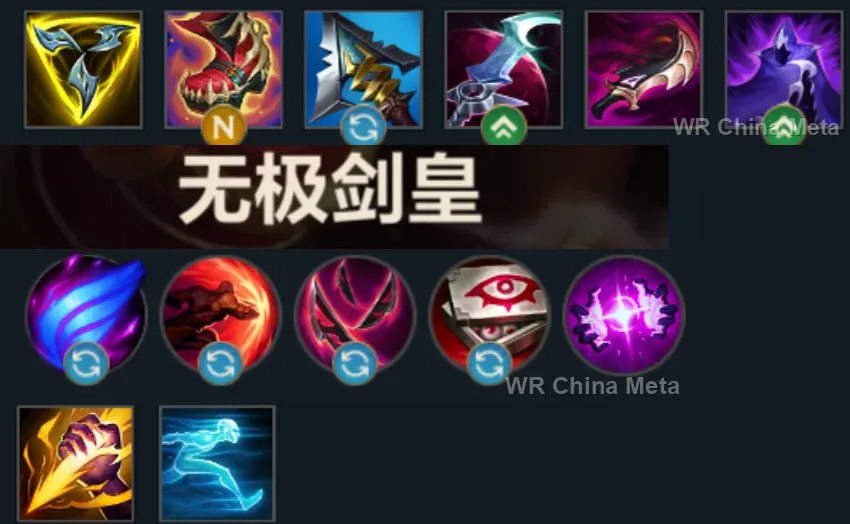
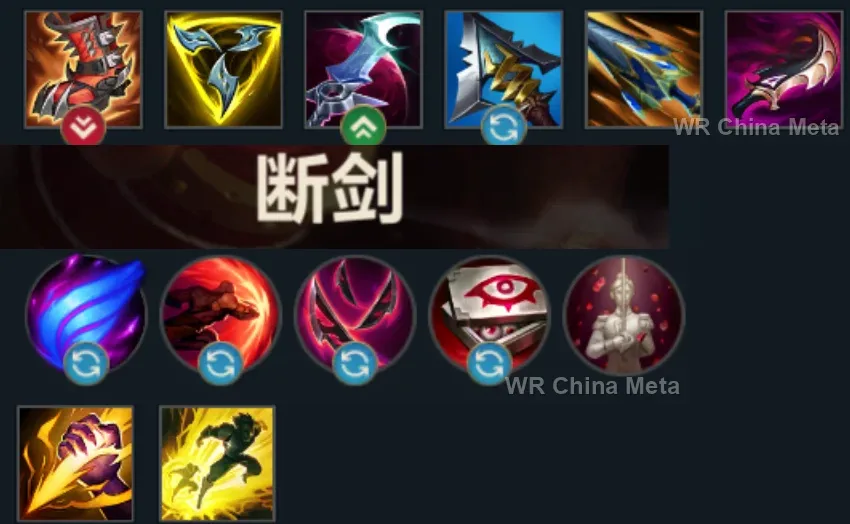
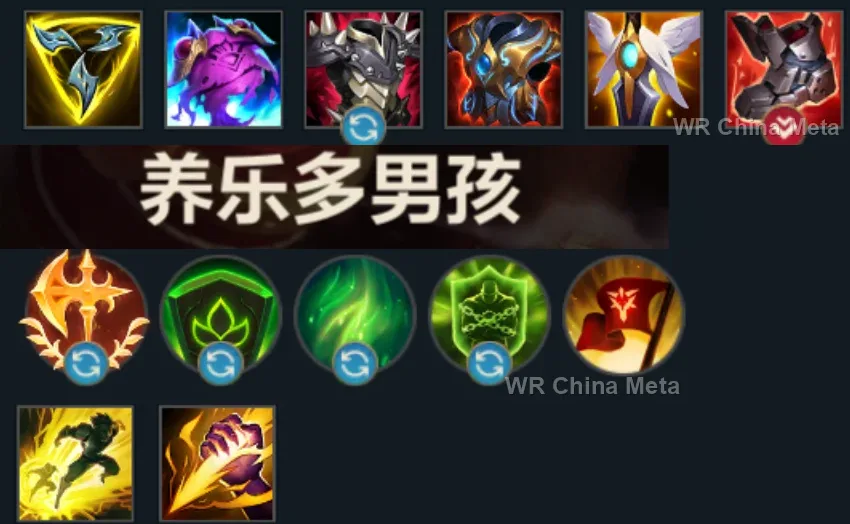
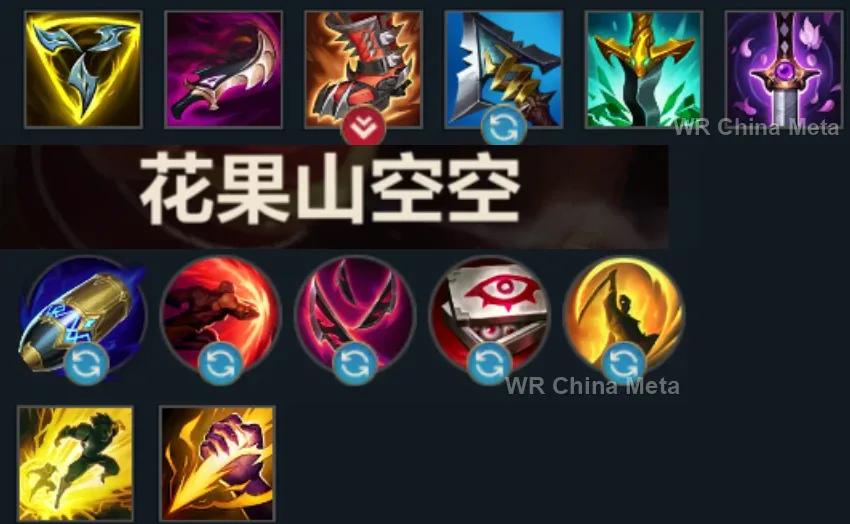
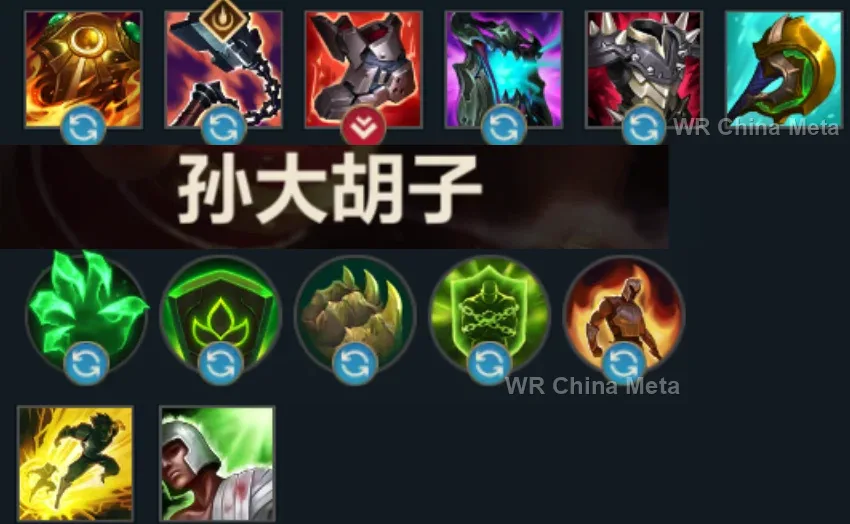
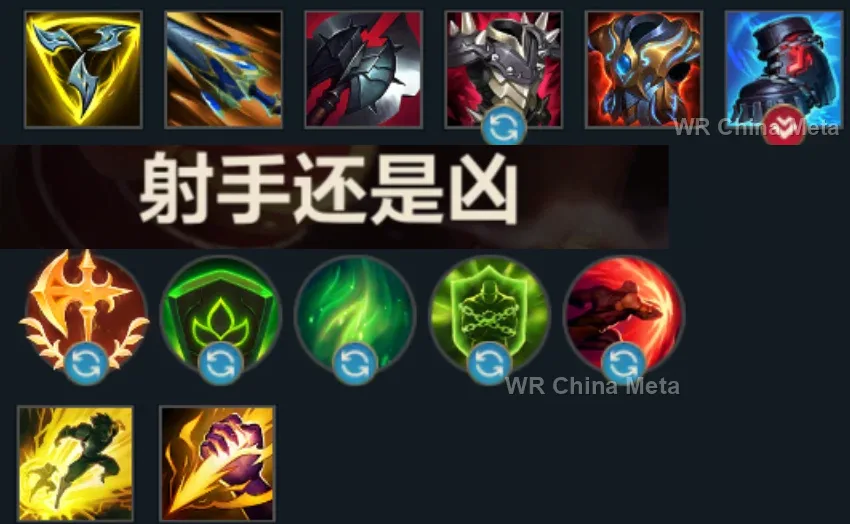
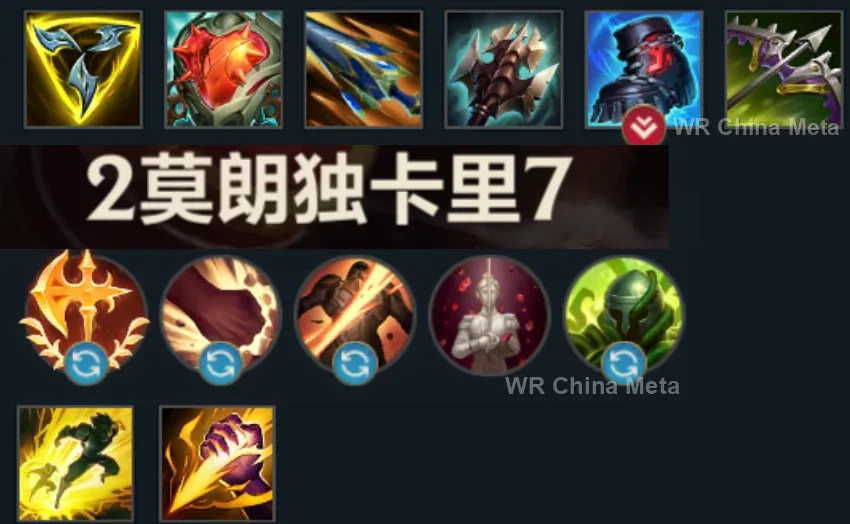
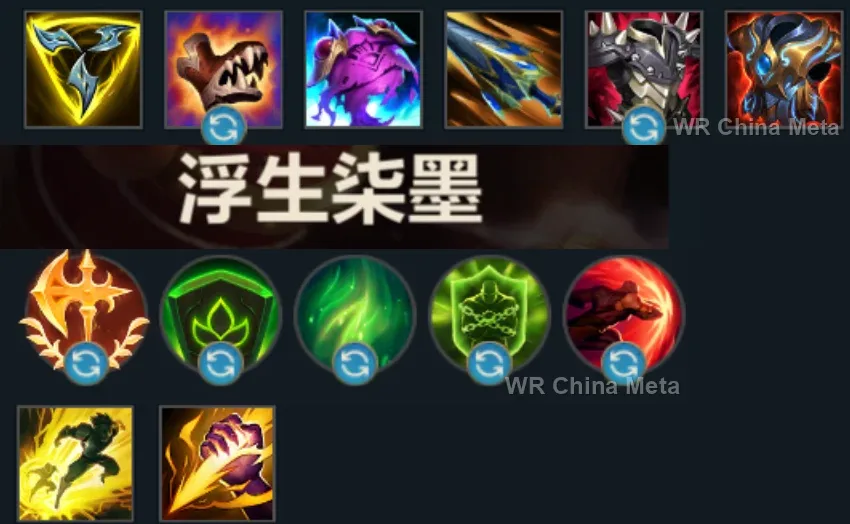
The toughest lane matchups for Wukong on the Wild Rift China server, with why each is hard and exactly how to play it.
 Wukong vs Malphite Unfavorable
Why Malphite counters Wukong: Armor against your physical kit and poke on your approach: the rock sees straight through the clone.
How to play Wukong into Malphite: Trade with E, Q and W, exiting with the clone, and never extend. In fights, R the carries BEHIND him: it is wasted on the rock.
→ Malphite Wukong vs Fiora Unfavorable
Why Fiora counters Wukong: Riposte reads your E-Q pattern and Vitals ignore the clone: the illusionist monkey, unmasked.
How to play Wukong into Fiora: Use the clone INSIDE the trade to scramble her Riposte. R once her Riposte is spent: two knock-ups are enormous damage.
→ Fiora Wukong vs Jax Skill matchup
Why Jax counters Wukong: His Counter Strike against your clone: two pretenders. He scales better in the duel, you bring more to teamfights.
How to play Wukong into Jax: E, Q and out with the clone BEFORE his Counter Strike spins. Your R in 5v5s is worth three of his duels: play the map.
→ Jax Wukong vs Teemo Skill matchup
Why Teemo counters Wukong: The blind catches attacks but your burst is made of abilities; his real damage is kiting your single entry.
How to play Wukong into Teemo: E, Q and R as one package: in, damage, knock-up, out. Use the clone to confuse him: he often wastes the blind on the one that does not bleed.
→ Teemo Wukong vs Renekton Skill matchup
Why Renekton counters Wukong: The fury stun wins your short exchanges: he owns the first minutes, then your teamfight kit passes him.
How to play Wukong into Renekton: Send the clone when he charges his W: the stun on the phantom is comedy. Real trades only at zero fury.
→ RenektonThe champions Wukong works best alongside on the Wild Rift China server, lane by lane, with the reason each pairing works.
Cyclone (R) has to be cast from inside the group, and that is exactly where enemy crowd control shuts you down: inside Curse of the Sad Mummy (R) nobody can interrupt you and nobody leaves the radius, not even on the recast.
Cataclysm (R) builds a wall around the target: you cast Cyclone (R) inside the arena and nobody leaves while you keep knocking them up. It is also the frontal engage that pulls their eyes off the flank you come from with Warrior Trickster (W).
Moonfall (R) only works up close and only while enemies stay around her: your knock-ups, counting the recast, are what keeps them there. And you both come in from the side, so their front line is looking the wrong way.
Absolute Zero (R) is a channel enemies cancel just by walking away: after Cyclone (R) they can't walk. And Biggest Snowball Ever! (W) is the second engage for when your ultimate is down and you are just a melee body with no crowd control.
Powerball (Q) cancelled into Soaring Slam (R) opens the same backline you reach from the side, and Frenzying Taunt (E) holds the carry still while you load Golden Staff (Q). You have to go in together, though: if he opens alone, you arrive late.
Last Breath (R) can only be cast on airborne targets, and Cyclone (R) puts a whole group in the air with a second wave on the recast: you open two windows for him inside the backline he could never reach on his own.
She sticks Command: Protect (E) on you before you vanish with Warrior Trickster (W): the Ball travels with you behind their line, and the moment Cyclone (R) lifts them Command: Shockwave (R) fires from there and drags them into a single point.
You flank alone and your own card says plainly that you bring no peel: Hero's Entrance (R) lands on you right after Cyclone (R) with a second knock-up and a shield, and Justice Punch (E) knocks off whoever read your flank.
Slicing Maelstrom (R) demands he stays inside the pile for three seconds of pulses, and outside it Kennen survives nothing: your knock-ups pay for them, and every pulse re-applies Mark of the Storm (P) and stuns all over again.
Vision of Empire (W) deals 50% more damage to anything already locked down, and the Cyclone (R) knock-up switches that on for the whole group. But he fights behind his front line and you fight from the flank: it only pays off in tight objective fights.
Bullet Time (R) is a stationary three-second channel that anyone with a dash sidesteps: after Cyclone (R), and even more after the recast, nobody sidesteps anything, and every wave can crit the group you are holding in the air.
Before Inferno Trigger (R) even exists she has to get to melee range and climb to S-rank: a group stuck in the air is the safest place to do it, and Wild Rush (E) brings her onto the very flank you came in from.
Deadly Flourish (W) becomes a root on anyone an ally has just hit: your empowered Golden Staff (Q) attack switches it on. And Curtain Call (R) wants targets that cannot dodge, which is exactly what Cyclone (R) is holding up.
Chain of Corruption (R) starts on one target and spreads to whoever stands next to them: after Cyclone (R) they all do, so the chain takes the group as a block and holds the spot still for your recast.
Your own card says hard crowd control mid-Nimbus Strike (E) leaves you stranded: bonded as her Oathsworn, Fate's Call (R) pulls you back out. She decides when, though, and it only works if you both play the whole game around that bond.
Your stated limit is the crowd control that interrupts Nimbus Strike (E) and leaves you stranded among them: Black Shield (E) on you before the dash eats it, and with Warrior Trickster (W) you arrive where you meant to, uninterrupted.
Beat Drop (E) climbs from a slow to a root to a stun on anyone who has already eaten crowd control: the Cyclone (R) knock-up promotes it two steps. Encore (R) extends every time it clips a champion, and you are the one bunching them up.
Crescendo (R) goes off as your knock-up runs out: it stuns the first target it touches and slows everyone else caught in the wave, so the group never really gets moving again. And Aria of Perseverance (W) patches up whoever went in first, which is you.
He is the one support who actually follows you onto the flank: Battle Dance (E) brings him to you, Grand Entrance (W) knocks up from range and The Quickness (R) chains a charm onto the group Cyclone (R) has just lifted.
When your flank gets read you are alone and at half health: the Dark Passage (W) lantern is the way home, and The Box (R) shuts the exits on whoever chases you. Only if he plays for you and not for his own carry, which is the rarer call.
| Lane | Tier | Win% | Pick% | Ban% | Pos. |
|---|---|---|---|---|---|
| Baron | A | 52.08% | 1.63% | 0.43% | #14 / 41 |
| Jungle | B | 50.4% | 3.46% | 0.43% | #23 / 40 |
| Lane | Tier | Win% | Pick% | Ban% | Pos. |
|---|---|---|---|---|---|
| Baron | A | 52.06% | 1.7% | 0.44% | #13 / 41 |
| Jungle | B | 50.5% | 3.53% | 0.44% | #25 / 40 |
| Lane | Tier | Win% | Pick% | Ban% | Pos. |
|---|---|---|---|---|---|
| Baron | A | 52.01% | 1.94% | 0.44% | #15 / 41 |
| Jungle | B | 50.13% | 3.66% | 0.44% | #24 / 42 |
| Lane | Tier | Win% | Pick% | Ban% | Pos. |
|---|---|---|---|---|---|
| Baron | B | 51.38% | 2.13% | 0.36% | #16 / 39 |
| Jungle | C | 52.31% | 3.27% | 0.36% | #30 / 41 |


Wukong is an easy-to-pick-up, deception-based Fighter in Wild Rift, built around a decoy clone, hard-hitting dashes, and heavy physical damage. He's one of the more approachable champions to learn, yet he swings fights hard once his combo comes online: Warrior Trickster's clone baits the wrong reaction while Nimbus Strike and Cyclone let him dive straight onto priority targets. Expect a self-sufficient, high-damage skirmisher rather than a peel-and-protect teammate.
Skill order: Q > E > W (max Cyclone whenever it's available)
Focus on clean, efficient clears using Golden Staff's empowered auto to shred through camps or waves quickly, and start hunting for skirmishes once you hit level 3-4 and your full E-into-auto trade is online. Use Warrior Trickster's stealth to slip past vision and set up plays the enemy never sees coming, letting the clone soak up a spell or a read before your real damage lands. Avoid long, face-tank trades before level 5 - without Cyclone you have no knockup, so pick your windows around cooldowns instead. Once Nimbus Strike connects, its attack-speed buff plus your Stone Skin stacks are usually enough to win short trades against squishier opponents.
From mid game on, look to flank rather than walk in from the front: go invisible with Warrior Trickster, loop around vision, and land Cyclone on the backline before the enemy front line even reacts. Save the ultimate's knockup for the first isolated priority target you can reach - locking down a marksman or mage buys your team a clean window to burst them down - and remember you can recast Cyclone within 8 seconds if a second wave of displacement is worth more than a longer single cast. With Divine Sunderer online, that empowered auto also punishes tanks and duelists who try to just stand and fight you. Keep the clone active for the extra chip damage and split focus, but treat it as a distraction, not a shield - if the flank closes, fall back to peeling for your own carries instead.