
WR China Meta
Meta, tier list & top-player builds from the China server · live
Meta, tier list & top-player builds from the China server · live

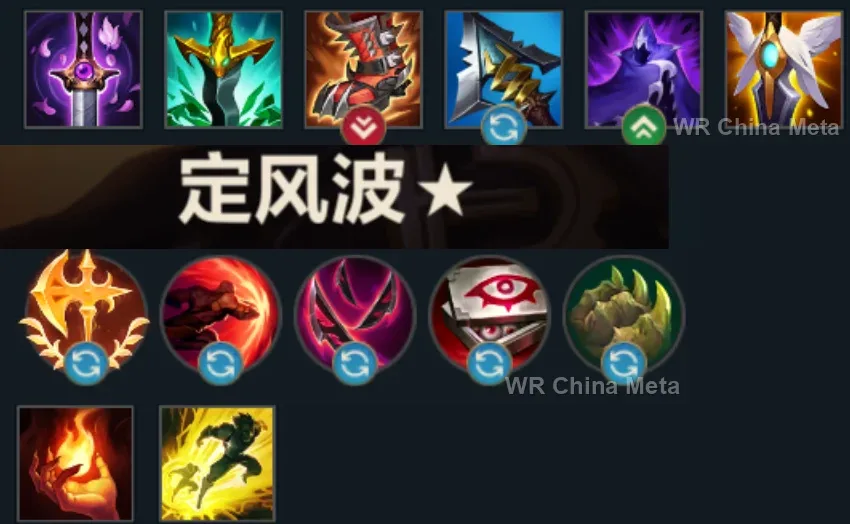
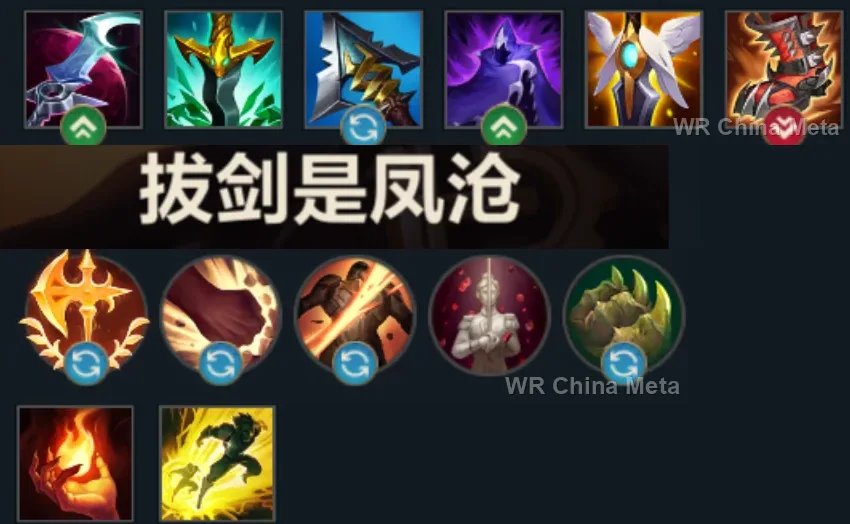
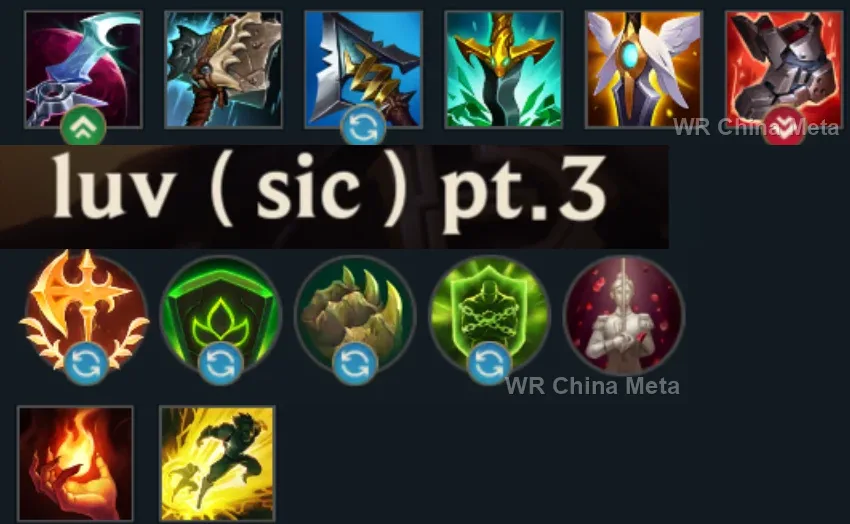
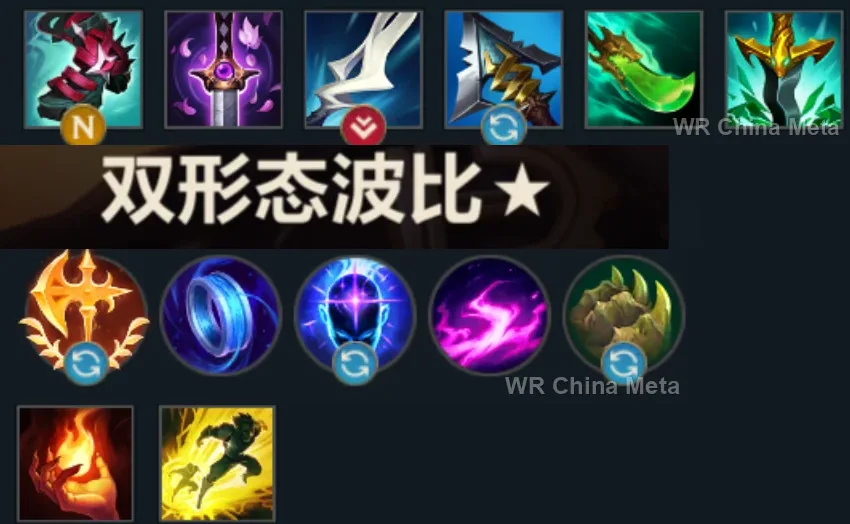
杰斯 · 未来守护者 Fighter C
✅ Patch 7.2e · stats updated 2026-09-12 · real builds of 23 top-ranked China server players captured 2026-09-11
Difficulty Damage Toughness Utility
How the strongest players on the Wild Rift China server (国服) build Jayce: live win/pick statistics by rank bracket, the most-used item and rune sets, and the real loadouts of the top ranked Jayce players, captured in-game.
📖 How to play Jayce








Counted on 25 real builds captured from the Chinese client, player by player. Independent from the official API above.


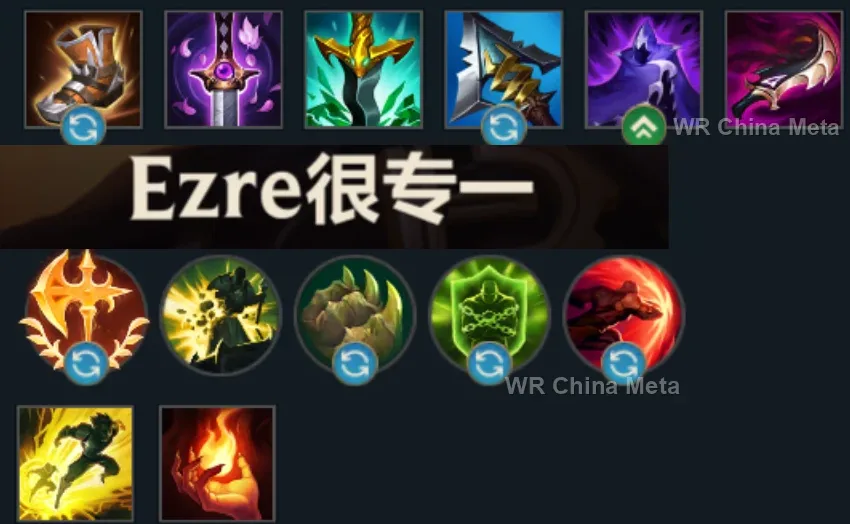
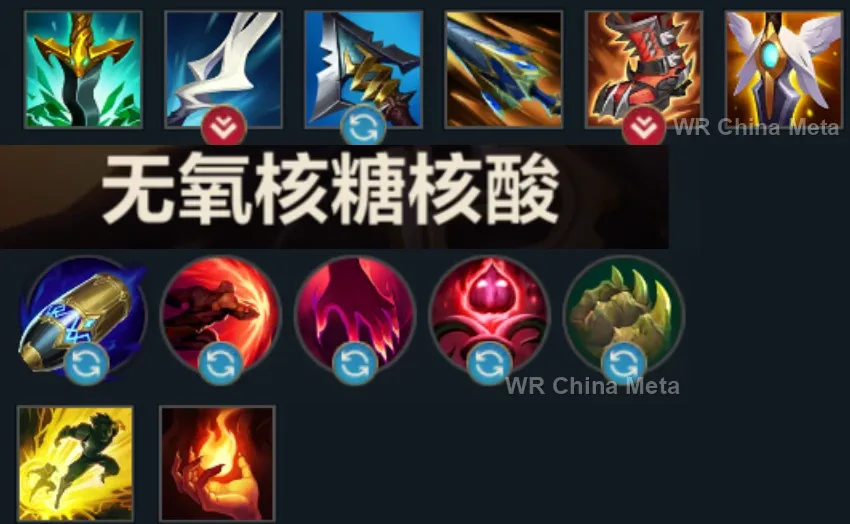
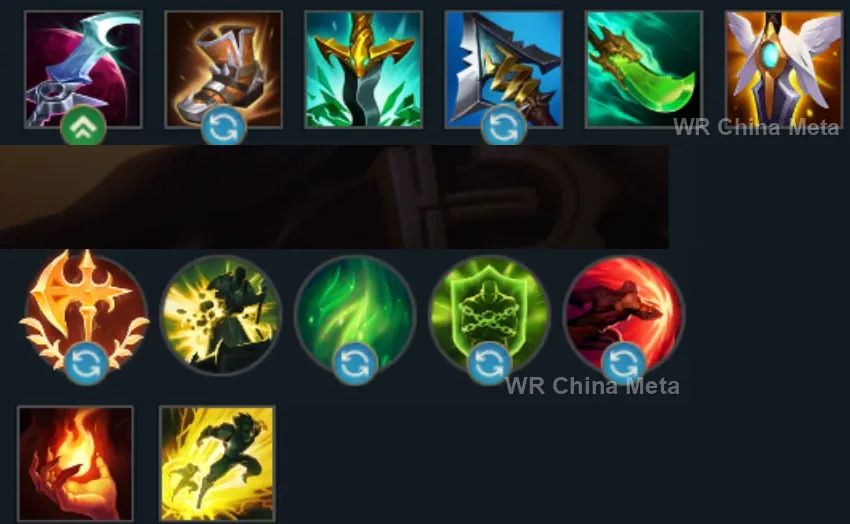
Taken from the official in-game China leaderboard. Spells, runes and items of every public top player.
23 of the top 30 players have a public match history; the others keep theirs private.
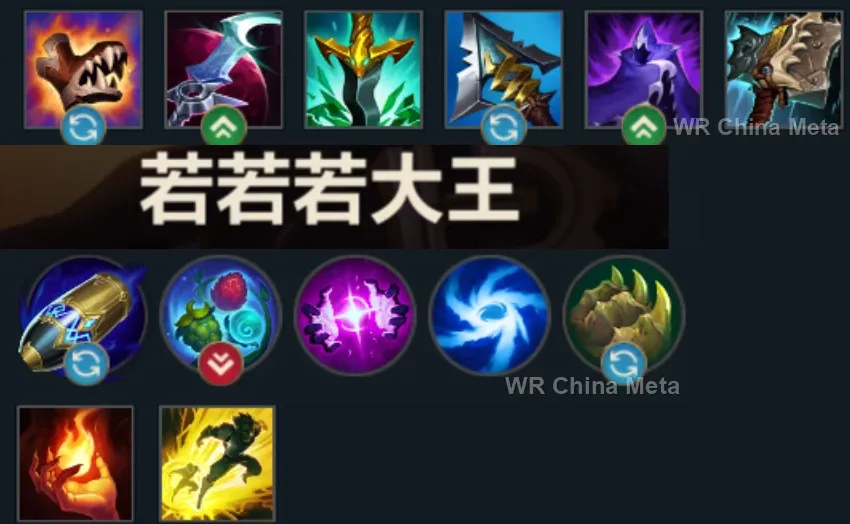
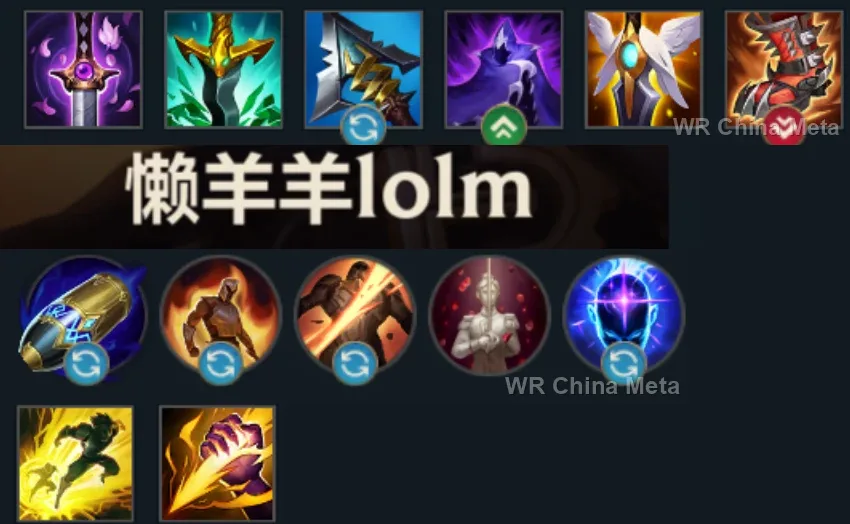
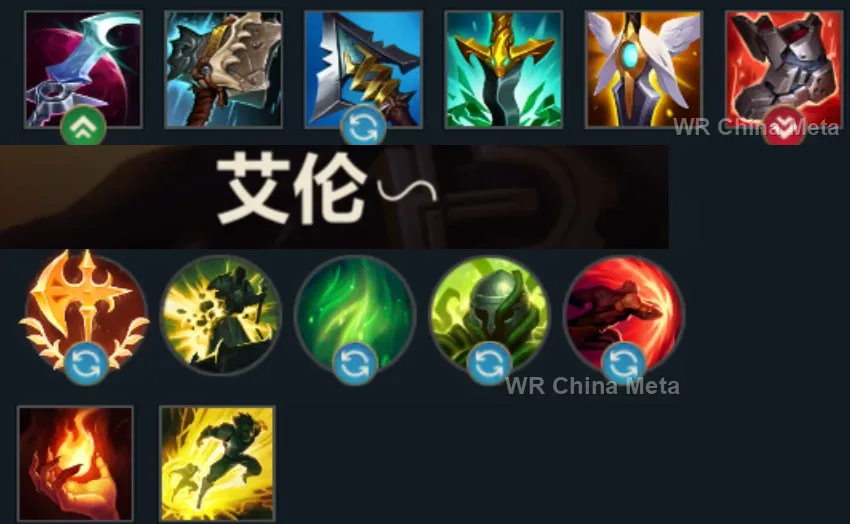
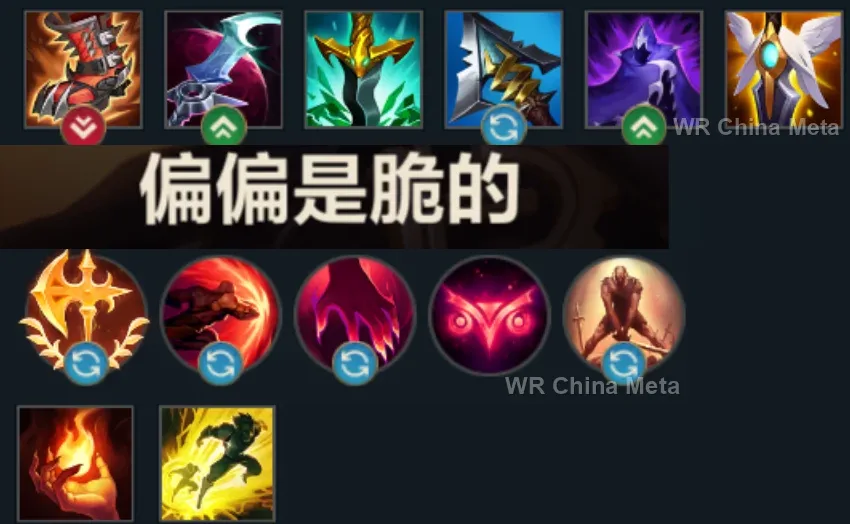
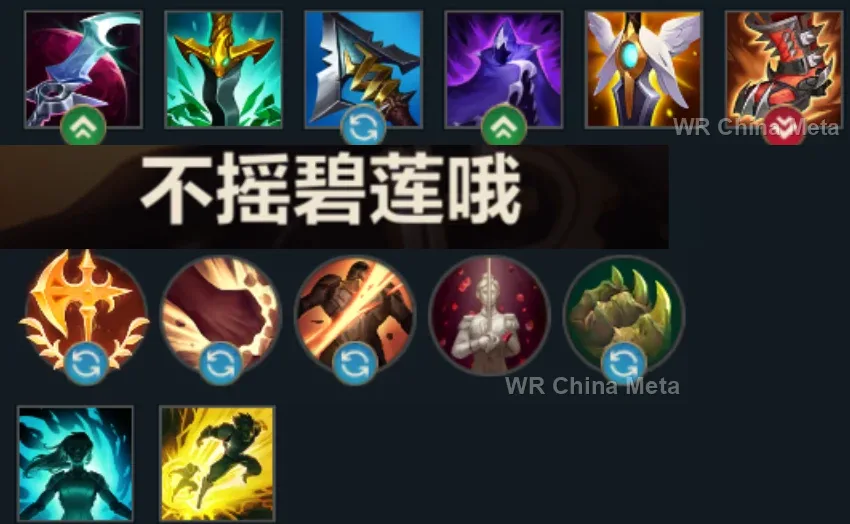
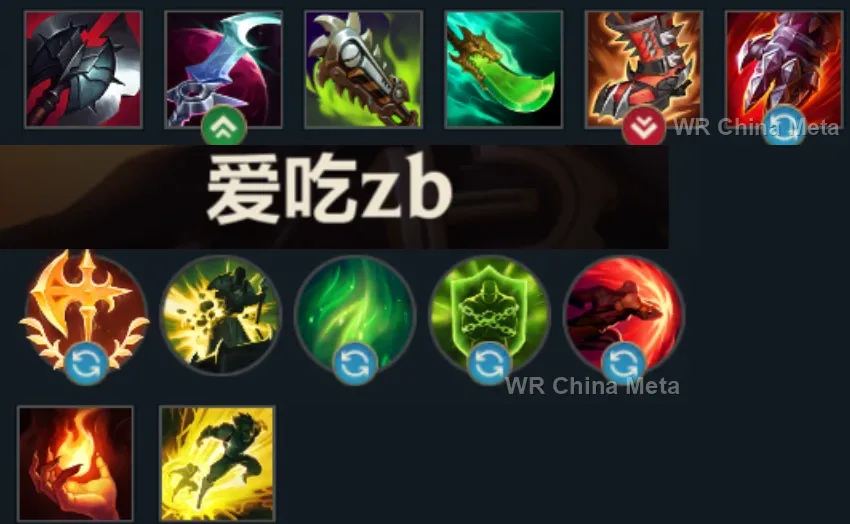
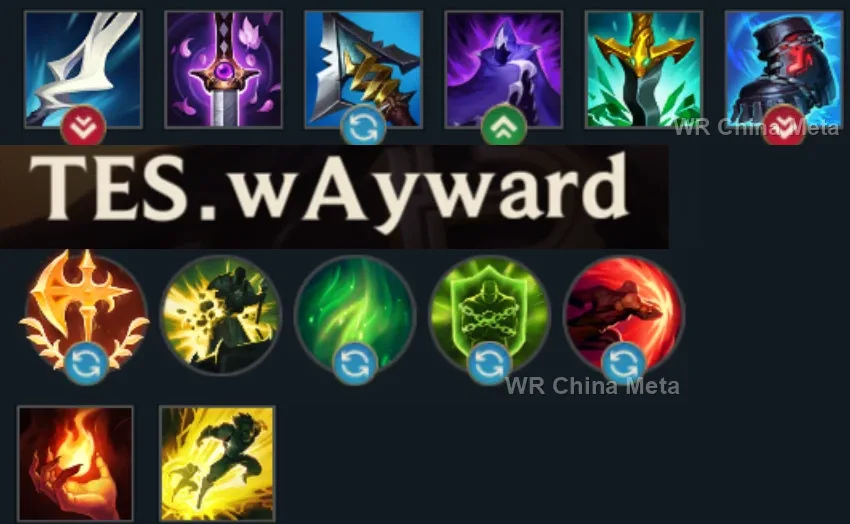
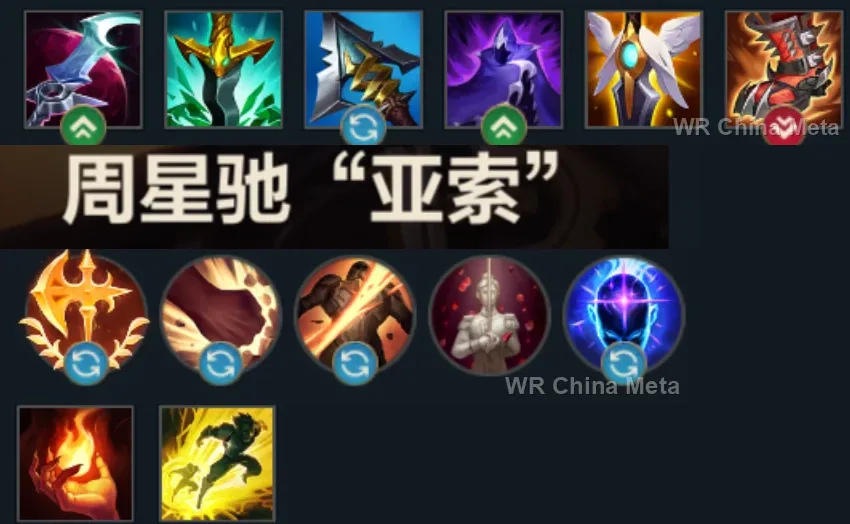
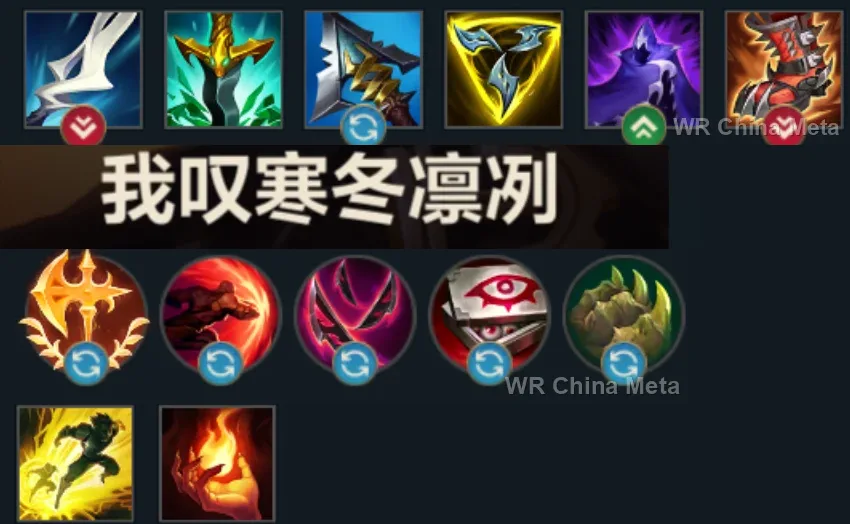
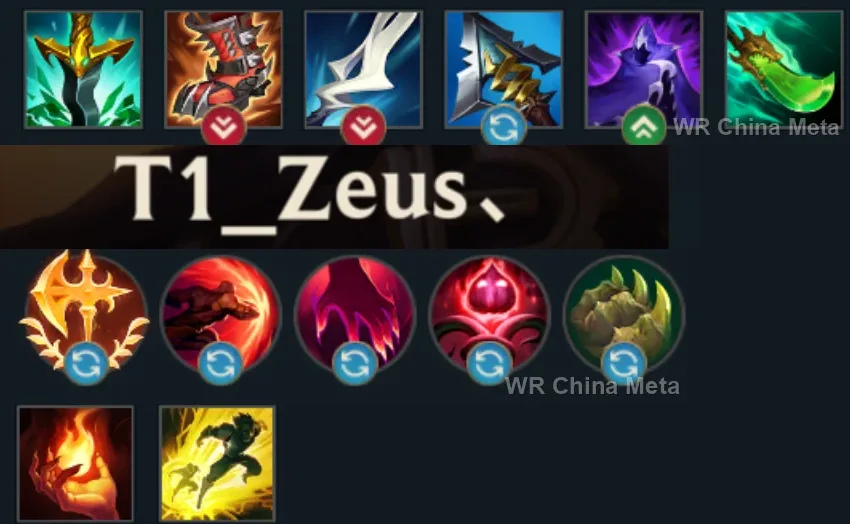
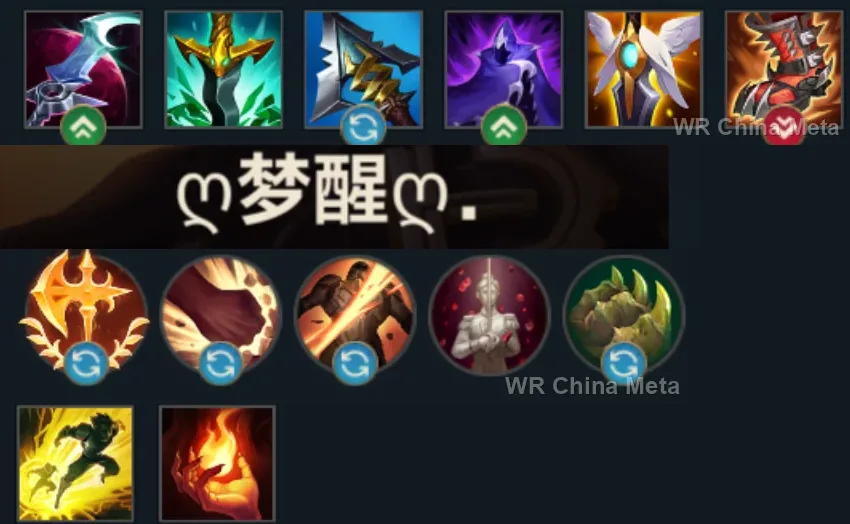
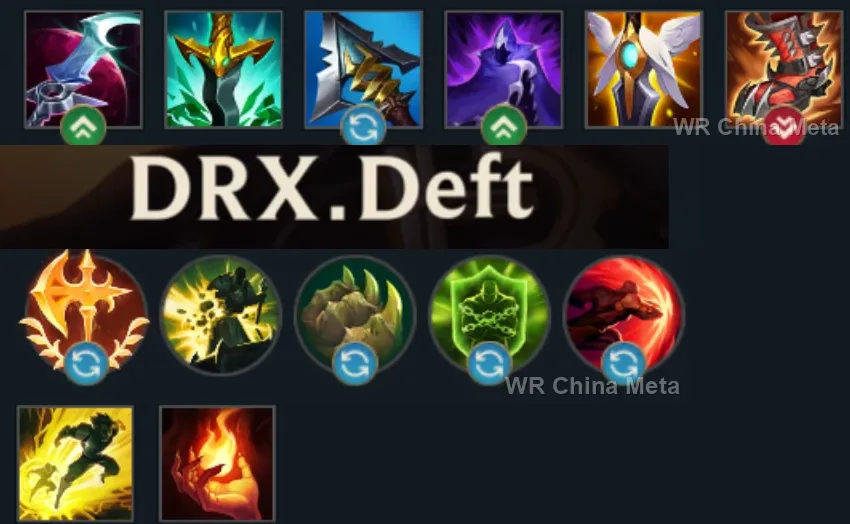
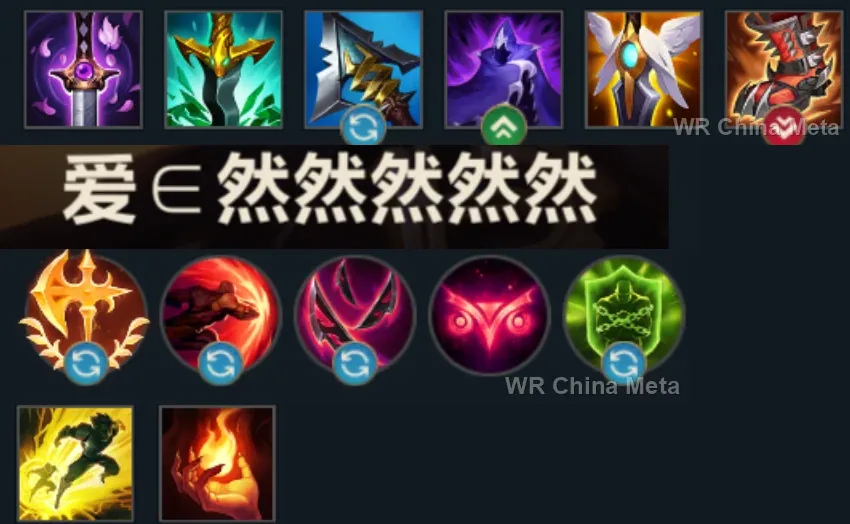
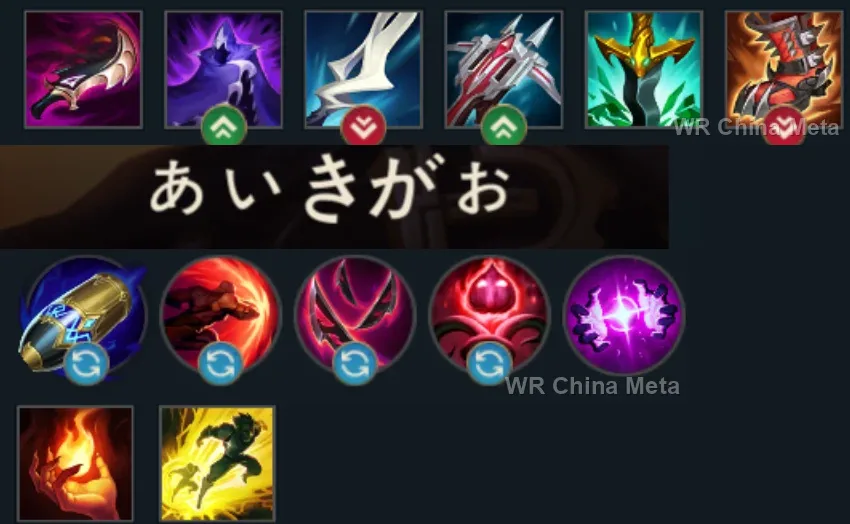
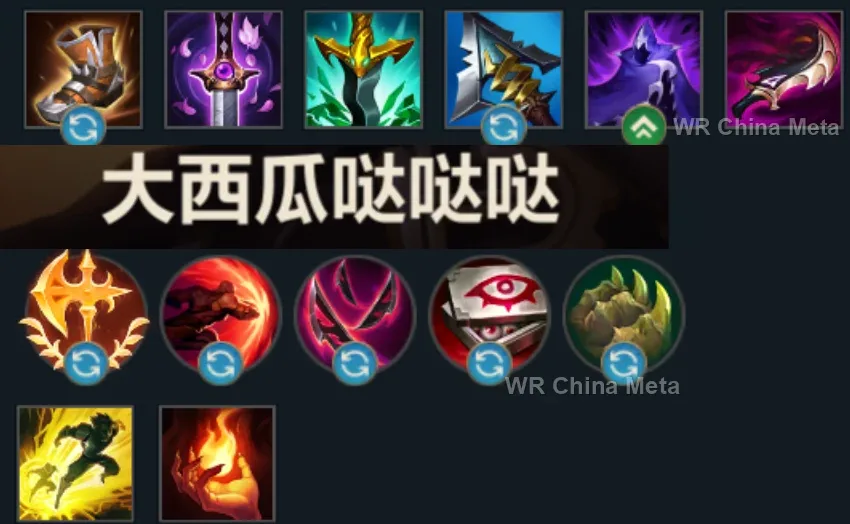
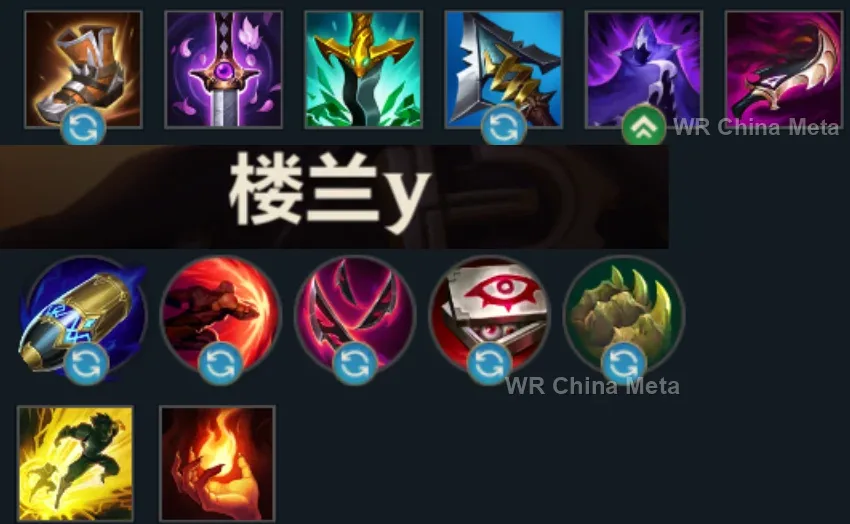
The toughest lane matchups for Jayce on the Wild Rift China server, with why each is hard and exactly how to play it.
 Jayce vs Malphite Unfavorable
Why Malphite counters Jayce: Armor absorbs your fully physical kit: cannon poke bounces off the mountain.
How to play Jayce into Malphite: Cannon poke only to deny him minions. Never trade in melee. In fights target the carries: treat Malphite as furniture.
→ Malphite Jayce vs Fiora Unfavorable
Why Fiora counters Jayce: Riposte blocks your knock-back or the empowered Q, and your hammer-form windows hand her the Vitals.
How to play Jayce into Fiora: Stay at range in cannon form while her Riposte is up. Switch to hammer ONLY to finish below 40%.
→ Fiora Jayce vs Kayle Skill matchup
Why Kayle counters Jayce: Your early game switches her off, her late game switches you off: the hammer racing the clock.
How to play Jayce into Kayle: Beat her down before her 5 with cannon poke combos and call your jungler. Every tower plate taken now is a teamfight won later.
→ Kayle Jayce vs Jax Skill matchup
Why Jax counters Jayce: His Counter Strike cancels your hammer-form flurry and his scaling outgrows your mid-game gold peak.
How to play Jayce into Jax: Live in cannon form: kite his Counter Strike and punish his jump with the acceleration-gate combo. Push to close inside YOUR mid game.
→ Jax Jayce vs Teemo Skill matchup
Why Teemo counters Jayce: The blind stops the hammer and kiting slows your walk, but the cannon outranges him and the combo executes him.
How to play Jayce into Teemo: Stay in cannon and win the poke: acceleration gate plus Q needs no blinded basic attacks. Hammer only when he is below half health.
→ TeemoThe champions Jayce works best alongside on the Wild Rift China server, lane by lane, with the reason each pairing works.
Your page says you have no shields and no heals and that one bad engage kills you: Crescent Guard (R) knocks everyone back except the target marked with Wind Becomes Lightning (W) and blocks ranged damage. It leaves you exactly what you need: one isolated target and nobody on you.
Armour stacking switches off half your kit: Cursed Touch (P) adds true damage to every magic tick you deal, meaning Lightning Field (W), Thundering Blow (E) and the empowered attack after Mercury Hammer (R). Curse of the Sad Mummy (R) hands you a still target.
Your page says a well-timed parry turns your all-in into a death sentence: Frenzying Taunt (E) is point-and-click, cannot be dodged and cannot be parried, and a taunted target cannot press anything while To the Skies! (Q) lands on them.
Your cannon-form poke leaves targets under half health, which is exactly the threshold where Blood Hunt (W) reveals them and gives him the speed to reach them. Then the one-second suppress from Infinite Duress (R) holds the body still for your combo.
Thundering Blow (E) knocks a target away from its team, which is exactly the isolation condition Taste Their Fear (Q) pays bonus damage for. Worth it if the two of you can agree on the target: he is still a 49.3% jungler in China.
Your kit contains no shield at all: Hero's Entrance (R) lands on you from anywhere on the map when a flank goes wrong, and the Shield of Durand (W) taunt holds your isolated target still for the whole leap-auto-knockback sequence.
Your number two weakness is armour, which blunts the leap, your basic attacks and cannon form all at once: Spirit Fire (E) shreds it. And Wither (W) strips movement and attack speed from the duelist who reaches you, which is the other way you die.
Command: Protect (E) attaches the Ball to you with a shield, armour and magic resist: the only defensive tool you will get, and it travels with you into the flank. Then Command: Shockwave (R) drags whoever was running back into your range.
You are two players who show up where nobody is looking: Destiny (R) reveals the whole map and teleports him into the pick you just opened. And the Gold Card from Pick a Card (W) stuns for 1.25 seconds, about as long as your combo takes.
Ring of Frost (W) roots and Frozen Tomb (R) freezes the same target: close to three seconds in which it can neither parry nor dash away, which is the exact window where To the Skies! (Q), the empowered attack and Thundering Blow (E) all land.
Frost Shot (P) slows with every single hit: a slowed target cannot walk out of To the Skies! (Q) range and cannot sidestep a Shock Blast (Q) accelerated through Acceleration Gate (E). Then Enchanted Crystal Arrow (R) opens the pick from off-screen.
Thundering Blow (E) shoves an isolated target back into your own team: home delivery for a carry whose page says she is ordinary outside point-blank range. And Acceleration Gate (E) is the movement speed that gets her there.
Deadly Flourish (W) roots anyone an ally has just hit: one max-range Shock Blast (Q) arms that root half a screen away, and you leap onto a body that can neither move nor parry any more.
Arc of Judgment (W) slows a target almost to a standstill, and To the Skies! (Q) does not miss that. In return her page says she has no dash at all: Acceleration Gate (E) is the only movement speed anyone will ever hand her.
Worth it in poke-shaped games: two champions hitting from outside their range force the enemy to walk in, and the mid game is your window. But beyond the Hextech Capacitor (P) speed burst, neither of you has any way to stop a hard engage.
Concussive Blows (P) also stacks from ally hits, and Hyper Charge (W) gives you three very fast attacks: three marks in a second and the stun almost lands by itself. And Unbreakable (E) stops the shot that kills a flanker with no shields.
Your page says a point-and-click stun or silence shuts down your transform-in before you do anything at all: Black Shield (E) eats it. And a two-second Dark Binding (Q) root is a target that cannot parry you.
Death Sentence (Q) hands you the isolated target that is actually worth transforming for, and the Dark Passage (W) lantern is the way out the instant the combo is spent and you are still standing among them.
Tidecaller's Blessing (E) loads bonus damage and a slow onto your next basic attacks: they all land on the three hits of Hyper Charge (W) and on the empowered attack after Mercury Cannon (R). Aqua Prison (Q) meanwhile holds the target still.
The Zenith Blade (E) root into the Shield of Daybreak (Q) stun takes away the window to parry, the one thing that switches off your all-in. And Solar Flare (R) extends the chain if the target still tries to leave.
Worth it when the enemy punishes every retreat: a Mantra (P) empowered Inspire (E) gives you a shield and movement speed the instant you leave the combo, and Focused Resolve (W) roots from range the target you want isolated. It is utility, not damage.
| Lane | Tier | Win% | Pick% | Ban% | Pos. |
|---|---|---|---|---|---|
| Baron | C | 48.84% | 2.33% | 1.06% | #34 / 41 |
| Mid | D | 47.75% | 1.29% | 1.06% | #37 / 39 |
| Lane | Tier | Win% | Pick% | Ban% | Pos. |
|---|---|---|---|---|---|
| Baron | C | 48.69% | 2.34% | 1.14% | #34 / 41 |
| Mid | D | 47.41% | 1.28% | 1.14% | #36 / 38 |
| Lane | Tier | Win% | Pick% | Ban% | Pos. |
|---|---|---|---|---|---|
| Baron | C | 49.03% | 2.56% | 1.55% | #31 / 41 |
| Mid | D | 47.69% | 1.36% | 1.55% | #35 / 39 |
| Lane | Tier | Win% | Pick% | Ban% | Pos. |
|---|---|---|---|---|---|
| Mid | C | 49.96% | 1.86% | 3.02% | #29 / 41 |
| Baron | D | 48.27% | 3.5% | 3.02% | #37 / 39 |


Jayce, the Defender of Tomorrow, is a mechanically demanding dual-form fighter for the Wild Rift top lane, swapping between the melee Mercury Hammer and the ranged Mercury Cannon stance on demand with his ultimate transform. His damage is a genuine physical-and-magic mix - a physical leap and auto-attacks alongside a magic-damage zone and knockback - but he plays more like a burst assassin than a sustained bruiser, poking safely from range before diving in for one decisive combo. He has a high damage ceiling and a high skill ceiling to match, but he's fragile, so his games are won by picking the right moment to commit rather than by grinding out extended fights.
Skill order: Q > E > W (max R whenever it's available)
Start the lane in Mercury Cannon stance and lean on ranged autos to poke safely - trading in melee Hammer form before Q comes online around level 3-4 is rarely worth it. Once Q is up, look for the first real all-in window: transform in, leap with Q, weave the empowered auto, and follow with E to lock the fight down before backing off again. Use Lightning Field to help clear the wave and restore mana between trades rather than hoarding it purely for burst, and remember every transform grants a free burst of movement speed to reset spacing after a trade goes wrong.
Jayce is a flank-and-pick fighter rather than a frontline one - sit near the edge of the fight in Cannon form, chip down priority targets from range, and only transform in once a single squishy target can be isolated for the full leap-auto-knockback burst. Use Thundering Blow either offensively, shoving an isolated target back into the team, or defensively, peeling a diver off the backline. Because his survivability is low, he shouldn't linger once the combo is spent - get in, take the pick or the damage, and use the mobility to get back out rather than trading blows on the front line.