
WR China Meta
Meta, tier list & top-player builds from the China server · live
Meta, tier list & top-player builds from the China server · live

布隆 · 弗雷尔卓德之心 Tank S
✅ Patch 7.2e · stats updated 2026-09-12 · real builds of 23 top-ranked China server players captured 2026-09-11
Difficulty Damage Toughness Utility
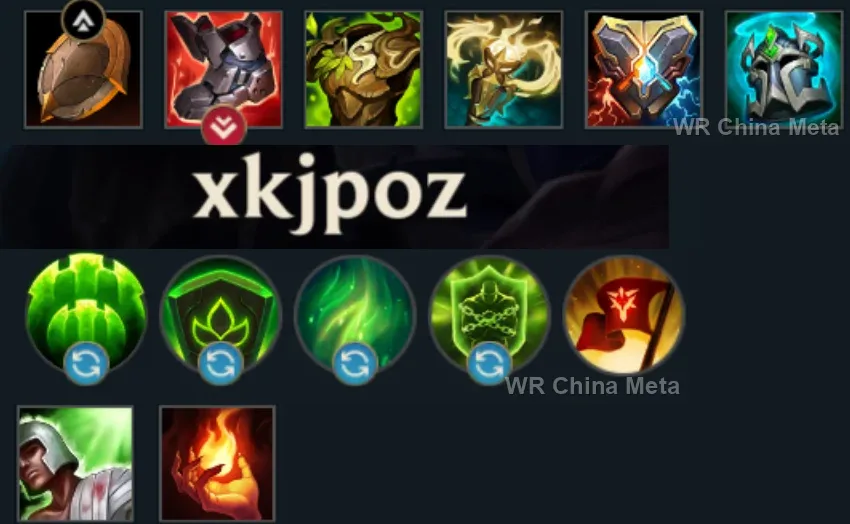
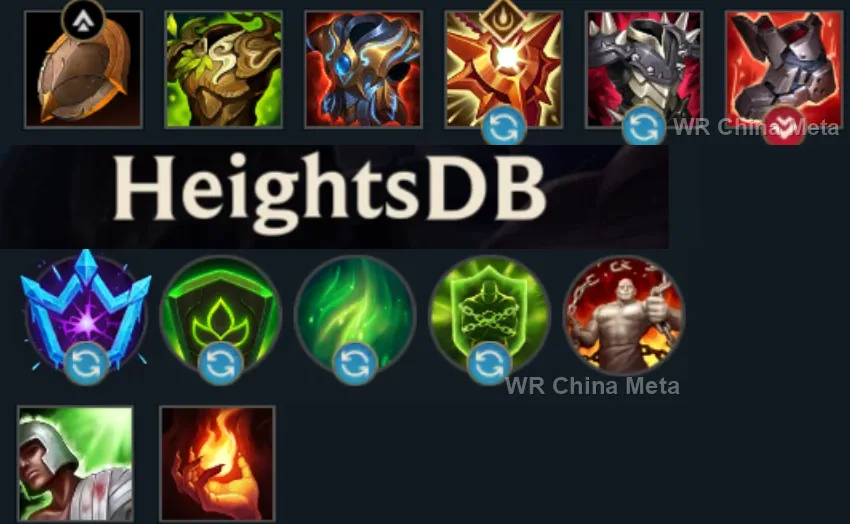
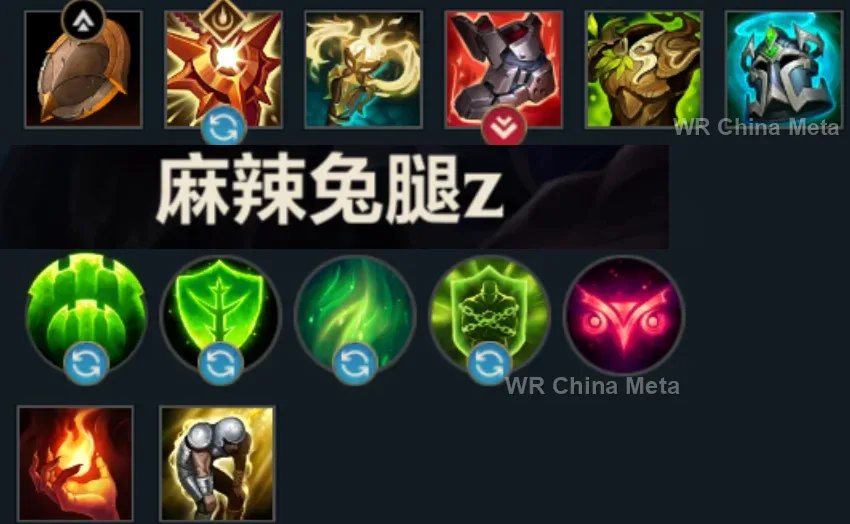
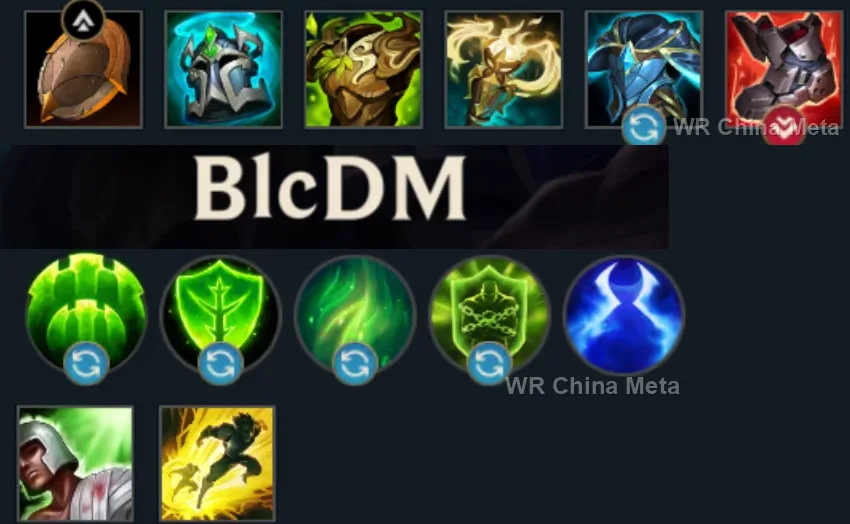
How the strongest players on the Wild Rift China server (国服) build Braum: live win/pick statistics by rank bracket, the most-used item and rune sets, and the real loadouts of the top ranked Braum players, captured in-game.
📖 How to play Braum


Counted on 25 real builds captured from the Chinese client, player by player. Independent from the official API above.


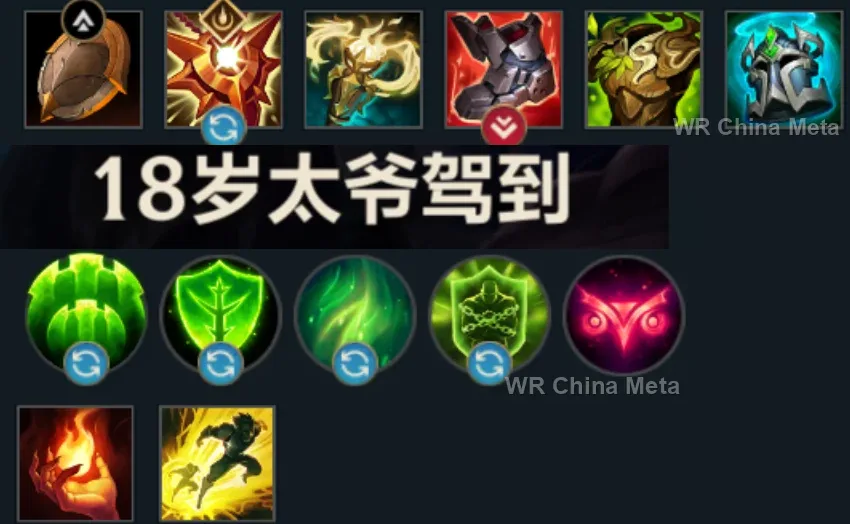
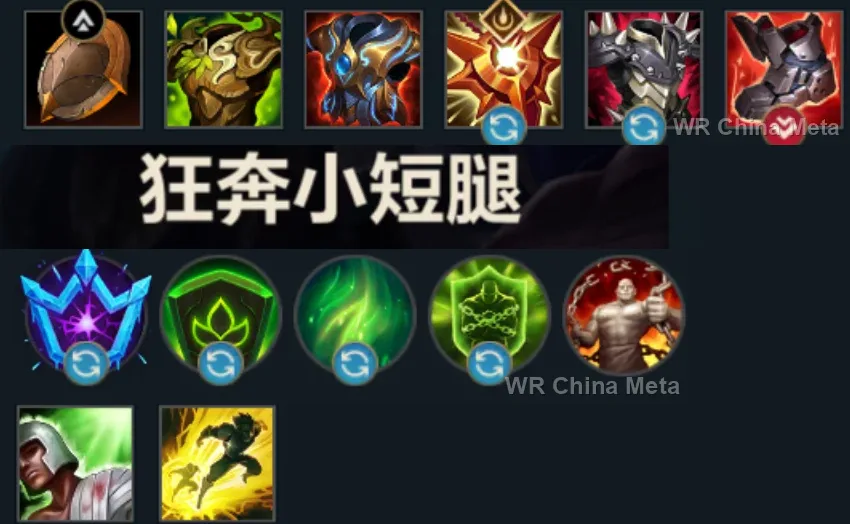
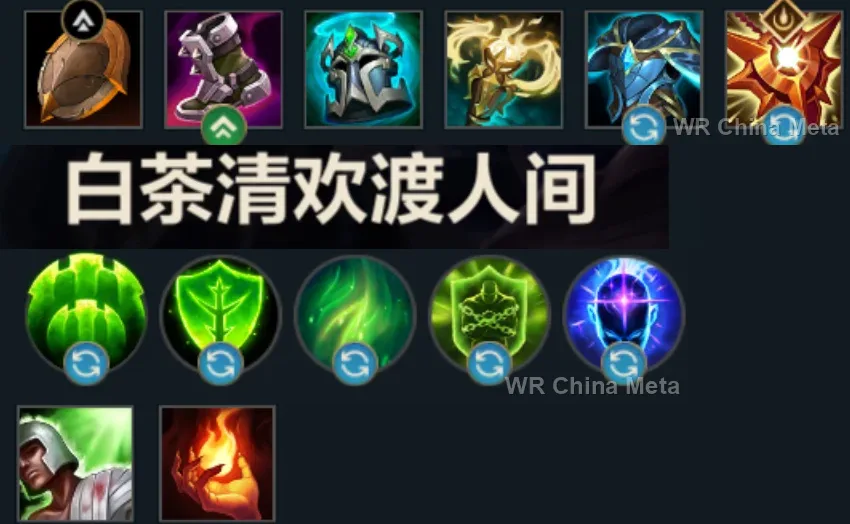
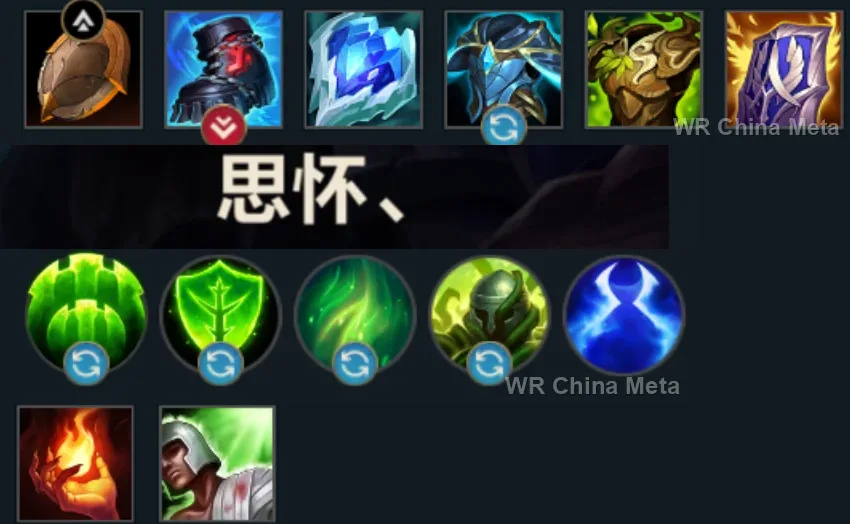
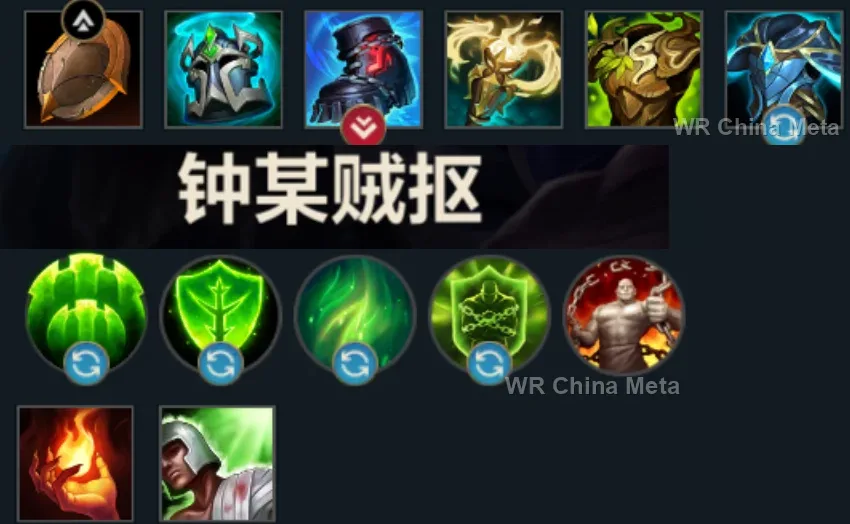
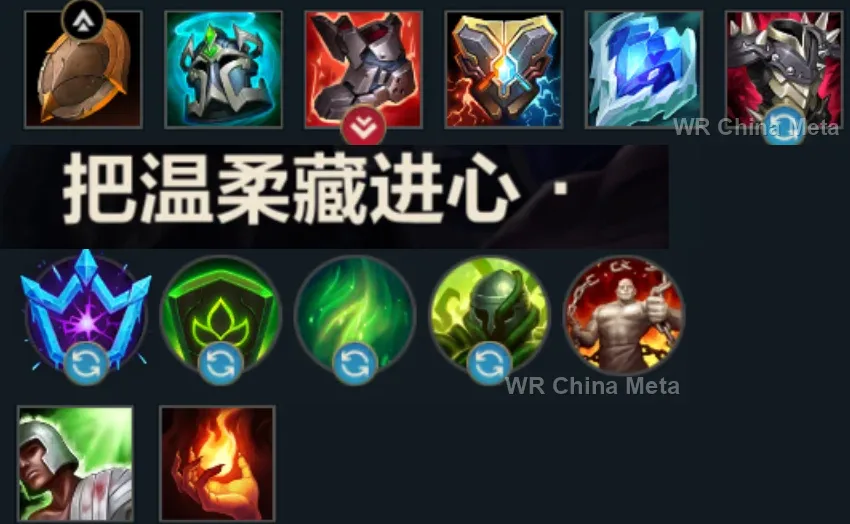
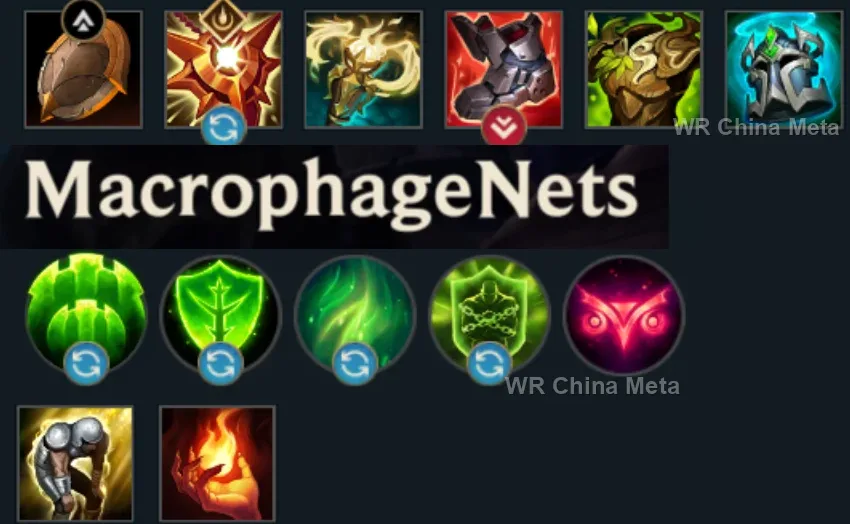
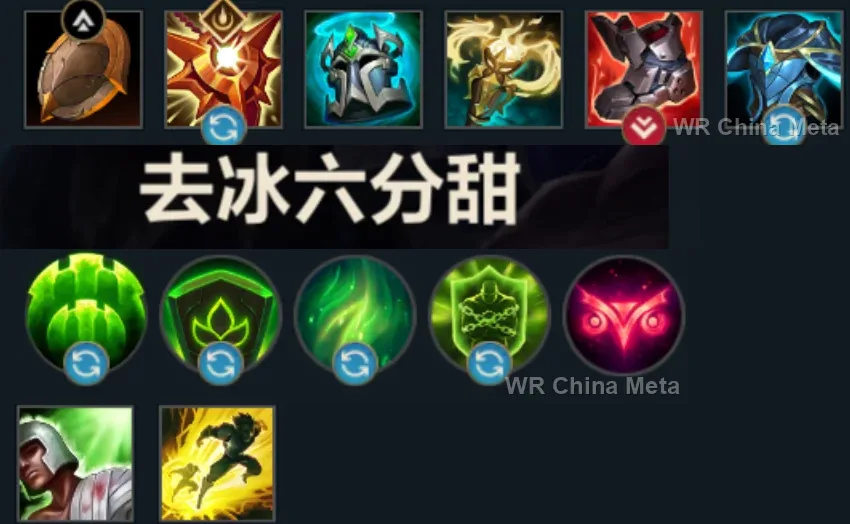
Taken from the official in-game China leaderboard. Spells, runes and items of every public top player.
23 of the top 30 players have a public match history; the others keep theirs private.
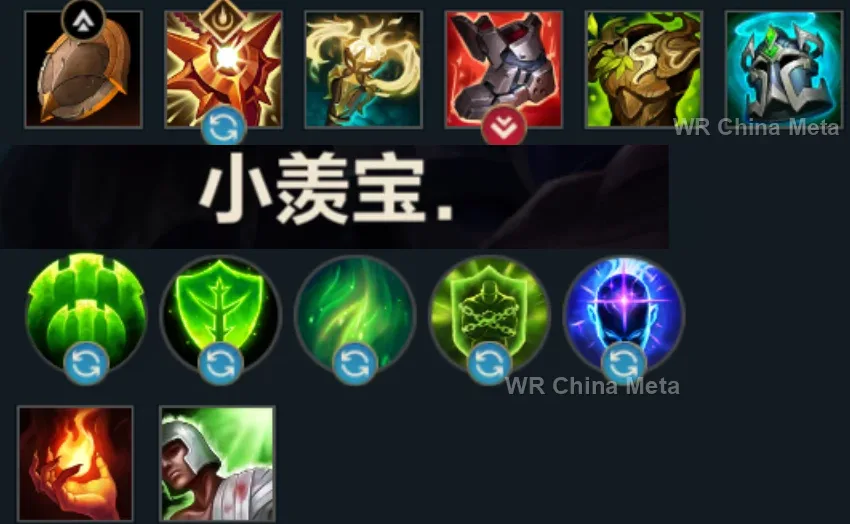
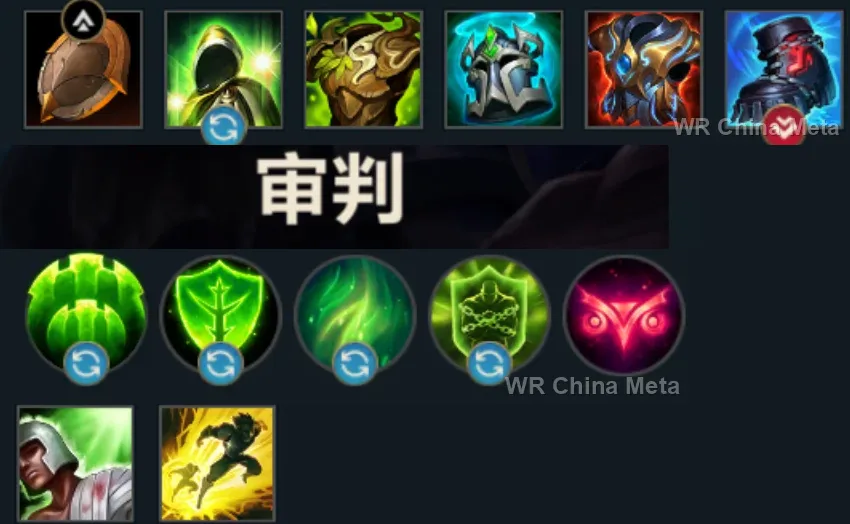
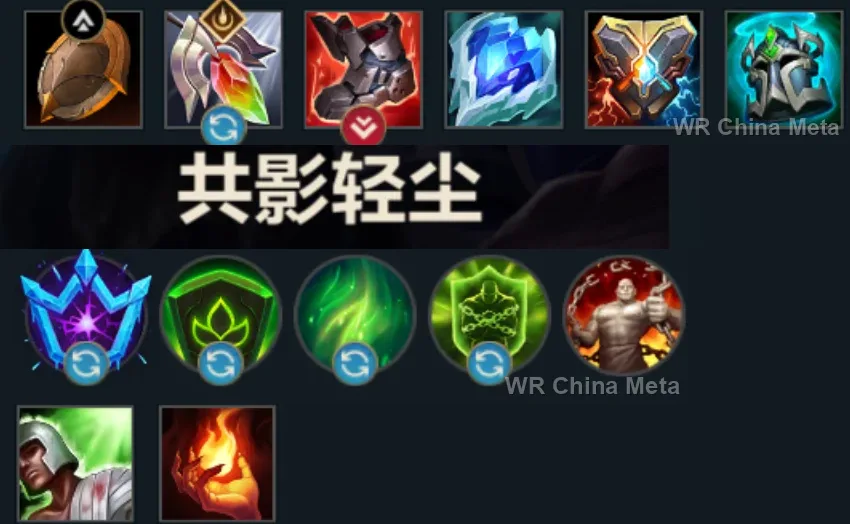
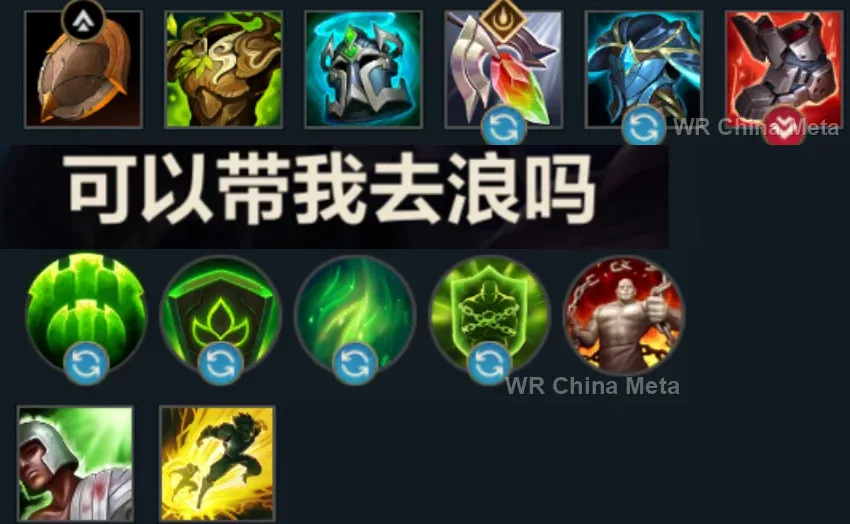
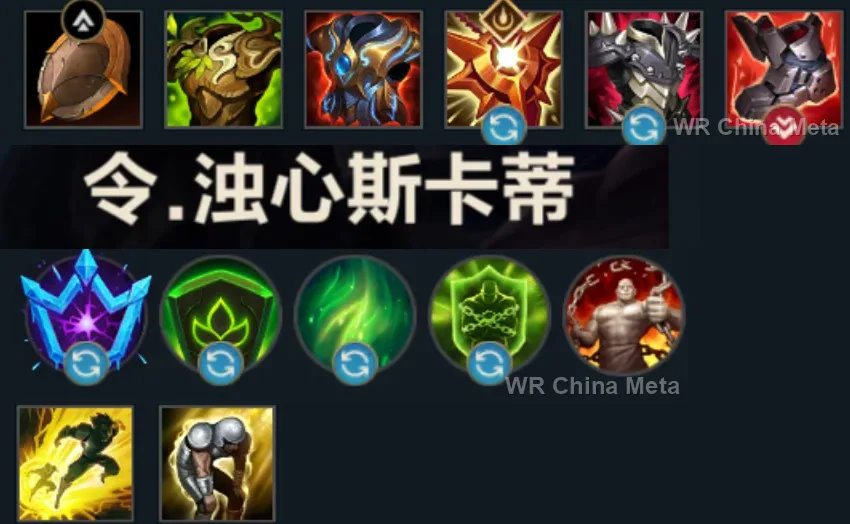
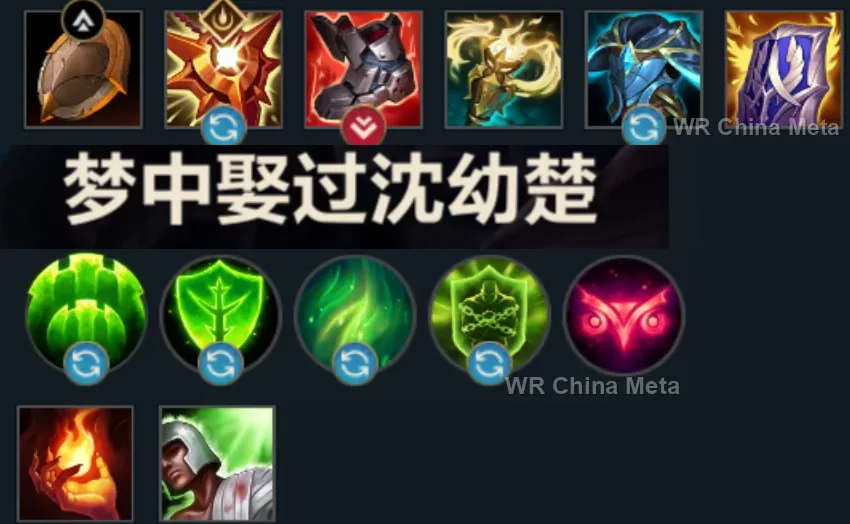
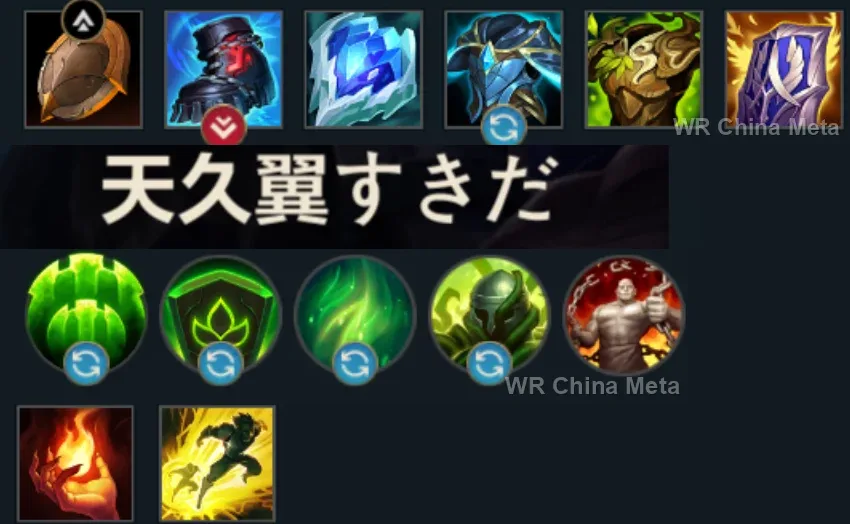
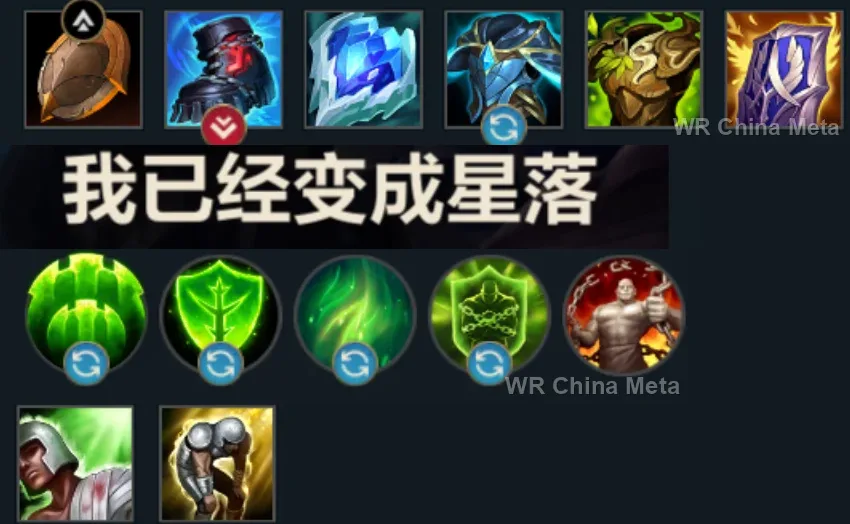
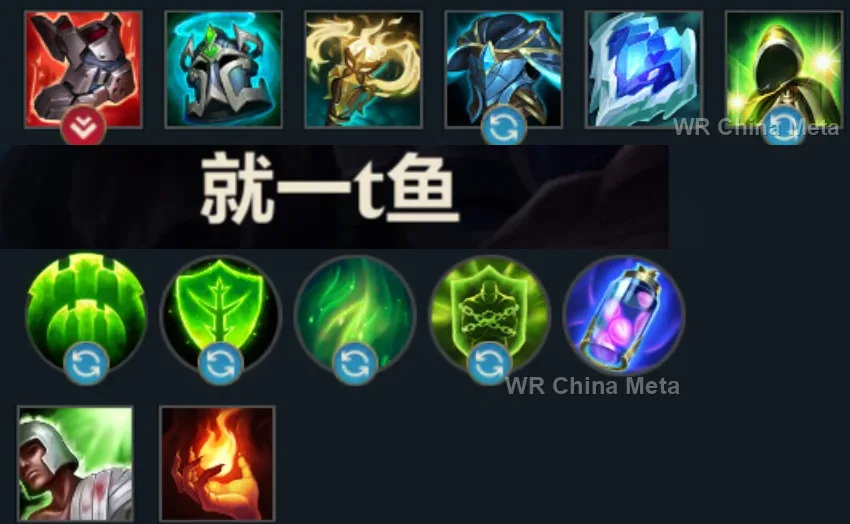
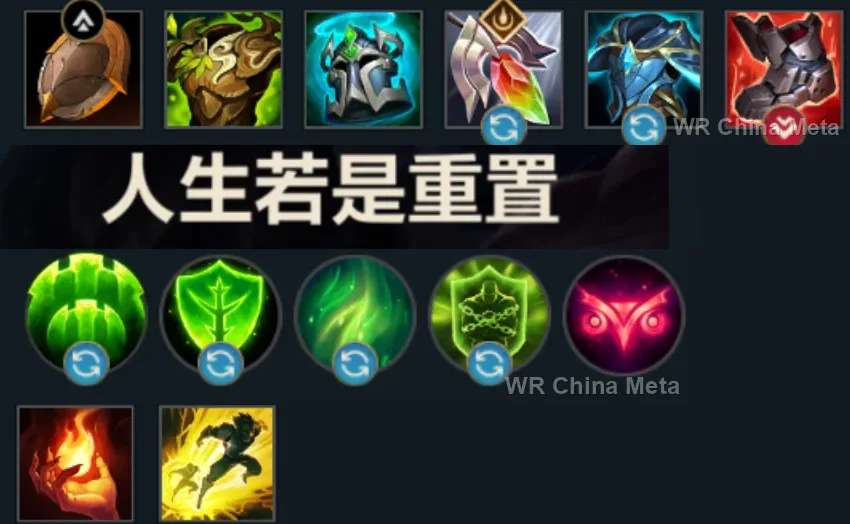
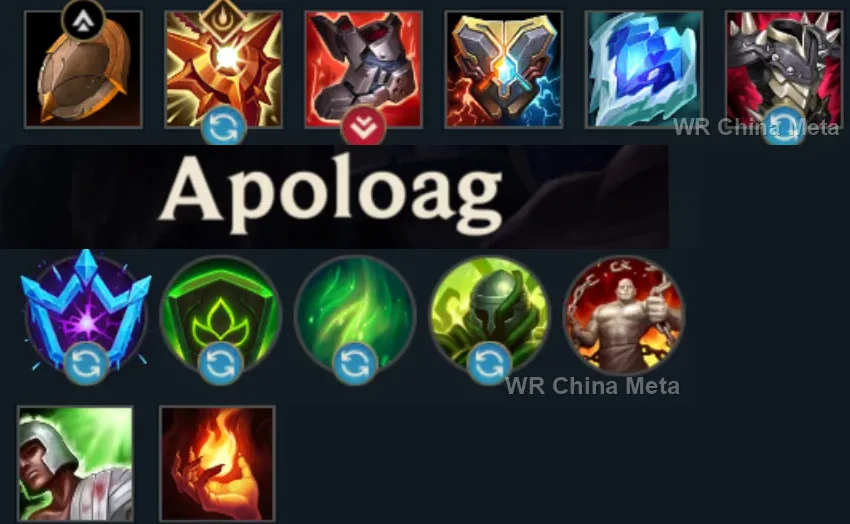
The toughest lane matchups for Braum on the Wild Rift China server, with why each is hard and exactly how to play it.
 Braum vs Zyra Unfavorable
Why Zyra counters Braum: Her plants hit from every side and go around your wall, while constant poke drains your slow-charging passive.
How to play Braum into Zyra: Wall on the path of her Qs and stomp the seeds the moment she plants them. Engage right after she has wasted her plants.
→ Zyra Braum vs Lulu Skill matchup
Why Lulu counters Braum: Polymorph stops your jump and her shields make your poke useless: defense versus defense, and hers is more flexible.
How to play Braum into Lulu: Play reactively: wall and jump are answers, not openers. Your value is saying no to enemy engages: wait for them.
→ Lulu Braum vs Sona Skill matchup
Why Sona counters Braum: She pokes you from afar while your passive needs melee range: she plays her tune from safety and never engages.
How to play Braum into Sona: Wall her power chord and jump to your ADC when she walks up for Q. In a real 2v2 with engage, Sona disappears.
→ Sona Braum vs Milio Skill matchup
Why Milio counters Braum: His cleanse strips your passive's stun and his fire poke goes around your wall in lane.
How to play Braum into Milio: The wall stops his Q: it is a projectile, use it there. Build the stun in two stages: first hit, pause to make him spend the cleanse, then the real concussion.
→ Milio Braum vs Blitzcrank Skill matchup
Why Blitzcrank counters Braum: His hook hunts your ADC and you exist precisely to deny it: this matchup is your job description.
How to play Braum into Blitzcrank: Always keep your body between hook and carry. If he hooks you, that is a bargain: tank it and stun. Win through boredom: Blitzcrank lives off other people's mistakes.
→ BlitzcrankThe champions Braum works best alongside on the Wild Rift China server, lane by lane, with the reason each pairing works.
The Relentless Storm (P) makes him swing faster and faster, and every hit of his counts toward your marks: Concussive Blows (P) reaches the fourth while he is still biting. And Glacial Fissure (R) is the area control his page says he never brings.
Relentless Assault (P) makes him hit faster and faster, and the four marks fill from your hits combined: the stun lands halfway through the duel. Counter Strike (E) adds its own right after, and the target never finds a free moment.
Bellows Breath (W) leaves Brittle on the target for 3 seconds and stretches every following piece of crowd control by 30%: your fourth mark and the Glacial Fissure (R) knock-up both run noticeably longer. Two front lines like that do not move for one engage.
You mark, slow and knock up but you kill nobody on your own; with no pull he reaches nobody, because Apprehend (E) is all the range he has. Winter's Bite (Q) keeps the target in place until Noxian Guillotine (R) executes it.
Soul Unbound (E) always snaps his spirit back on a fixed timer and that is when they punish him, his page says: Stand Behind Me (W) drops you in front of him at exactly that moment, armour and magic resist included. The damage is his job.
Worth it only if the other three bring the damage, because between the two of you nobody dies: in exchange, neither does your carry. Stand United (R) shields her from anywhere on the map and Shadow Dash (E) taunts the diver you were already slowing.
A dash or a piece of crowd control is all it takes to break Infinite Duress (R) - unless the target has just taken the fourth Concussive Blows (P) mark. And the two of you fill that fourth mark together, at the attack speed Blood Hunt (W) hands him.
His stated gap is that mobile targets dash away before Audacious Charge (E) connects: Winter's Bite (Q) slows them enough for him to land it. Then the three hits of Three Talon Strike (Q), the third of which knocks up, close the four marks together with yours.
Your limit is that you lock targets down without killing them: Savagery (Q) always crits after an Unseen Predator (P) leap, and that is exactly the damage you lack. If the leap does not finish it his page says he has nothing left - that is where Unbreakable (E) points at him.
Absolute Zero (R) is a long channel that, his page says, is beaten by walking away: nobody walks away from a line Glacial Fissure (R) has just knocked up and left slowed. And Biggest Snowball Ever! (W) only asks for the time you buy in front of him.
Lamb's Respite (R) gives three seconds in which nobody inside it dies: with your body in front and Unbreakable (E) raised, those three seconds win the teamfight instead of postponing it. And the 25% attack speed from Dance of Arrows (Q) fills your marks by itself.
Nobody fills the four marks like he does, but he is also the jungler with the least crowd control and the lowest win rate in this group: worth it when the game runs long and you can keep him alive, not when you need someone to open fights for you.
Glacial Fissure (R) sends a whole line airborne and Last Breath (R) hooks onto anyone an ally launches: it is the damage you flatly do not have, multiplied by however many the fissure caught. Wind Wall (W) meanwhile stops the poke that keeps you away.
The 1.5-second taunt on Shield of Durand (W) holds still the target you need to hit four times: it is the condition Concussive Blows (P) asks for and almost nobody grants you. And while he charges it, stationary and exposed, you are the wall in front.
The 50% bonus on Vision of Empire (W) demands a target that is already locked down, and you offer him two kinds: the fourth Concussive Blows (P) mark and the line Glacial Fissure (R) lifts. He never has to risk Nevermove (E), the skillshot he whiffs most.
He is C tier, but the link is exact: whoever stands still under your four marks takes all three Organic Deconstruction (P) stacks without dodging anything, and from there Life Form Disintegration Ray (R) turns into true damage. You are what lets him channel.
Worth it if your mid plays for rotations: Destiny (R) drops him into the bot lane and the Gold Card from Pick a Card (W) pins the target for 1.25 seconds, exactly the window your four marks need. If he just farms mid instead, it changes nothing.
His damage only exists while he stands still at maximum range, and his page says that without a team peeling for him he never gets to: you are that team. In exchange the fast hits from Bio-Arcane Barrage (W) close your four marks on their own.
Concussive Blows (P) asks for four close-range hits on the same target, and the permanent slow from Frost Shot (P) is what stops that target from leaving your reach. Then Enchanted Crystal Arrow (R) opens from off-screen the fight you cannot open yourself.
Winter's Bite (Q) deals damage while it slows, and on a target an ally has just hit Deadly Flourish (W) becomes a real root instead of a poke shot: that hold hands you the hits your four marks are missing. And you cover the Curtain Call (R) channel.
Every target your four marks lock down turns into gold: League of Draven (P) converts that kill into Adoration stacks to cash in. And he has to stay in the middle catching axes, which is exactly the spot Stand Behind Me (W) lands you on.
His page says ganks and lane pressure push his whole plan back: Dragon Practice (P) only needs quiet repetitions, and Unbreakable (E) eats the poke that denies them. Do not expect an aggressive lane, though: you fill the marks by yourself.
| Lane | Tier | Win% | Pick% | Ban% | Pos. |
|---|---|---|---|---|---|
| Support | A | 51.65% | 3.95% | 1.21% | #7 / 34 |
| Lane | Tier | Win% | Pick% | Ban% | Pos. |
|---|---|---|---|---|---|
| Support | S | 51.69% | 4% | 1.24% | #6 / 34 |
| Lane | Tier | Win% | Pick% | Ban% | Pos. |
|---|---|---|---|---|---|
| Support | S | 51.59% | 3.96% | 1.14% | #4 / 33 |
| Lane | Tier | Win% | Pick% | Ban% | Pos. |
|---|---|---|---|---|---|
| Support | S | 51.8% | 4.38% | 0.96% | #6 / 33 |


Braum, the Heart of the Freljord, is Wild Rift's premier peel-and-setup Tank — a Support who deals almost no damage himself but turns every trade into a potential stun through his passive, Concussive Blows. His identity is built entirely around soaking damage and protecting his team: Unbreakable blocks incoming hits and projectiles, Stand Behind Me repositions him to shield an ally, and Glacial Fissure turns a grouped enemy team into knocked-up, slowed targets for his carries to clean up. He's less about winning lane 1v1 and more about making every other lane and teamfight safer for the people around him.
Skill order: Q > E > W
Lead trades with Winter's Bite to slow and mark the enemy laner, then follow with an autoattack to push Concussive Blows toward its stun — pair this with your ADC's damage to threaten a real all-in once the mark count gets close to four. Use Unbreakable to shrug off poke or eat an opponent's biggest hit rather than holding it back defensively, and prioritize keeping your ADC safe and on tempo over chasing kills yourself.
By the mid-game your role splits between initiating and peeling depending on how the fight starts: lead with Glacial Fissure into a grouped enemy team to knock up and slow their front line, ideally catching a priority carry in the blast, then follow in with Winter's Bite to punish anyone trying to walk away. When you're not the one engaging, hold Stand Behind Me and Unbreakable for whichever ally is being dove or focused, shielding them and buying time for your team to turn the fight around. Stay glued to the frontline near your own damage dealers rather than diving alone — you're the wall your team fights behind, not a solo threat.