
WR China Meta
Meta, tier list & top-player builds from the China server · live
Meta, tier list & top-player builds from the China server · live

崔丝塔娜 · 麦林炮手 Marksman D
✅ Patch 7.2e · stats updated 2026-09-12 · real builds of 26 top-ranked China server players captured 2026-09-11
Difficulty Damage Toughness Utility
How the strongest players on the Wild Rift China server (国服) build Tristana: live win/pick statistics by rank bracket, the most-used item and rune sets, and the real loadouts of the top ranked Tristana players, captured in-game.
📖 How to play Tristana


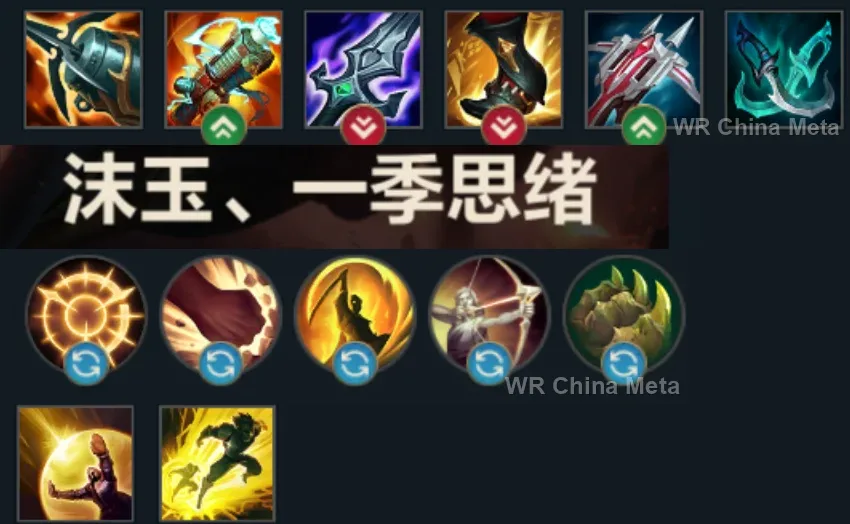
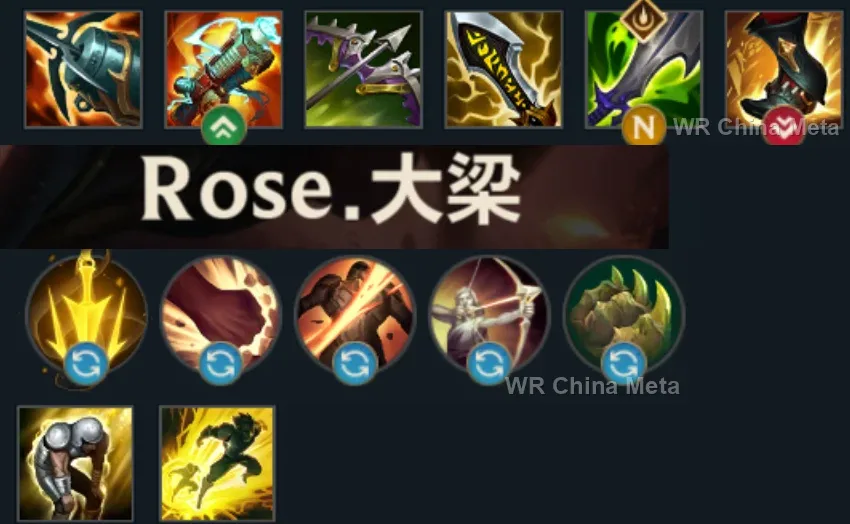
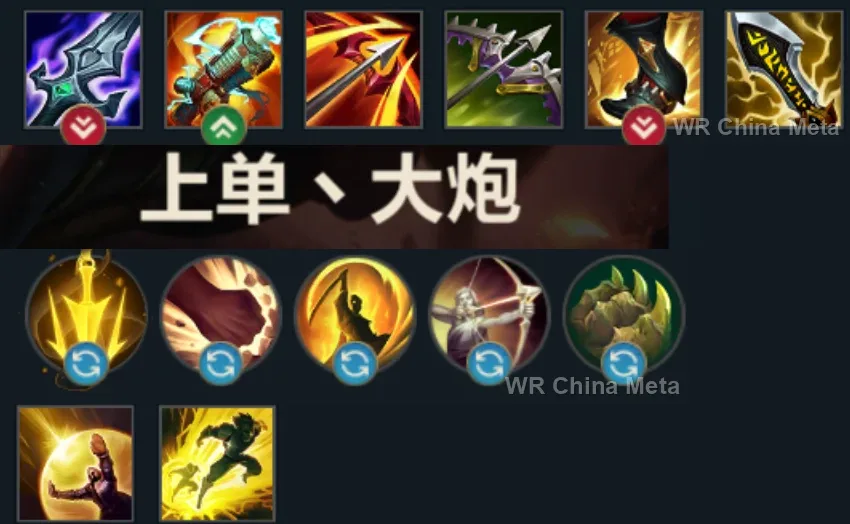
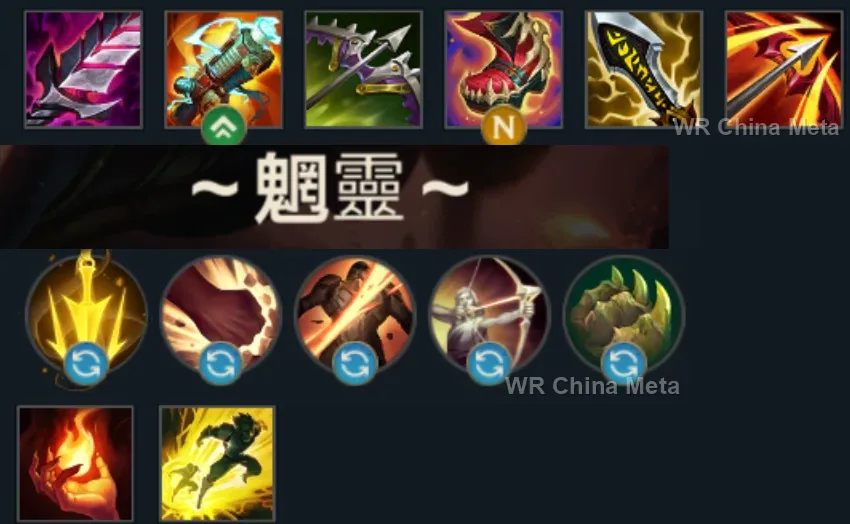
Counted on 28 real builds captured from the Chinese client, player by player. Independent from the official API above.


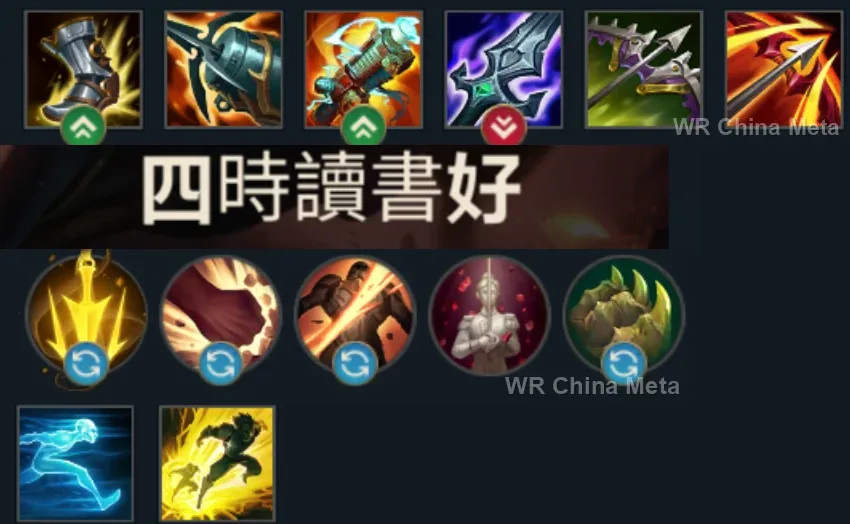
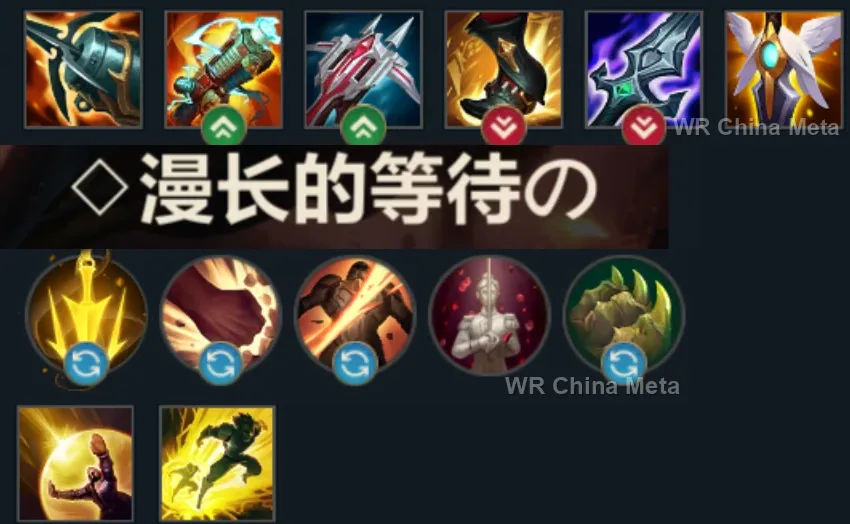
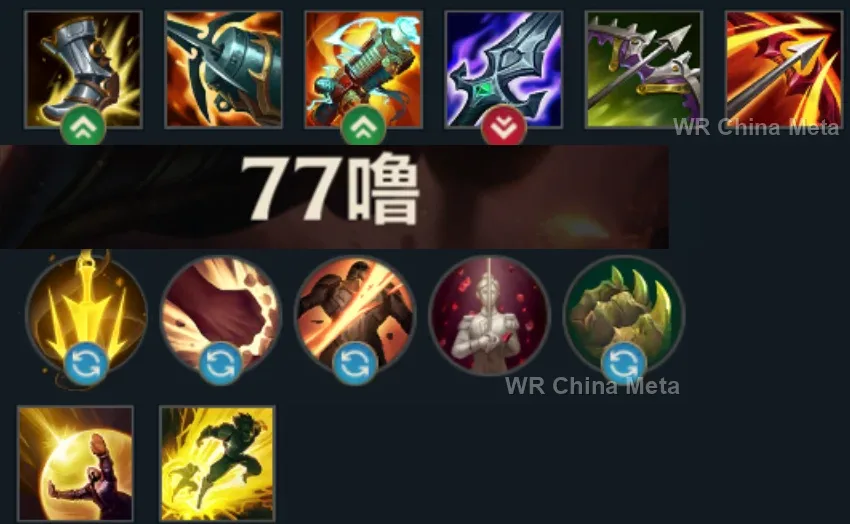
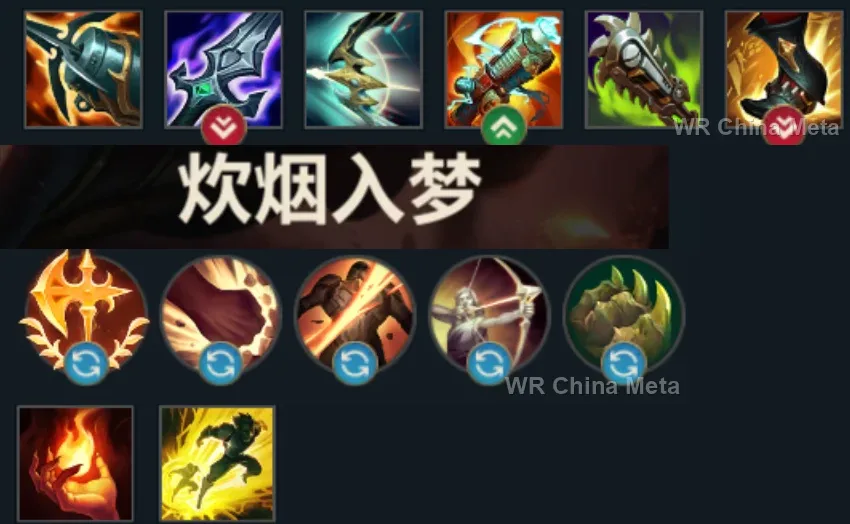
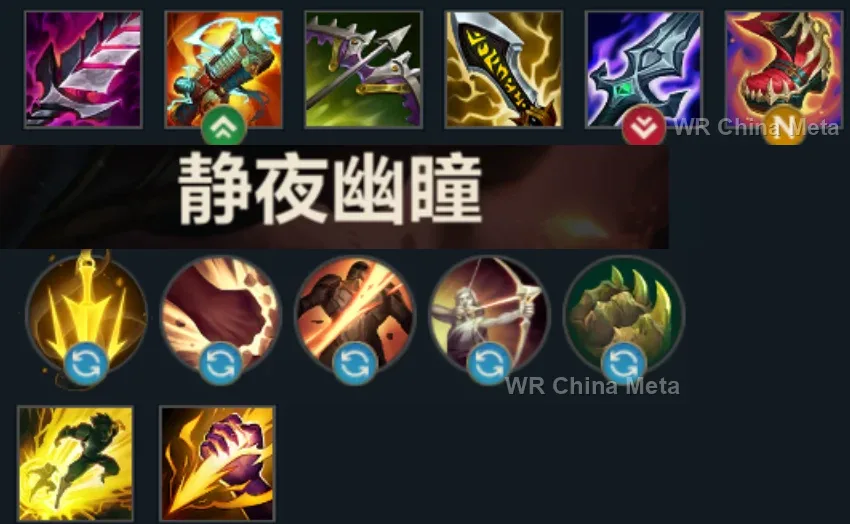
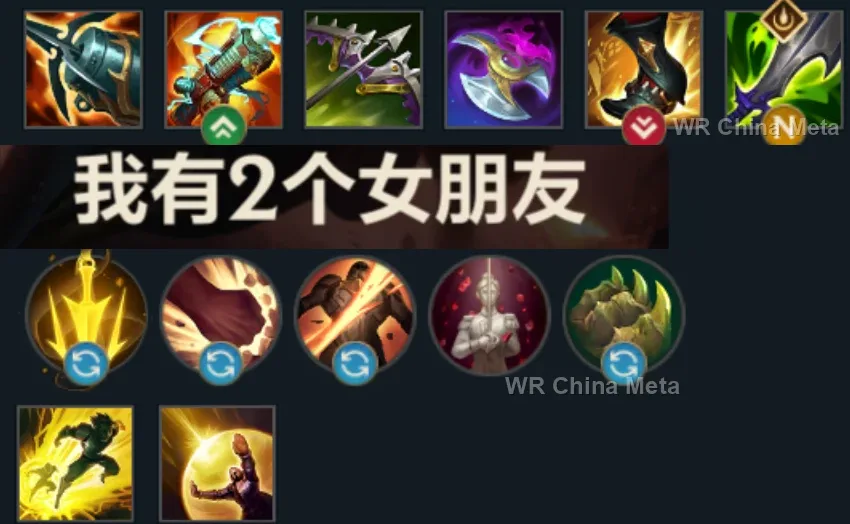
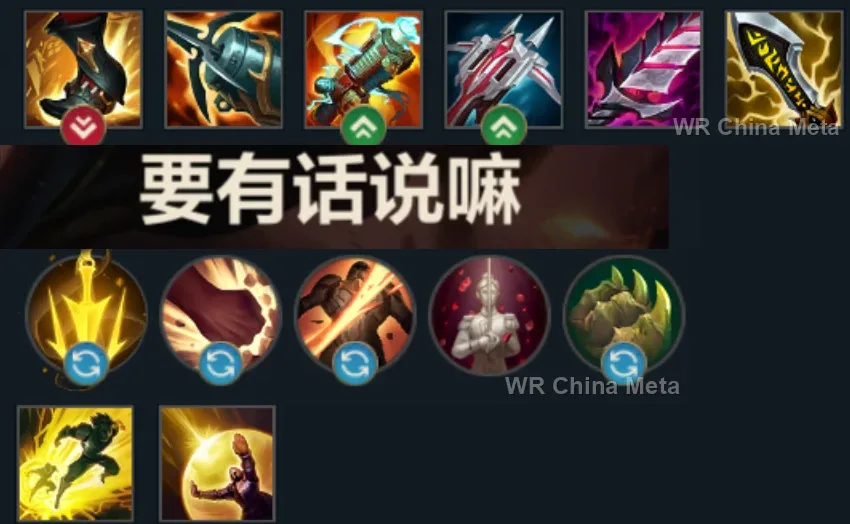
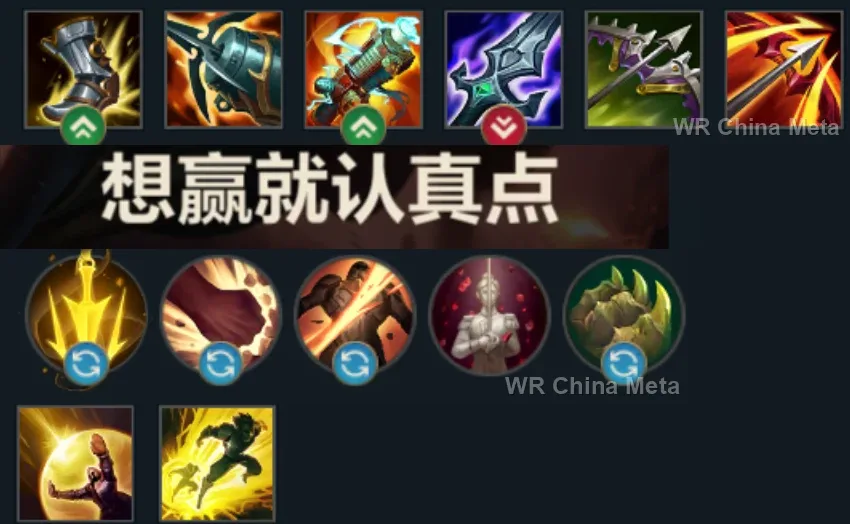
Taken from the official in-game China leaderboard. Spells, runes and items of every public top player.
26 of the top 30 players have a public match history; the others keep theirs private.
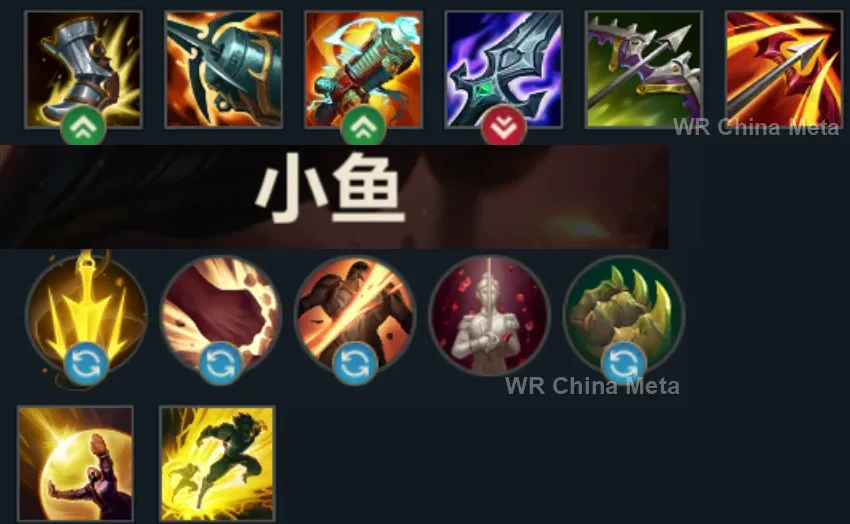
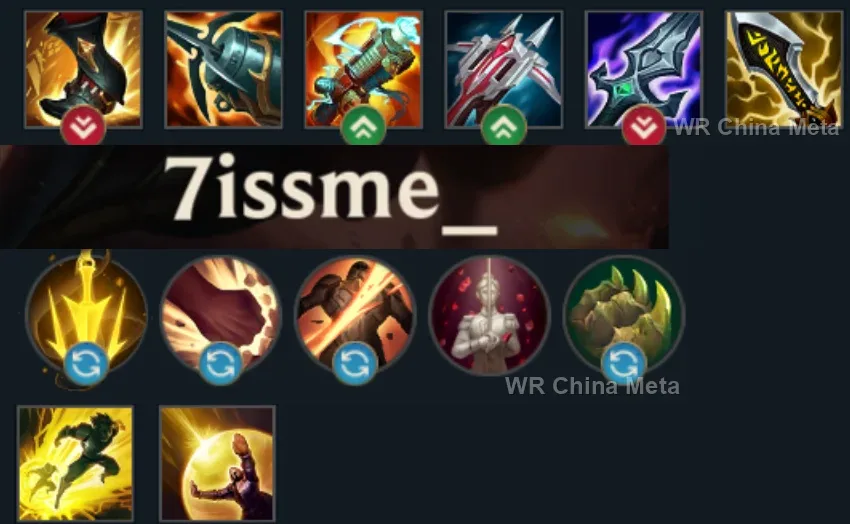
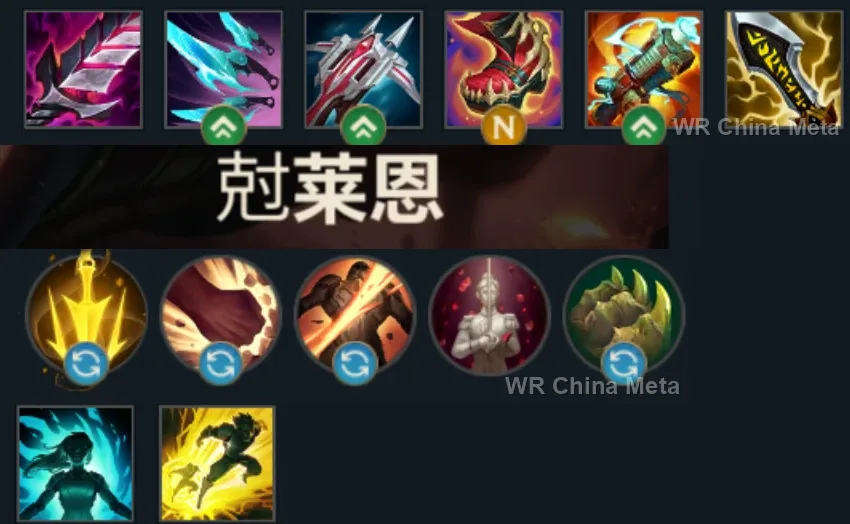
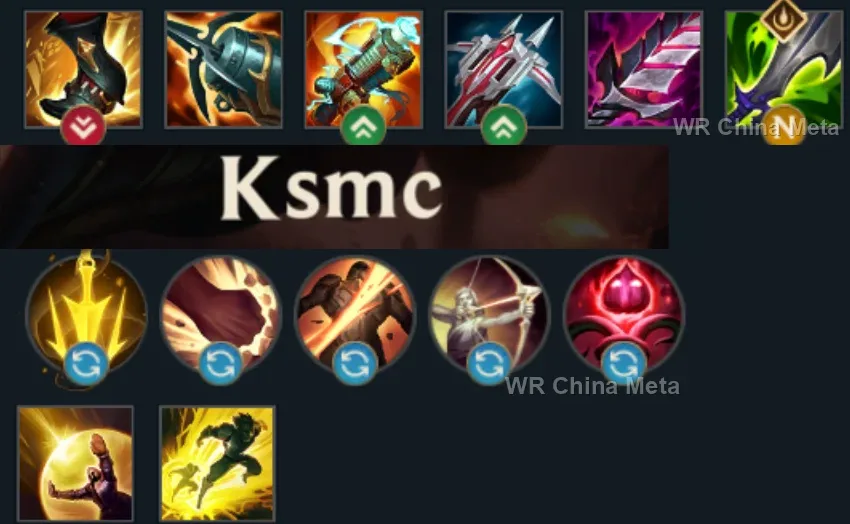
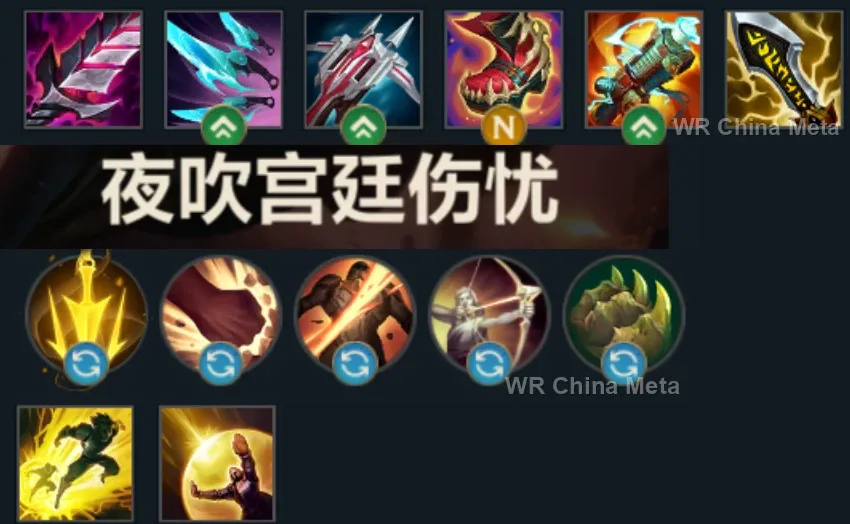
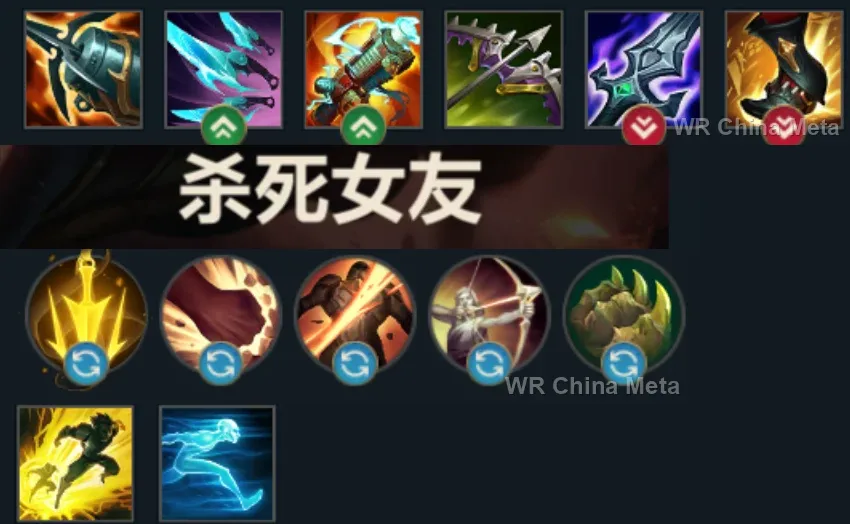
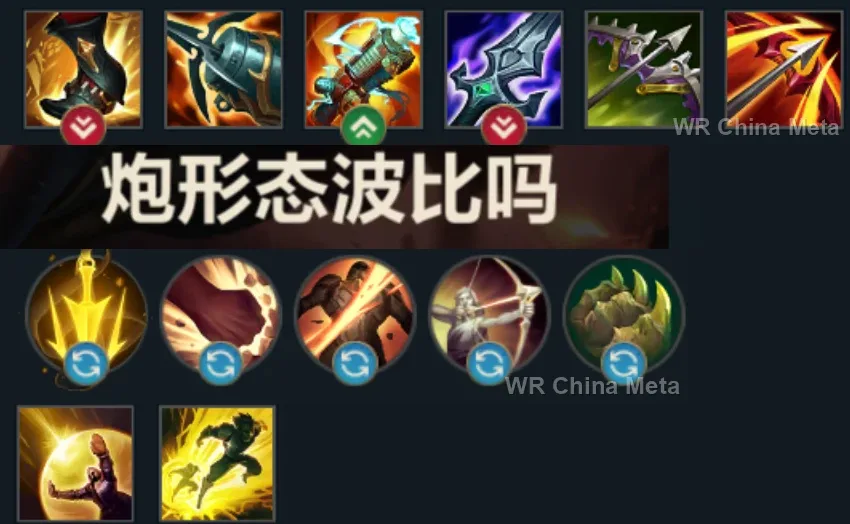
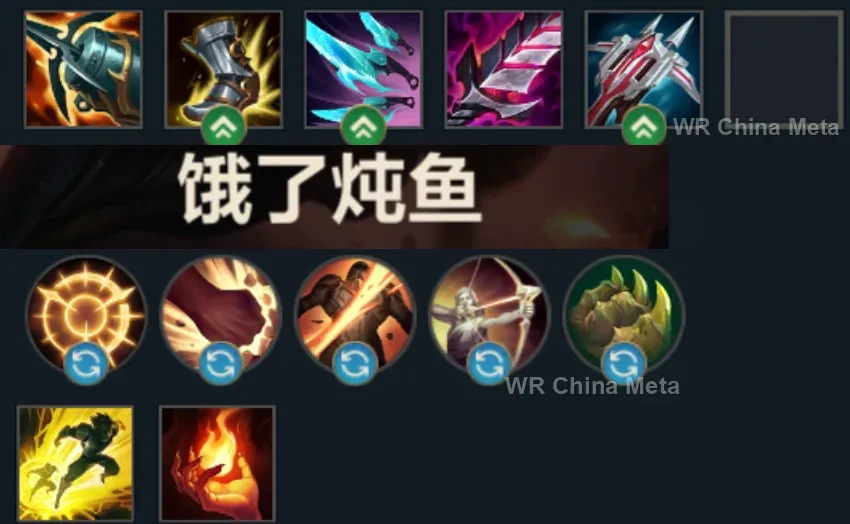
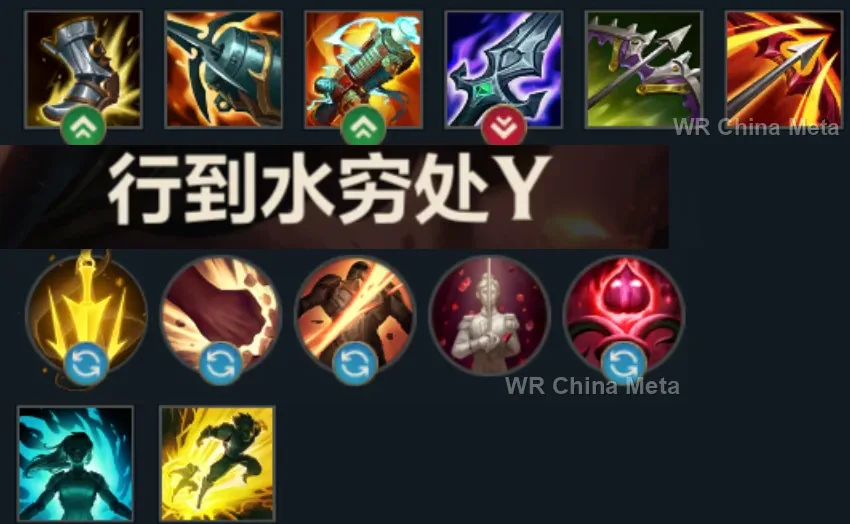
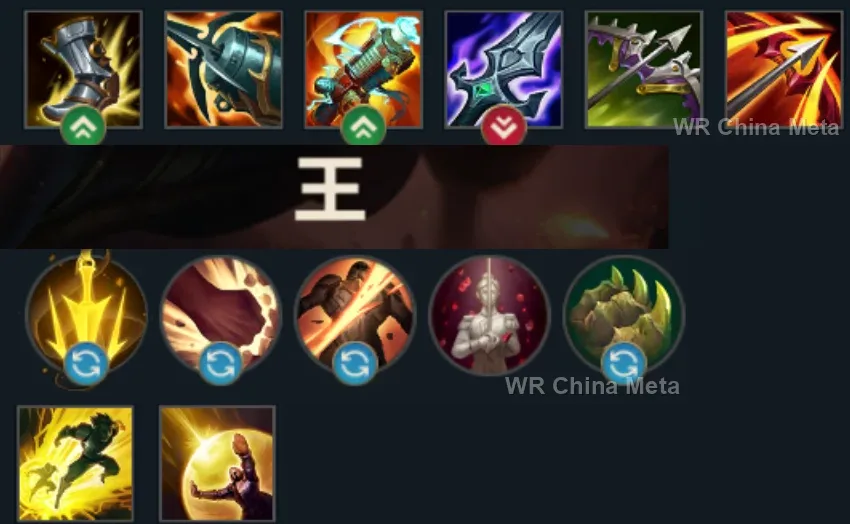
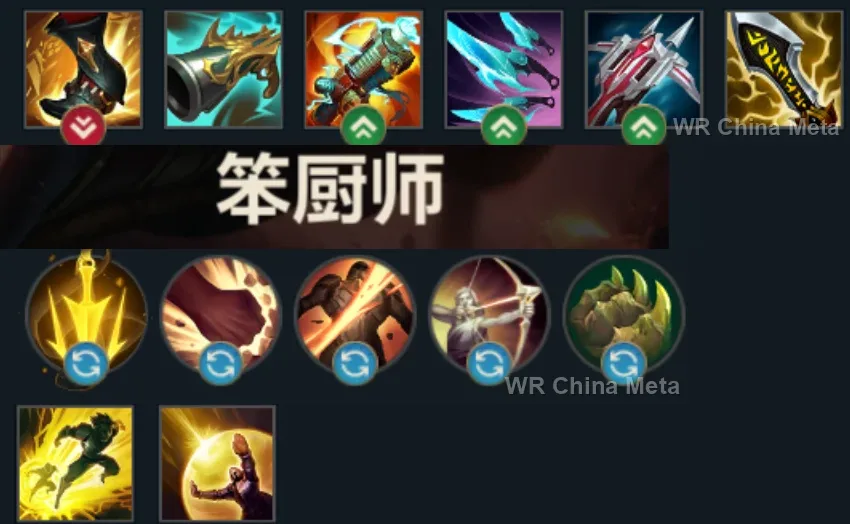
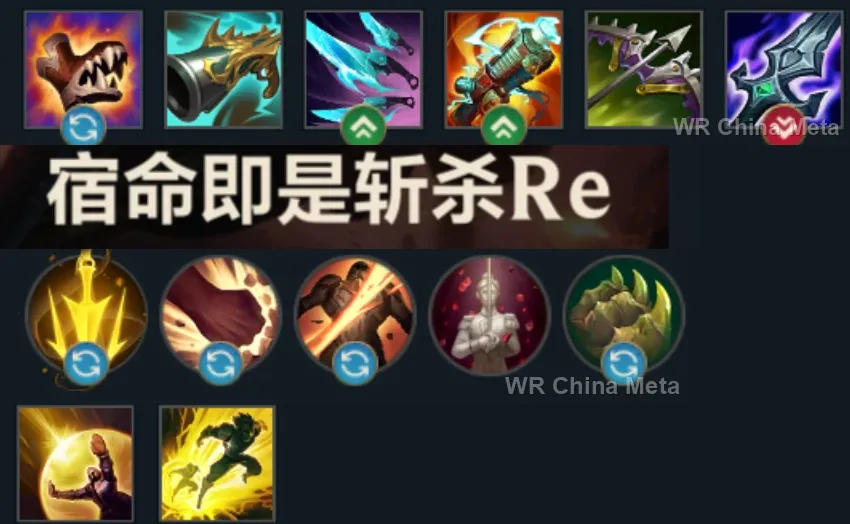
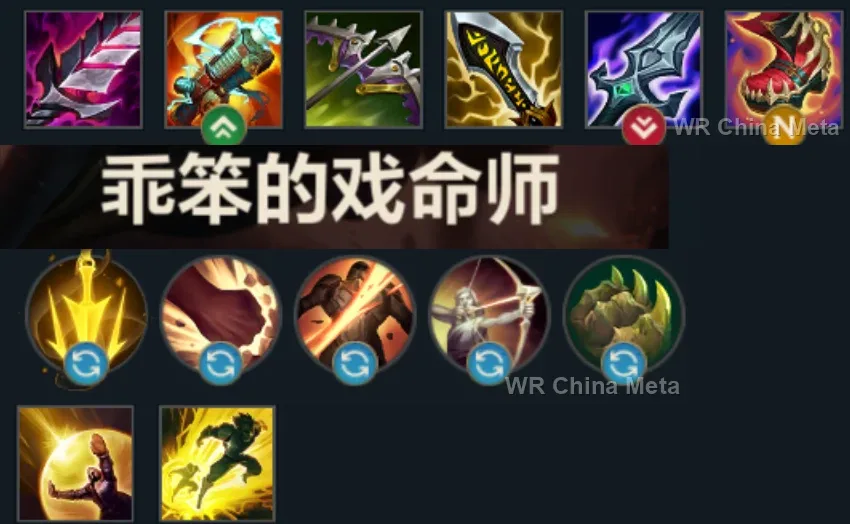
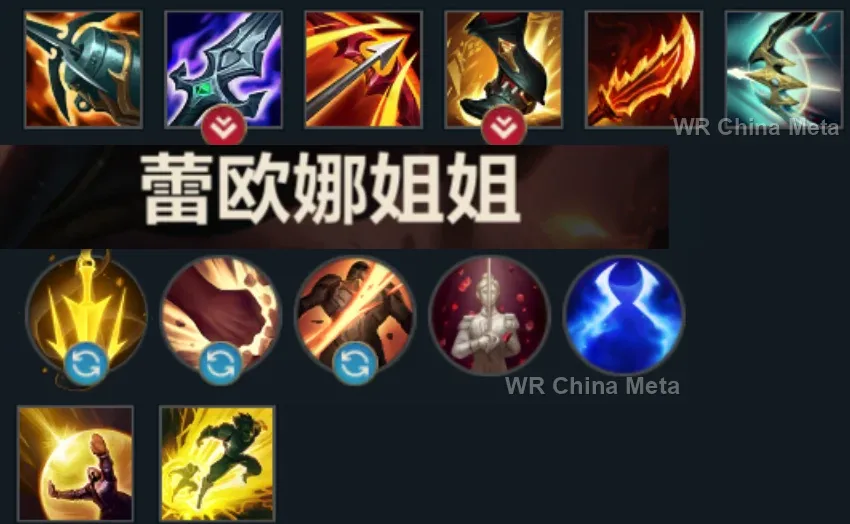
The toughest lane matchups for Tristana on the Wild Rift China server, with why each is hard and exactly how to play it.
 Tristana vs Caitlyn Unfavorable
Why Caitlyn counters Tristana: She zones your farm from outside jump range and punishes the landing with trap and net: your all-in comes with advance notice.
How to play Tristana into Caitlyn: Jump ONLY onto CC'd targets or to leave. Win with the mid game: your bomb on towers pays better than dueling her.
→ Caitlyn Tristana vs Ashe Unfavorable
Why Ashe counters Tristana: Slow on your landing: the entry jump becomes a jump into glue, and without the reset you never leave.
How to play Tristana into Ashe: Offensive jump only with the kill guaranteed — bomb charged and support CC. Otherwise it is a one-way ticket.
→ Ashe Tristana vs Vayne Skill matchup
Why Vayne counters Tristana: All-in versus scaling: your early bomb scares her, her late Tumble humiliates you.
How to play Tristana into Vayne: Bomb at 4 charges plus jump is a kill before 5: repeat until she gives up. Late game jump AWAY from her, never toward her.
→ Vayne Tristana vs Ezreal Skill matchup
Why Ezreal counters Tristana: His blink answers your jump one for one: whoever wastes it first gifts the all-in.
How to play Tristana into Ezreal: Jump AFTER his E, always. Your tower dive with the bomb beats his poke: hunt plates at calculated risk.
→ Ezreal Tristana vs Jhin Skill matchup
Why Jhin counters Tristana: His root punishes your greedy jump, your jump punishes his reload.
How to play Tristana into Jhin: Count his 4 shots and jump during the reload. Never land in line with his W. Your shove wins the lane: bomb the wave on every recall.
→ JhinThe champions Tristana works best alongside on the Wild Rift China server, lane by lane, with the reason each pairing works.
Rocket Jump (W) is both your engage and your escape, which is exactly why you always waste it: with the group already knocked up by Unstoppable Force (R) you can land on the right target and let Explosive Charge (E) reach four stacks before it pops.
You jump into the middle with no shield, no heal and no damage reduction: Stand United (R) shields you from anywhere on the map the instant you land, and Shen arrives with you. Shadow Dash (E) then taunts whoever turns on you while the bomb counts down.
The Hextech Ultimatum (R) locks a carry inside a zone she cannot leave and shoves away anyone who would peel for her: that is your perfect 2v1, because Explosive Charge (E) finally gets the time to reach four stacks with nobody pulling you off.
GNAR! (R) hurls the group into a wall and the slow turns into a stun: you land on people who cannot walk away. And if the first one dies, Rocket Jump (W) refreshes instantly and you are already on the second one with a fresh bomb.
Useful when the problem is that they run: the Vanguard's Edge (R) wall slows anyone crossing it by 90%, and a target who cannot back off is a target the bomb pops on at full stacks. Irelia flanks on her own, though - do not count on her for peel.
Infinite Duress (R) suppresses for a full second: that is not just crowd control, it is exactly how long Rapid Fire (Q) needs to take Explosive Charge (E) to four stacks. And if the target dies, Rocket Jump (W) refreshes and you are already on the next one.
Your spike lands before theirs and Powerball (Q) reaches bot before anyone else: Frenzying Taunt (E) nails the target down, you jump in and pop the bomb. Every takedown refreshes Rocket Jump (W), so you leave the tower having spent nothing.
Cease and Desist (R) is unstoppable and point-and-click: their carry gets locked down regardless, dashes and crowd control do not save her. All that is left for you is landing on top with Rocket Jump (W) and letting Explosive Charge (E) finish its count.
In the early 2v2s the third-hit knock-up of Three Talon Strike (Q) plus your dive close kills neither of you gets alone. Later, Crescent Guard (R) knocks back everyone but his marked target: the exit you have when Rocket Jump (W) is already spent.
Cataclysm (R) seals the target in an arena his teammates cannot enter: four Explosive Charge (E) stacks with nobody pulling you off. Rocket Jump (W) clears the wall on the way out, but if you already spent it getting in you are stuck in there with them.
Your jump is always a gamble: with Pyromania (P) charged it stops being one, because Annie's next spell stuns for certain and you land on a target already frozen. Summon: Tibbers (R) keeps busy whoever should be peeling you off while the bomb counts.
You are the one who goes deepest into their backline and you have no defensive button at all: Hero's Entrance (R) lands with you, shields you and knocks up everyone about to punish you. Justice Punch (E) does the same job in miniature when the ultimate is down.
Have her attach the ball to you before you jump: Command: Protect (E) shields you and adds resistances in the exact second you land among them, and Command: Shockwave (R) drags the rest of their team around your bomb instead of leaving them scattered.
Frozen Tomb (R) freezes in place the target you just jumped onto: the bomb reaches four stacks and nobody can drag him out. Ring of Frost (W) does the same to the whole group around her, if the two of you commit from the same side.
Pick a Card (W) on the gold card stuns for 1.25 seconds, exactly the time to land and place Explosive Charge (E), and Destiny (R) teleports him next to you. He is still a ranged mage, though: if the dive goes wrong he is not the one coming to get you.
The Dark Passage (W) lantern is the second escape you do not have: with it you can spend Rocket Jump (W) going in instead of saving it to get out. And Death Sentence (Q) hands you a target dragged in and frozen, with the bomb already ticking on it.
Zenith Blade (E) roots, Shield of Daybreak (Q) stuns and Solar Flare (R) extends the chain: that is the longest single-target lockdown in the game, which is exactly what Explosive Charge (E) needs to reach four stacks with nobody walking away.
Before level 3 you lose to anyone who hits you from outside jump range, and Unbreakable (E) intercepts exactly those projectiles. Then Rapid Fire (Q) stacks Concussive Blows (P) to four marks in no time, so the stun lands inside your all-in.
Grand Entrance (W) into The Quickness (R) is nearly two seconds of back-to-back crowd control on the same group: the window where jumping is not a gamble. And Battle Dance (E) brings him to you even when you have landed inside their backline.
Your engage range is short: Rocket Grab (Q) brings the target inside jump distance instead of making you chase it. Power Fist (E) knocks him up right after, and with Rapid Fire (Q) running the bomb is already at four stacks when he lands.
An all-or-nothing lane: Bone Skewer (Q) and Phantom Undertow (E) hand you the target, and every takedown refreshes both Rocket Jump (W) and Death From Below (R). But neither of you heals or shields: if the first trade goes badly, you never get it back.
| Lane | Tier | Win% | Pick% | Ban% | Pos. |
|---|---|---|---|---|---|
| Duo (ADC) | D | 48.28% | 5.67% | 0.11% | #18 / 20 |
| Lane | Tier | Win% | Pick% | Ban% | Pos. |
|---|---|---|---|---|---|
| Duo (ADC) | D | 48.12% | 5.56% | 0.11% | #18 / 20 |
| Lane | Tier | Win% | Pick% | Ban% | Pos. |
|---|---|---|---|---|---|
| Duo (ADC) | D | 47.58% | 4.8% | 0.06% | #20 / 22 |
| Lane | Tier | Win% | Pick% | Ban% | Pos. |
|---|---|---|---|---|---|
| Duo (ADC) | B | 47.51% | 3.79% | 0.03% | #14 / 22 |


Tristana is an all-in explosive marksman in Wild Rift who trades the safe, standing poke of most bot laners for point-blank aggression: Rocket Jump closes the gap, Explosive Charge counts down on the target, and detonating it resets the jump so she can chain onto the next target or bail out clean. Her damage splits between magic (bomb, landing impact, ultimate) and physical (autoattacks, on-hit effects), so she plays less like a scaling hyper-carry and more like a lane bully who wants fights to end before enemies reach their own power spikes.
Skill order: Q > E > W (max R whenever available) - Rapid Fire first keeps her attack speed, and her Explosive Charge stacking, ahead of the enemy's ability to peel.
Lane phase is about baiting a jump-range mistake: sit just outside Rocket Jump distance, farm safely with autoattacks, and wait for the enemy to misplay their positioning or for Rocket Jump, Explosive Charge and Rapid Fire to all come online around level 3-4 - that's her first real power spike. Respect anyone who can hit her from beyond jump range before then, and trade with Explosive Charge on the wave or tower instead of forcing a fight she can't win. Once she does commit, jump straight onto the priority target, bomb them, and unload autoattacks before they can peel or flee.
By mid-game Tristana wants to jump onto or near the enemy back line, tag the biggest threat with Explosive Charge, and stack it with autoattacks and Rapid Fire while Buster Shot's knockback either finishes a fleeing target or shoves a diver off her own carries. Positioning is the whole skill ceiling here: Rocket Jump is also her only escape, so it shouldn't be burned as a pure engage tool - let the frontline commit first, jump in for a clean pick, and if the takedown lands, use the free reset to jump straight back out or chain onto whoever's next. Hold Buster Shot for securing kills at range or peeling a diver away from her own squishies.