
WR China Meta
Meta, tier list & top-player builds from the China server · live
Meta, tier list & top-player builds from the China server · live

璐璐 · 仙灵女巫 Support C
✅ Patch 7.2e · stats updated 2026-09-12 · real builds of 10 top-ranked China server players captured 2026-09-11
Difficulty Damage Toughness Utility
How the strongest players on the Wild Rift China server (国服) build Lulu: live win/pick statistics by rank bracket, the most-used item and rune sets, and the real loadouts of the top ranked Lulu players, captured in-game.
📖 How to play Lulu



Counted on 10 real builds captured from the Chinese client, player by player. Independent from the official API above.


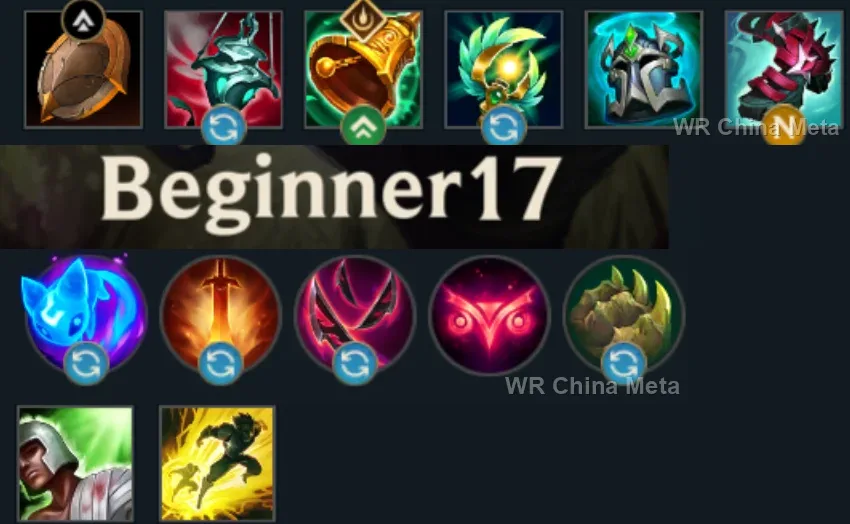
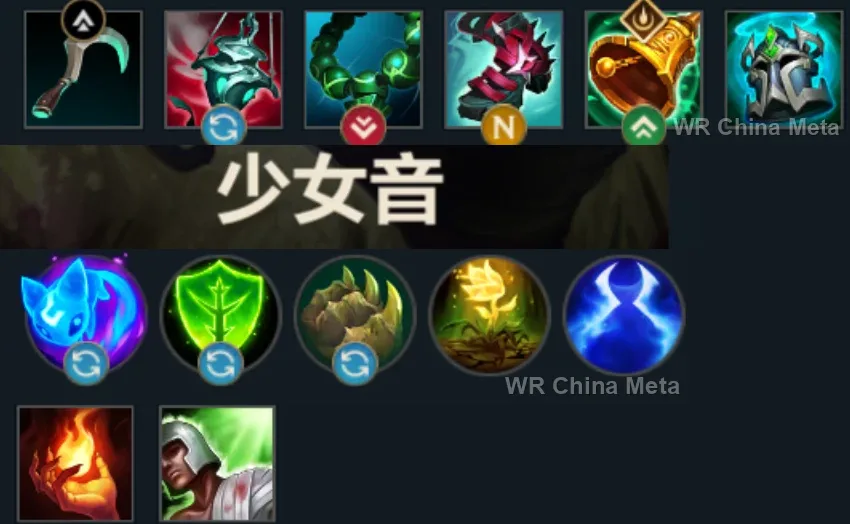
Taken from the official in-game China leaderboard. Spells, runes and items of every public top player.
10 of the top 30 players have a public match history; the others keep theirs private.
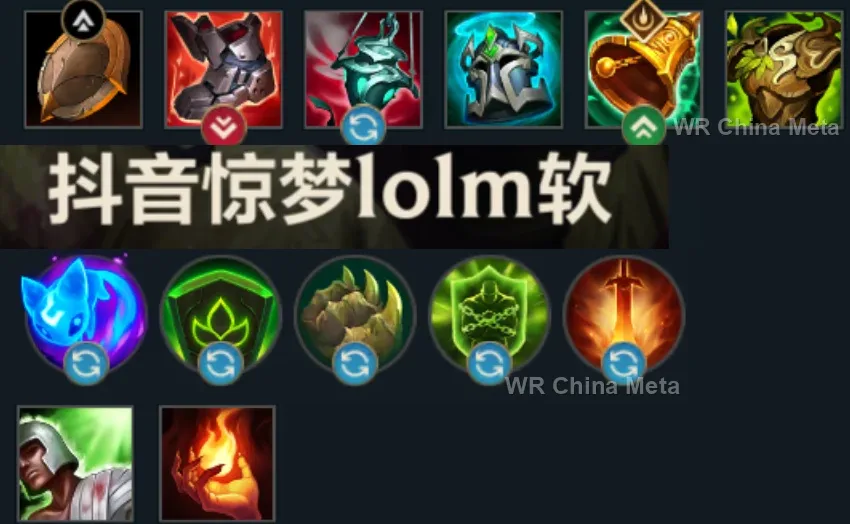
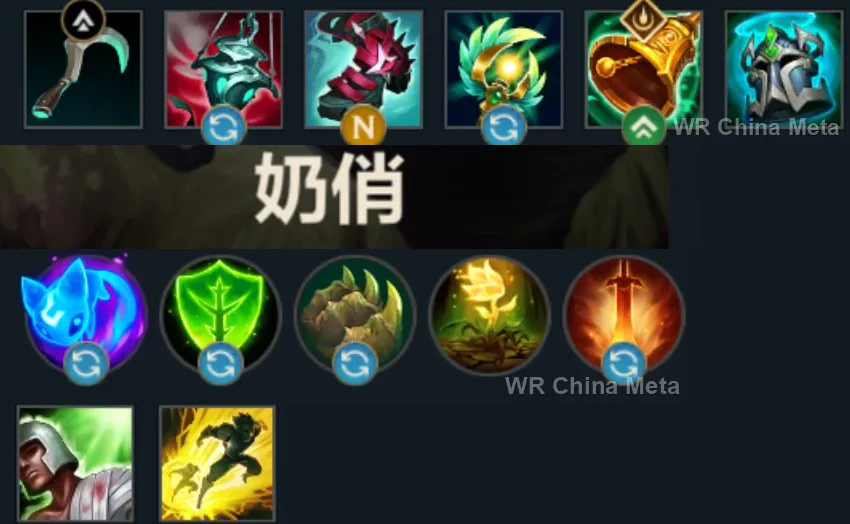
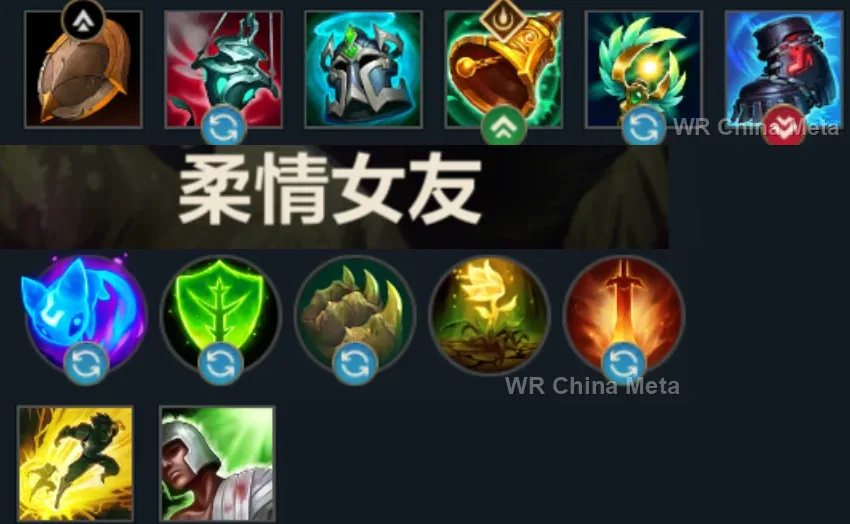


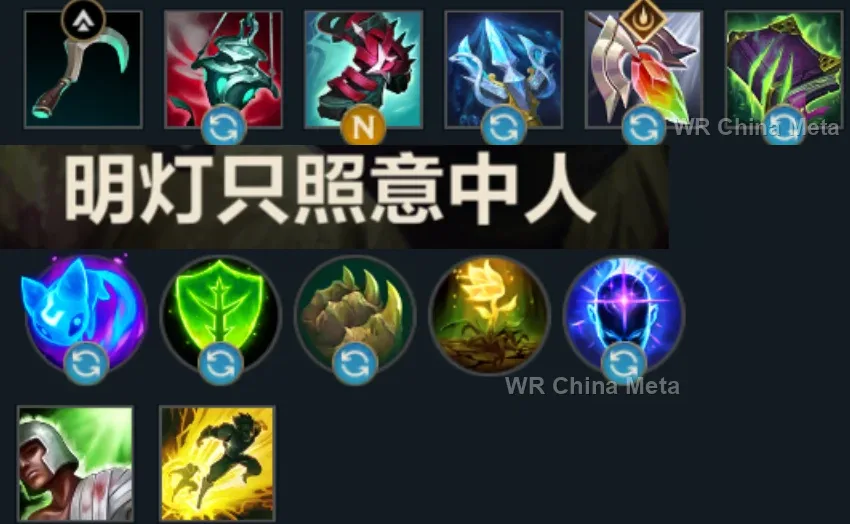


The toughest lane matchups for Lulu on the Wild Rift China server, with why each is hard and exactly how to play it.
 Lulu vs Blitzcrank Skill matchup
Why Blitzcrank counters Lulu: The hook hunts your ADC and Polymorph does not stop projectiles: your reflexes against one clean shot.
How to play Lulu into Blitzcrank: Have the ADC stand behind YOU: hook the fairy, find the Polymorph. Instant shield on whoever gets pulled.
→ Blitzcrank Lulu vs Leona Skill matchup
Why Leona counters Lulu: Her CC train overwhelms your shields if it arrives whole: the fairy can only say no once at a time.
How to play Lulu into Leona: Polymorph Leona mid-flight. Save your R for her stun's target: the knock-up breaks her team's follow-up.
→ Leona Lulu vs Pyke Skill matchup
Why Pyke counters Lulu: His R executes underneath your every shield: healing cannot save someone already below the scythe's threshold.
How to play Lulu into Pyke: Your R (knock-up plus bonus health) RAISES his execute threshold: use it on instinct when he dives. Polymorph as he surfaces from the swim.
→ Pyke Lulu vs Zyra Skill matchup
Why Zyra counters Lulu: Poke and plants from beyond fairy range: you win the fights, she wins the lane on points.
How to play Lulu into Zyra: Poke with Pix on her planting steps. Hold Polymorph for the incoming root: your reaction is worth her entire combo.
→ Zyra Lulu vs Milio Skill matchup
Why Milio counters Lulu: An enchanter mirror: cleanse versus Polymorph, heals versus shields. Whoever answers better wins, not whoever starts.
How to play Lulu into Milio: Polymorph IS your edge: he has no equivalent CC. Use it on the enemy ADC at the burst moment and the trades are yours.
→ MilioThe champions Lulu works best alongside on the Wild Rift China server, lane by lane, with the reason each pairing works.
Yone is painfully fragile and Fate Sealed (R) teleports him behind the last target he hits, which means alone in the middle of everyone: Rampant Growth (R) gives him bonus health and knocks up whoever surrounds him right there, and Whimsy (W) switches off the one who turns on him.
His page says kiters just sit outside Poison Trail (Q) range and dodge Fling (E): the Whimsy (W) speed boost is what gets him there. From that point Mega Adhesive (W) and Fling close the trap, and Help, Pix! (E) covers his way back out.
Counter Strike (E) dodges basic attacks but not single-target burst, and that is precisely what Help, Pix! (E) absorbs. And when there is nothing nearby to Leap Strike (Q) onto, Whimsy (W) is the only speed he has left to close a gap.
Defiant Dance (W) cuts 60% of the incoming damage but leaves her standing still through the channel, and Rampant Growth (R) covers exactly those seconds. Whimsy (W) meanwhile turns the point-and-click stunner her page names as her punisher into a critter.
Your real limit is the short range on Whimsy (W) and Help, Pix! (E), which forces you to stand close to danger: Stand United (R) shields you from anywhere on the map and Shadow Dash (E) taunts the diver before he ever reaches you.
Undying Rage (R) still ends with him on one health: Rampant Growth (R) at that exact moment hands him maximum health and knocks up everyone around him, and the enemy plan of waiting out the five seconds falls apart. He is under 50% though, and gives you nothing back.
His page lists no shield, no crowd control and one short dash: you are all three of those. Whimsy (W) turns whoever is about to stun him the moment Alpha Strike (Q) ends, Help, Pix! (E) covers the burst and Rampant Growth (R) keeps Highlander (R) rolling. He is still at 47.8%.
If the leap does not close, his page says he has nothing left to fall back on: Rampant Growth (R) the instant he lands out of Thrill of the Hunt (R) hands him a second health bar and knocks up everyone around him, while Whimsy (W) removes whoever turns on him.
Lamb's Respite (R) is three seconds where nobody can die, plus 150 health at the end: land Rampant Growth (R) inside that circle and she walks out fuller than she walked in. Whimsy (W) covers the windows where Dance of Arrows (Q) and Mounting Dread (E) are down.
Infinite Duress (R) is a one-second suppress that cannot be broken: against the assassin who reached you it is the peel you cannot give yourself. While he channels it he is a stationary target, and Help, Pix! (E) plus Rampant Growth (R) get him through it.
Onslaught of Shadows (R) throws him inside the enemy backline and scatters it with fear: that is where he ends up alone, and that is where Rampant Growth (R) matters. Whimsy (W) meanwhile hands him the speed Devastating Charge (E) would need a run-up to build.
Crescent Guard (R) knocks back everyone except his marked target and blocks damage coming from range: it is the anti-dive tool your kit simply does not have. It only counts if he decides to protect you instead of diving with it, which is what he usually does.
Rampant Growth (R) knocks up everyone around the ally you cast it on, and his page says any allied knock-up is an invitation for Last Breath (R): you are the one opening his ultimate. In return Wind Wall (W) stops the ranged poke that chips you out of lane.
Void Stone (P) only blocks magic damage, so against the physical burst that punishes a bad Riftwalk (R) he has nothing: Help, Pix! (E) and Rampant Growth (R) cover exactly that. Before level 5 they are also the reason he never walks back to base.
Nevermove (E) is a skillshot with a return trip that kiters simply walk out of: the Glitterlance (Q) slow is what makes it connect, and every root is another Soul Shard and more permanent health. Rampant Growth (R) extends how long he survives inside the fight.
Shield of Durand (W) needs a full two-second channel with him standing still and exposed: Help, Pix! (E) and Rampant Growth (R) are what carry it through to the end. And Hero's Entrance (R) is the anti-dive that you, the squishiest of them all, do not have.
Until level 8 she has no dash and no self-peel, and her page says divers punish her exactly there: Whimsy (W) and Help, Pix! (E) are that missing defence. In return Divine Judgment (R) saves you, and you are usually the first to die. She is under 50%, though.
Outside Astral Flight (W) he has no dash and no shield: Whimsy (W) turns the assassin into a critter for the one second he needs to lift off. Worth it against compositions built on diving, much less so against a team that just pokes you both from range.
He loses almost every trade before his first items and owns no dash: the Glitterlance (Q) slow keeps whoever is walking at him away, and Help, Pix! (E) is the shield plus the Pix, Faerie Companion (P) bolts that win the lane on his behalf.
Her page is blunt about it: no heal, no shield, no damage reduction, and painfully short range. Help, Pix! (E) is the only shield she will ever see, Whimsy (W) carries her in and back out, and Rampant Growth (R) holds the dive during Final Hour (R).
His entire game is stacking Dragon Practice (P) without being interrupted, and his page says the early game is his worst phase: Help, Pix! (E) and the Glitterlance (Q) slow buy him wave after wave without a single recall.
No shield, no defensive cooldown, and Kanmei's Steps (E) gives her speed rather than a dash: when somebody actually reaches her she has nothing. Help, Pix! (E) is the missing shield and Whimsy (W) switches off the diver while she keeps standing there hitting.
She has to reach point-blank range or she is nothing, and enemy crowd control is exactly what stops her getting there: the Whimsy (W) speed opens the way, and Rampant Growth (R) keeps her upright in the middle of everyone while Inferno Trigger (R) unloads.
Whimsy (W) and Rampant Growth (R) take away the only thing that ever kills her, someone closing the distance while she is firing Switcheroo! (Q). But she sits at 47.2% on the CN server: the pairing works better than the champion does.
| Lane | Tier | Win% | Pick% | Ban% | Pos. |
|---|---|---|---|---|---|
| Support | C | 48.04% | 7.51% | 8.91% | #27 / 34 |
| Lane | Tier | Win% | Pick% | Ban% | Pos. |
|---|---|---|---|---|---|
| Support | C | 47.95% | 7.86% | 9.65% | #28 / 34 |
| Lane | Tier | Win% | Pick% | Ban% | Pos. |
|---|---|---|---|---|---|
| Support | B | 47.91% | 10.25% | 13.33% | #22 / 33 |
| Lane | Tier | Win% | Pick% | Ban% | Pos. |
|---|---|---|---|---|---|
| Support | C | 47.65% | 8.19% | 11.98% | #26 / 33 |


Lulu, the Fae Sorceress, is a magic-damage enchanter Support in Wild Rift, built around Pix, her ever-present faerie companion who fights and peels alongside her. She spends more time buffing and protecting her ADC than dealing damage herself - shielding, hasting, and, when a fight goes wrong, turning the biggest threat on the enemy team into a harmless critter for a second. She doesn't out-damage real mages, but no other support says 'no' to an engage as cleanly.
Skill order: E > Q > W, taking R (Rampant Growth) at every level it's available (5/9/13)
Poke with Q (Glitterlance)'s piercing slow into an auto-attack to trigger Pix's bolts, then finish the trade with E (Help, Pix!) for extra damage and a reveal. Force all-ins around level 2-3 with W (Whimsy)'s speed buff, before the enemy support has their own cooldowns back, and hold the polymorph in reserve for their engage rather than burning it just to buff your carry. Against a mirror enchanter like Milio, patience wins the lane - baiting his cleanse or heal before you commit your own cooldowns matters more than starting the trade, since the better reaction wins, not the first move. Manage the wave with Glitterlance's pierce so you're not shoved into deep vision, and always keep one peel tool ready before your ADC commits.
By mid game, Lulu should stay glued to her main carry, weaving E (Help, Pix!)'s shield and W (Whimsy)'s speed to keep them alive and dealing damage rather than hunting kills herself. Save R (Rampant Growth) for the instant a diver locks onto your ADC or main damage source - the bonus health and knock-up can turn a dying teammate into a won fight, or get flipped onto a frontliner to force a fight your team wants. Against heavy chain-CC engage like Leona's, don't save every peel tool for one ally - a full CC train can lock down more targets than one shield and one polymorph can answer in a single rotation. Position on the edge of the fight, out of dash range, and spend the polymorph on whichever enemy threatens to delete your backline first.