
WR China Meta
Meta, tier list & top-player builds from the China server · live
Meta, tier list & top-player builds from the China server · live

布里茨 · 蒸汽机器人 Tank B
✅ Patch 7.2e · stats updated 2026-09-12 · real builds of 26 top-ranked China server players captured 2026-09-11
Difficulty Damage Toughness Utility
How the strongest players on the Wild Rift China server (国服) build Blitzcrank: live win/pick statistics by rank bracket, the most-used item and rune sets, and the real loadouts of the top ranked Blitzcrank players, captured in-game.
📖 How to play Blitzcrank


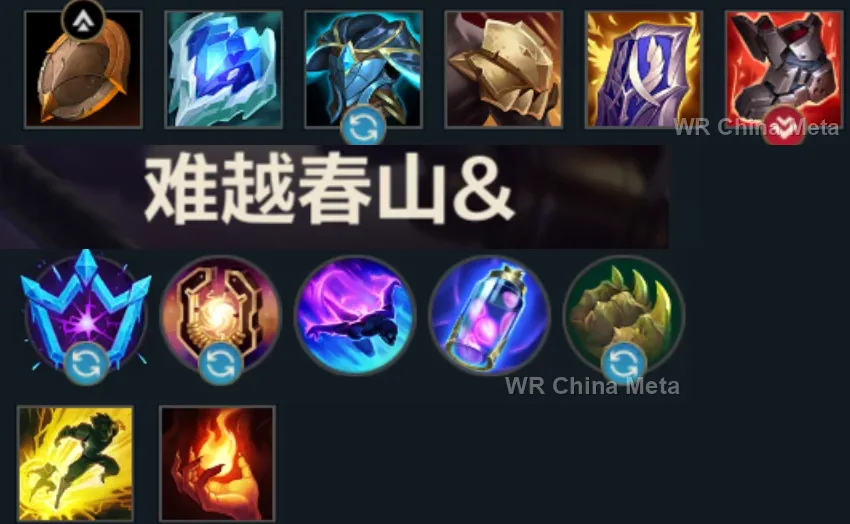
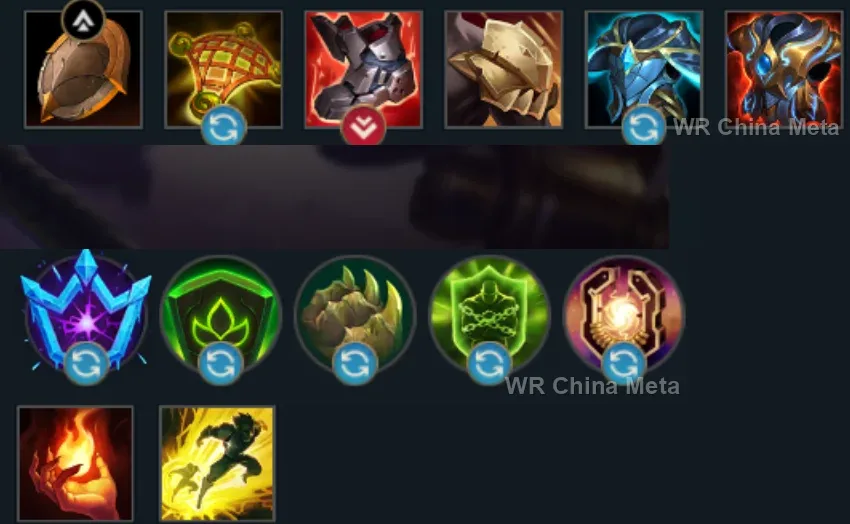
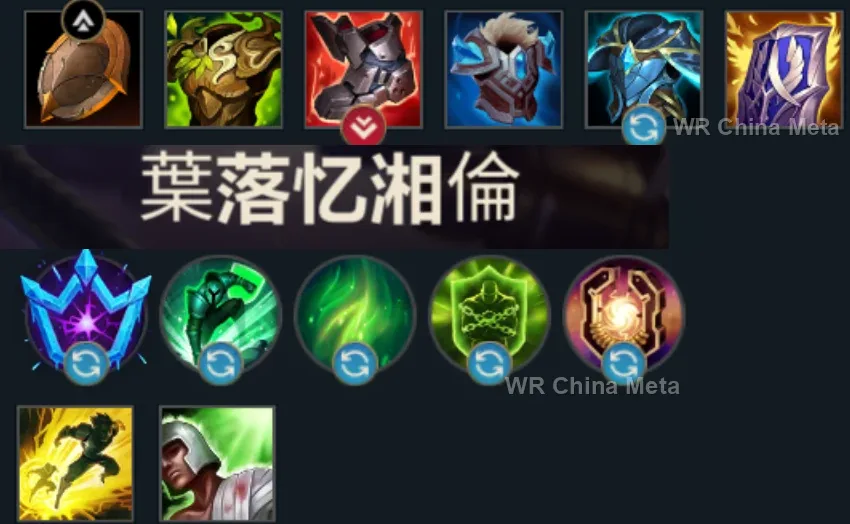
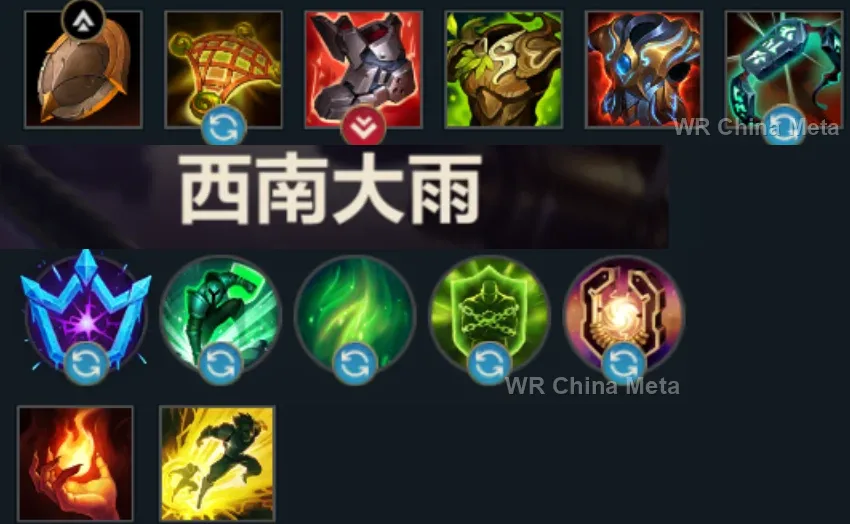
Counted on 28 real builds captured from the Chinese client, player by player. Independent from the official API above.


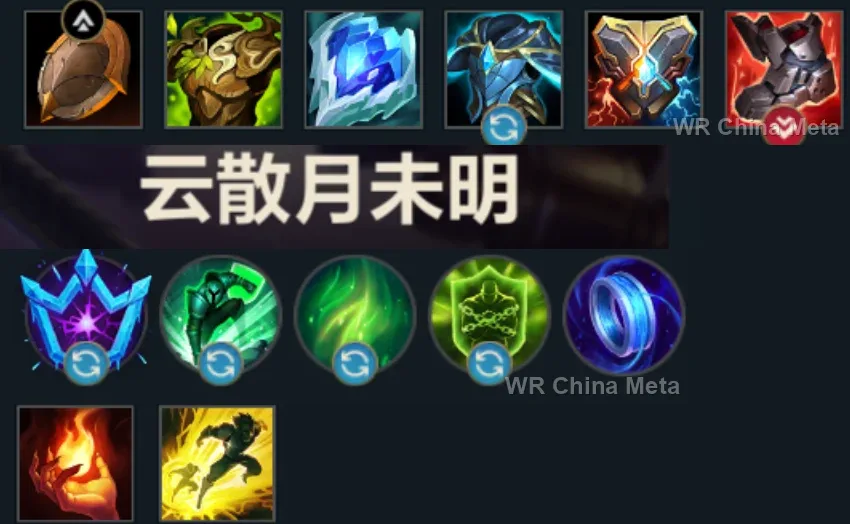
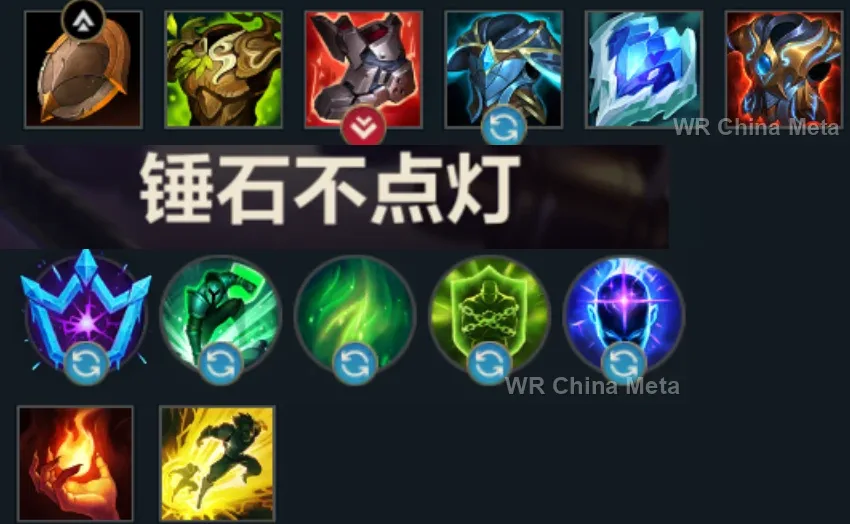
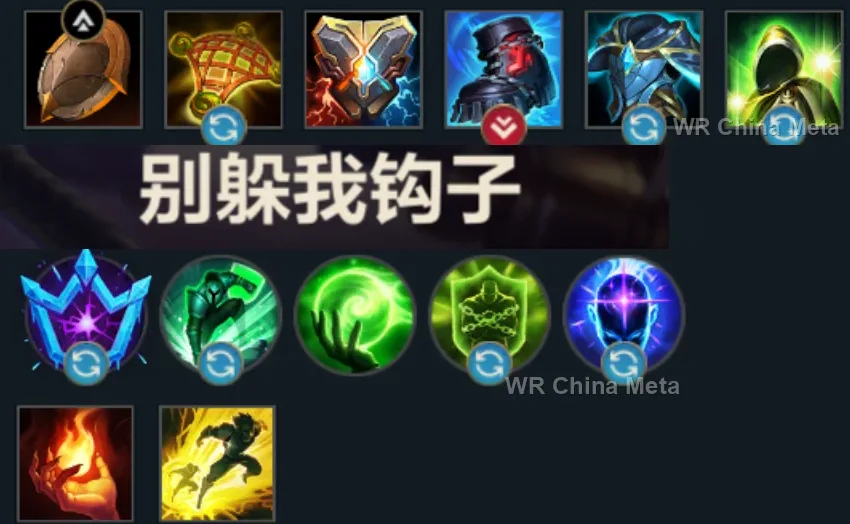
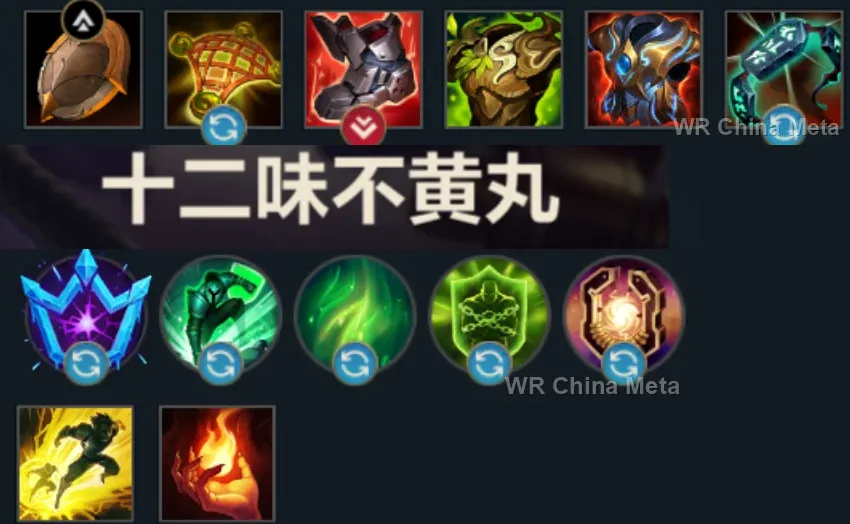
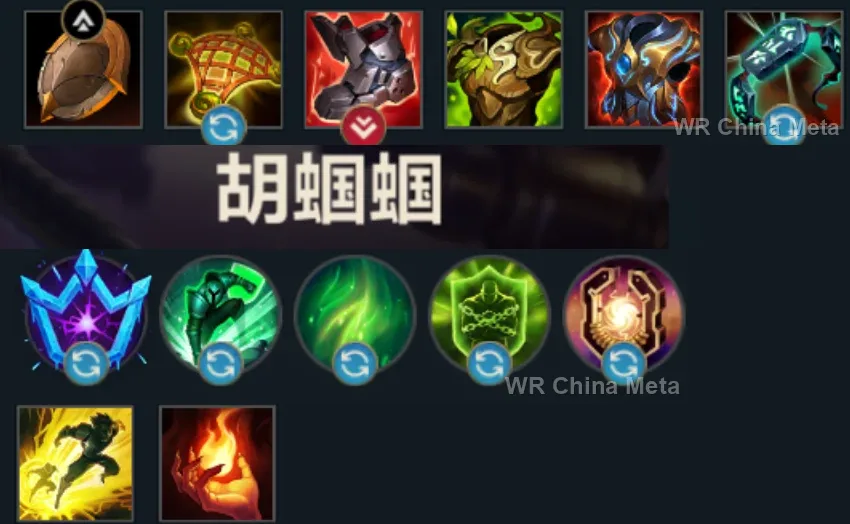
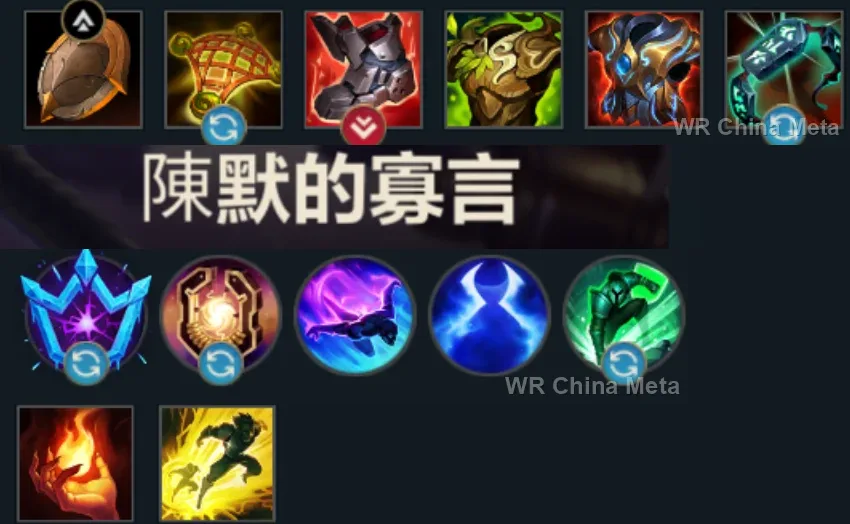
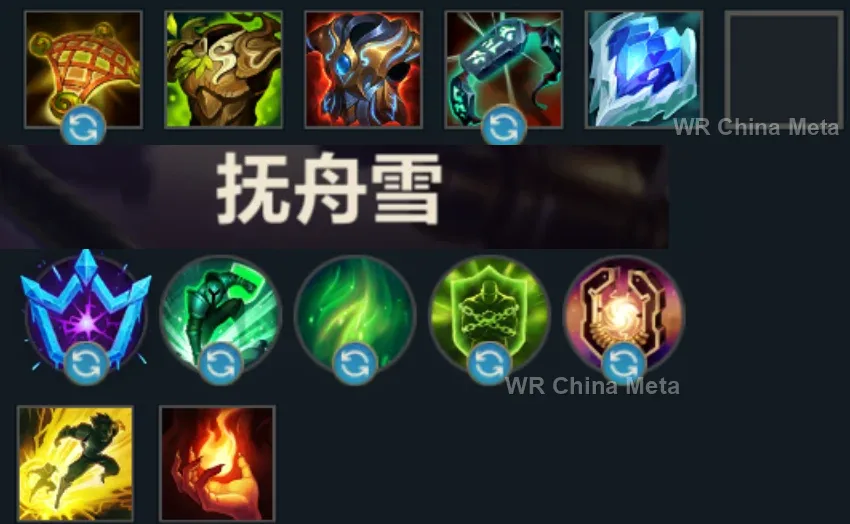
Taken from the official in-game China leaderboard. Spells, runes and items of every public top player.
26 of the top 30 players have a public match history; the others keep theirs private.
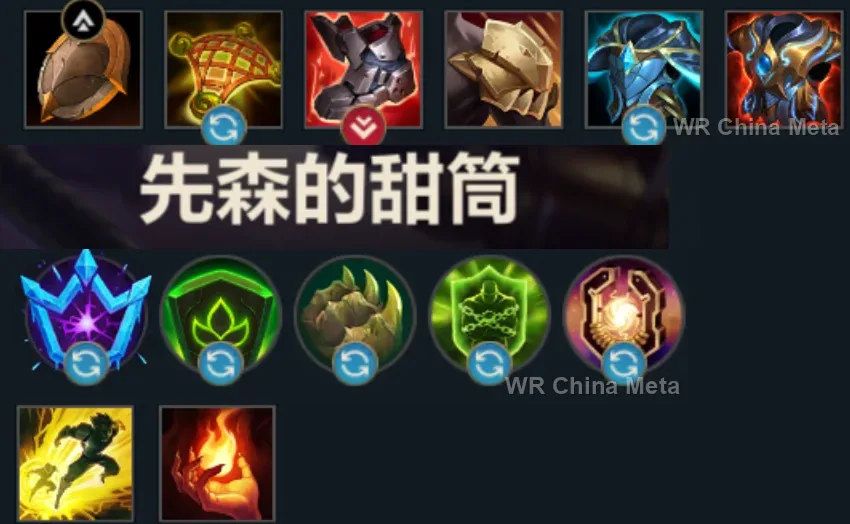
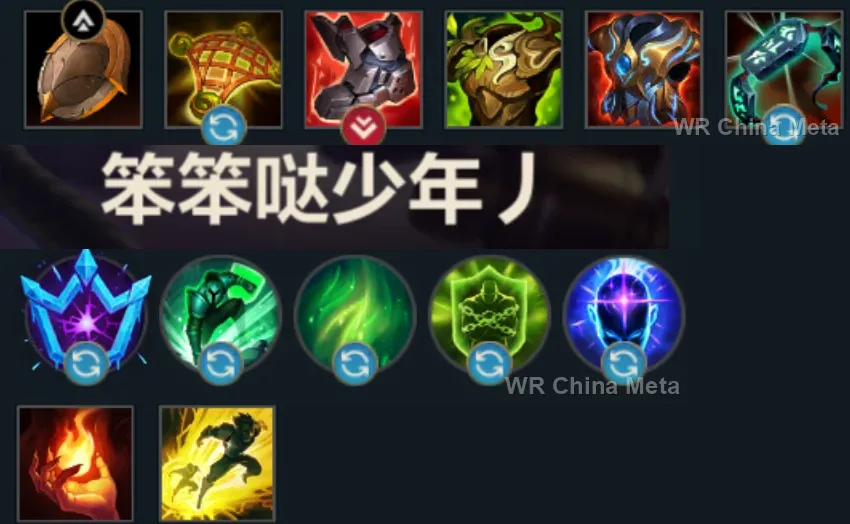
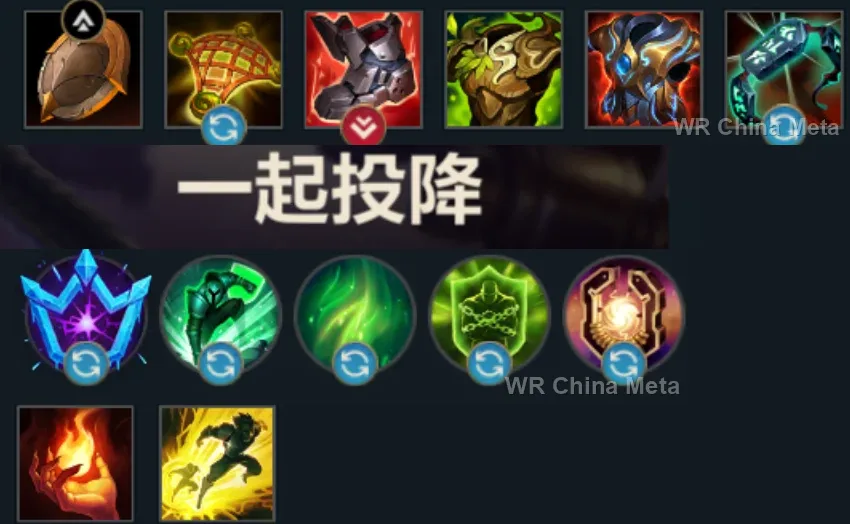
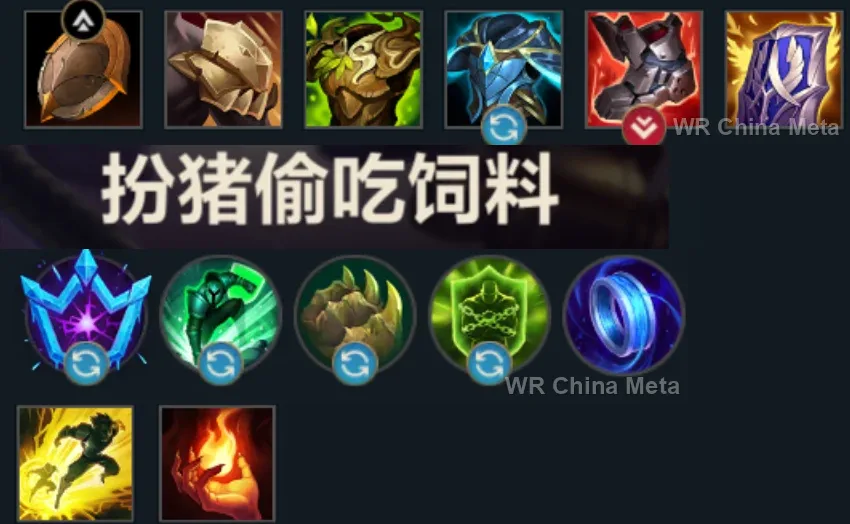
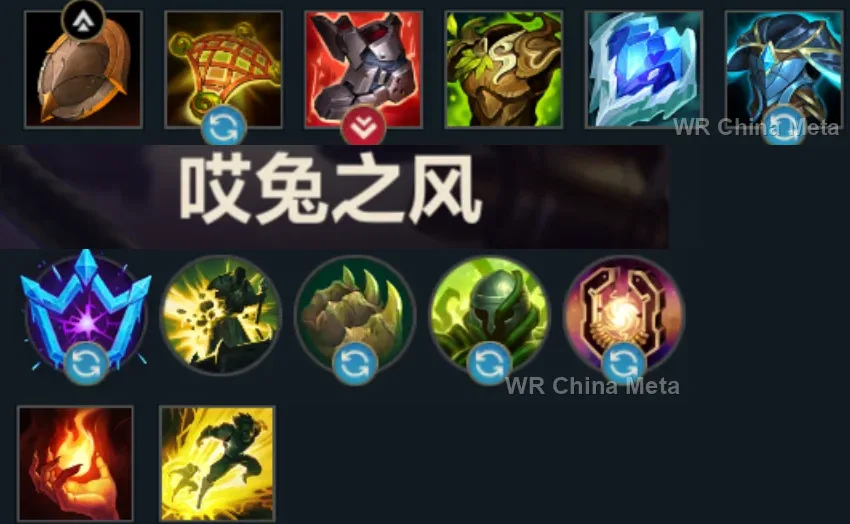
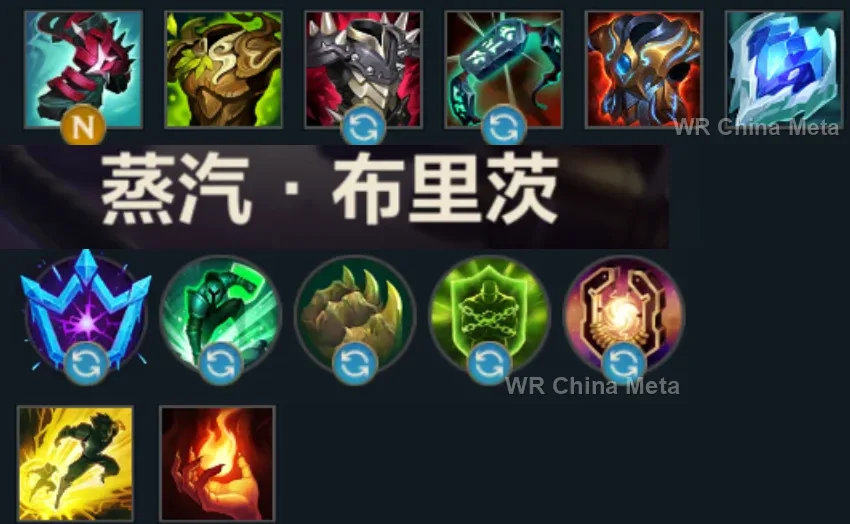
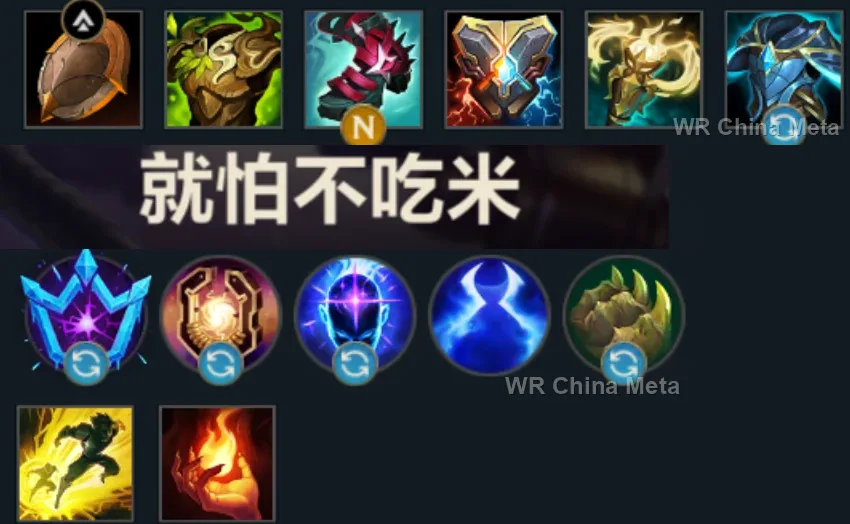
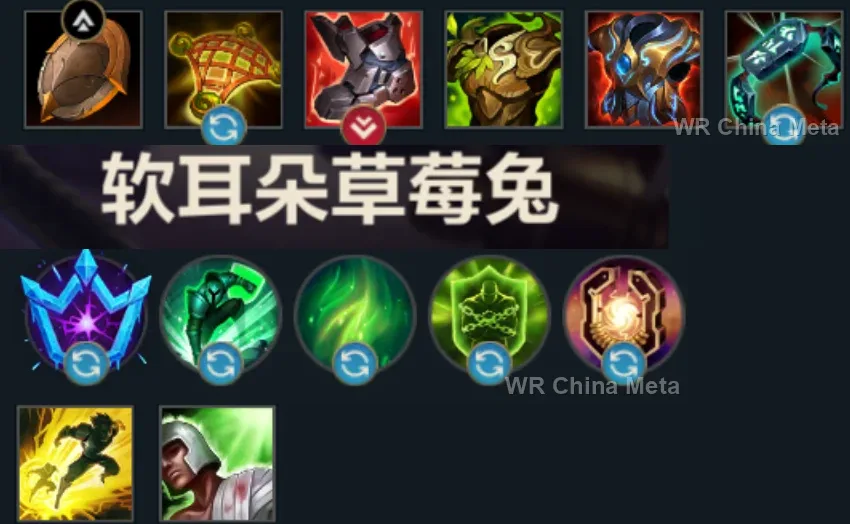
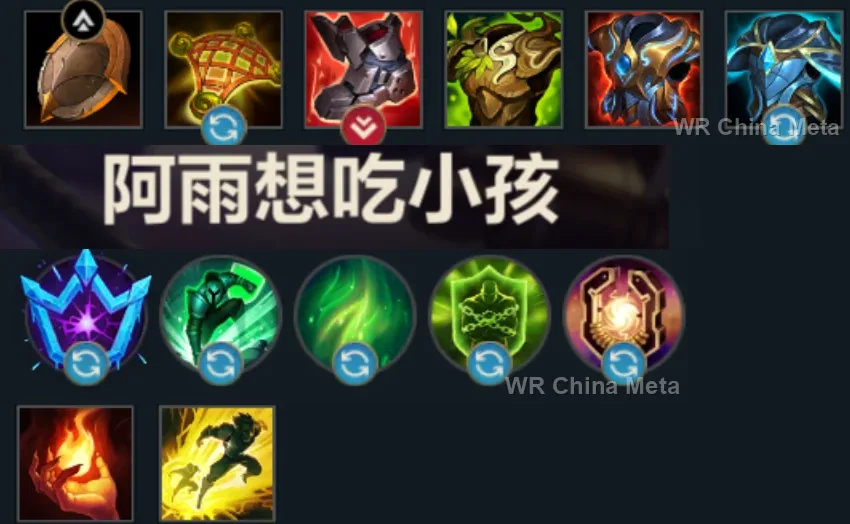
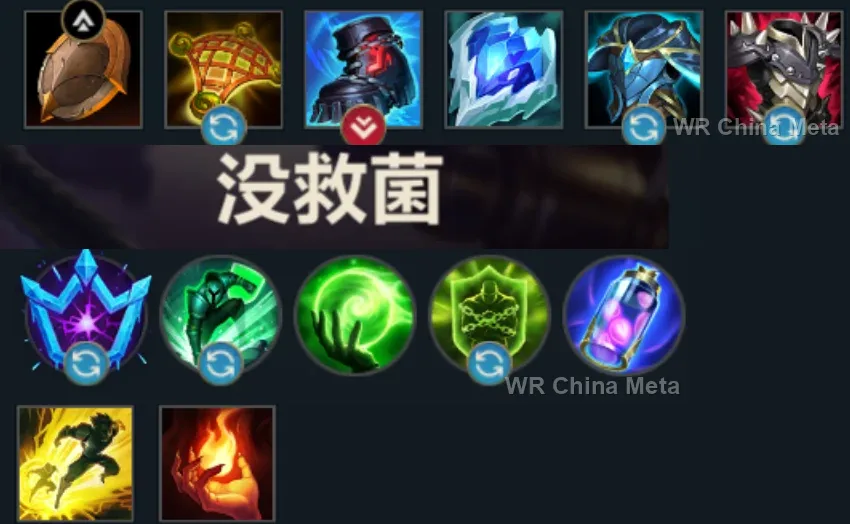
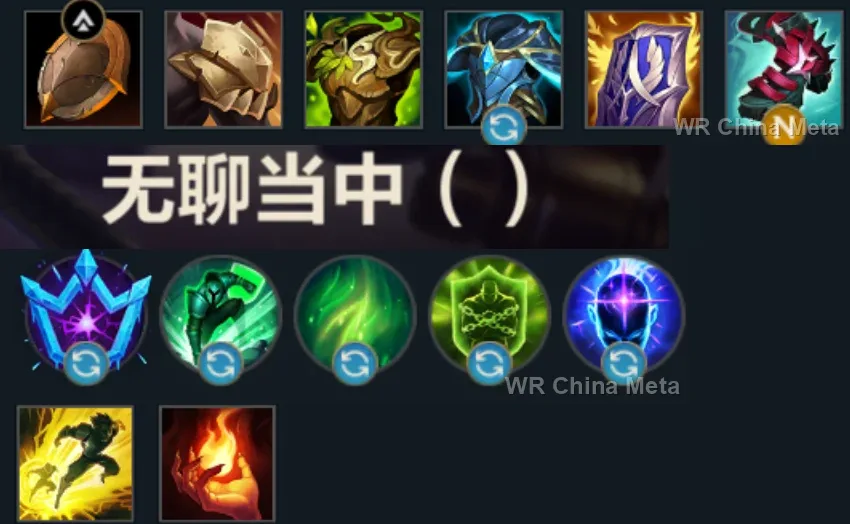
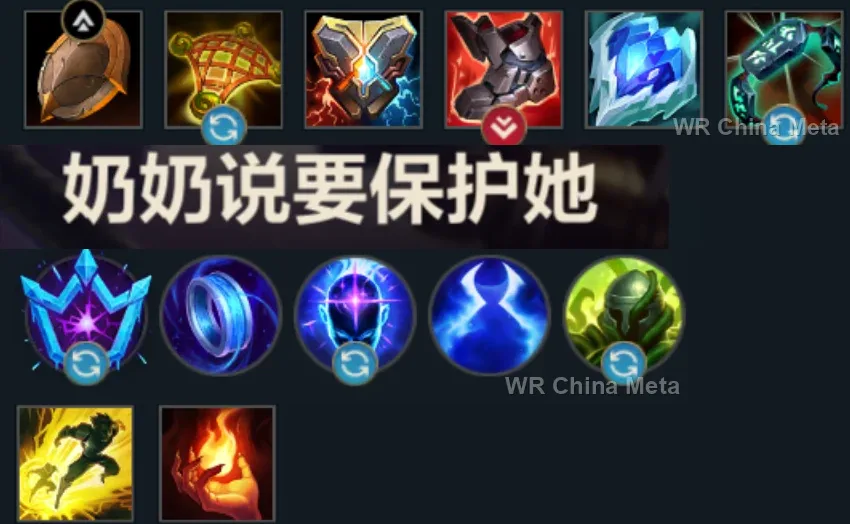
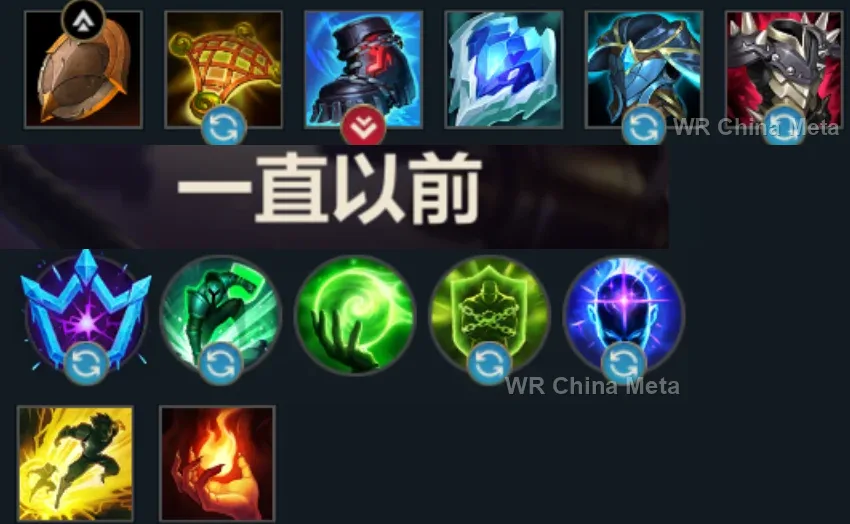
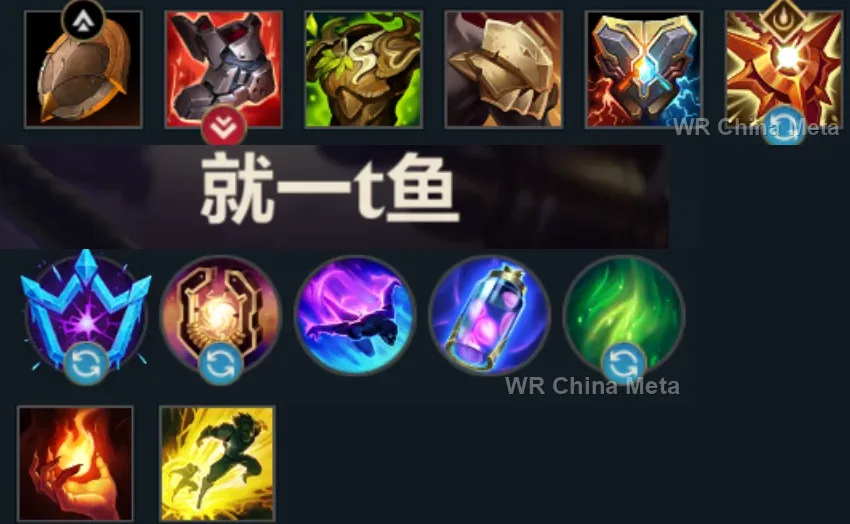
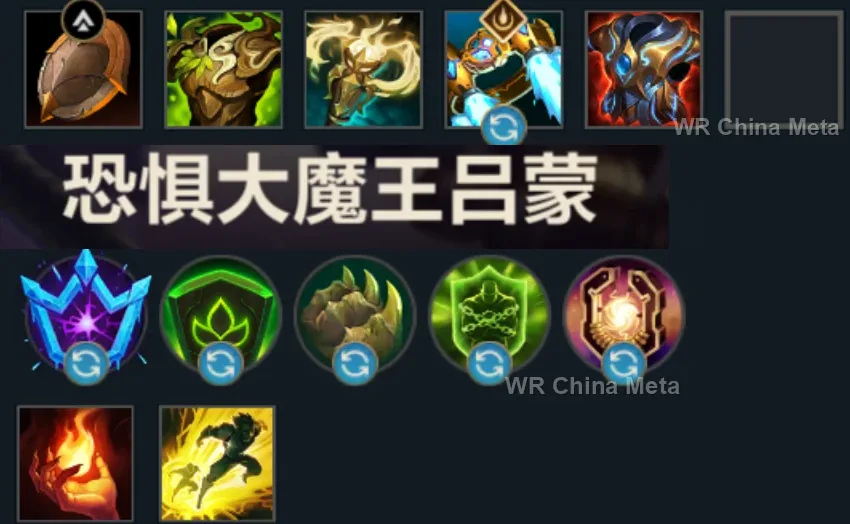
The toughest lane matchups for Blitzcrank on the Wild Rift China server, with why each is hard and exactly how to play it.
 Blitzcrank vs Morgana Hard counter
Why Morgana counters Blitzcrank: Black Shield blocks your hook — the only thing that makes you dangerous. With the shield up, you have no threats left.
How to play Blitzcrank into Morgana: Hook the minion in front of her to open the firing line onto the ADC. Make her waste the shield with repeated feints: it has a long cooldown.
→ Morgana Blitzcrank vs Sivir Unfavorable
Why Sivir counters Blitzcrank: Her Spell Shield eats one hook for free every few seconds: your best tool becomes a blank shot.
How to play Blitzcrank into Sivir: Hook only after the shield is spent: bait it out with feints. Or hook the support instead: someone always catches a hook eventually.
→ Sivir Blitzcrank vs Braum Unfavorable
Why Braum counters Blitzcrank: He jumps in front of whoever you hook and his wall blocks your follow-up: he is the goalkeeper of your hooks.
How to play Blitzcrank into Braum: Hook HIM: a Braum surrounded by your team is still a good deal. Or pull from angles he cannot cover.
→ Braum Blitzcrank vs Milio Skill matchup
Why Milio counters Blitzcrank: His cleanse frees whoever you hooked and his knock-back rejects your entry: he dismantles your play with two buttons.
How to play Blitzcrank into Milio: Hook into instant E: the knock-up lands before his reflex. Think in two targets: make him spend the cleanse on the first, the decisive hook goes on the second.
→ Milio Blitzcrank vs Alistar Skill matchup
Why Alistar counters Blitzcrank: Hook him and he headbutts you in the teeth: the only target happy to be pulled toward you.
How to play Blitzcrank into Alistar: Never hook the cow. Draw your lines on the carries behind him: he can only react, and your E interrupts his W-Q combo.
→ AlistarThe champions Blitzcrank works best alongside on the Wild Rift China server, lane by lane, with the reason each pairing works.
His stated problem is distance: with no gap closer, anything with a dash slips out of Apprehend (E). You cancel that distance from the other side, delivering the target onto him, and Power Fist (E) keeps it grounded until Noxian Guillotine (R) executes.
Realm of Death (R) removes anyone he can actually reach from the fight for seven seconds, and with no dash he reaches nobody: Rocket Grab (Q) picks the target for him. And Obliterate (Q) hits 45% harder on a lone target, which is what a hook creates.
Outside Stormbringer (R) he has no dash and no range, and his page says he gets kited all game: a hooked, knocked-up target is the only one Frenzied Maul (W) lands on cleanly. Static Field (R) meanwhile silences away their escape button.
Facebreaker (E) only stuns when it catches enemies on both sides, which is his stated limit: a target ripped out of their line and planted inside yours hands it to him in exactly the right spot. And The Show Stopper (R) goes off on a body still grounded.
Your flaw is written plainly: if Rocket Grab (Q) misses, you are nobody until it comes back. Unstoppable Force (R) is the second engage that covers that window, and the enemies it piles into one spot are the easiest hook you will ever throw.
Worth it when the fights happen grouped and close: Garen reaches nowhere on his own, his page says so, but on a target you hand him standing still, the Decisive Strike (Q) silence and the true damage of Demacian Justice (R) close it without argument.
A target ripped out of their team and knocked up by Power Fist (E) is precisely what Rengar asks for: after an Unseen Predator (P) leap, Savagery (Q) crits for free and finishes before anyone turns around. Your damage ends with the hook; his does not.
Taste Their Fear (Q) hits far harder when nobody stands near the target, and that is the condition Rocket Grab (Q) manufactures for a living: you rip the carry away from her team and for a moment she is isolated. C tier, but no kit reads a hook this well.
Her page says that with Cease and Desist (R) reaching the carry is the easy part and getting out alive is not: if you bring the carry to her, that ultimate stays in her pocket for the second target. And the three Denting Blows (P) hits never miss a knocked-up body.
Infinite Duress (R) is wasted on anything with a dash, but nothing dashes while it is still in the air from your hook. Then Static Field (R) silences, so even the escape ability is gone: that champion simply does not get to play.
Worth it if the first hook lands: Yi creates nothing on his own, his page says so, but on a target hooked, knocked up and silenced there is nothing left to create. Miss it and you are two champions with no plan B, and that is the bet you take.
Power Fist (E) sends the target you just hooked airborne, and Last Breath (R) hooks onto anyone an ally launches: the carry you tore out of their line never lands alive. This is the pairing people queue up for on purpose.
Her whole game hinges on landing Charm (E), and her page says a dodged E leaves her with nothing in hand: on a target dragged in front of you and knocked up, there is nothing to dodge. From there Spirit Rush (R) goes in and out for free.
Vision of Empire (W) deals 50% more to anything already locked down, and you lock that target twice, with the hook and with Power Fist (E), without him risking Nevermove (E). And Demonic Ascension (R) sustains the fight you opened.
Her short range forces her to walk in to deal damage, and her page says walking in is what kills her: with Rocket Grab (Q) the target comes to her instead. If Pyromania (P) is charged, the lockdown extends before that body even lands.
Hero's Entrance (R) lands on an ally, and after a hook the ally standing inside their team is you: he arrives on the whole group while your target is still grounded. And if you miss the hook, Justice Punch (E) is an engage that does not depend on you.
A hooked, knocked-up target stands still for two axes, and at his DPS two axes are half a health bar. Every kill like that fills the Adoration stacks on League of Draven (P), which is how Draven buys his lead before anyone else does.
Away from point-blank range she is a mediocre carry, her own page says it: Rocket Grab (Q) brings the target to zero range instead of forcing her to walk in, and on a knocked-up body the sequence that raises her Daredevil Impulse (P) Style rank comes for free.
Rocket Grab (Q) deals damage as it drags, and on a target an ally has just damaged Deadly Flourish (W) turns into a real root: it arrives locked down and stays locked down. Then the fourth Whisper (P) shot crits into a body that cannot move.
Her page says Bullet Time (R) is a stationary channel people simply dance out of: a hooked, knocked-up target does not dance, and in a 2v2 the whole channel lands. Double Up (Q) always crits on the bounce, and you are the one lining the targets up.
His spike is in the first minutes and he lives on short windows: a target dragged in and knocked up is the window where Lightslinger (P) and Piercing Light (Q) dump everything at once. Relentless Pursuit (E) gets him there for free.
| Lane | Tier | Win% | Pick% | Ban% | Pos. |
|---|---|---|---|---|---|
| Support | B | 48.85% | 7.43% | 2.58% | #21 / 34 |
| Lane | Tier | Win% | Pick% | Ban% | Pos. |
|---|---|---|---|---|---|
| Support | B | 48.79% | 7.34% | 2.54% | #21 / 34 |
| Lane | Tier | Win% | Pick% | Ban% | Pos. |
|---|---|---|---|---|---|
| Support | C | 49.12% | 7% | 1.95% | #23 / 33 |
| Lane | Tier | Win% | Pick% | Ban% | Pos. |
|---|---|---|---|---|---|
| Support | B | 49.36% | 6.08% | 1.23% | #22 / 33 |


Blitzcrank, Wild Rift's Steam Golem, is a Tank whose entire game plan revolves around one button: Rocket Grab. He deals a mix of magic damage from his hook and ultimate plus a physical critical hit off Power Fist, but his real value isn't raw damage — it's turning an isolated enemy into a free kill for his team. With a low difficulty rating, he's one of the most approachable engage tanks around: land the hook, and the rest of the combo plays itself.
Skill order: Q > E > W — max Rocket Grab first since a shorter cooldown means more hook attempts and more picks, follow with Power Fist for the trade damage and knock-up, and leave Overdrive last since it's pure utility.
Play patient through Wild Rift's shorter lane phase: hover near your Rocket Grab's max range, bait the enemy into overextending for a minion or a spell, and only commit the hook once you're confident it lands, since every whiff leaves you defenseless until the cooldown resets. Follow any landed hook with Power Fist and let your carry finish the kill rather than forcing it yourself, as your own damage stays low until items come online. Keep Static Field's passive shock ticking with autos whenever you trade, but remember it only marks targets while the ultimate itself is off cooldown.
By the mid-game the job doesn't change: find the backline priority target and hook them the instant they're even slightly out of position, since a clean pull often ends the fight on its own. Approach from a flank or through a wall when you can — a frontal hook is easy to see coming and easy to spell-shield. The moment it lands, follow with Power Fist's knock-up and pop Static Field to silence away a defensive ability, then let your team clean up. If there's no safe angle, don't force it: soak damage with your tankiness and wait for a better read instead of throwing your one real tool into a shield.