
WR China Meta
Meta, tier list & top-player builds from the China server · live
Meta, tier list & top-player builds from the China server · live

塔莉垭 · 岩雀 Mage A
✅ Patch 7.2e · stats updated 2026-09-12 · real builds of 16 top-ranked China server players captured 2026-09-11
Difficulty Damage Toughness Utility
How the strongest players on the Wild Rift China server (国服) build Taliyah: live win/pick statistics by rank bracket, the most-used item and rune sets, and the real loadouts of the top ranked Taliyah players, captured in-game.
📖 How to play Taliyah





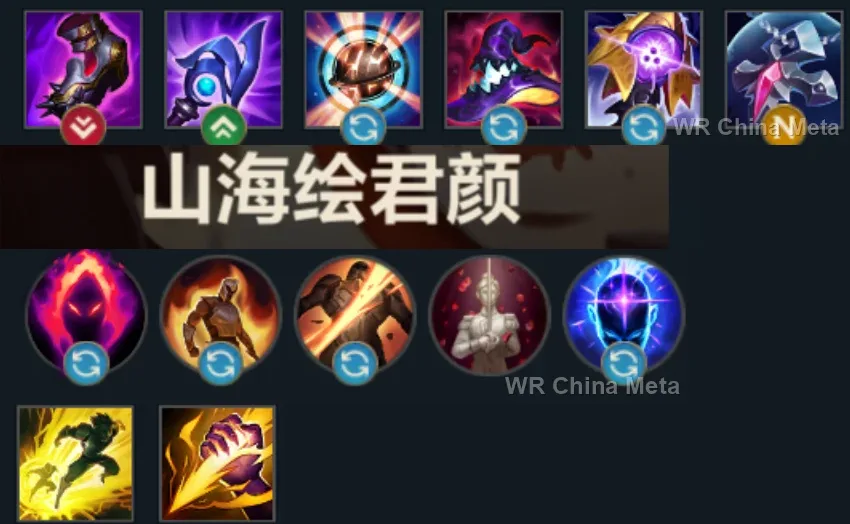
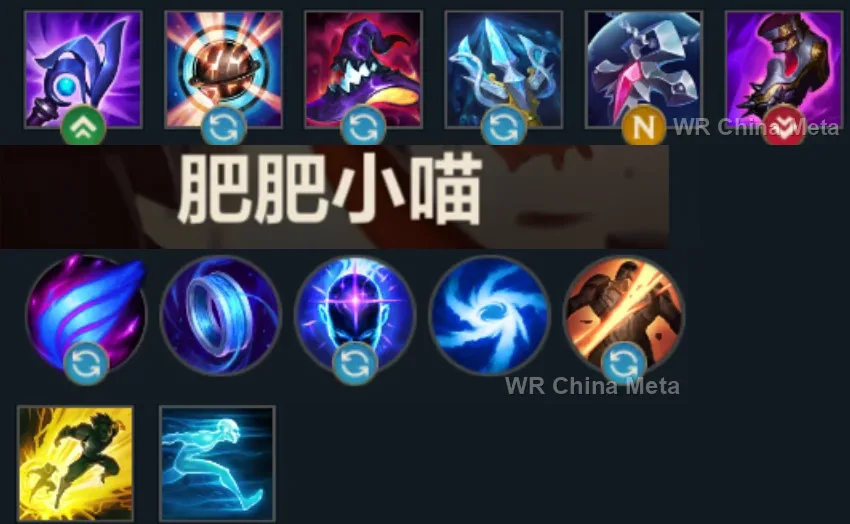
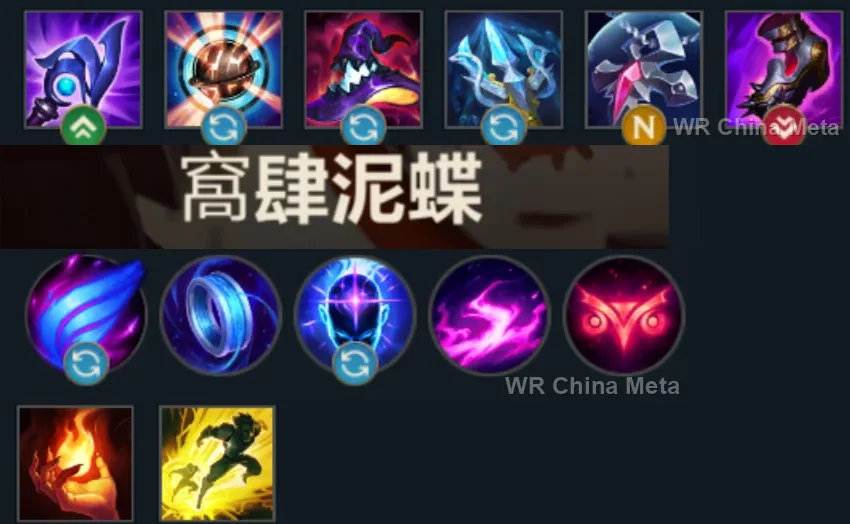
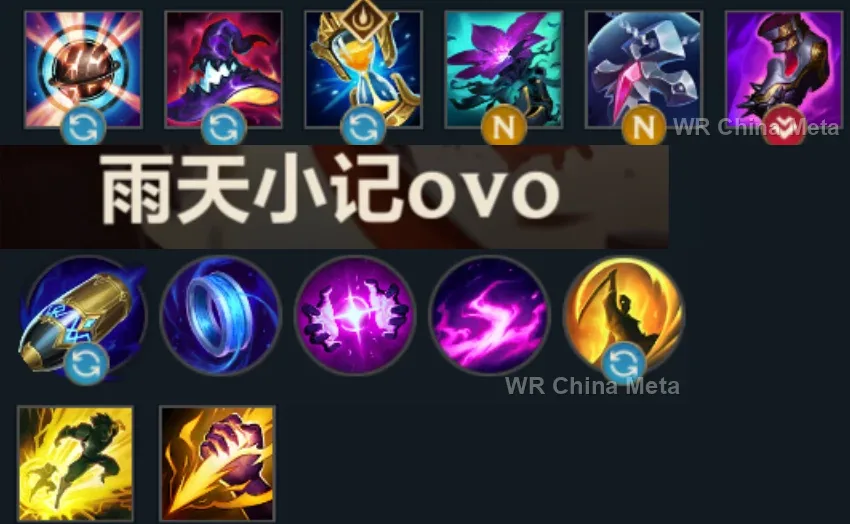
Counted on 18 real builds captured from the Chinese client, player by player. Independent from the official API above.


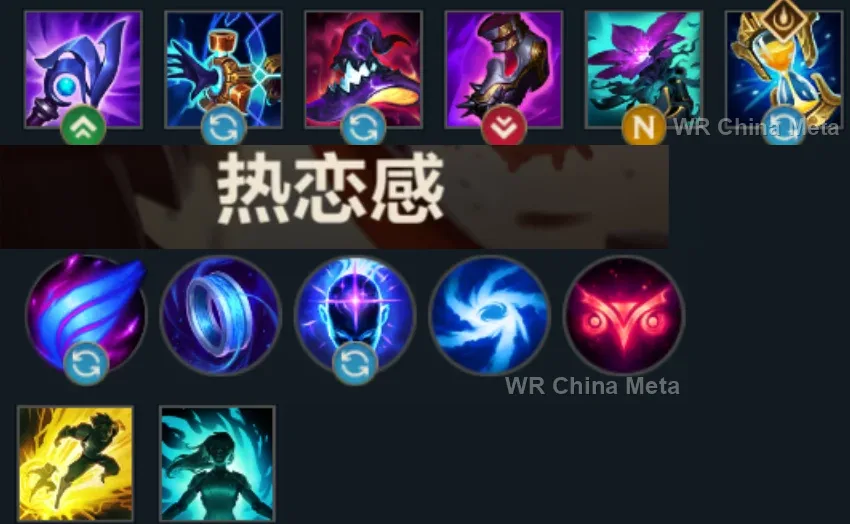
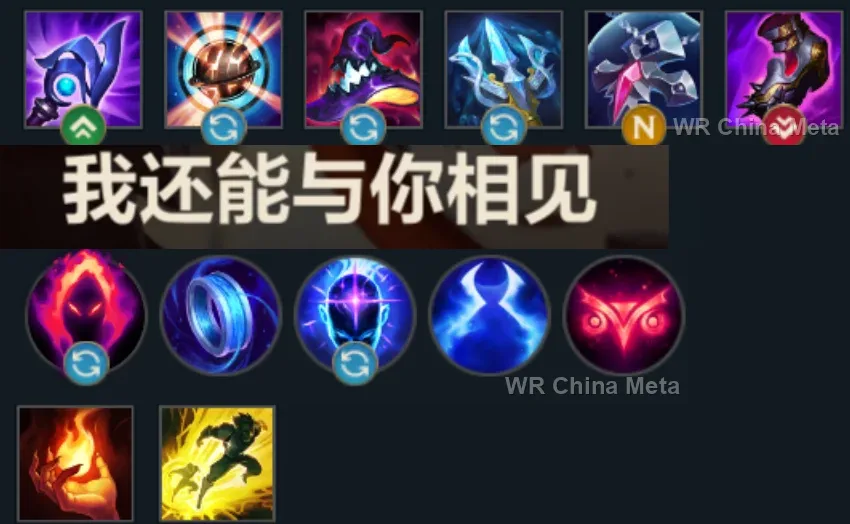
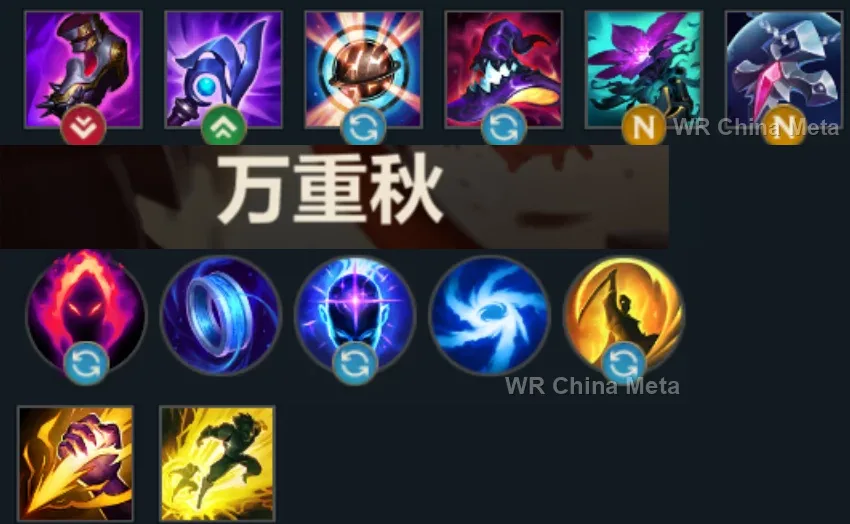
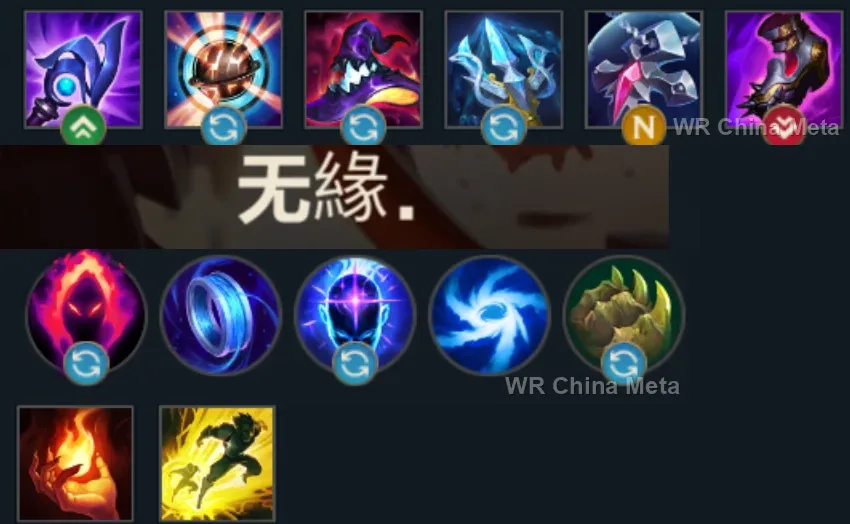
Taken from the official in-game China leaderboard. Spells, runes and items of every public top player.
16 of the top 30 players have a public match history; the others keep theirs private.
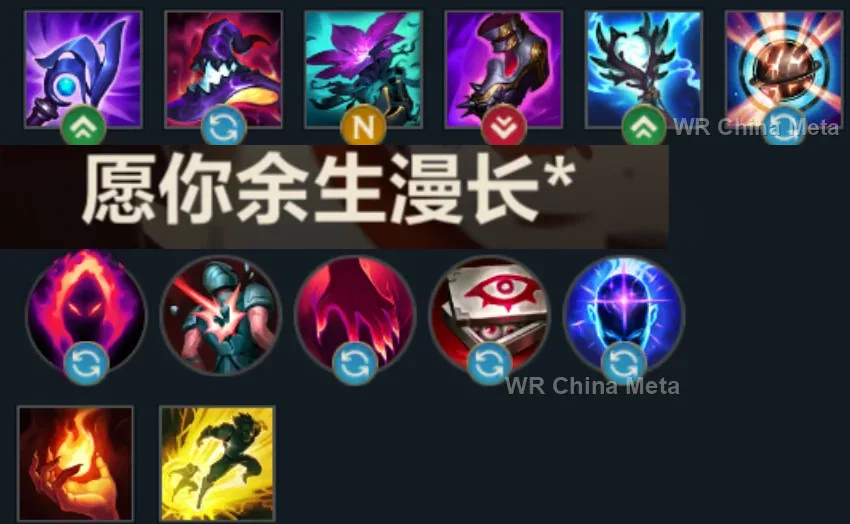
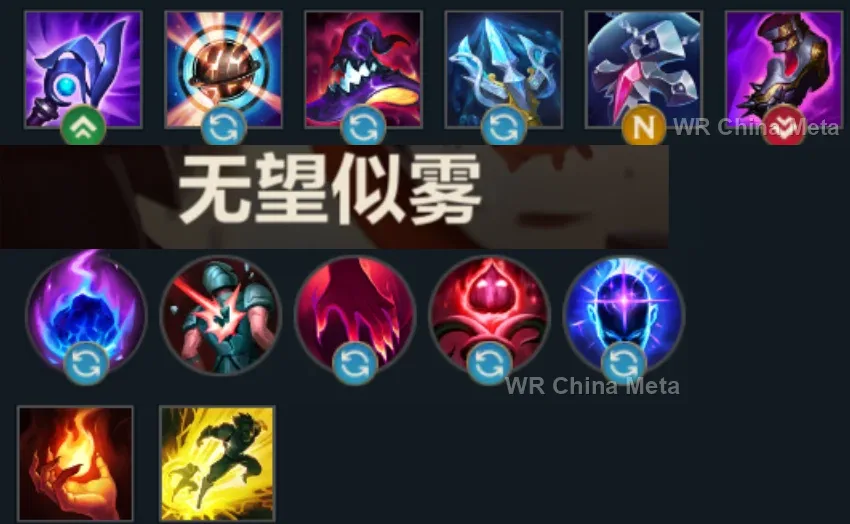
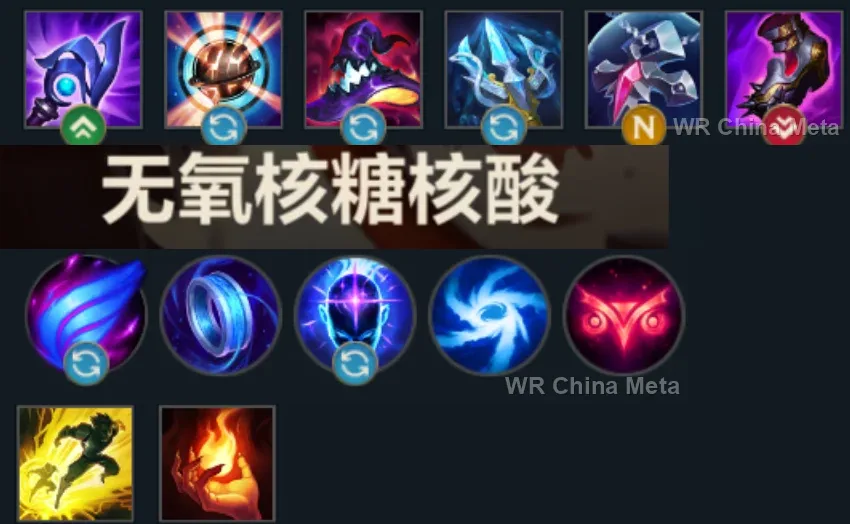
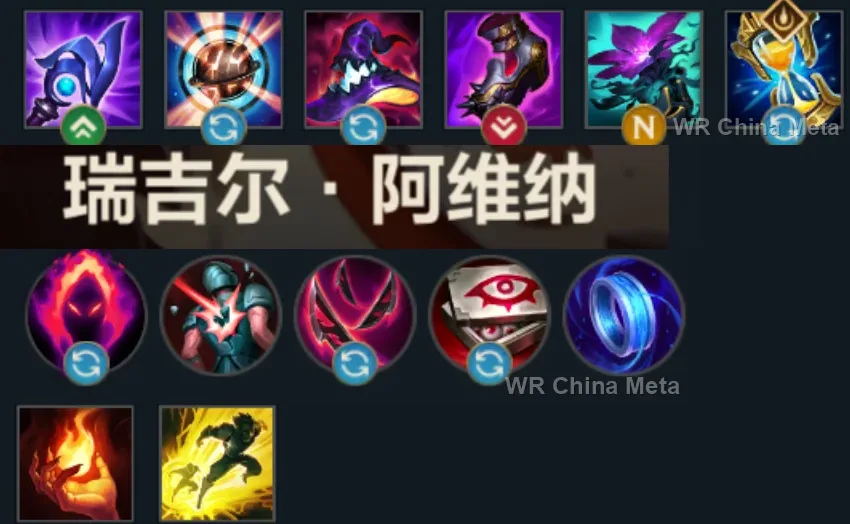
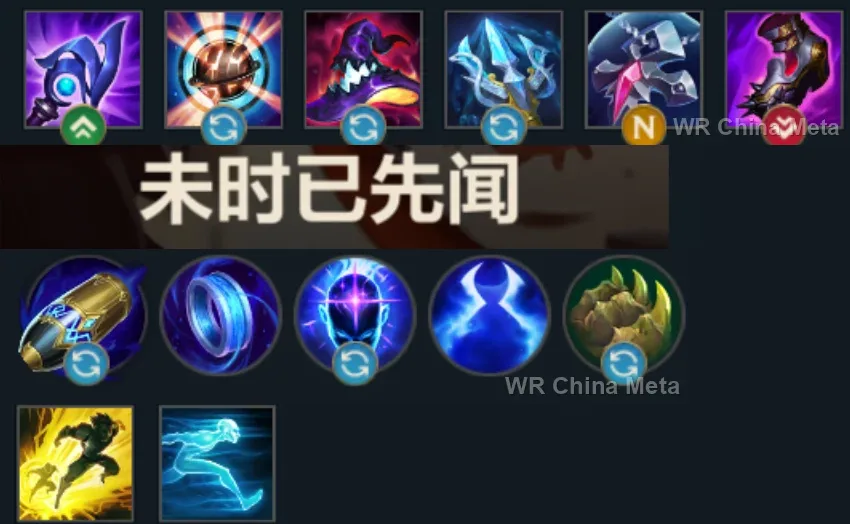
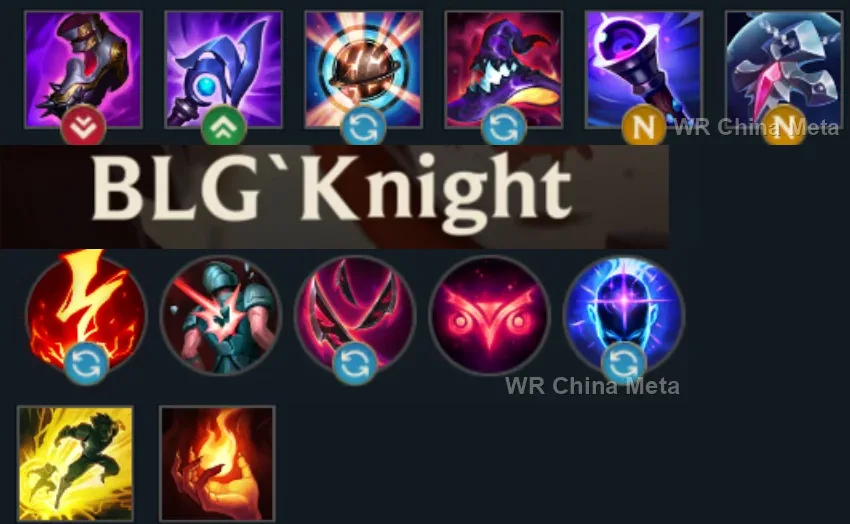
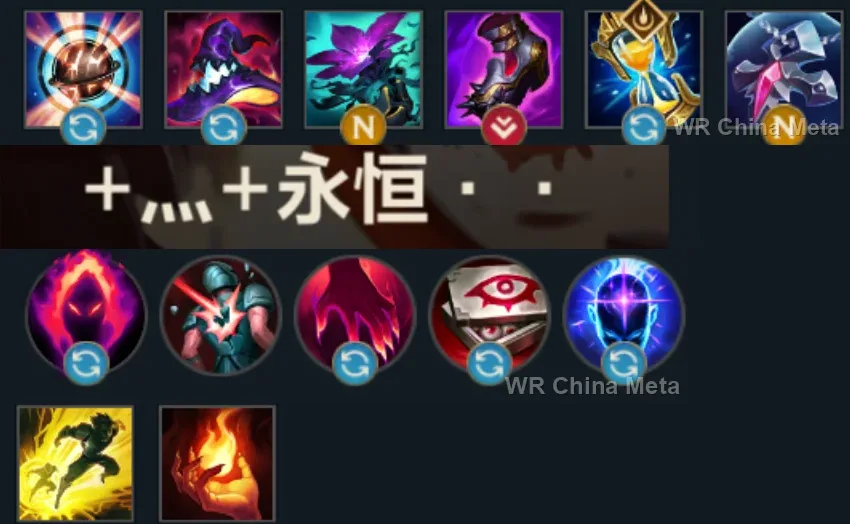
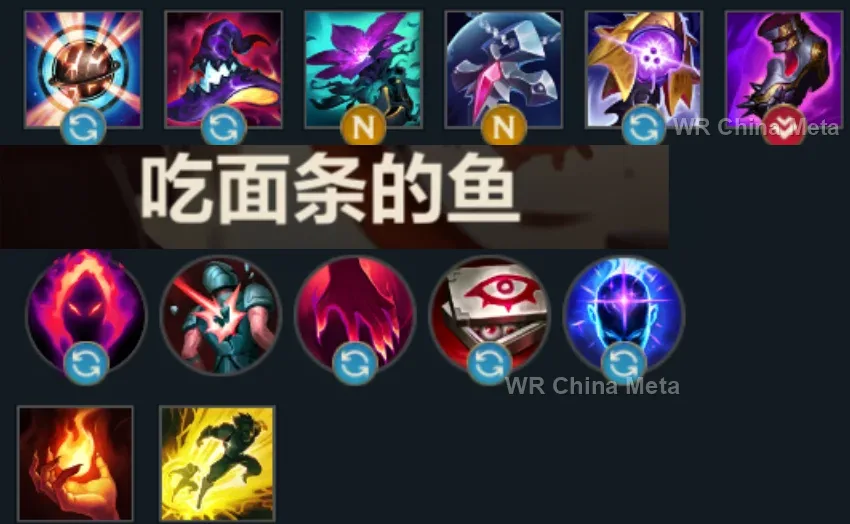
The toughest lane matchups for Taliyah on the Wild Rift China server, with why each is hard and exactly how to play it.
 Taliyah vs Fizz Unfavorable
Why Fizz counters Taliyah: The jump ignores your worked ground and up close your Q loses half its shards: he wants you exactly where you hurt least.
How to play Taliyah into Fizz: Reactive W on his jump: toss him back mid-flight. Worked ground BETWEEN you and life at maximum range.
→ Fizz Taliyah vs Yasuo Unfavorable
Why Yasuo counters Taliyah: The Wall blocks your Q and his dashes dance between your stones: your poke becomes an obstacle course you paid for.
How to play Taliyah into Yasuo: W his dash: it interrupts it. Your R wall cuts off his reinforcements in fights: use it as scissors, not as a fence.
→ Yasuo Taliyah vs Kassadin Unfavorable
Why Kassadin counters Taliyah: Shield on your poke and a jump over your W: your golden mid game has an hourglass named Kassadin.
How to play Taliyah into Kassadin: Out-roam him: with your R you are the best-ganking mid in the game. Every lane won elsewhere is an item he never recovers.
→ Kassadin Taliyah vs Ahri Skill matchup
Why Ahri counters Taliyah: Mobility versus terrain: her dash dodges your W, your stones punish repeated entries.
How to play Taliyah into Ahri: Work the ground on her favorite entry angles. W on the dash: knock her out of position and the full combo is yours.
→ Ahri Taliyah vs Orianna Skill matchup
Why Orianna counters Taliyah: Control versus control: the ball wins static fights, your terrain wins the movement game.
How to play Taliyah into Orianna: Move the lane with fast shoves and roam with R. Never fight statically inside ball radius: always relocate the arena.
→ OriannaThe champions Taliyah works best alongside on the Wild Rift China server, lane by lane, with the reason each pairing works.
Fling (E) is forced displacement in its purest form: it throws the target into the Unraveled Earth (E) rubble and hands them back stunned. Mega Adhesive (W) then holds them there, on the worked ground where the Threaded Volley (Q) recast really hurts.
All Out (R) hurls the carry away, and a forced displacement through Unraveled Earth (E) is a stun: it hands them to you alone and held still. Footwork (E) then dashes to you and shares his shield, the defensive tool your kit simply lacks.
Threaded Volley (Q) deals full damage to every new enemy it hits, and Unstoppable Force (R) piles them into a single spot, the exact condition where your poke pays the most. He is also the frontline that keeps divers off you.
Weaver's Wall (R) locks out for three seconds the moment you take a hit, which is exactly when they dive you: Shadow Dash (E) taunts the diver before he lands, and Stand United (R) shields you from half a map away in that window.
Worth it where terrain is close by. GNAR! (R) slams the group backwards and that is forced displacement: with Unraveled Earth (E) laid behind them it detonates on everyone, and into a wall Gnar adds his own stun. In open ground it is worth far less.
His whole kit is dragging: Ixtal's Impact (E) grabs and hauls a target away, Impale (R) suppresses up to three and drags them along. Every metre of that drag inside Unraveled Earth (E) is a stun, and Weaver's Wall (R) builds the terrain to slam them into.
His page says Absolute Zero (R) is beaten by simply walking away: Weaver's Wall (R) shuts the exit and the freeze actually gets to detonate. And Biggest Snowball Ever! (W) leaves them stacked in one spot for Threaded Volley (Q).
Cursed Touch (P) makes every magic hit carry true damage, and you are magic from the first rock to the last. Curse of the Sad Mummy (R) pins the group for 1.5 seconds: Threaded Volley (Q) hits them all at full value and the worked-ground recast cannot be dodged.
Your page is blunt: once a diver reaches you, nothing in your kit lets you take the hit. Crescent Guard (R) knocks him back and blocks ranged damage, and that knockback runs through Unraveled Earth (E) like any other forced displacement.
For games where a single enemy carry decides everything: Cease and Desist (R) is unstoppable and displaces her, so lay Unraveled Earth (E) where Vi will land and the carry arrives already stunned. Against the other four it changes nothing.
Your single-target damage lives entirely in the worked-ground recast: Deadly Flourish (W) roots anyone an ally has just hit, and one shard of Threaded Volley (Q) is enough to arm it. Rooted, they cannot step off the worked ground.
Frost Shot (P) slows on every hit, and a slowed target does not leave the worked ground before your recast. In return her page says she has no self-peel at all: Weaver's Wall (R) is the wall you put between her and the divers.
Her page says Bullet Time (R) is a stationary three-second channel that anyone with a dash walks around: Unraveled Earth (E) stuns exactly those dashes, and Weaver's Wall (R) closes the only way out left on foot.
Chain of Corruption (R) roots the first target and spreads to whoever stands next to them: a static, packed group is the condition where Threaded Volley (Q) deals full damage to every body instead of falling off on one.
Only if you accept playing forward: Seismic Shove (W) can push a target toward her instead of away, and Wild Rush (E) gets in for free. But you peel for nobody and her page says one crowd control shuts her down: you need a frontline.
Death Sentence (Q) drags and Flay (E) shoves: two forced displacements per fight, which means two Unraveled Earth (E) detonations. And the Dark Passage (W) lantern is your escape during the three seconds Weaver's Wall (R) stays locked out.
Magnet Storm (R) vacuums the whole group out of position: that is forced displacement on several targets at once, so Unraveled Earth (E) detonates on all of them and leaves them piled up for Threaded Volley (Q).
Dark Binding (Q) roots for two seconds: the target stays on the worked ground and the Threaded Volley (Q) recast cannot miss. Black Shield (E) meanwhile eats the crowd control that kills you while Weaver's Wall (R) is locked out.
Headbutt (W) shoves the target away and is the cleanest Unraveled Earth (E) trigger there is, because you decide where they get sent. And his page rates him among the tankiest in the game, which is the body you completely lack.
Rocket Grab (Q) pulls the carry across the rubble field, so they arrive already stunned and isolated, and Power Fist (E) keeps them down. But his page says that if the hook misses nothing is left, and you have no peel to give back.
| Lane | Tier | Win% | Pick% | Ban% | Pos. |
|---|---|---|---|---|---|
| Mid | A | 51.39% | 2.52% | 3.45% | #13 / 39 |
| Lane | Tier | Win% | Pick% | Ban% | Pos. |
|---|---|---|---|---|---|
| Mid | A | 51.46% | 2.54% | 3.74% | #13 / 38 |
| Lane | Tier | Win% | Pick% | Ban% | Pos. |
|---|---|---|---|---|---|
| Mid | A | 52.44% | 2.8% | 4.57% | #11 / 39 |
| Lane | Tier | Win% | Pick% | Ban% | Pos. |
|---|---|---|---|---|---|
| Mid | S | 53.16% | 3.37% | 5.51% | #6 / 41 |


Taliyah, the Stoneweaver, is a ranged mid-lane mage in Wild Rift who fights with thrown rock and reshaped terrain instead of a single flashy burst combo. Threaded Volley pokes and clears waves from long range, Unraveled Earth turns enemy dashes and forced movement into stuns, and Weaver's Wall gives her some of the best map presence of any mage - she can split a fight, block an engage, or ride the wall to reposition in an instant. She's less about deleting one target in half a second and more about controlling where a fight happens and who's allowed to move through it.
Skill order: Q > E > W (take R whenever it's available at 5/9/13). Max Threaded Volley first since it's her main poke and wave-clear tool, put the second point into Unraveled Earth for the extra damage and stun setup in skirmishes, and leave Seismic Shove at rank one as long as possible since its value is almost entirely the forced displacement, not raw damage.
Play Taliyah like a long-range poker in lane: sit at max Threaded Volley range, spread your shards across the wave instead of dumping all five into one minion, and only commit to the worked-ground recast when the enemy laner is caught out of position, since that's where her real damage lives. Once Unraveled Earth comes online, start laying it over the wave or over likely dash-in paths so an aggressive walk-up turns into a stun instead of a free hit on you. Her clearest power spike is the moment Q and its recast are both available - look for short trades then - but respect melee and dash-heavy matchups before that, since she has very little to fall back on in a close fight.
From the mid game on, Taliyah wants to fight from the flank or the back of her own team, poking grouped enemies with Threaded Volley so the damage resets across multiple targets instead of falling off on one. Drop Unraveled Earth on the path the enemy engage is likely to take, so their dive turns into a long stun the moment someone commits to it. Save Weaver's Wall to split the fight - wall the enemy frontline off from your carries, block a dive coming at you, or ride it onto an exposed flank - but don't throw it out on the engage side unless you're confident you won't take damage in the next three seconds, or you lose the option to ride it away when you need it most.