
WR China Meta
Meta, tier list & top-player builds from the China server · live
Meta, tier list & top-player builds from the China server · live

韦鲁斯 · 惩戒之箭 Marksman A
✅ Patch 7.2e · stats updated 2026-09-12 · real builds of 25 top-ranked China server players captured 2026-09-11
Difficulty Damage Toughness Utility
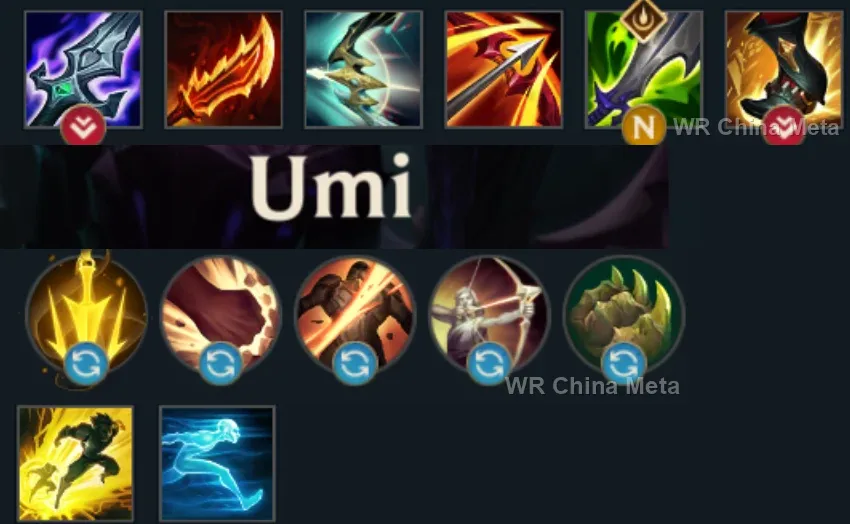
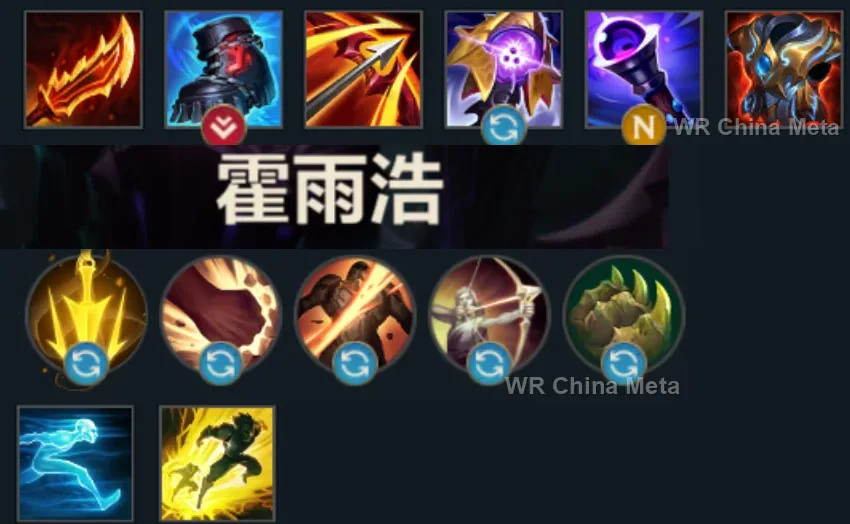
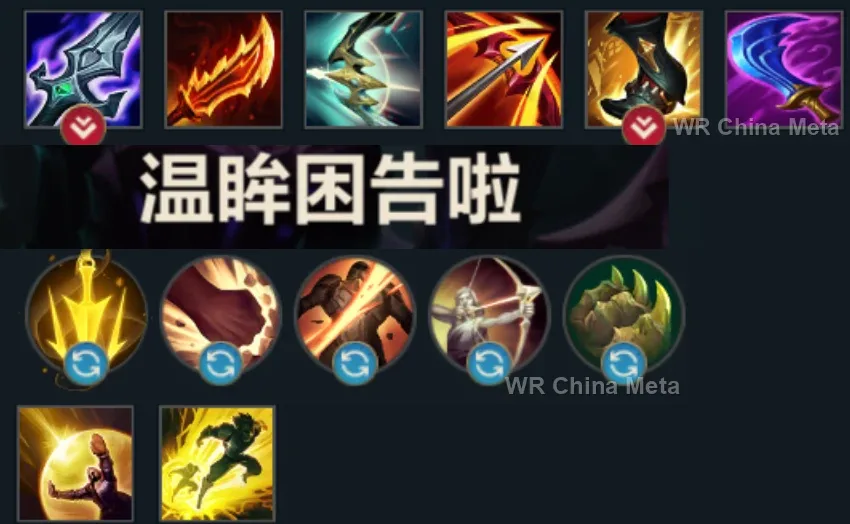
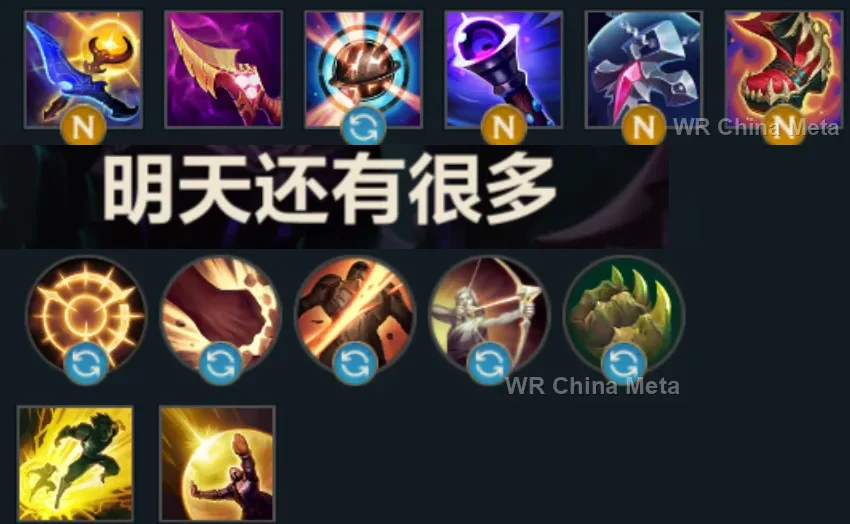
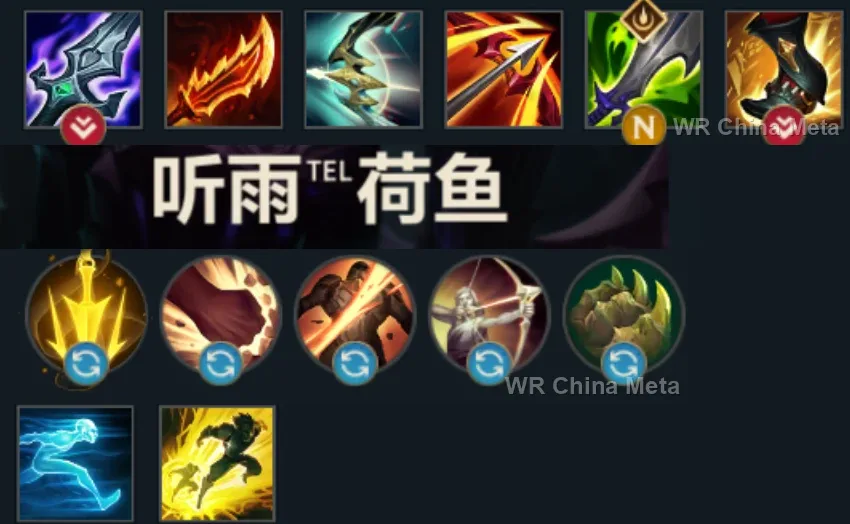
How the strongest players on the Wild Rift China server (国服) build Varus: live win/pick statistics by rank bracket, the most-used item and rune sets, and the real loadouts of the top ranked Varus players, captured in-game.
📖 How to play Varus





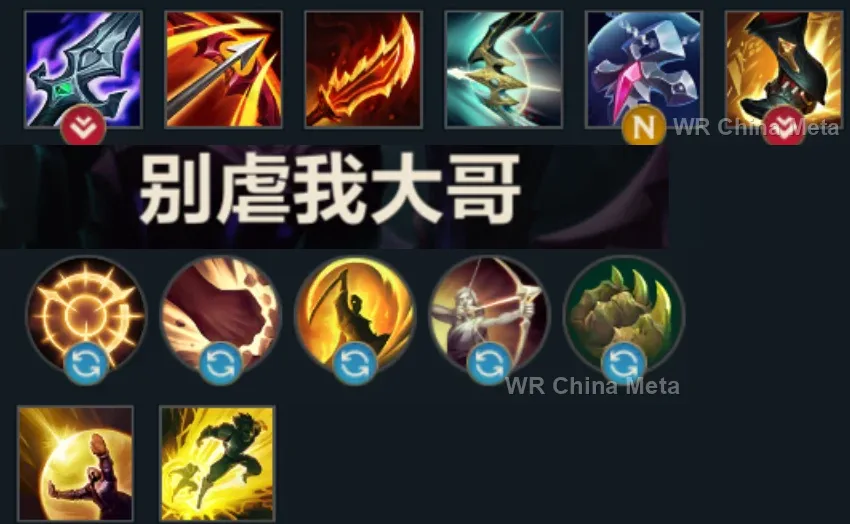
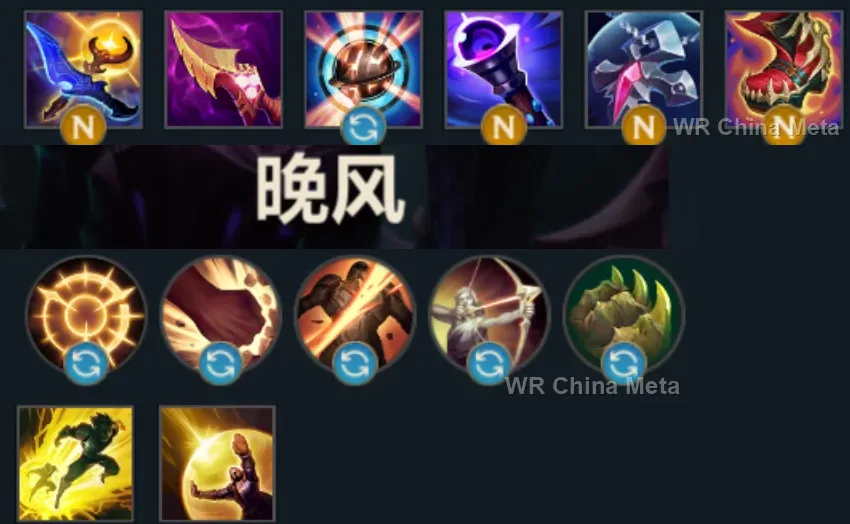
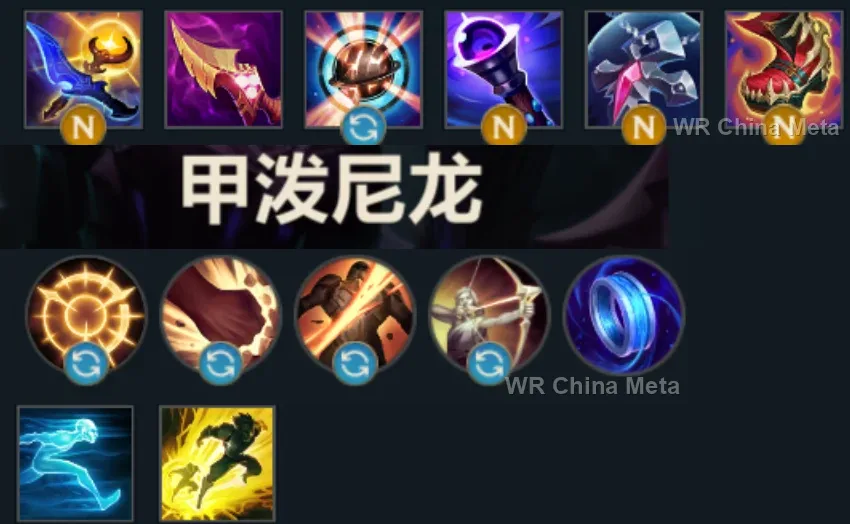
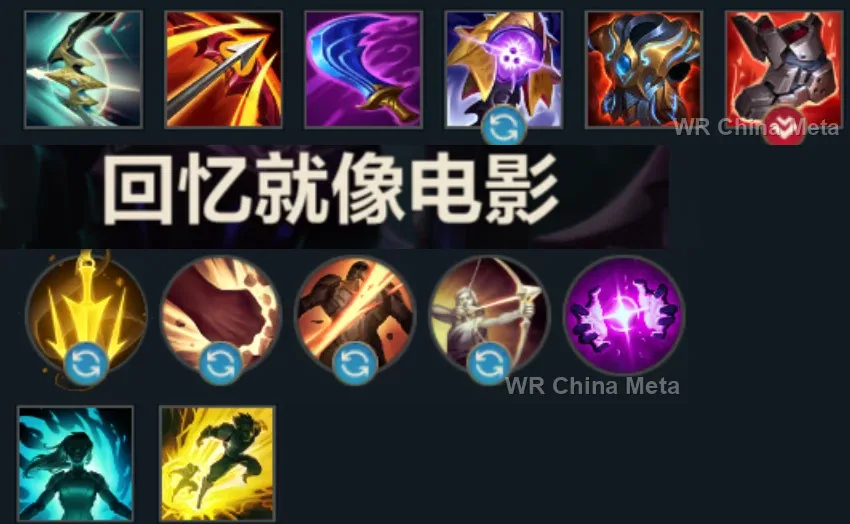
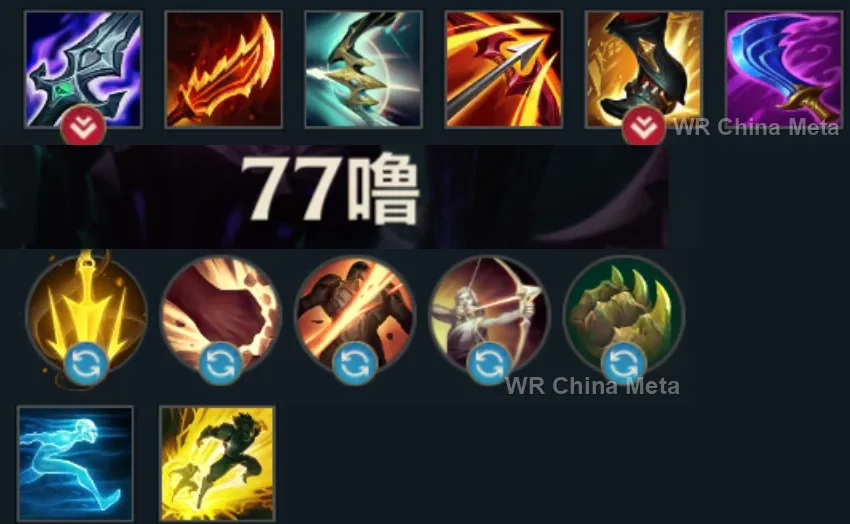
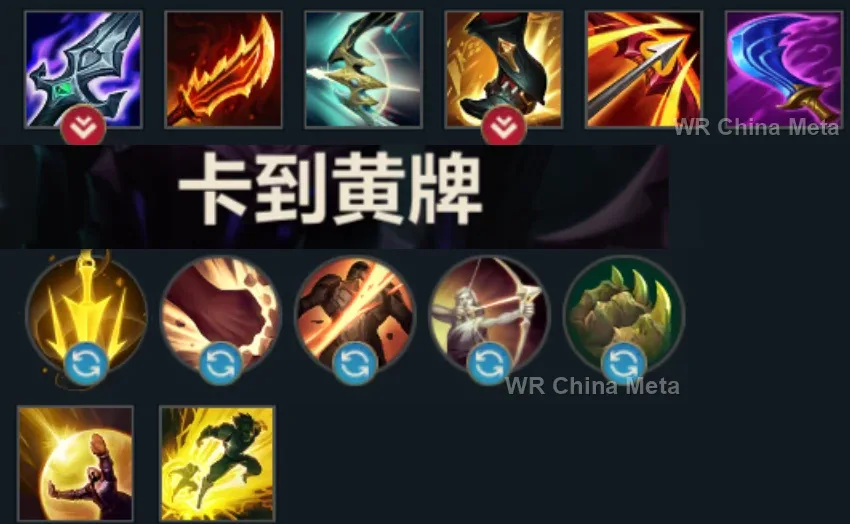
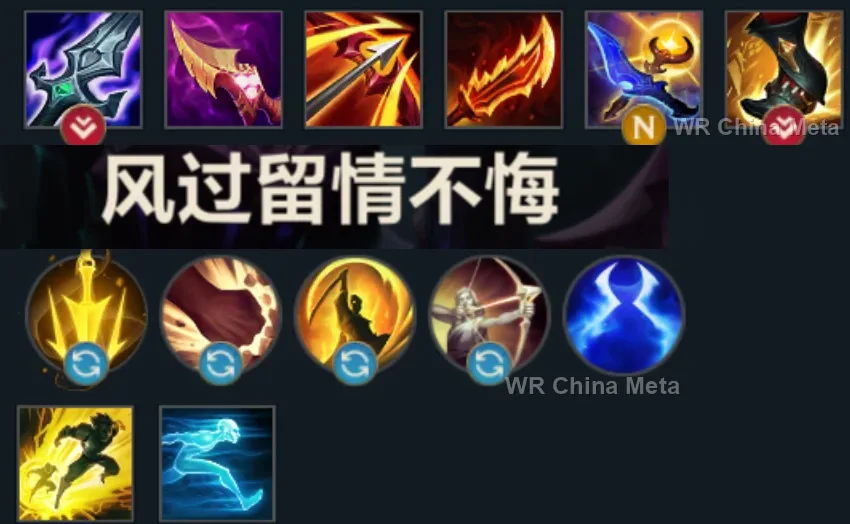
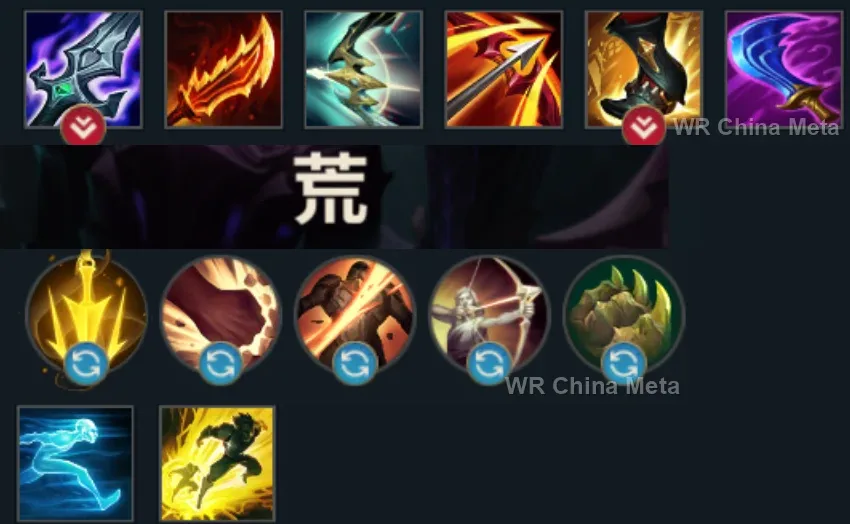
Counted on 26 real builds captured from the Chinese client, player by player. Independent from the official API above.


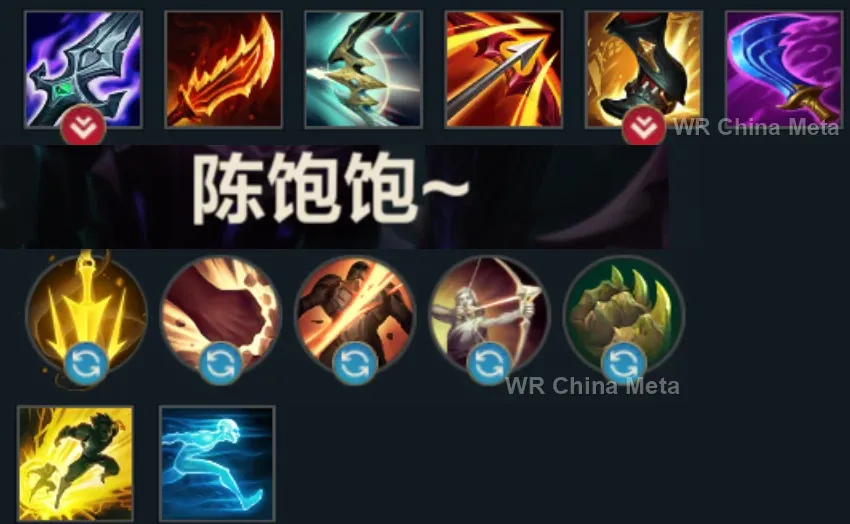
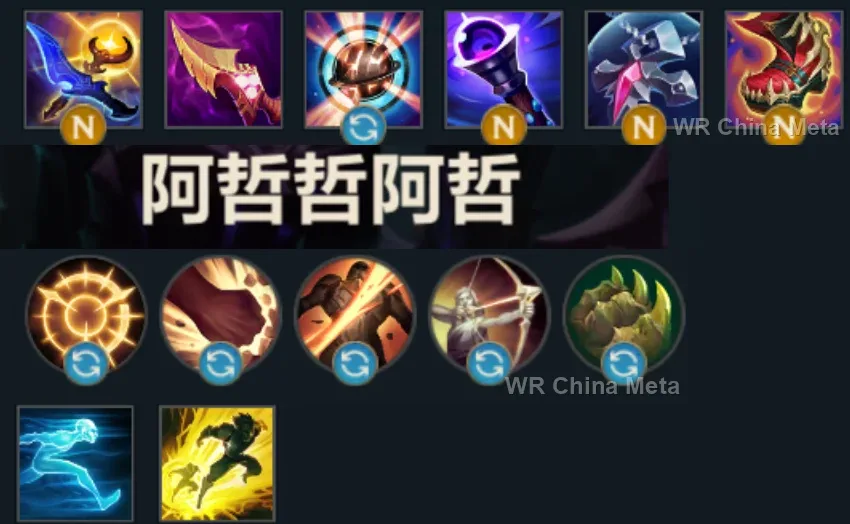
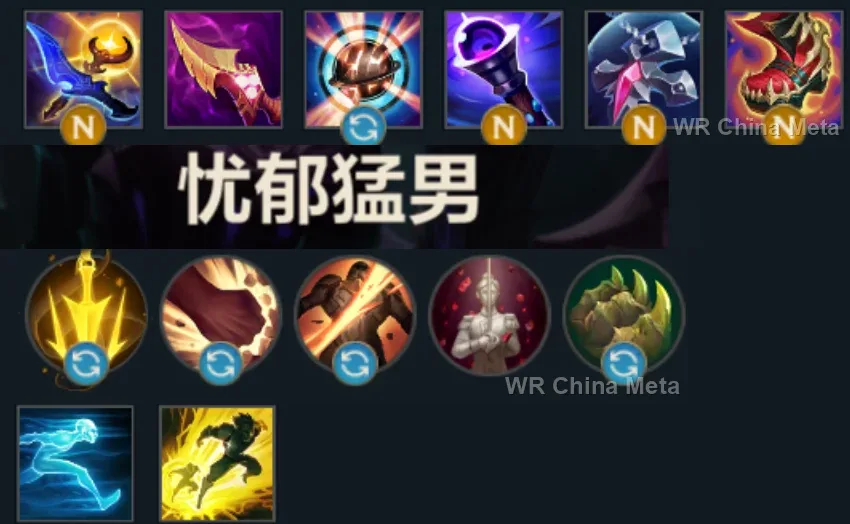
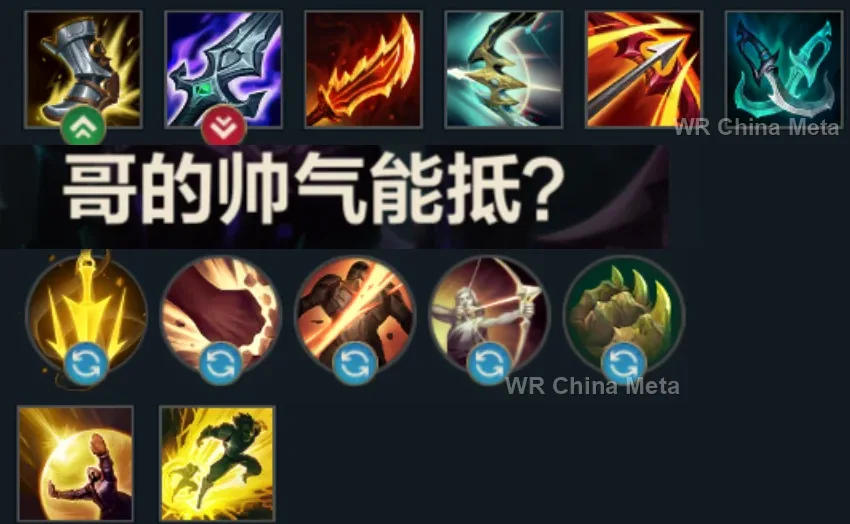
Taken from the official in-game China leaderboard. Spells, runes and items of every public top player.
25 of the top 30 players have a public match history; the others keep theirs private.
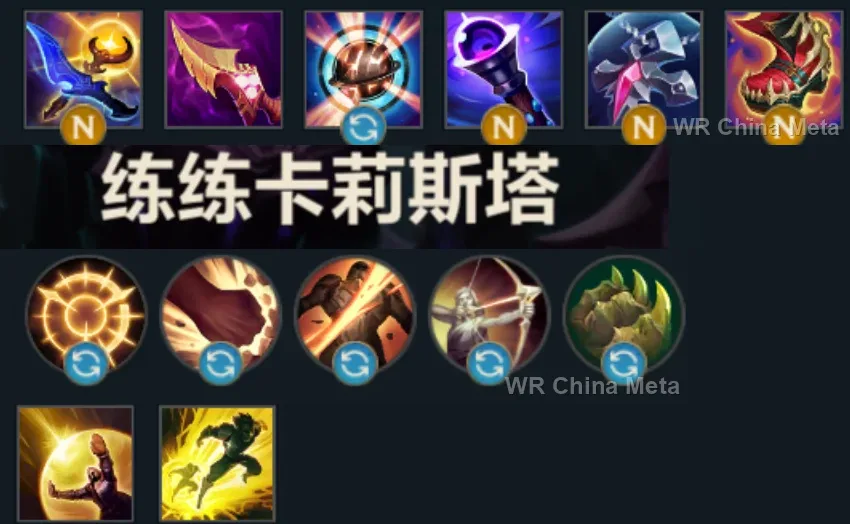
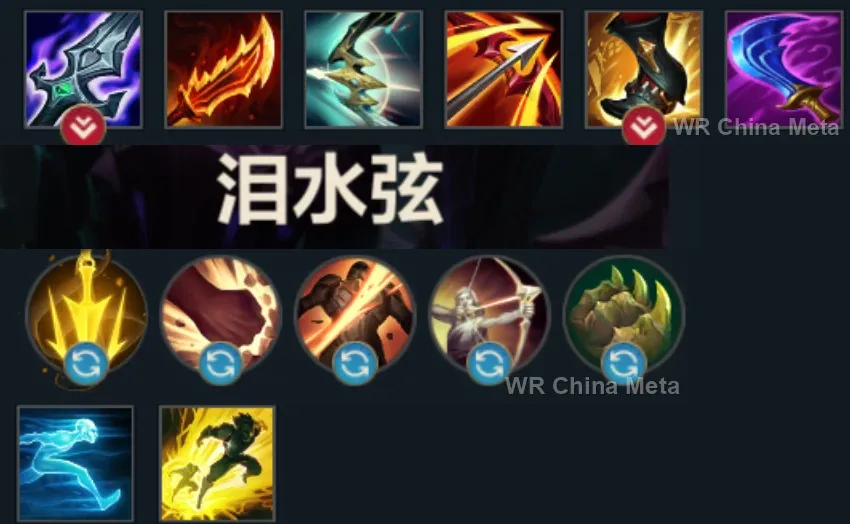
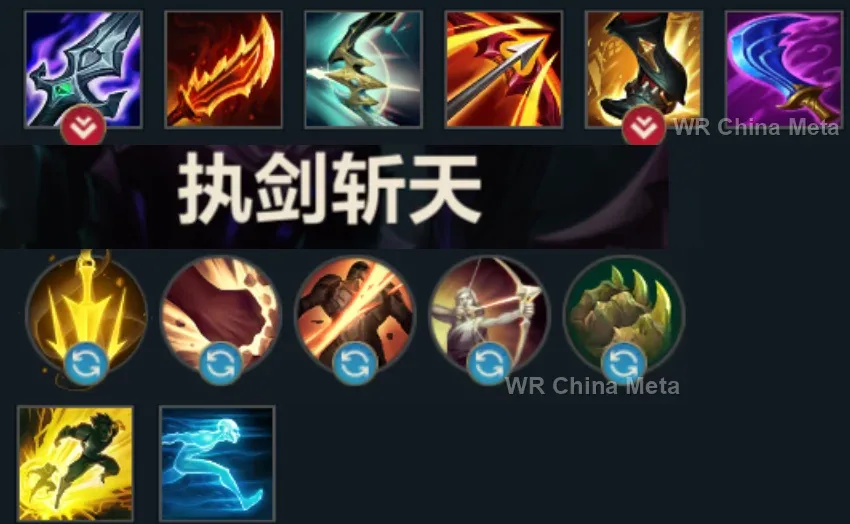
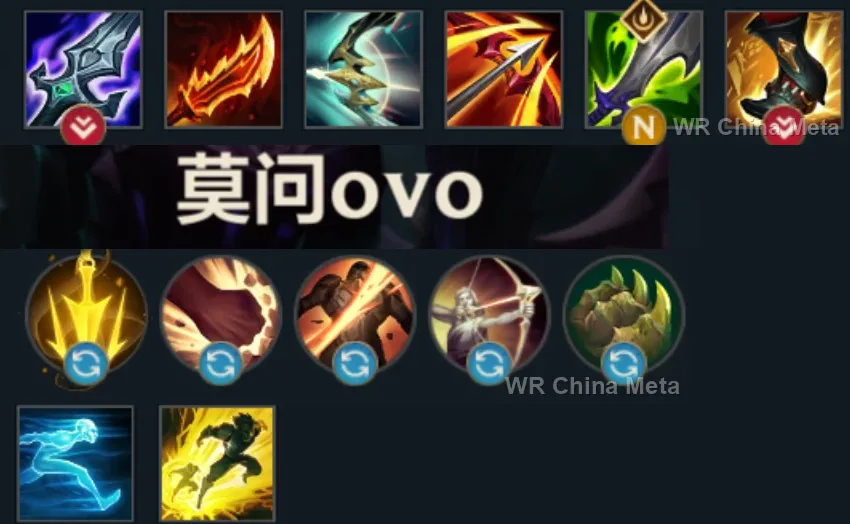
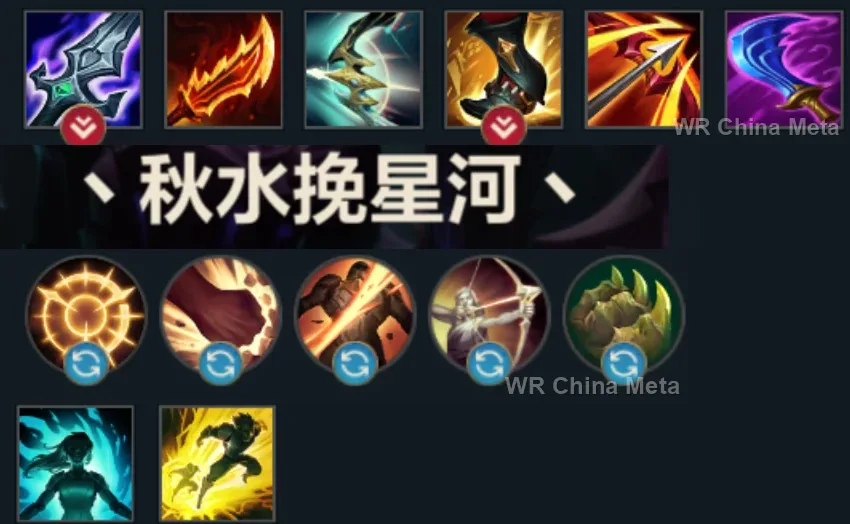
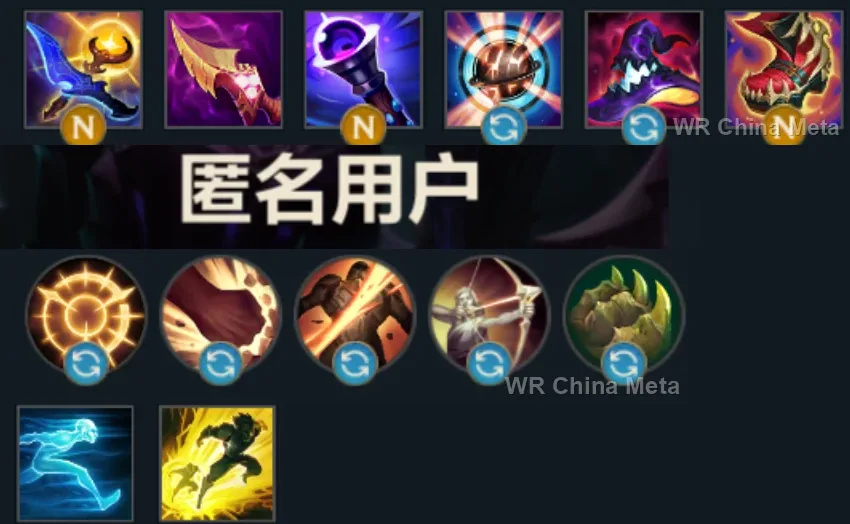
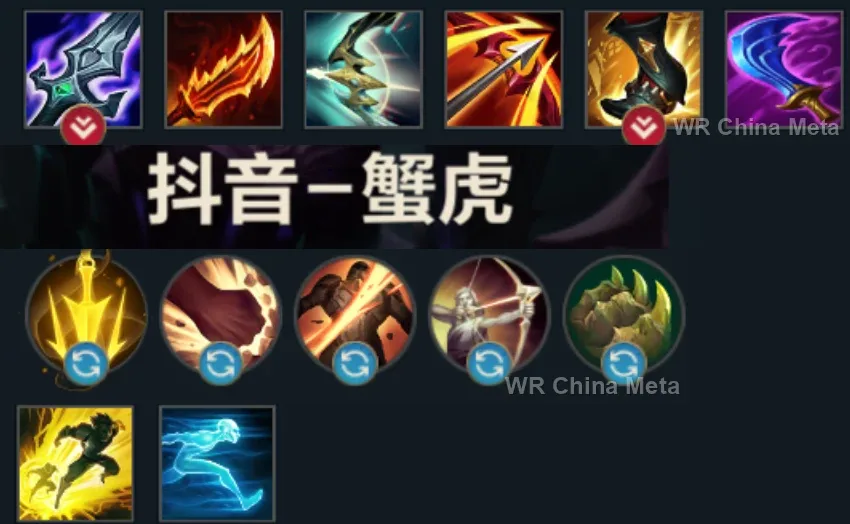
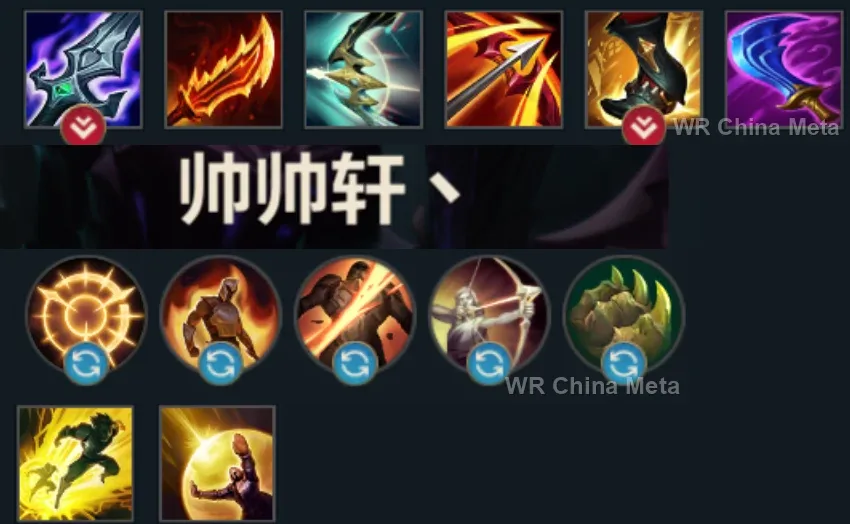
The toughest lane matchups for Varus on the Wild Rift China server, with why each is hard and exactly how to play it.
 Varus vs Zeri Unfavorable
Why Zeri counters Varus: She slides under your charged Q and out-paces you late: your slow poke against her electricity.
How to play Varus into Zeri: Dominate the early game with poke: she cannot answer. Pre-emptive root on her dash lines. Close the lane with plates.
→ Zeri Varus vs Samira Unfavorable
Why Samira counters Varus: Her W shreds your R mid-flight and her dash closes your range in a flash.
How to play Varus into Samira: R AFTER her W, always. Q poke from astronomical distance: a Samira below 60% never goes in.
→ Samira Varus vs Ezreal Skill matchup
Why Ezreal counters Varus: A poke duel: your Q charges more damage, his blink dodges better. The farm pays the winner.
How to play Varus into Ezreal: Q along the farming lines, not at him. Root when his E is on cooldown: that is the moment for the support all-in.
→ Ezreal Varus vs Ashe Skill matchup
Why Ashe counters Varus: Poke versus poke with crossing CC: your root fires faster, her slow lasts longer.
How to play Varus into Ashe: Win the first CC exchange: root the step she takes for Volley. Your multi-man R decides the 2v2s: open with it.
→ Ashe Varus vs Vayne Skill matchup
Why Vayne counters Varus: Your Blight stacks punish her in medium trades, but she out-lasts you in the infinite grind.
How to play Varus into Vayne: Trade at 3 Blight stacks plus Q: winning math. Root her exit Tumble. Close before her third item.
→ VayneThe champions Varus works best alongside on the Wild Rift China server, lane by lane, with the reason each pairing works.
Unstoppable Force (R) pins a whole group from outside their range: it's the one window where you can charge Piercing Arrow (Q) all the way without dying, and against clumped enemies Chain of Corruption (R) spreads from one to the next.
Charging Piercing Arrow (Q) leaves you motionless and exposed: Spirit's Refuge (W) blanks the burst combo that would kill you at that exact instant, and Stand United (R) shields you from anywhere on the map while Shen holds a side lane.
Call of the Forge God (R) charges through their whole team slowing everyone, and the recast knocks them up together: that's two area controls in a row on a compact group, the only shape in which Chain of Corruption (R) really spreads.
In Mega form Crunch (E) gathers them and Wallop (W) stuns the pile for 1.25 seconds: stationary and packed together is the condition where Chain of Corruption (R) spreads to three targets instead of rooting one.
Situational: Realm of Death (R) removes the assassin who would kill you mid-charge for 7 seconds, and you poke a calm 4v4. But for those 7 seconds you don't have him in front of you either, so it only pays against one clear threat.
Curse of the Sad Mummy (R) is a 1.5-second AoE stun: you get the time to charge Piercing Arrow (Q) into targets that cannot move, and Hail of Arrows (E) on top keeps working because nobody walks out of the circle.
Cataclysm (R) seals the target inside a ring they can't leave: Hail of Arrows (E) in there is undodgeable and every Blight stack lands. Dragon Strike (Q) through Demacian Standard (E) opens the fight from far out.
Infinite Duress (R) suppresses for a full second: the target can't dash or run while you detonate the Blight stacked on them. And every takedown lights up Living Vengeance (P), the attack speed that closes the next fight.
You stand still and defenceless for the whole charge of Piercing Arrow (Q): Frenzying Taunt (E) drags the assassin onto Rammus in exactly that window, and Soaring Slam (R) lands on the front line, slowing whoever wanted to reach you.
Absolute Zero (R) puts the enemy to a choice: stand under the nuke or leave the circle. Hail of Arrows (E) laid over the channel takes the second option away, and Snowball Barrage (E) roots whoever tries it anyway.
Command: Shockwave (R) yanks them all into one spot: that's the shape where Chain of Corruption (R) jumps from one enemy to the next instead of rooting a single one. And Command: Protect (E) shields you while you're still charging.
Shield of Durand (W) taunts everyone who reached you at once and leaves them standing inside Hail of Arrows (E). And Hero's Entrance (R) drops in from across the map exactly when your charge has pinned you in the wrong place.
Demonic Ascension (R) keeps him in the middle of the fight healing for its whole duration: that's the front line you need to charge from behind without anyone reaching you. And Nevermove (E) clumps them before you even spend your ultimate.
Your problem is the dashes that reach you mid-charge: Unraveled Earth (E) cuts short and stuns anyone who tries to dash through it. Weaver's Wall (R) splits the fight in two and leaves you isolated targets to shoot at.
Charging Piercing Arrow (Q) is a bet: if anything touches you, the whole thing is wasted. With Pyromania (P) ready Annie's stun cannot be dodged, so you know in advance that second of frozen enemies is yours and the arrow flies.
Dark Binding (Q) roots for 2 seconds: that's the exact window to charge Piercing Arrow (Q) all the way on a target that cannot move. And Black Shield (E) blanks the hook or stun that, with no dash of your own, would kill you.
Flay (E) shoves and slows whoever is reaching you while you're locked into a charge, and The Box (R) seals the group in a 99% slow cage: nobody moves in there, and Chain of Corruption (R) finds them all packed together.
A pure poke lane: Inner Flame (Q) and Piercing Arrow (Q) push the enemy out before level 5. Focused Resolve (W) threatens a root on two enemies at once, and Inspire (E) gives you the shield and speed to walk out of a dive.
Glitterlance (Q) slows from range and sets up the stationary targets a charged arrow demands. Then, if the dive lands anyway, Rampant Growth (R) adds health and knocks the assassin off in the one instant you couldn't react.
Aqua Prison (Q) into Tidal Wave (R) is two knock-ups in a row: a group locked down twice is exactly what Chain of Corruption (R) wants. And Tidecaller's Blessing (E) adds a slow to your attacks to keep them in range.
Worth it if you play Varus as an early lane bully: Zenith Blade (E) into Shield of Daybreak (Q) holds a target still long enough. But she drags you into close-range fights, and with no dash you don't come back out of those.
| Lane | Tier | Win% | Pick% | Ban% | Pos. |
|---|---|---|---|---|---|
| Duo (ADC) | A | 51.3% | 6.23% | 0.51% | #5 / 20 |
| Lane | Tier | Win% | Pick% | Ban% | Pos. |
|---|---|---|---|---|---|
| Duo (ADC) | A | 51.25% | 6.39% | 0.52% | #6 / 20 |
| Lane | Tier | Win% | Pick% | Ban% | Pos. |
|---|---|---|---|---|---|
| Duo (ADC) | A | 50.57% | 6.83% | 0.48% | #6 / 22 |
| Lane | Tier | Win% | Pick% | Ban% | Pos. |
|---|---|---|---|---|---|
| Duo (ADC) | B | 50.39% | 7.42% | 0.32% | #10 / 22 |


Varus, the Arrow of Retribution, is a hybrid marksman in Wild Rift who blends long-range physical poke with a magic damage engine built from Blight stacks. He's built for damage over durability — a fragile, low-utility hyper-carry who wins by whittling lanes down from max range and then converting stacked Blight into burst once fights start. His build path flexes between crit and on-hit, but the game plan stays the same: poke safely, snowball attack speed off takedowns, and let Chain of Corruption pick apart grouped enemies.
Skill order: Q > W > E (take R whenever it's available)
Lane from behind your charged Q — poke at max range and back off before the enemy can close, since you have no escape once you commit. Prioritize safe farm with autos before level 5, letting Blighted Quiver stack Blight naturally whenever you do trade. Your first real power spike is level 5: Chain of Corruption turns any overextension from the enemy lane into a kill. Your second spike comes with your first couple of items, once Blight's magic damage starts adding real numbers on top of your physical hits.
From mid-game on, hang at max range and let Chain of Corruption open the fight — a good root through a grouped enemy team chains onto extra targets and hands your team a free follow-up window. Once it lands, drop Hail of Arrows on the cluster to slow them and cut incoming heals, then kite with attack-move, prioritizing whoever's rooted or easiest to reach instead of the front line. Save the ultimate to punish an overextending dive rather than just to open damage — the crowd control is worth more than the magic damage most of the time.