
WR China Meta
Meta, tier list & top-player builds from the China server · live
Meta, tier list & top-player builds from the China server · live

黛安娜 · 皎月女神 Assassin A
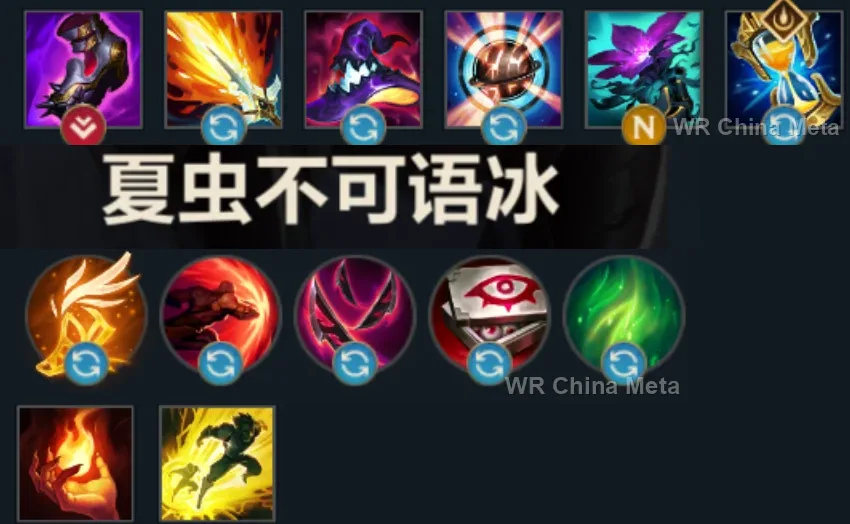
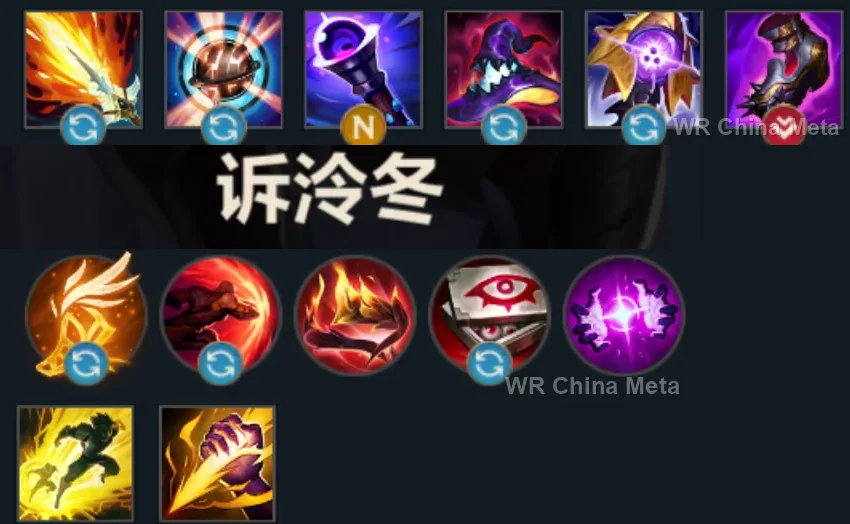
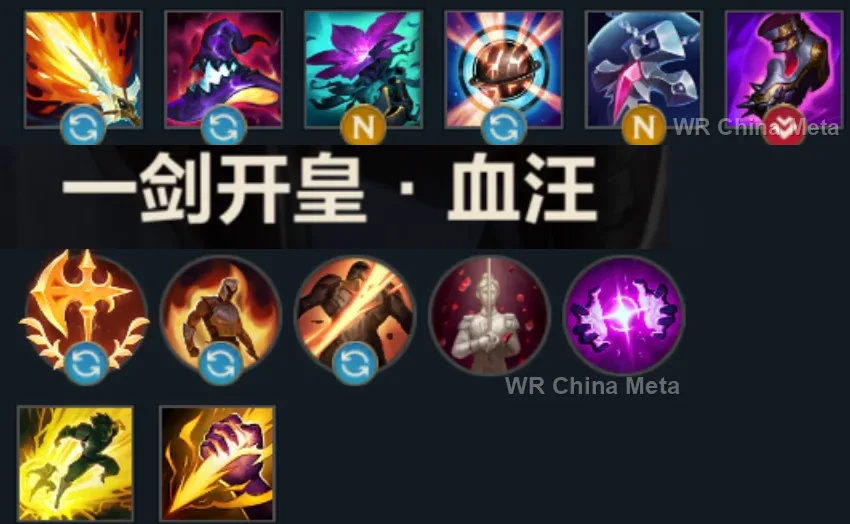
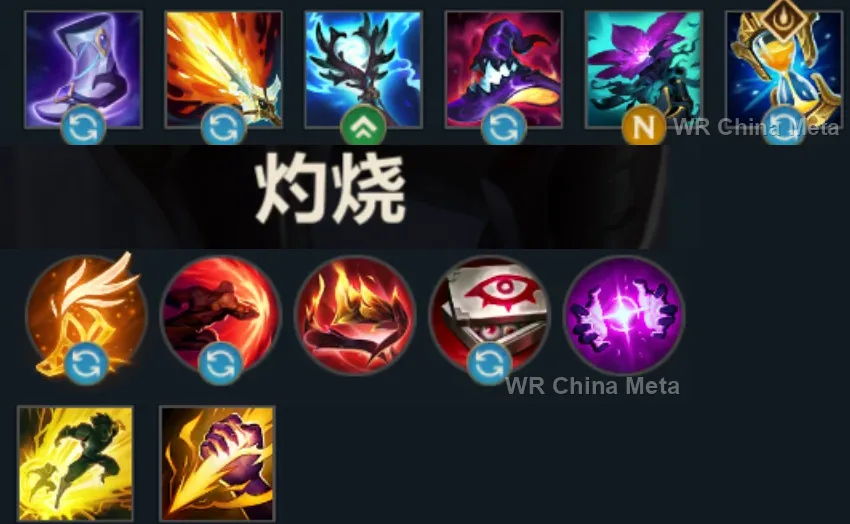
✅ Patch 7.2e · stats updated 2026-09-12 · real builds of 16 top-ranked China server players captured 2026-09-11
Difficulty Damage Toughness Utility
How the strongest players on the Wild Rift China server (国服) build Diana: live win/pick statistics by rank bracket, the most-used item and rune sets, and the real loadouts of the top ranked Diana players, captured in-game.
📖 How to play Diana







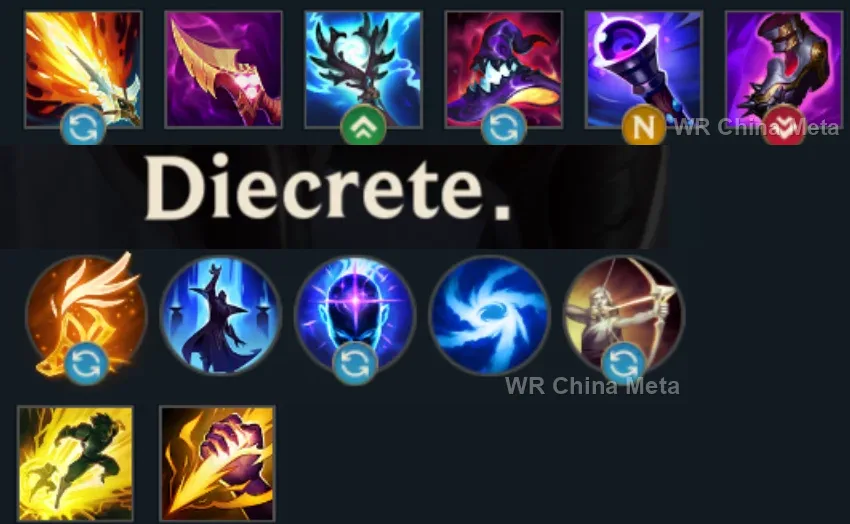
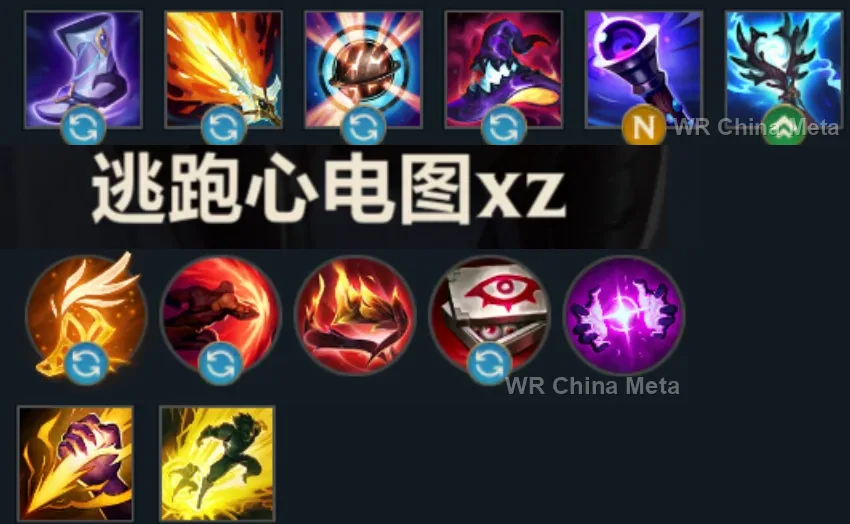
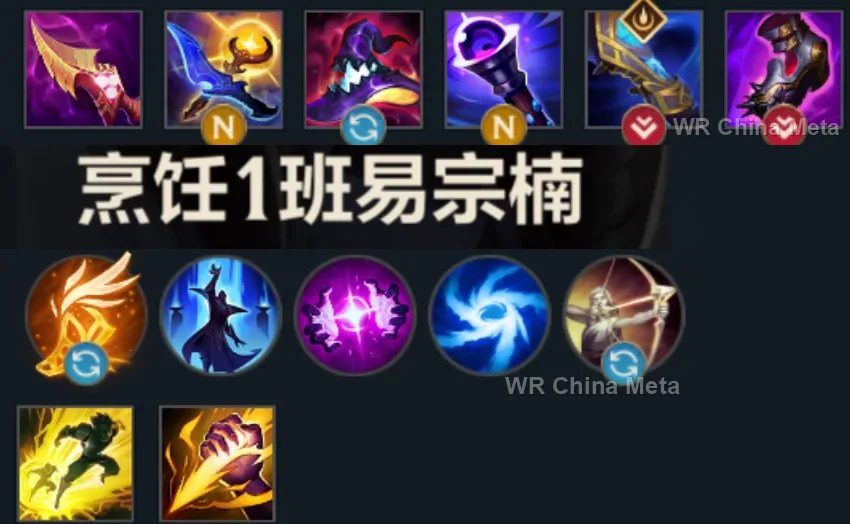
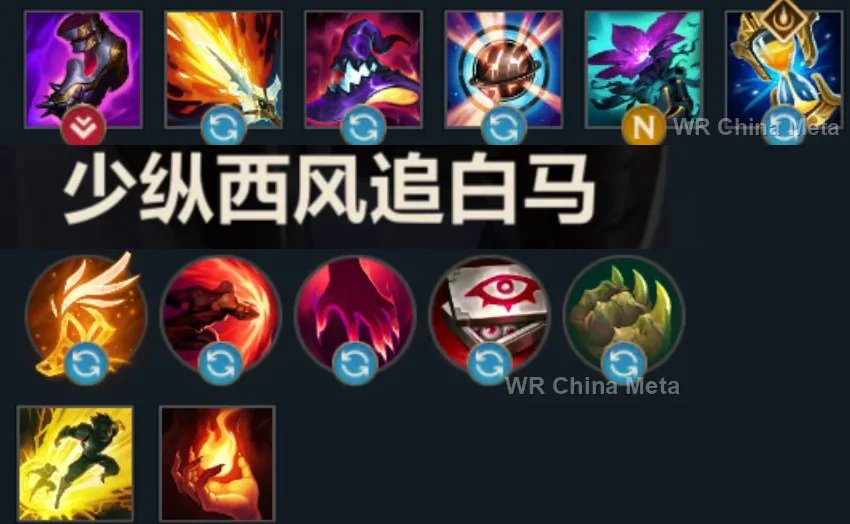
Counted on 18 real builds captured from the Chinese client, player by player. Independent from the official API above.



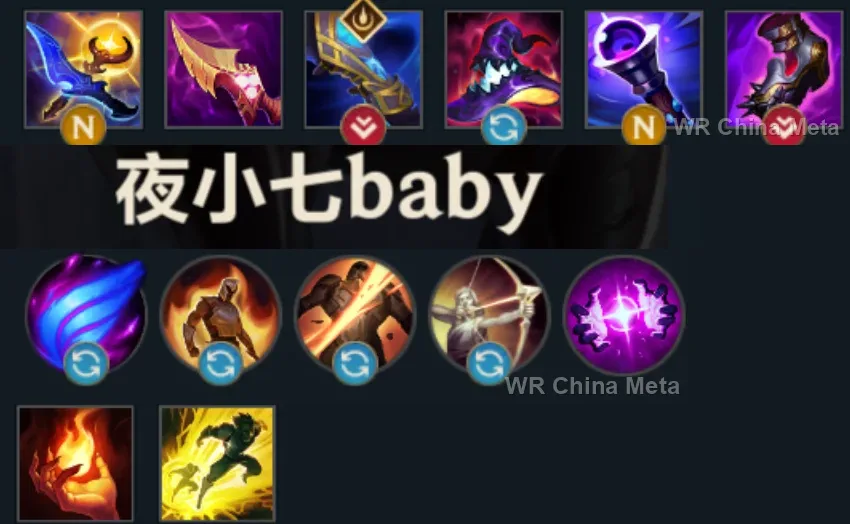
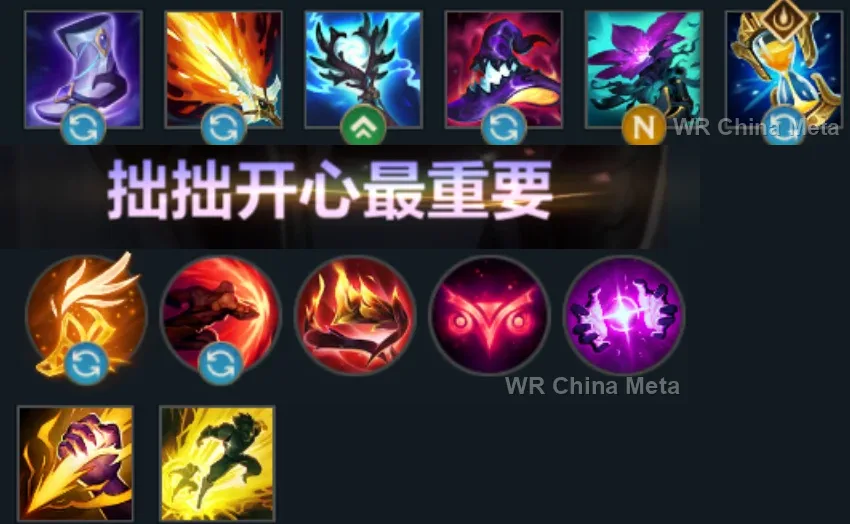
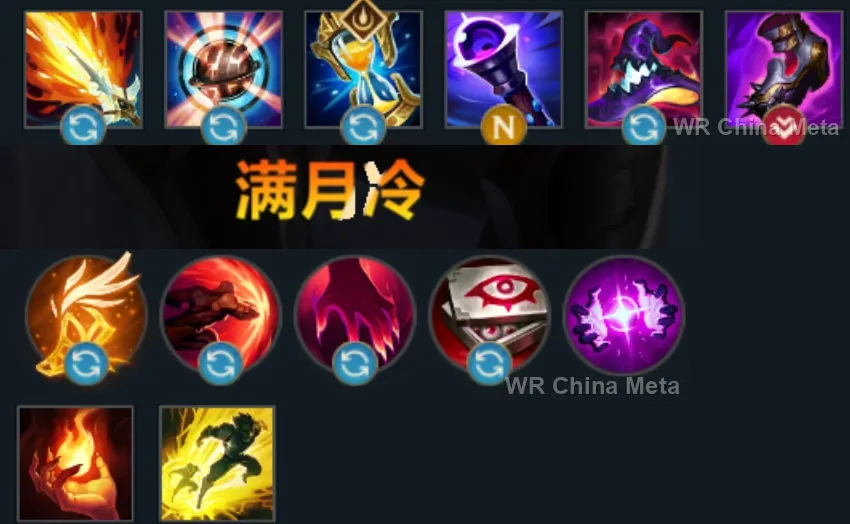
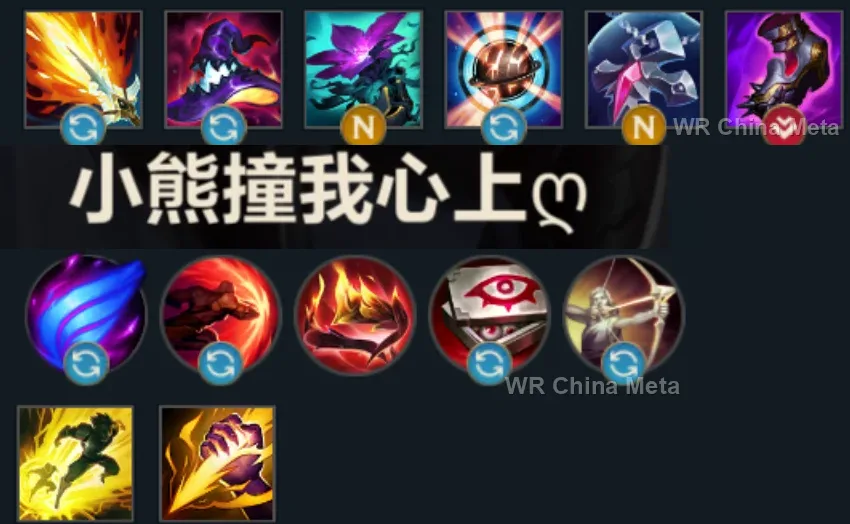
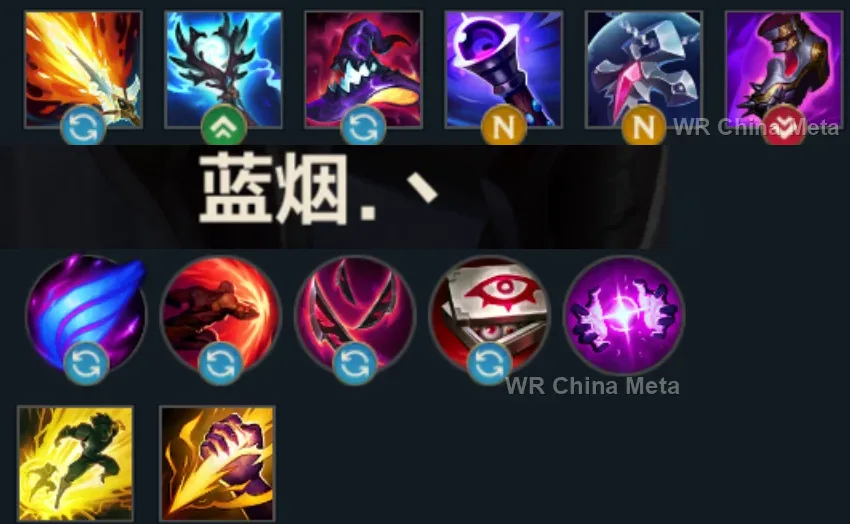
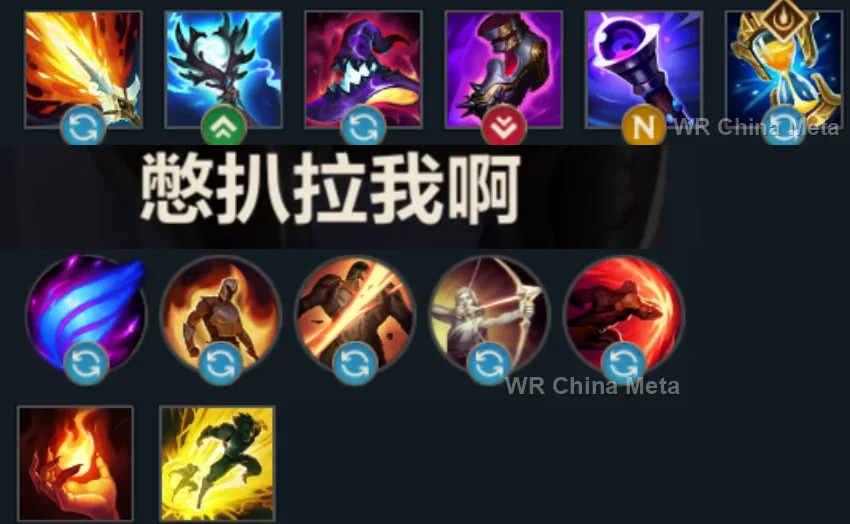
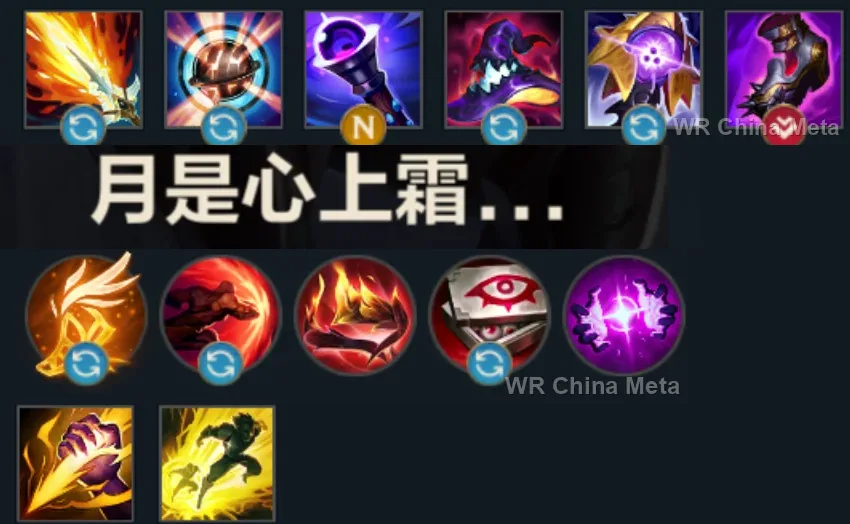
Taken from the official in-game China leaderboard. Spells, runes and items of every public top player.
16 of the top 30 players have a public match history; the others keep theirs private.
The toughest lane matchups for Diana on the Wild Rift China server, with why each is hard and exactly how to play it.
 Diana vs Kayle Unfavorable
Why Kayle counters Diana: After 9 she kites you from beyond your jump range, and her R cancels your R combo right at the best moment.
How to play Diana into Kayle: Beat her up before her level 5 with E-Q-attack trades. In fights hold your R for AFTER her invulnerability, never force it earlier.
→ Kayle Diana vs Galio Unfavorable
Why Galio counters Diana: The anti-mage made champion: magic shield, taunt, and follow-up on your every entry. Your all-in makes his job easier.
How to play Diana into Galio: Never go in first while his taunt is up. Shove the wave and call your jungler: you win the 2v2, especially right after he spends his W.
→ Galio Diana vs Fizz Unfavorable
Why Fizz counters Diana: His E dodges your Q and your shield does not hold his full all-in: whoever missteps first dies, and he picks the moment.
How to play Diana into Fizz: Save the shield for the shark, not for poke. Throw Q at his landing spot: it is the only predictable instant he has.
→ Fizz Diana vs Lissandra Unfavorable
Why Lissandra counters Diana: Root on your entry and self-R against your burst: she defuses you twice within the same combo.
How to play Diana into Lissandra: Make her waste the root before you commit, with a short feint jump. Your AoE R wins 5v5s: go in second, not first.
→ Lissandra Diana vs Zoe Skill matchup
Why Zoe counters Diana: Her bubble punishes the fixed line of your jump, but one clean entry of yours removes her from the map.
How to play Diana into Zoe: Enter at an angle, never in line with the bubble. Below 60% health she has to base: that is where Q and E close it out.
→ ZoeThe champions Diana works best alongside on the Wild Rift China server, lane by lane, with the reason each pairing works.
Moonfall (R) is a close-range zone that slows and re-marks - it groups nobody, so you have to find them already still. Unstoppable Force (R) leaves them floored and stuck together, and every fresh Moonlight the detonation applies is another Lunar Rush (E) reset.
Everything in your kit starts with landing Crescent Strike (Q)'s mark: Searing Charge (E) into the Volcanic Rupture (Q) wall is a guaranteed 1.25-second knock-up every skirmish, not one per teamfight. On an airborne target you don't miss that arc.
Pale Cascade (W) holds one charge and your own card says that once it's gone you get deleted: Stand United (R) shields you from across the map and teleports him in, and Shadow Dash (E) taunts whoever jumped you while Moonfall (R) charges.
Moonfall (R) can only be cast up close and the channel is visible from range, so mobile targets reposition before it detonates: after GNAR! (R) into a wall they're stunned and they can't. Wallop (W) does a smaller version of it every fight.
Thundering Smash (Q) is a hard stun he closes the gap with: the target stands still for Crescent Strike (Q) and you come in with Lunar Rush (E) already primed to reset. Stormbringer (R) disables turrets for three seconds, so tower dives become something you two can actually do.
Heroic Charge (E) into terrain is a 1.7-second stun, the cleanest way to guarantee your mark, and Steadfast Presence (W) roots whoever jumps you once your shield is gone. She's C tier at a 48.3% win rate right now: you take her for those two uses.
You go in, spend Pale Cascade (W) and you're exposed: Hero's Entrance (R) lands on you from anywhere on the map, knocks up everyone inside the Moonfall (R) zone and shields you. That's exactly the window your own card calls fatal.
Miss Crescent Strike (Q)'s mark and Lunar Rush (E) doesn't reset, leaving you stranded in the middle of them: that's your number one weakness. Charm (E) takes the target's movement away for 1.4 seconds and makes that arc impossible to miss.
Ring of Frost (W) into Frozen Tomb (R) is nearly three seconds where the target doesn't move: you mark at your leisure, come in with Lunar Rush (E) and get all the time you need to charge and detonate Moonfall (R) from inside the group.
Moonfall (R) pays in proportion to how many enemies are around you, and it isn't the one gathering them: Command: Shockwave (R) is. A compressed pile means Moonlight on all of them at the detonation and a chain of Lunar Rush (E) onto the lowest-health ones.
A charged Pyromania (P) turns any of her spells into a stun, and Summon: Tibbers (R) puts one on a whole group: that's the moment you can walk in and charge Moonfall (R) with nobody stepping out of the channel.
Enchanted Crystal Arrow (R) pins a target from off-screen: Crescent Strike (Q) on a motionless enemy is a guaranteed mark, and from there Lunar Rush (E) takes you in with the reset already banked. Frost Shot (P) keeps slowing all game long.
Bullet Time (R) only pays against grouped or crowd-controlled enemies, and the Moonfall (R) zone leaves them slowed and slow to scatter: that's the most a jungler with no hard CC can hand her. Make It Rain (E) adds the slow that lands your Crescent Strike (Q).
Deadly Flourish (W) roots anyone who has just taken damage from an ally, and the Moonfall (R) detonation touches everyone around you: you hand him free roots. Curtain Call (R) then closes out whoever walks out of your burst alive.
Chain of Corruption (R) starts on one target and spreads to whoever stands near them: inside your slow zone nobody manages to split off, so the chain takes the whole group. It's the hard CC your kit doesn't have at all.
Bladecaller (E) only roots with three feathers on the same target, and feathers land on things that aren't moving: the Moonfall (R) slow helps, but a slow is not a stun. Worth it if she can wait for your entry instead of firing early.
Death Sentence (Q) hands you a stunned, motionless target: Crescent Strike (Q) cannot miss it. And after the dive, once Pale Cascade (W) is spent, the Dark Passage (W) lantern is your only way out besides Lunar Rush (E).
Zenith Blade (E) into Shield of Daybreak (Q) locks a target long enough for you to mark it, dive it and detonate Moonfall (R) from inside; Solar Flare (R) then slows anyone trying to leave the zone before it goes off by 80%.
Aqua Prison (Q) is a clean stun that guarantees your mark, and Tidal Wave (R) knocks up a whole line while your zone charges. Tidecaller's Blessing (E) adds a slow to your hits when you have to chase whoever escaped the detonation.
Grand Entrance (W) into The Quickness (R) is nearly two seconds where nobody moves: you come in with Lunar Rush (E) and charge Moonfall (R) safely. Battle Dance (E) recasts within five seconds, so it shields you twice in the same dive.
Rampant Growth (R) on you is the second health bar you don't have once Pale Cascade (W) is spent, and it knocks up everyone around you - the ones inside the Moonfall (R) zone. Whimsy (W) instead removes the diver who answers you.
Rocket Grab (Q) rips a carry out from behind their line and Power Fist (E) knocks them up as they land: an isolated, motionless target, the best case for your single-target burst. A missed grab leaves you both without the fight's only hook.
| Lane | Tier | Win% | Pick% | Ban% | Pos. |
|---|---|---|---|---|---|
| Jungle | A | 52.81% | 2.25% | 0.32% | #13 / 40 |
| Mid | D | 48.6% | 1.29% | 0.32% | #35 / 39 |
| Lane | Tier | Win% | Pick% | Ban% | Pos. |
|---|---|---|---|---|---|
| Jungle | A | 52.7% | 2.34% | 0.34% | #13 / 40 |
| Mid | D | 48.48% | 1.3% | 0.34% | #34 / 38 |
| Lane | Tier | Win% | Pick% | Ban% | Pos. |
|---|---|---|---|---|---|
| Jungle | S | 53.48% | 2.79% | 0.4% | #6 / 42 |
| Mid | D | 48.64% | 1.39% | 0.4% | #36 / 39 |
| Lane | Tier | Win% | Pick% | Ban% | Pos. |
|---|---|---|---|---|---|
| Jungle | B | 53.57% | 4.01% | 0.68% | #20 / 41 |
| Mid | D | 46.29% | 1.5% | 0.68% | #40 / 41 |


Diana, the Scorn of the Moon, is a magic-damage assassin in Wild Rift built around a single reset: land Crescent Strike's Moonlight mark, then dash in with Lunar Rush to strip it and cut that skill's cooldown down to 0.5 seconds for an almost-free second jump. She trades team utility for some of the highest single-target burst in the game, backed by a self-shield from Pale Cascade and a wide, expanding slow zone on her ultimate, Moonfall. She's most dangerous isolating one priority target rather than spreading damage across a group, and she snowballs hard off every kill she personally converts.
Skill order: Q > E > W (start Q for the Moonlight mark and reset uptime, take one early point in W for the shield, and level R at 5/9/13)
Use Crescent Strike's arc to poke safely and start trades - landing the Moonlight mark before committing Lunar Rush turns most 1-vs-1s in her favor, and Pale Cascade's shield lets her out-trade most lane opponents in extended fights. Manage the wave so you can roam or all-in the moment you hit your level 4-5 power spike, and hold Lunar Rush rather than burning it on a whiffed engage since it's also your only escape. Remember Moonfall needs an enemy champion nearby to even activate, so scout carefully before committing to level 5 plays.
From the mid game on, Diana's job is to pick off the highest-value marked target rather than open the fight herself - let the front line clash first, then step in and let Moonfall's expanding zone mark and slow everyone around you, since it can't even be cast without an enemy champion close by. Once committed, chain Q into E for the initial burst, shield with W, and look for a second Lunar Rush reset onto the next lowest-health marked target if the cooldown allows; if there's no safe entry, hold Moonfall and wait rather than forcing a bad dive - it does nothing from the back line. Positioning around her dash range is everything, so bait out CC or Flash from the front line before committing her jump to the backline.