
WR China Meta
Meta, tier list & top-player builds from the China server · live
Meta, tier list & top-player builds from the China server · live

娜美 · 唤潮鲛姬 Support B
✅ Patch 7.2e · stats updated 2026-09-12 · real builds of 13 top-ranked China server players captured 2026-09-11
Difficulty Damage Toughness Utility
How the strongest players on the Wild Rift China server (国服) build Nami: live win/pick statistics by rank bracket, the most-used item and rune sets, and the real loadouts of the top ranked Nami players, captured in-game.
📖 How to play Nami





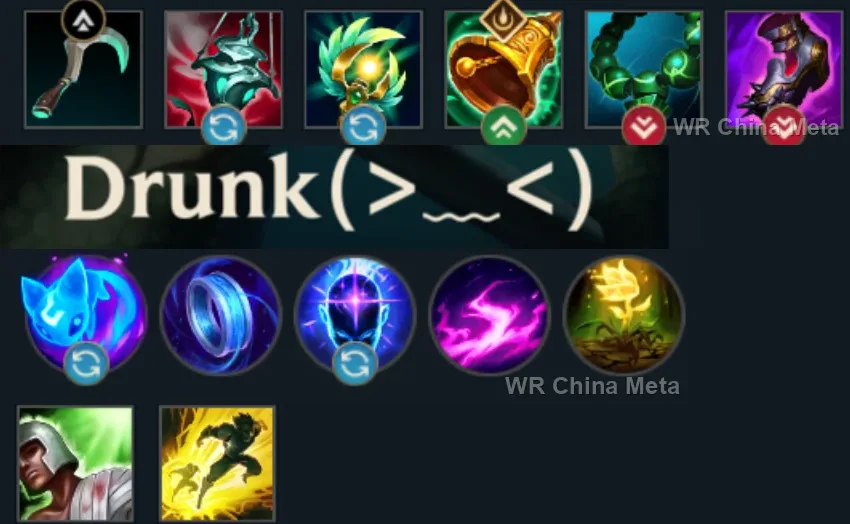
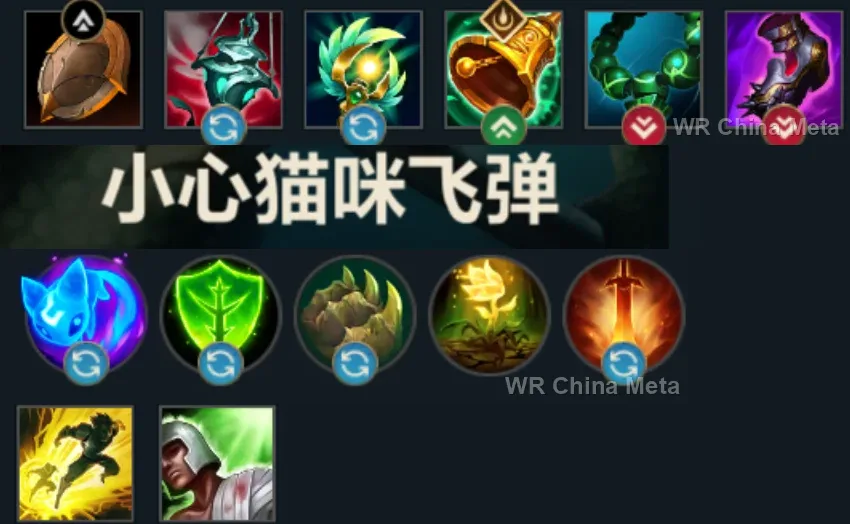
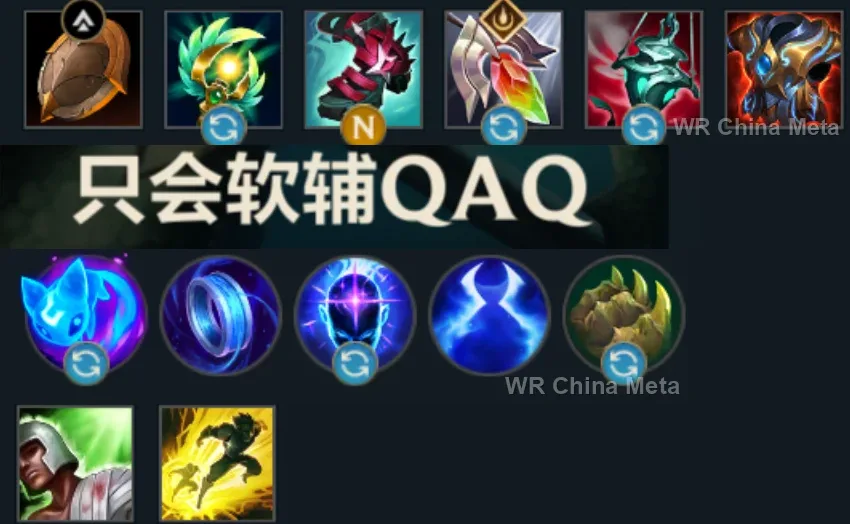
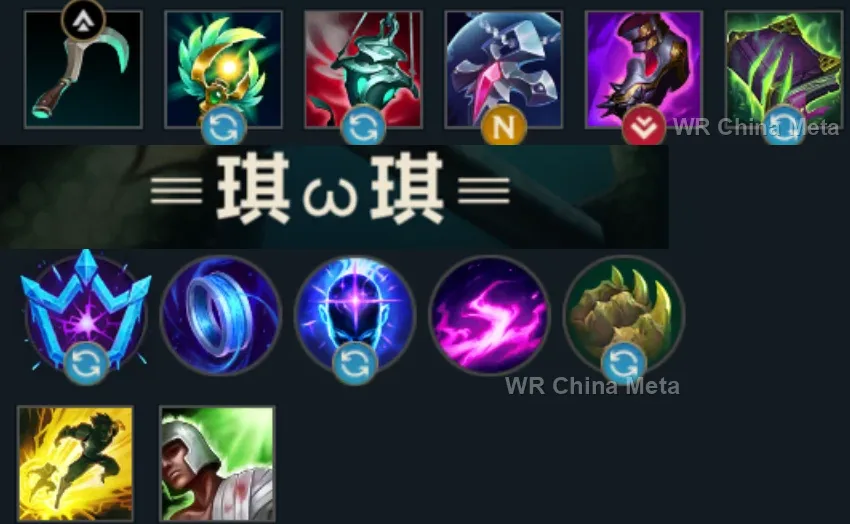
Counted on 13 real builds captured from the Chinese client, player by player. Independent from the official API above.


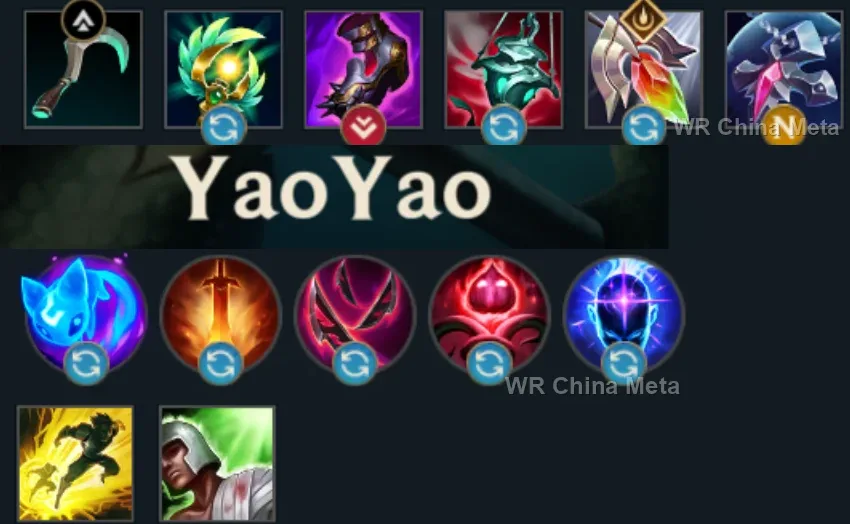
Taken from the official in-game China leaderboard. Spells, runes and items of every public top player.
13 of the top 30 players have a public match history; the others keep theirs private.
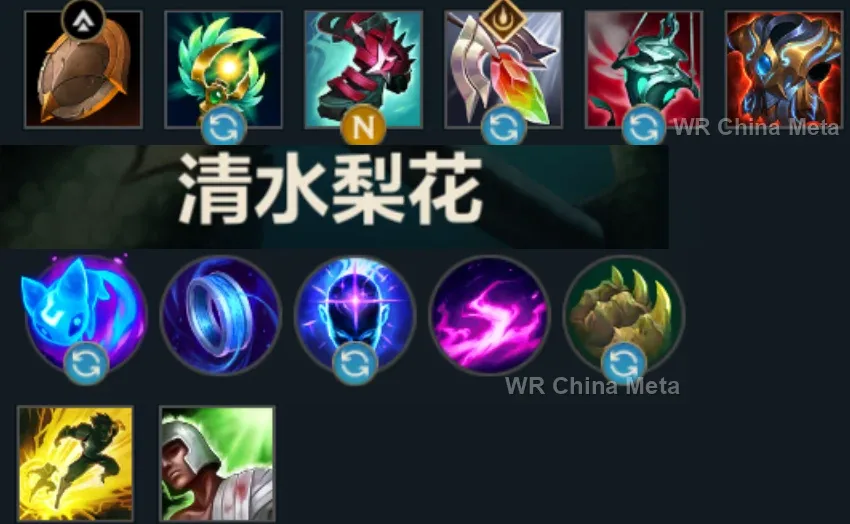
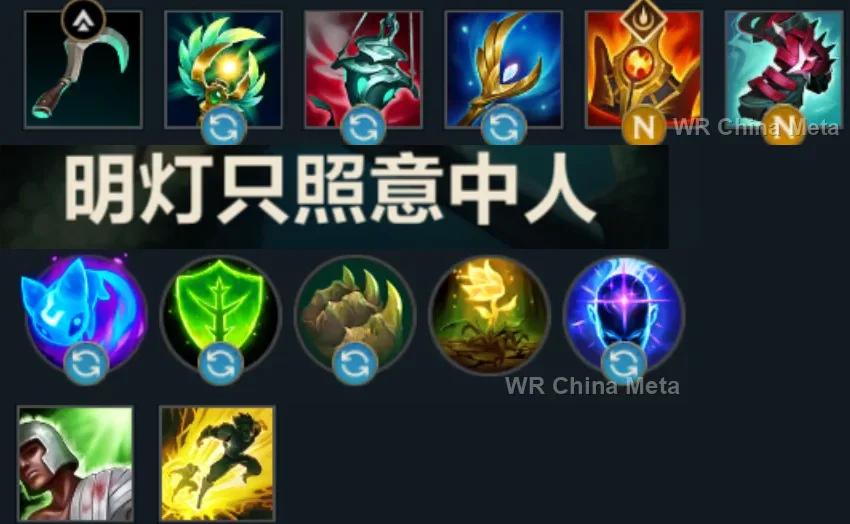
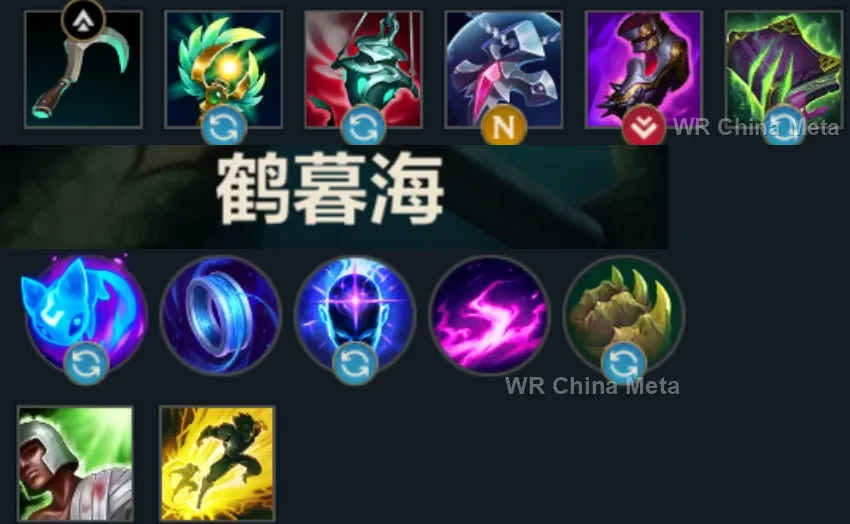
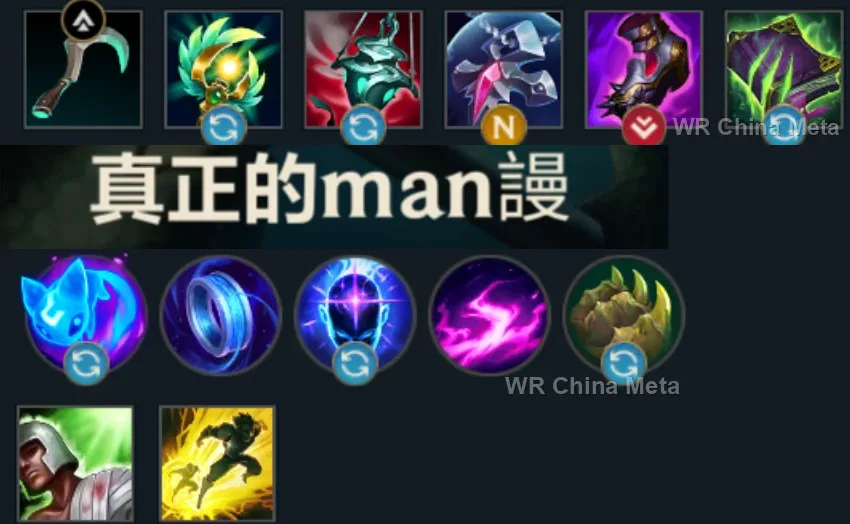
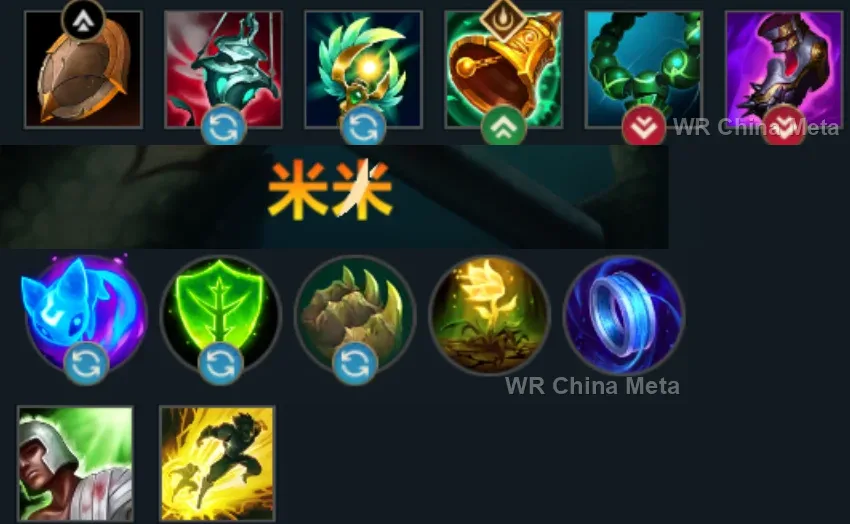
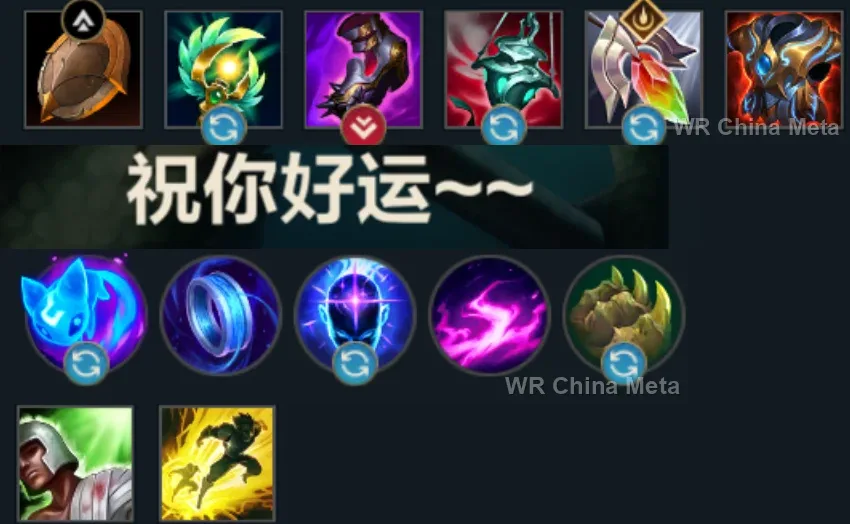
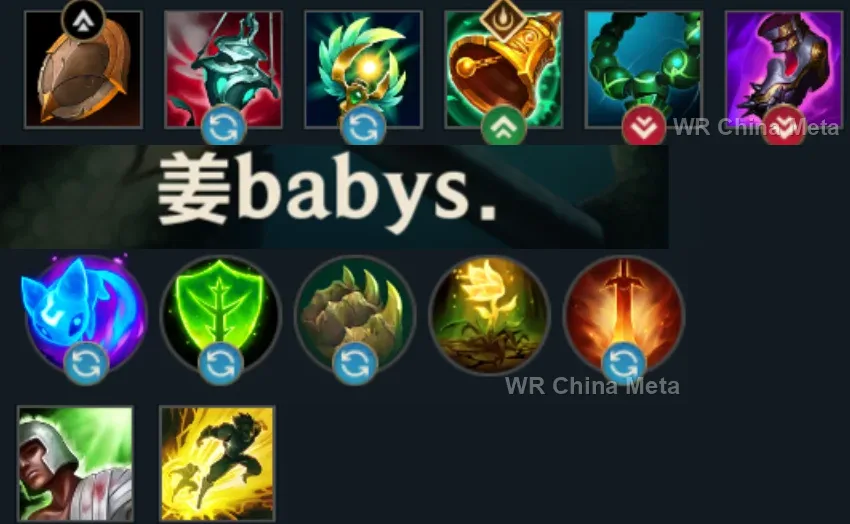
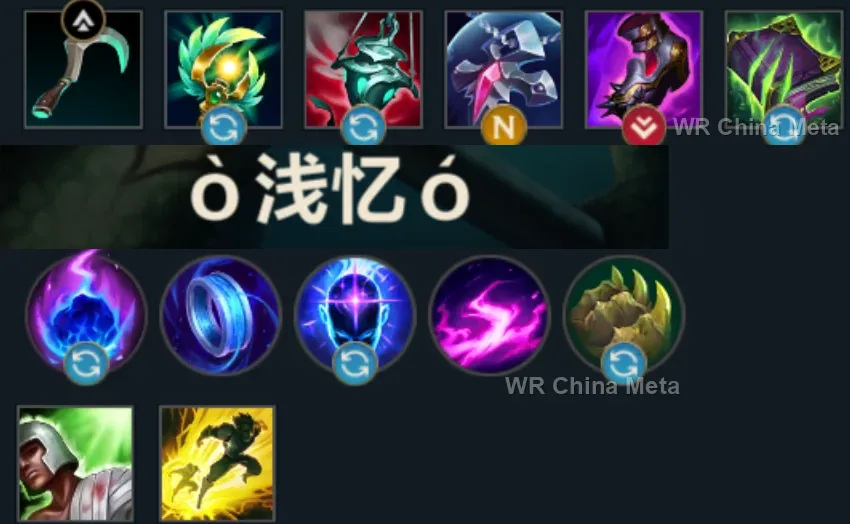
The toughest lane matchups for Nami on the Wild Rift China server, with why each is hard and exactly how to play it.
 Nami vs Blitzcrank Skill matchup
Why Blitzcrank counters Nami: His hook against your bubble: two skillshots deciding the lane on every throw.
How to play Nami into Blitzcrank: Bubble his hooking position: it interrupts the wind-up. Chain heal right after the hook: you flip the trade he opens.
→ Blitzcrank Nami vs Leona Skill matchup
Why Leona counters Nami: Her CC train against your tide: if she starts first, you end up healing corpses.
How to play Nami into Leona: Bubble HER mid-E. Answer her engage with your R: wave against train, and the wave comes in wider.
→ Leona Nami vs Zyra Skill matchup
Why Zyra counters Nami: Garden versus tide: her plant poke beats your healing in the lane's long arithmetic.
How to play Nami into Zyra: Bounce W onto her when she steps up to plant: double value. Bubble while she seeds: her timings are fixed, exploit them.
→ Zyra Nami vs Milio Skill matchup
Why Milio counters Nami: Heal versus heal: his cleanse strips your bubble off its target and the lane becomes an arithmetic race.
How to play Nami into Milio: Win through movement: your E slow on his carry makes every trade yours. Bubble on the second beat, not the first.
→ Milio Nami vs Thresh Skill matchup
Why Thresh counters Nami: Hook versus bubble, Lantern versus heal: every pick of his has an answer of yours — if you arrive in time.
How to play Nami into Thresh: Bubble the hooked ally: it interrupts the follow-up. Chain heal, and W-poke every empty fishing trip.
→ ThreshThe champions Nami works best alongside on the Wild Rift China server, lane by lane, with the reason each pairing works.
Empower (W), Grandmaster-at-Arms (R) and Relentless Assault (P) all run through basic attacks, and Tidecaller's Blessing (E) is exactly what loads them with magic damage and a slow. Aqua Prison (Q) meanwhile holds still the target Leap Strike (Q) has to land on.
Bladesurge (Q) only resets on a marked or dying target, so the chain snaps the moment somebody gets away from her: Aqua Prison (Q) leaves it standing still. And Tidecaller's Blessing (E) loads the quick hits she weaves between resets.
Heroic Charge (E) into a wall is a 1.7-second stun, but she has to grab the target first: Aqua Prison (Q) leaves it hanging still and the grab stops missing. Tidecaller's Blessing (E) covers the damage her own page calls low.
Your page says you convert nothing without a teammate close by: Unstoppable Force (R) is the engage you cannot make, and Tidal Wave (R) rolls in as a second knock-up over the pile he leaves behind. In return he eats the dive that would kill you.
Battle Fury (P) and Bloodlust (Q) are pure basic-attack damage, and Tidecaller's Blessing (E) is the multiplier a kit like that is asking for. But he has no crowd control to protect you and he is C tier: only in games decided by his duels.
Javelin Toss (Q) hits harder the farther it flies, up to 225 magic damage, and her page says a dodged spear leaves her with no answer at all. Aqua Prison (Q) into Tidal Wave (R) is two back-to-back knock-ups: the target is still pinned when the full-distance spear arrives.
Three Talon Strike (Q) is three empowered attacks in a row and nobody spends Tidecaller's Blessing (E) better than that. His page says mobile targets simply leave Audacious Charge (E) range: Aqua Prison (Q) leaves them standing right in front of him.
With Mortal Will (P) armed, Shield Vault (W) turns into a three-attack flurry, and Tidecaller's Blessing (E) loads all three. Grand Starfall (R), on the other hand, is visible on the way down: it needs someone pinned underneath, and Aqua Prison (Q) into Tidal Wave (R) does that.
Her page says everything starts from the Crescent Strike (Q) mark and that the Moonfall (R) channel is visible from a distance: Aqua Prison (Q) hands her the first target motionless, and Tidal Wave (R) knocks up the line that was walking out of the zone.
Her page says almost everything she does runs through basic attacks, and Twin Bite (Q) turns one of them into two: Tidecaller's Blessing (E) is the right multiplier, and the slow it carries keeps the target inside Burnout (W).
Nobody burns through Tidecaller's Blessing (E) at his attack speed, and Aqua Prison (Q) is what makes his ganks actually land, because he owns no crowd control at all. On the CN server he sits at 47.8%, though: the pairing works better than the champion.
Aqua Prison (Q) and Tidal Wave (R) are two separate knock-ups and you chain them on purpose: his page says Last Breath (R) fires off any allied crowd control, so you are the one who gets him two casts in the same fight.
Vision of Empire (W) deals 50% more against anything already locked down, and his page says that condition normally rides on the Nevermove (E) return wave, which mobile targets just walk out of: Aqua Prison (Q) hands it over with no guesswork.
His page says Siphoning Strike (Q) is coded as a basic attack: Tidecaller's Blessing (E) stacks magic damage and a slow on top of it, and he owns no dash to chase with. Tidal Wave (R) knocks up whoever was keeping him at arm's length.
Her page says the whole combo revolves around Charm (E) and that a dodge leaves her with poke only: nothing gets sidestepped on a target Aqua Prison (Q) is holding in the air. Ebb and Flow (W) meanwhile carries her through the skirmishes she loses alone.
Hero's Entrance (R) marks its landing zone two and a half seconds early, so anyone paying attention just walks out: Tidal Wave (R) knocks them up and slows them right there. In return Justice Punch (E) removes the diver you have no answer to.
The Shadow Surge (R) recast cannot miss a target still hanging in the air, and Aqua Prison (Q) into Tidal Wave (R) keeps it there. But her page says she has no mobility whatsoever: when someone jumps you both, she protects neither of you.
His page says his only defensive tool is the bonus damage Lightslinger (P) grants after an ally heals him, and Ebb and Flow (W) hands him one every trade. Then Aqua Prison (Q) into Tidal Wave (R) is the only way nobody walks out of The Culling (R).
His page says Mystic Shot (Q) and Arcane Shift (E) have real travel time and get dodged: Aqua Prison (Q) into Tidal Wave (R) is two back-to-back windows where nothing can miss. And Tidecaller's Blessing (E) loads the autos he weaves for Rising Spell Force (P).
Tidecaller's Blessing (E) empties in an instant at Bio-Arcane Barrage (W) attack speed, and every hit carries the slow as well. His page says he owns no dash: Tidal Wave (R) is the peel his kit simply does not have.
Her page says she has no shield and no defensive cooldown, and that her early game is standing still and hitting: Ebb and Flow (W) carries her through those minutes, and Tidecaller's Blessing (E) rides basic attacks, which she throws more of than anyone.
Her page says she starts the lane losing and has nothing in her kit to heal with: Ebb and Flow (W) heals her and damages them in the same cast. And the slow on Tidecaller's Blessing (E) keeps the target inside her painfully short range.
Tidal Wave (R) slows a whole line, and every extra auto that lands is another Deadly Venom (P) stack before Contaminate (E). But he plays far away from you, inside Ambush (Q), so half your kit never reaches him, and he is C tier at 48.5%.
| Lane | Tier | Win% | Pick% | Ban% | Pos. |
|---|---|---|---|---|---|
| Support | B | 50.59% | 4.37% | 0.14% | #17 / 34 |
| Lane | Tier | Win% | Pick% | Ban% | Pos. |
|---|---|---|---|---|---|
| Support | B | 50.62% | 4.53% | 0.14% | #17 / 34 |
| Lane | Tier | Win% | Pick% | Ban% | Pos. |
|---|---|---|---|---|---|
| Support | B | 50.67% | 5.6% | 0.14% | #15 / 33 |
| Lane | Tier | Win% | Pick% | Ban% | Pos. |
|---|---|---|---|---|---|
| Support | B | 49.28% | 6.33% | 0.1% | #15 / 33 |


Nami is a Support-role enchanter in Wild Rift built entirely around chaining crowd control into her allies' damage. She's a mixed utility and magic-damage caster — Aqua Prison and Tidal Wave both knock enemies airborne, while Ebb and Flow's bouncing current heals her team and chips the enemy at the same time. Nami is at her best setting up long-range picks and then peeling or resetting fights with her wave, rather than trying to out-damage anyone herself.
Skill order: Q > W > E (max Tidal Wave at every chance: level 5, 9, 13)
In lane, lead with Ebb and Flow to sustain your ADC through poke, and only look for Aqua Prison when the enemy overextends or you can guarantee a follow-up — missing Q on cooldown just hands the enemy lane a free window. Respect hard-engage supports and never stand where a hook or dash can reach you first. Once you hit level 5, Tidal Wave turns even a 50/50 trade into a kill, so start hunting for angles where it can hit both enemies at once.
From the mid game on, Nami wants to fight from maximum range, using Tidal Wave either to open on a grouped enemy team or as emergency peel through a diver going for your carry. Weave Tidecaller's Blessing onto your highest-damage ally right before the fight actually starts so the slow and bonus damage are ready the instant they engage, and keep Ebb and Flow in reserve to heal whoever is under focus rather than spending it early. Positioning is everything — Nami has no escape, so always fight with an exit route or a teammate between you and the enemy frontline.