
WR China Meta
Meta, tier list & top-player builds from the China server · live
Meta, tier list & top-player builds from the China server · live

茂凯 · 扭曲树精 Tank B
✅ Patch 7.2e · stats updated 2026-09-12 · real builds of 26 top-ranked China server players captured 2026-09-11
Difficulty Damage Toughness Utility
How the strongest players on the Wild Rift China server (国服) build Maokai: live win/pick statistics by rank bracket, the most-used item and rune sets, and the real loadouts of the top ranked Maokai players, captured in-game.
📖 How to play Maokai



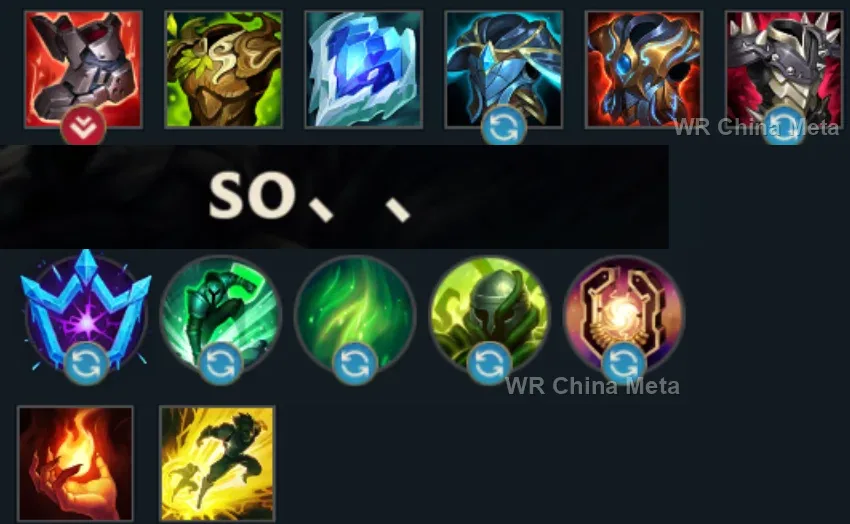
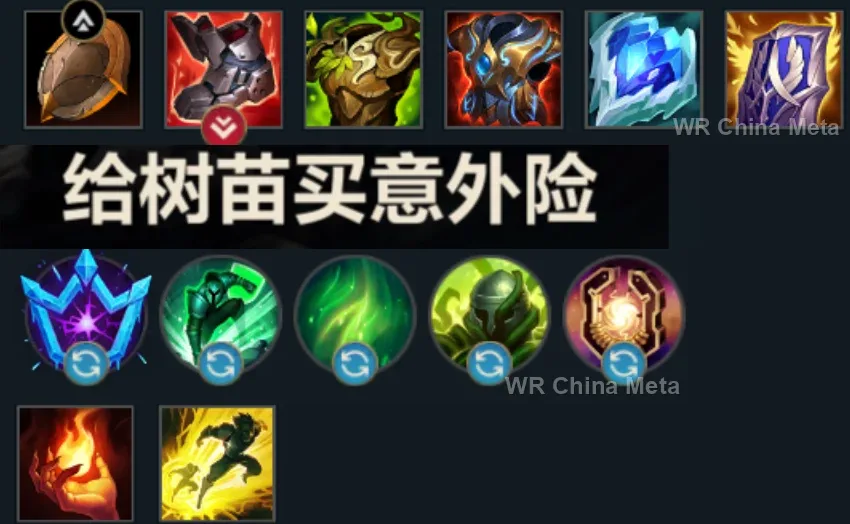
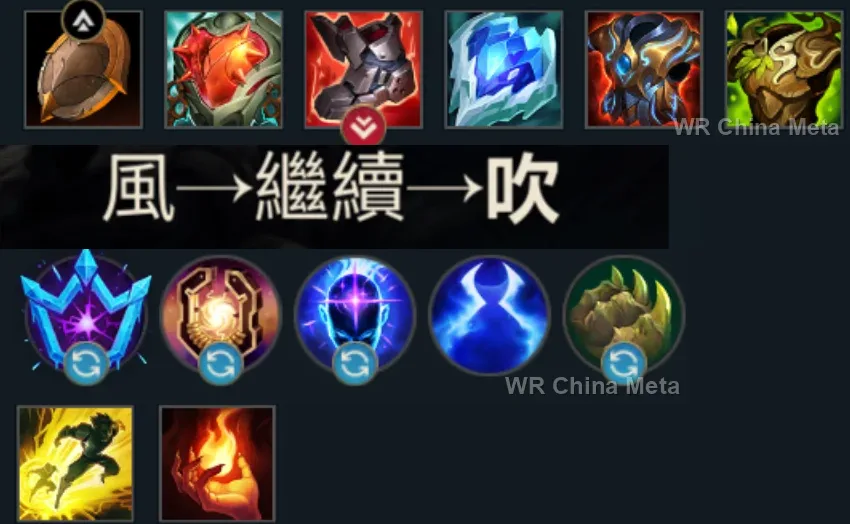
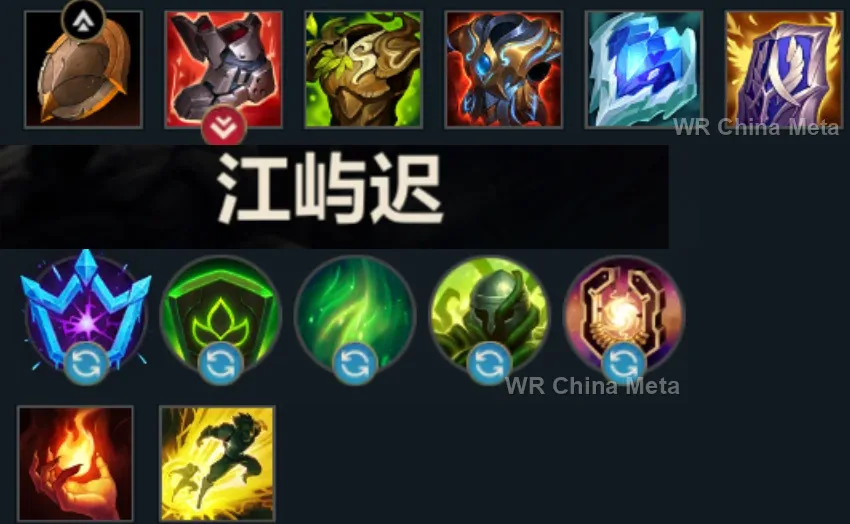
Counted on 27 real builds captured from the Chinese client, player by player. Independent from the official API above.


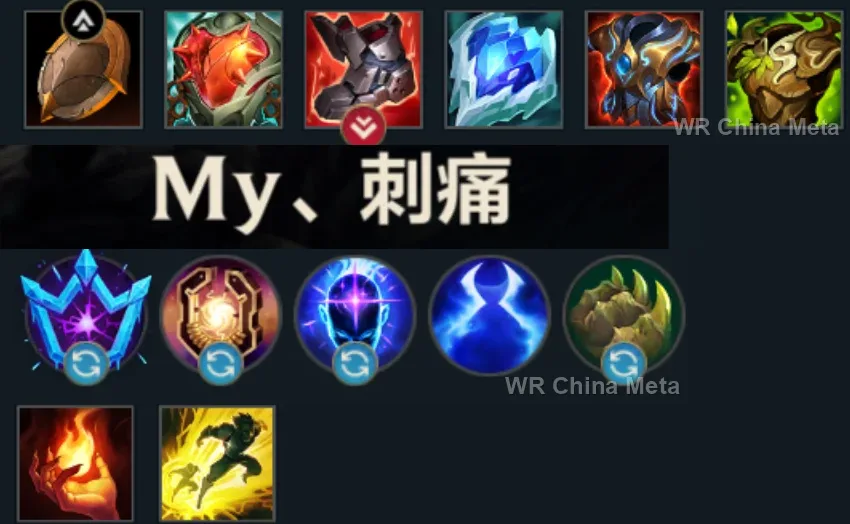
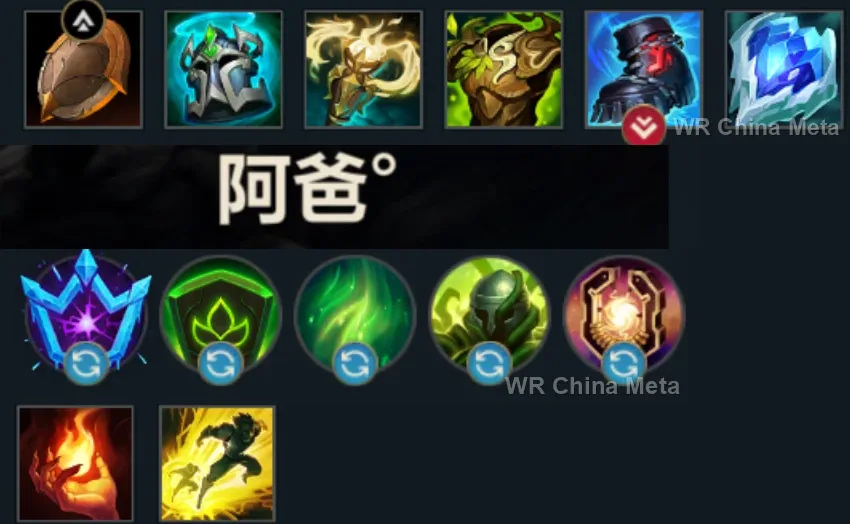
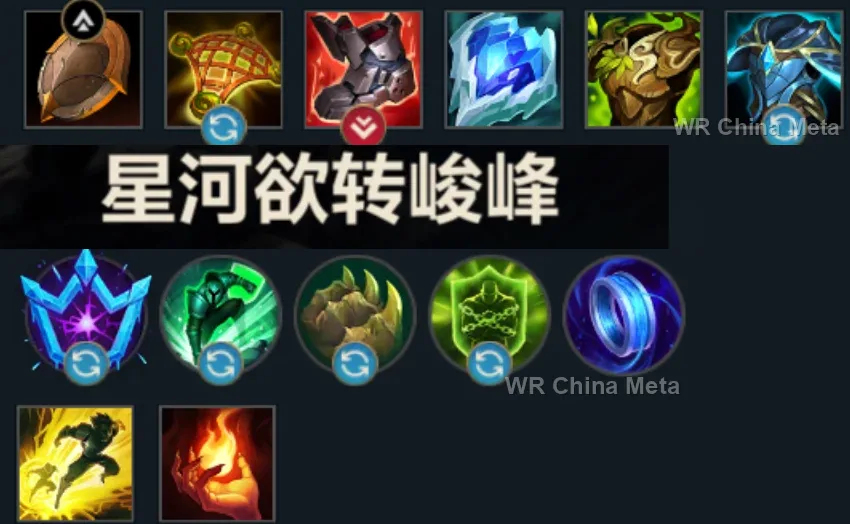
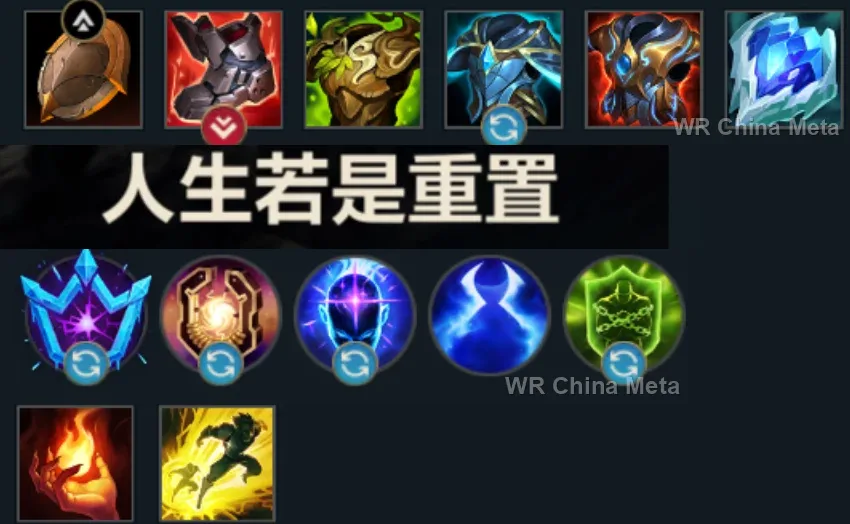
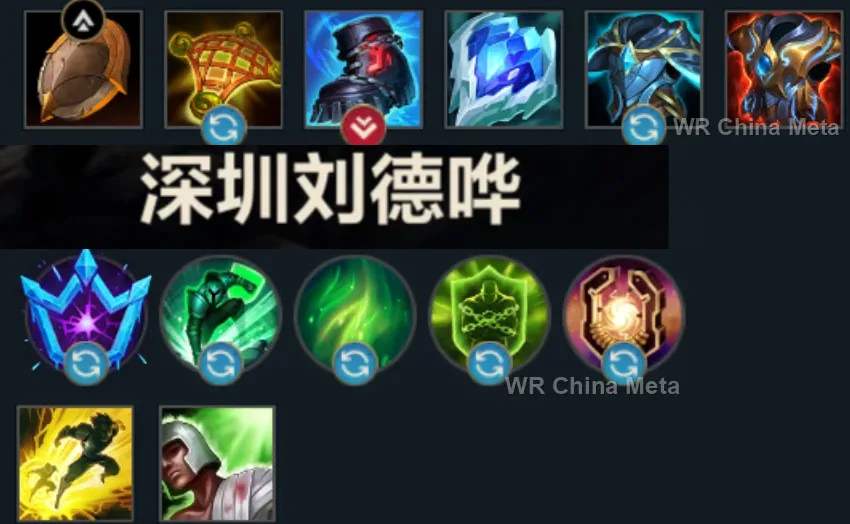
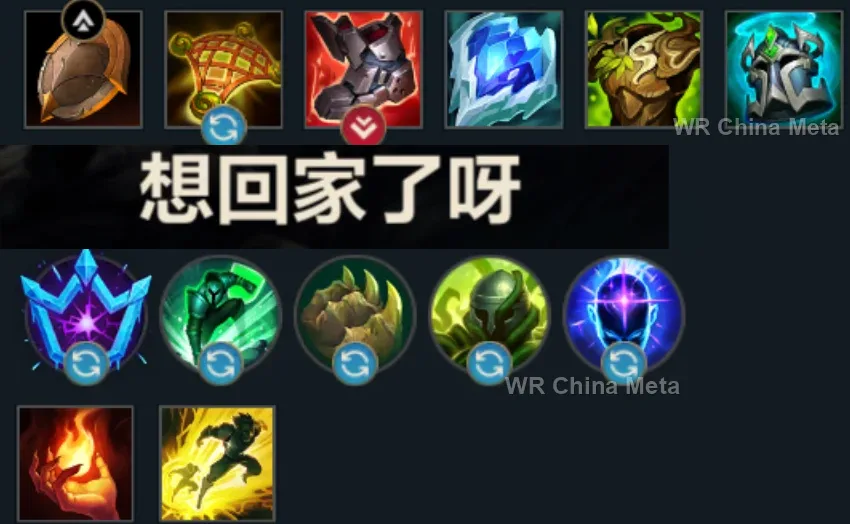
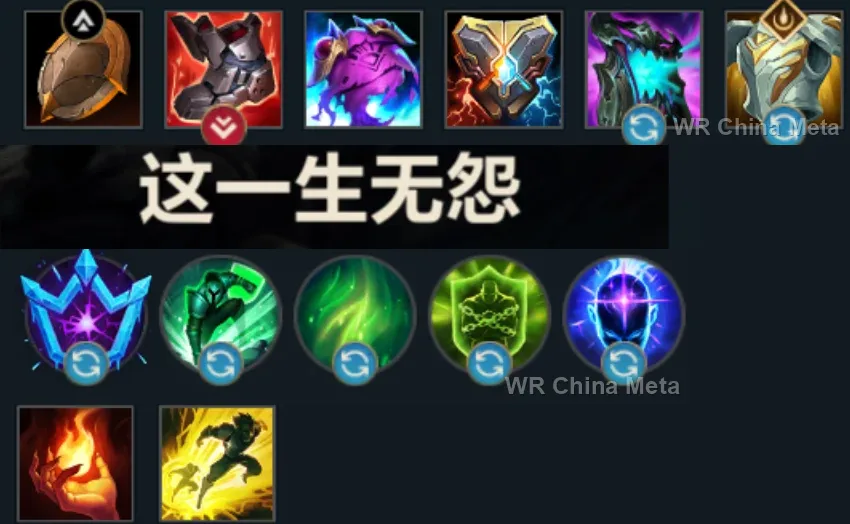
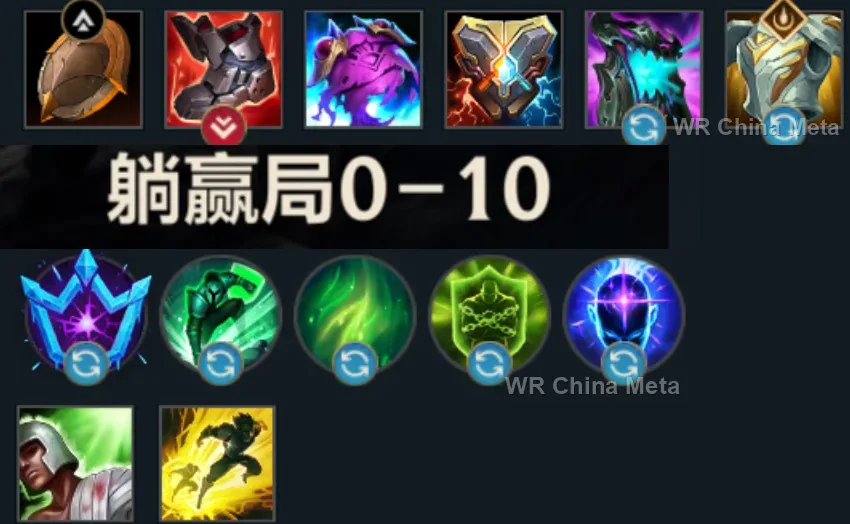
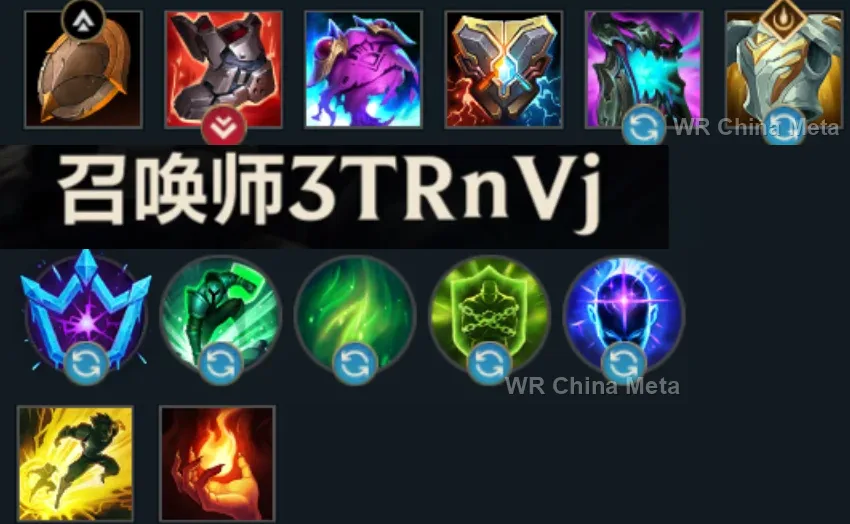
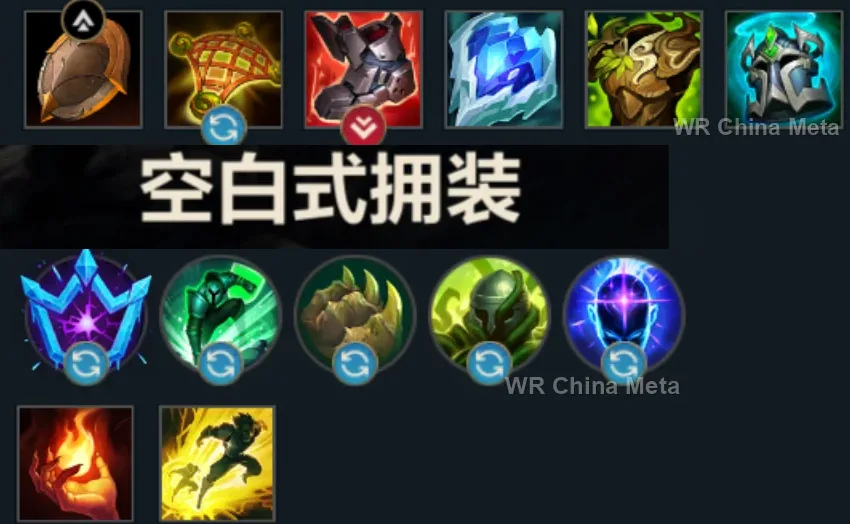
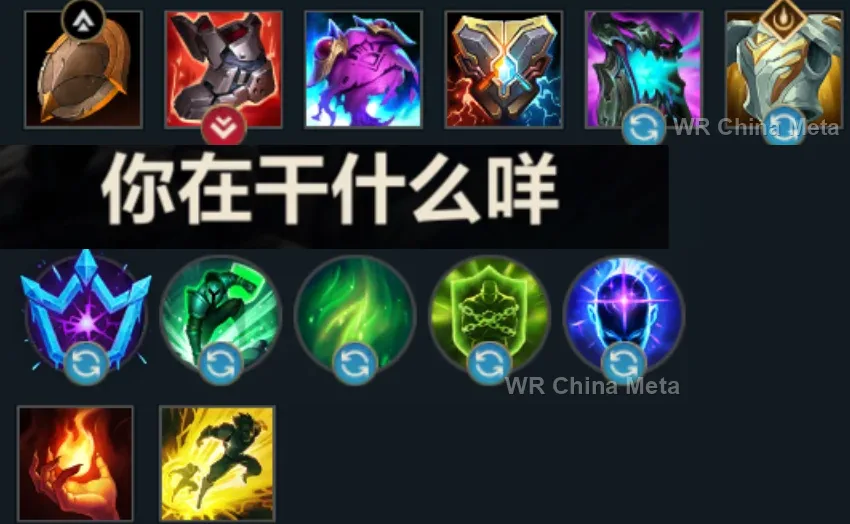
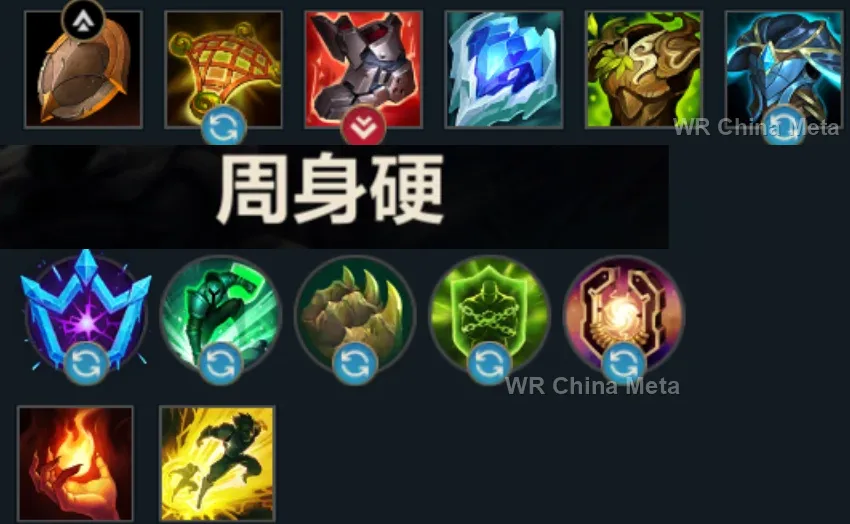
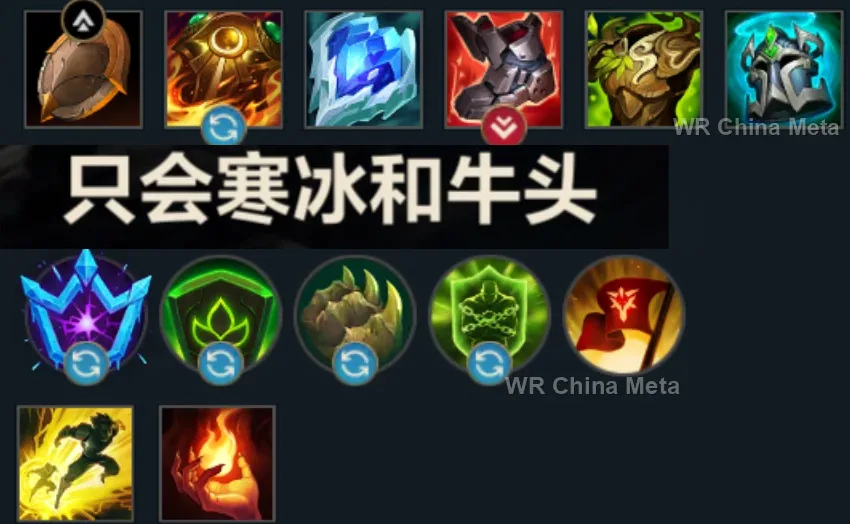
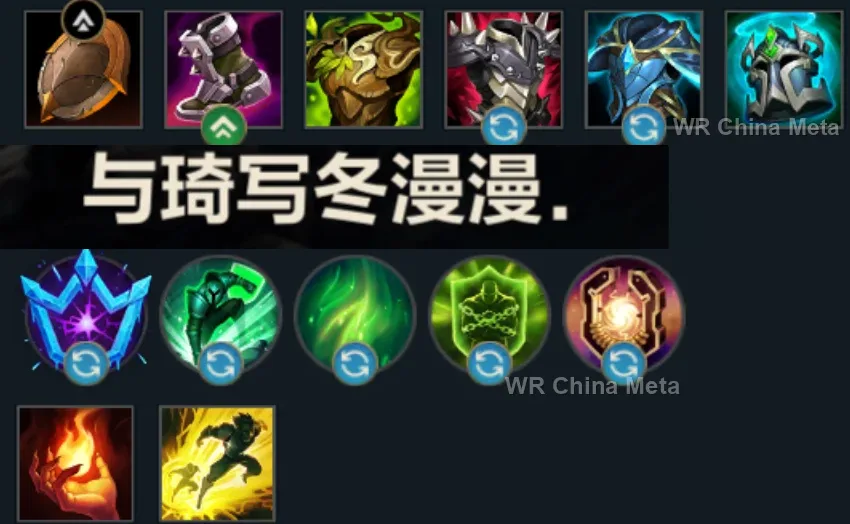
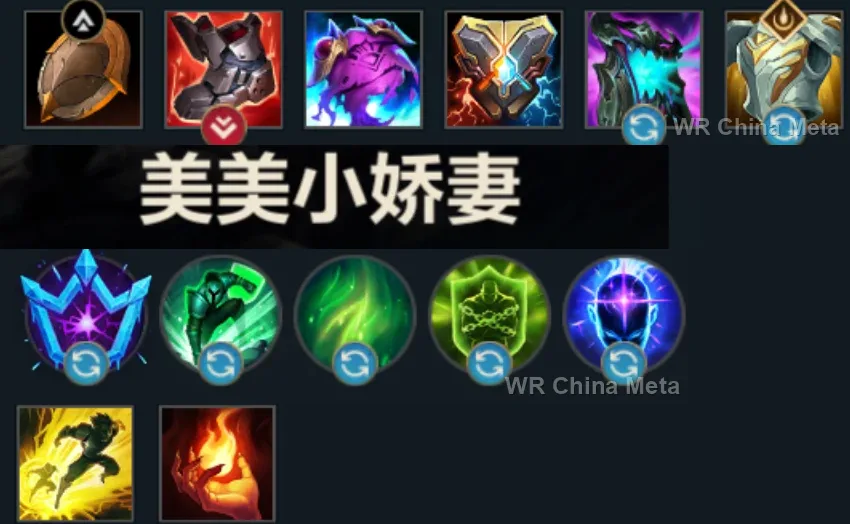
Taken from the official in-game China leaderboard. Spells, runes and items of every public top player.
26 of the top 30 players have a public match history; the others keep theirs private.
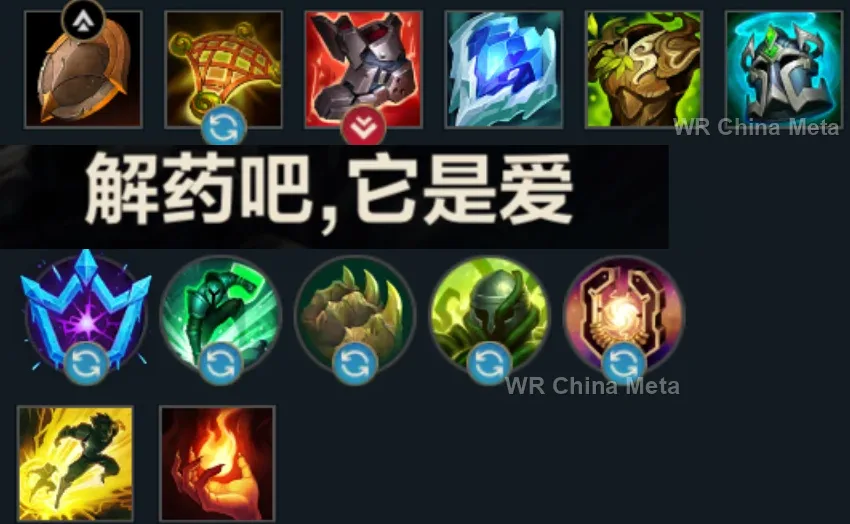
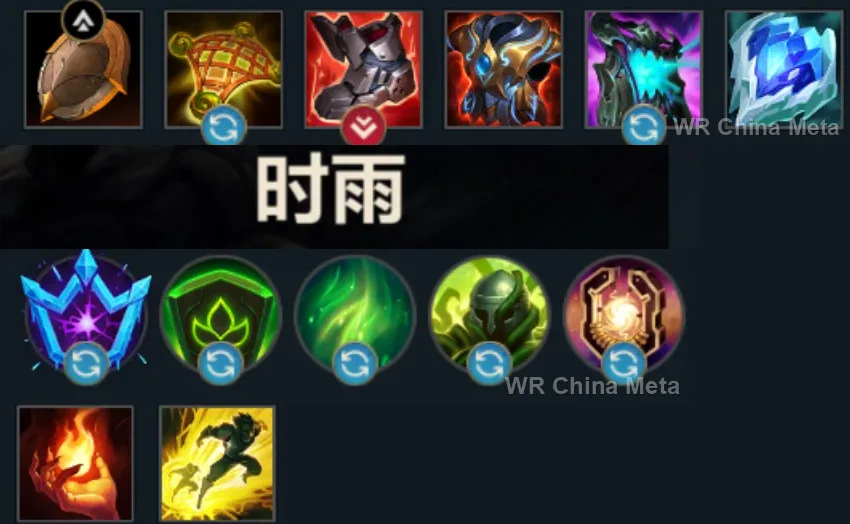
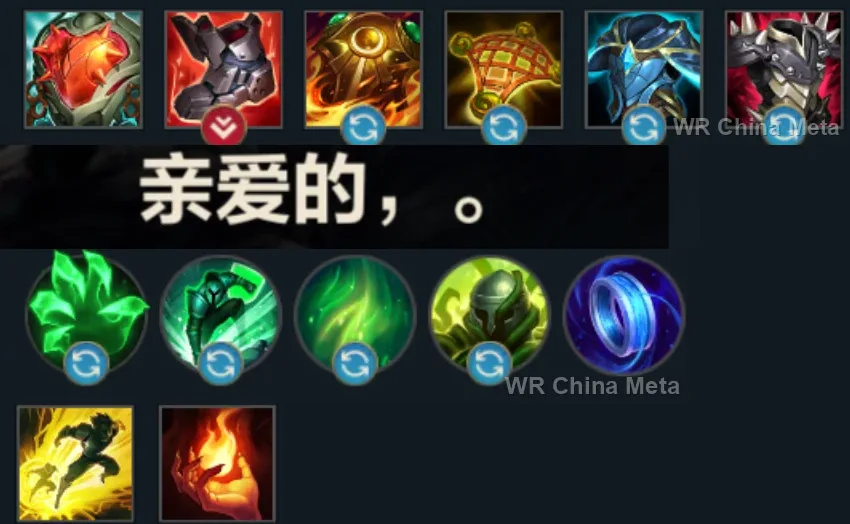
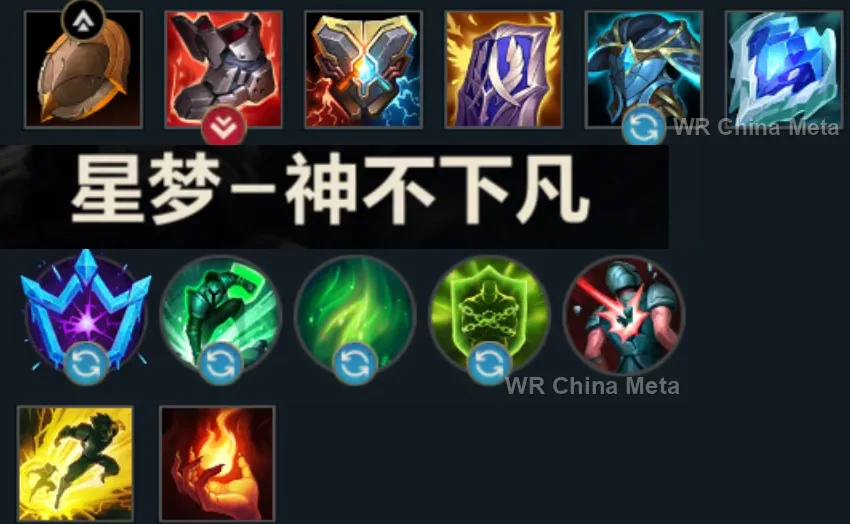
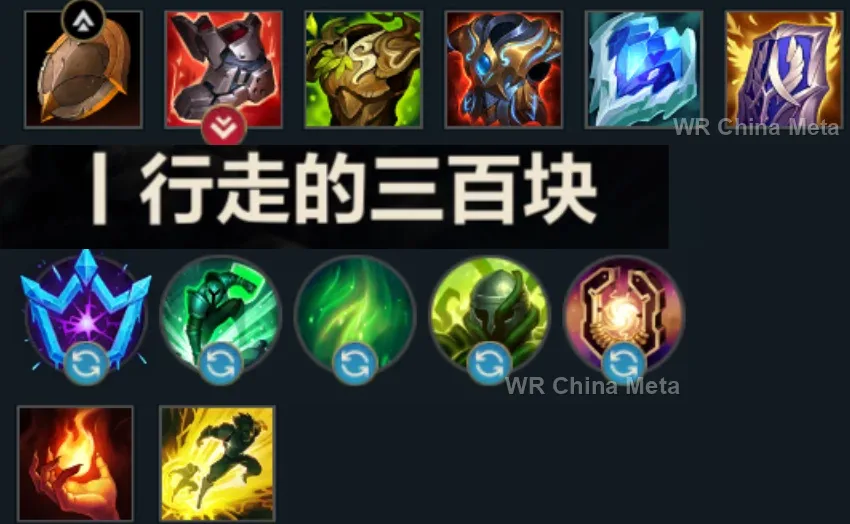
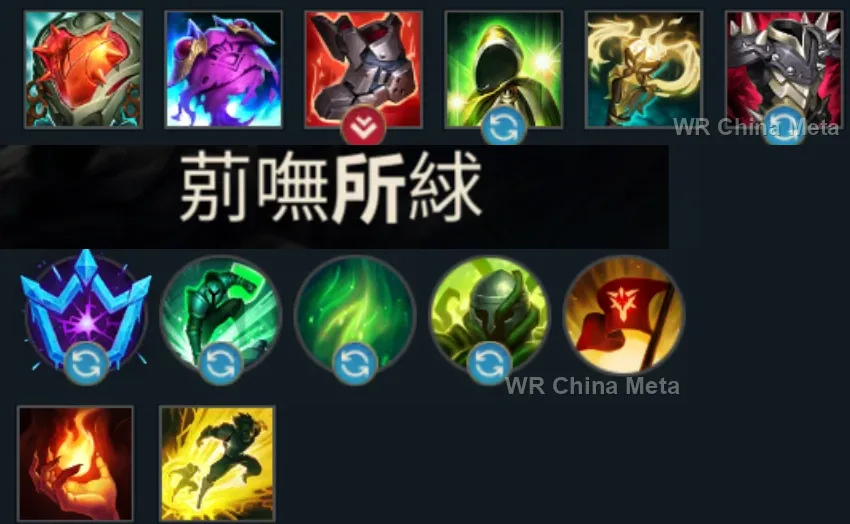
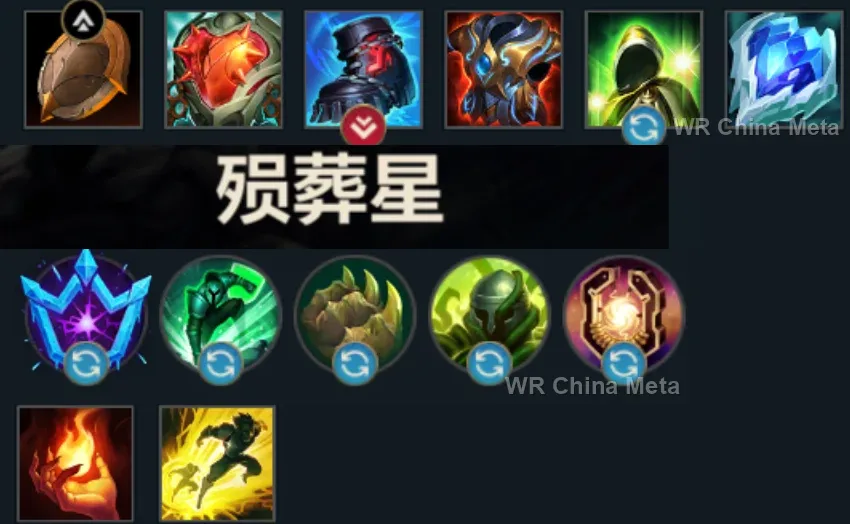
The toughest lane matchups for Maokai on the Wild Rift China server, with why each is hard and exactly how to play it.
 Maokai vs Kindred Skill matchup
Why Kindred counters Maokai: She kites your slow engage and her zone saves the targets of your roots: the tree hugging thin air.
How to play Maokai into Kindred: Saplings in the objective bushes: vision and damage in one. Cast R AFTER her zone: the roots that arrive second win.
→ Kindred Maokai vs Lee Sin Skill matchup
Why Lee Sin counters Maokai: Aggressive early game against a tree that blossoms late: he prunes you before spring.
How to play Maokai into Lee Sin: Full-clear and place defensive saplings on your entrances. In 2v2s your point-and-click W flips his kicks.
→ Lee Sin Maokai vs Nunu & Willump Skill matchup
Why Nunu & Willump counters Maokai: A Smite war over objectives: his dragon bite is bigger than yours — bigger than anyone's.
How to play Maokai into Nunu & Willump: Do not play the Smite war straight: root HIM before the last tick. Vision saplings to see his setups coming.
→ Nunu & Willump Maokai vs Warwick Skill matchup
Why Warwick counters Maokai: Two regenerators, but one has teeth: in duels his sustain beats yours.
How to play Maokai into Warwick: Zero duels: root and fall back to your team. Your value is the multi-man R: save it for 5v5s.
→ Warwick Maokai vs Graves Skill matchup
Why Graves counters Maokai: His buckshot hurts even a magic tank, and the smoke cancels your root's aim.
How to play Maokai into Graves: Your W is point-and-click and ignores the smoke: open with it. In ganks root him under YOUR tower: it always pays.
→ GravesThe champions Maokai works best alongside on the Wild Rift China server, lane by lane, with the reason each pairing works.
Your page says you have no damage of your own and that punishing whoever you root is somebody else's job: Brittle from Bellows Breath (W) adds max-health damage and stretches both of your roots by 30%. Call of the Forge God (R) lands on top of Nature's Grasp (R).
Catching a target with the edge of The Darkin Blade (Q) adds a knock-up and 60% bonus damage, and his page says kiters simply walk out of those swings: nobody walks out of a Twisted Advance (W) root. He is the damage you do not have.
GNAR! (R) into a wall is worth 50% extra damage and a full stun, but it needs the right angle on a target that is not moving: Twisted Advance (W) hands him one. Wallop (W) meanwhile area-stuns whoever Nature's Grasp (R) has already rooted.
His page says opponents disengage the moment they see Hemorrhage (P) climbing towards five stacks: rooted, they cannot. Twisted Advance (W) and Nature's Grasp (R) are the two windows where Decimate (Q) and Crippling Strike (W) stack it all the way up.
His two written gaps are that everything he owns is single-target and that, once Stormbringer (R) is down, he just gets kited: Nature's Grasp (R) is the area control he lacks, and a rooted target keeps nobody at arm's length.
Infinite Duress (R) can be dodged or cut short mid-air, as his page admits: on a target already held by Twisted Advance (W) that never happens. In return that second of suppression is the follow-up your all-roots, no-damage kit can never provide itself.
If the leap does not close, his page says he has nothing left: Twisted Advance (W) hands him a rooted carry and Bramble Smash (Q) knocks back whoever runs in to peel for her. In return he is the burst your kit completely lacks.
Cursed Touch (P) adds true damage to every magic hit, and Bramble Smash (Q) is magic damage scaling off max health: your tank poke starts genuinely hurting. And Curse of the Sad Mummy (R) inside Nature's Grasp (R) is a chain nobody walks out of.
All his damage depends on landing the three empowered Three Talon Strike (Q) hits on one target, and his page says mobile champions simply hop out of Audacious Charge (E) range: two separate roots are exactly those seconds.
If she misses Crescent Strike (Q) she is stranded in the middle with no Lunar Rush (E) reset, exactly as her page says: on a rooted target she does not miss. And Moonfall (R) needs enemies standing close, which is what Nature's Grasp (R) produces.
Two windows where the target cannot walk are two windows where he never stops swinging, and Bramble Smash (Q) knocks off whoever tries to stop him. But against the taunt that actually kills him you have nothing, and he sits at 47.8% in China.
The Sear (Q) stun only exists if the target is already burning, and Pillar of Flame (W) is dodged by walking: on a rooted target both of them land. And Pyroclasm (R) bounces between enemies standing close, which is precisely what Nature's Grasp (R) leaves behind.
Command: Shockwave (R) has a delay any dash can beat, and you cannot dash while rooted. And if she puts Command: Protect (E) on you before Twisted Advance (W), the ball flies into the fight alongside you and shields you the instant you land.
Slicing Maelstrom (R) pulses every half second for three seconds and keeps re-marking: it only pays if nobody leaves the radius, and Nature's Grasp (R) is a rolling wall that roots the whole line. Bramble Smash (Q) knocks off his divers, the defence he has none of.
Nevermove (E) is a skillshot with a return trip that kiters simply walk out of, and without that root he gets no Soul Shard and no burst: Twisted Advance (W) hands him a target that has stopped walking, and Nature's Grasp (R) does it to the whole line.
Life Form Disintegration Ray (R) is a hand-steered channel that any crowd control interrupts and that the target dodges on foot: your two roots are the only windows where it reaches the end. He is at 49.5% though, and gives you no protection at all.
A single crowd control cancels Death Lotus (R), so what she needs is enemies who cannot cast one: Twisted Advance (W) and Nature's Grasp (R) give her two full channels. She sits at 46.8% in China, though, so you are taking the mechanism, not the champion.
Bullet Time (R) is a stationary three-second channel that anyone with a dash walks around and any crowd control cuts short: Nature's Grasp (R) roots the formation in front of her and Bramble Smash (Q) knocks off whoever reaches her, since she has zero mobility.
Her page says enemy crowd control and long-range poke shut her combo down before it starts, and that anywhere but point-blank she is nothing: Twisted Advance (W) launches from range untargetable and opens the way onto someone who can no longer run.
Deadly Flourish (W) only roots someone who has just taken damage: Sapling Toss (E) and Bramble Smash (Q) keep it armed for the entire fight. And Curtain Call (R) is four shots that want a clean line on somebody who is not moving.
He only deals damage standing still at maximum range and has no dash to get out of anything: Twisted Advance (W) and Nature's Grasp (R) hold back whoever is hunting him, and Bramble Smash (Q) knocks away whoever gets there anyway.
Charging Piercing Arrow (Q) roots him in place and telegraphs the shot, and his page says assassins punish him exactly there: Bramble Smash (Q) throws them off. And Chain of Corruption (R) roots a group the same way Nature's Grasp (R) does.
Her kit lives on targets that cannot move, and you produce two of those per fight between Twisted Advance (W) and Nature's Grasp (R): on a still target every shot becomes a Headshot (P). But she is at 46.5% in China, and your early levels are as soft as hers.
| Lane | Tier | Win% | Pick% | Ban% | Pos. |
|---|---|---|---|---|---|
| Support | B | 50.89% | 4.25% | 0.63% | #16 / 34 |
| Lane | Tier | Win% | Pick% | Ban% | Pos. |
|---|---|---|---|---|---|
| Support | B | 50.81% | 4.42% | 0.65% | #16 / 34 |
| Lane | Tier | Win% | Pick% | Ban% | Pos. |
|---|---|---|---|---|---|
| Support | B | 50.78% | 4.67% | 0.58% | #16 / 33 |
| Lane | Tier | Win% | Pick% | Ban% | Pos. |
|---|---|---|---|---|---|
| Support | A | 51.99% | 5.08% | 0.44% | #7 / 33 |


Maokai is a magic-damage Tank in Wild Rift built around a single idea: force fights on his own terms. Twisted Advance dashes him onto a chosen target while he's untargetable, and once he lands he chains root into root — his own snare, then Nature's Grasp rolling in right behind it — so his team can clean up whoever gets caught. He has almost no burst combo of his own, so his value comes from initiation, disruption, and raw durability rather than damage, making him one of the more beginner-friendly, high-impact tanks to pick up.
Skill order: W > E > Q (max R at every level it's available)
Poke with Bramble Smash whenever the wave crashes — its knockback disrupts channels and all-ins, and the max-HP scaling means it threatens even tankier laners early. Stay patient before level 5: Twisted Advance only roots for 0.8 seconds, so dashing in alone just strands you in the middle of a trade — wait until you have minion aggro or a jungler nearby to follow up. Weave in an auto-attack whenever Sap Magic is off cooldown to sustain through poke, and treat level 5 as your first real spike: with Nature's Grasp online you can start forcing skirmishes around river and the first dragon.
Look to open fights from a flank or down a chokepoint with Nature's Grasp — it roots and slows everyone it rolls through, and every champion it connects with refreshes your bonus movement speed, which is what lets you stay stuck to a kiting backline. Once the fight is committed, save Twisted Advance for the biggest isolated threat rather than the first body you see, lock them down for your team's damage, then use Bramble Smash's knockback to peel anyone diving your own carries. Sit on the front edge of the fight rather than deep inside the enemy team: in tank items like Frozen Heart and Warmog's Armor, your job is chaining CC onto priority targets and soaking damage, not trading with their carries.