
WR China Meta
Meta, tier list & top-player builds from the China server · live
Meta, tier list & top-player builds from the China server · live

卡尔玛 · 天启者 Mage A
✅ Patch 7.2e · stats updated 2026-09-12 · real builds of 13 top-ranked China server players captured 2026-09-11
Difficulty Damage Toughness Utility
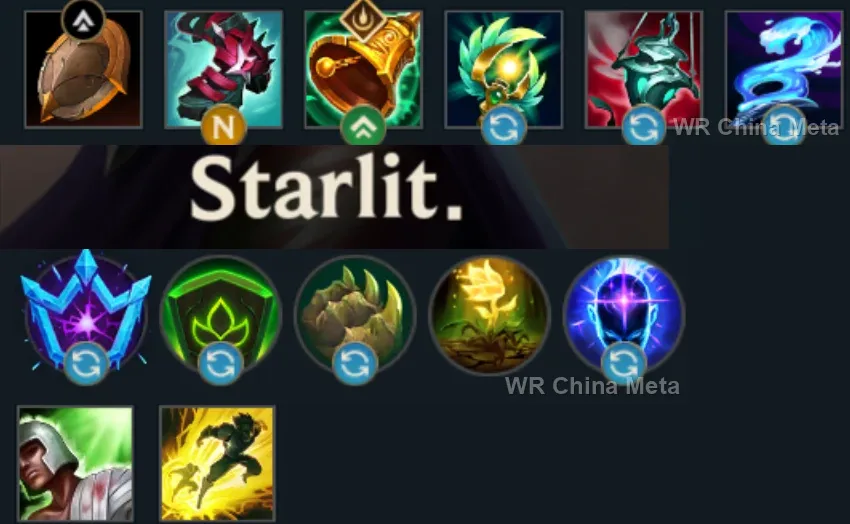
How the strongest players on the Wild Rift China server (国服) build Karma: live win/pick statistics by rank bracket, the most-used item and rune sets, and the real loadouts of the top ranked Karma players, captured in-game.
📖 How to play Karma





Counted on 14 real builds captured from the Chinese client, player by player. Independent from the official API above.


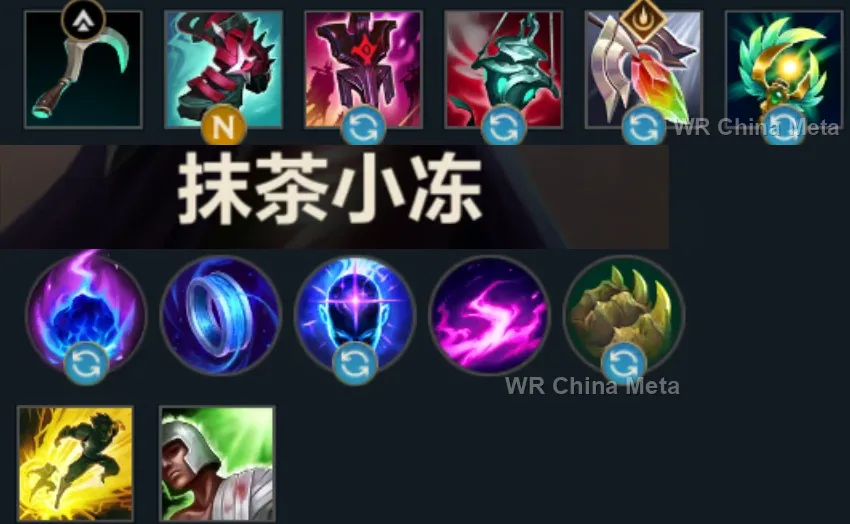
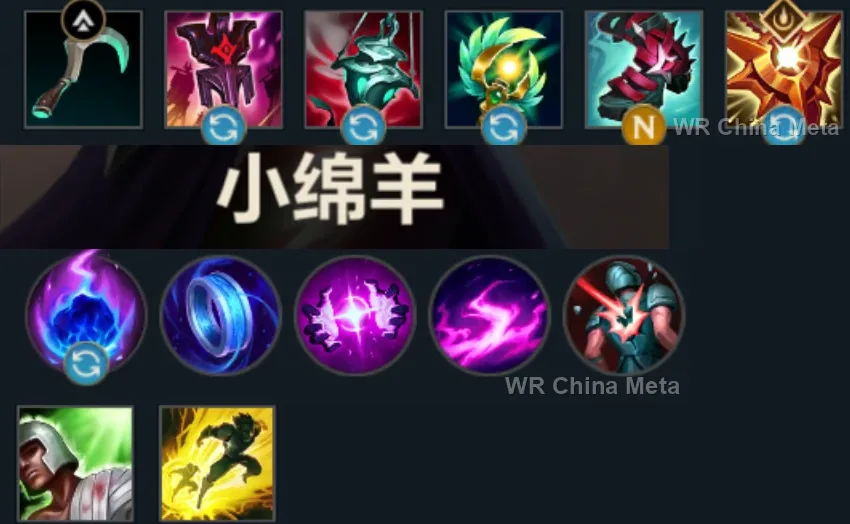
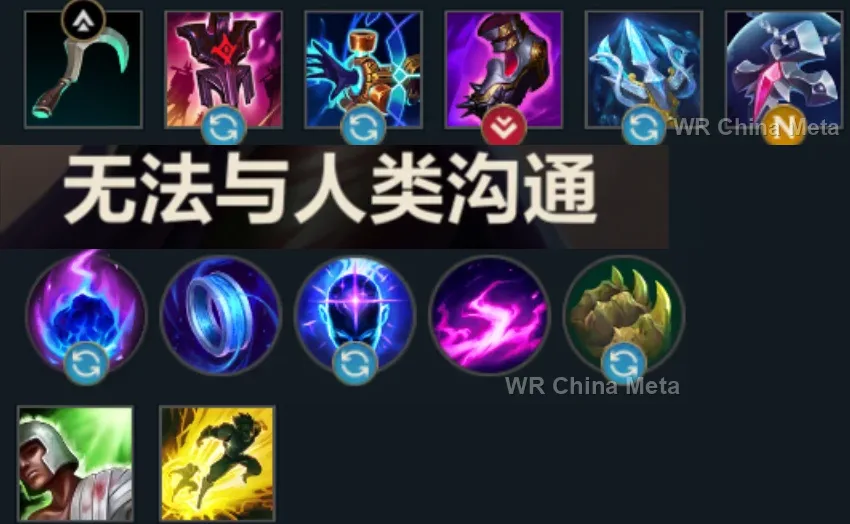
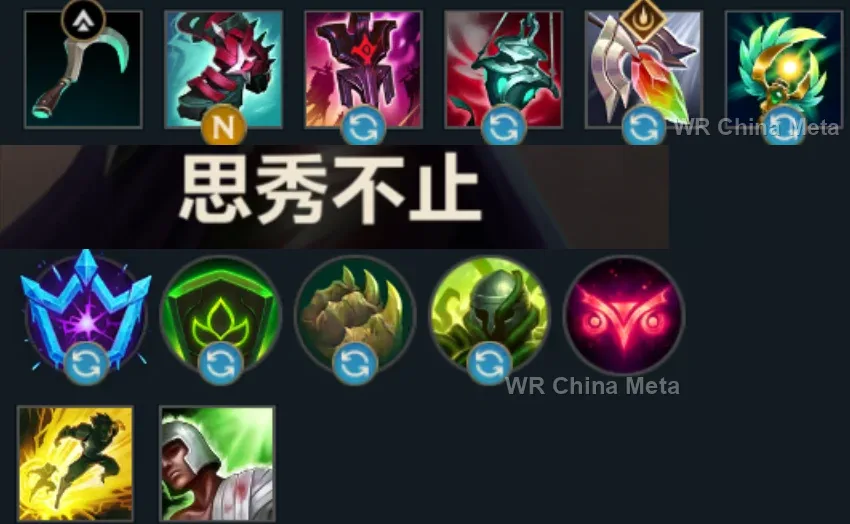
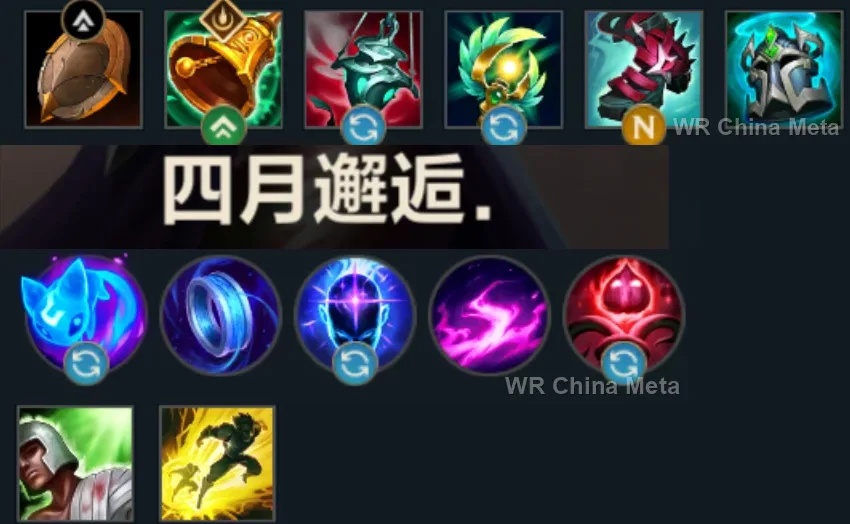
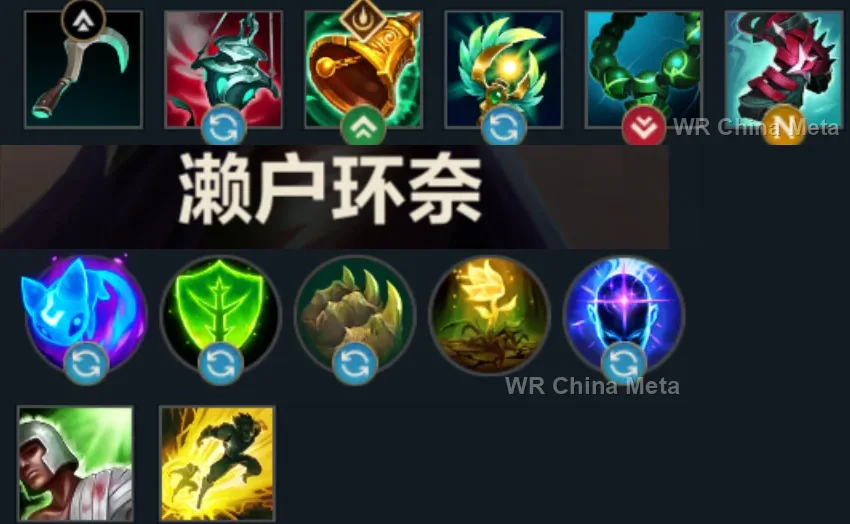
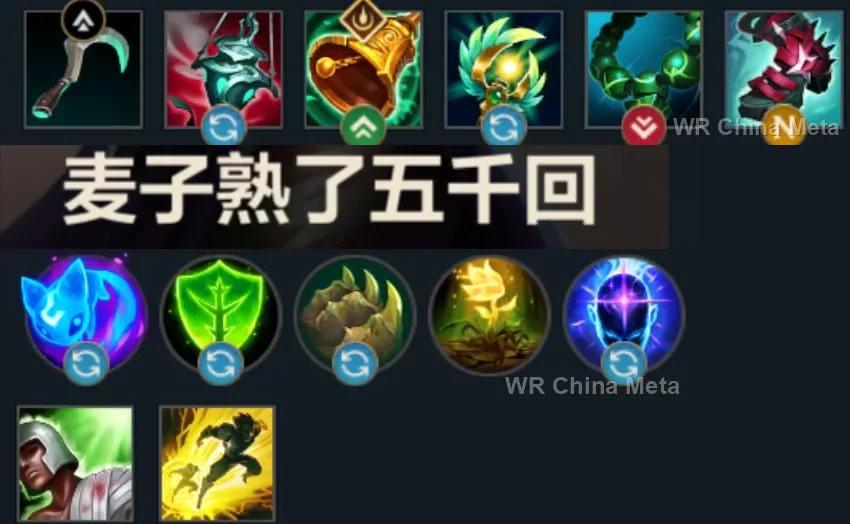
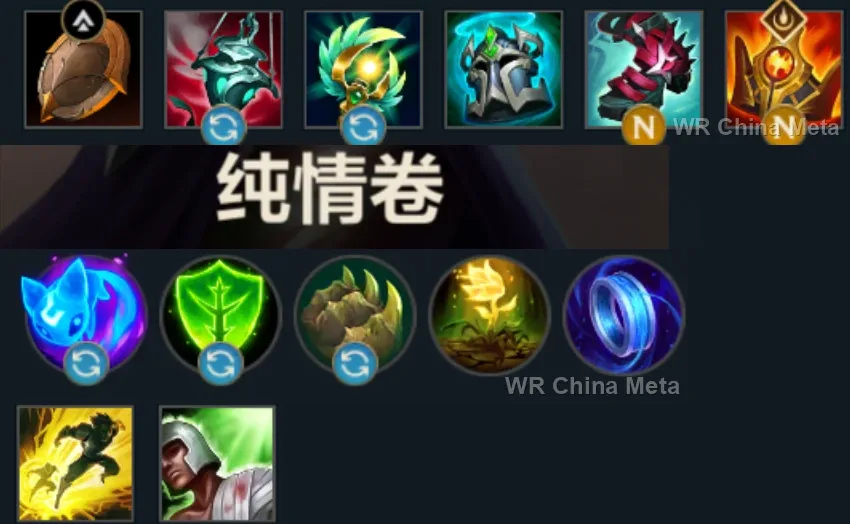
Taken from the official in-game China leaderboard. Spells, runes and items of every public top player.
13 of the top 30 players have a public match history; the others keep theirs private.
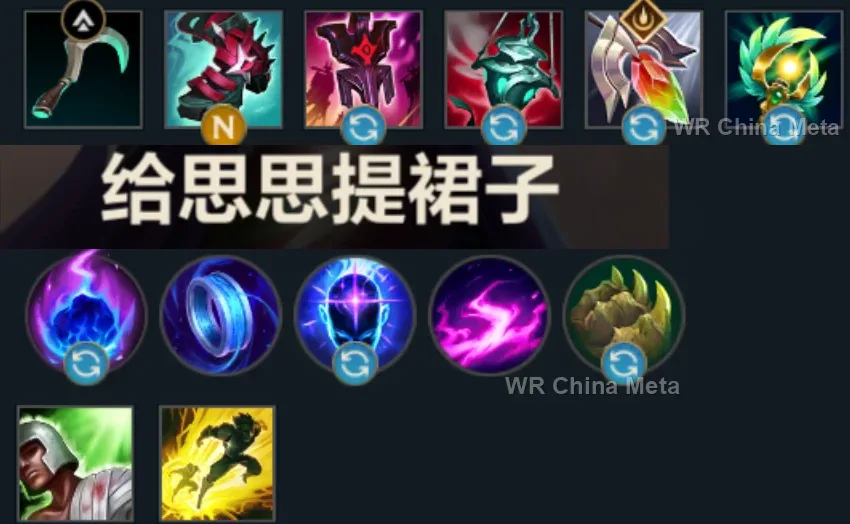
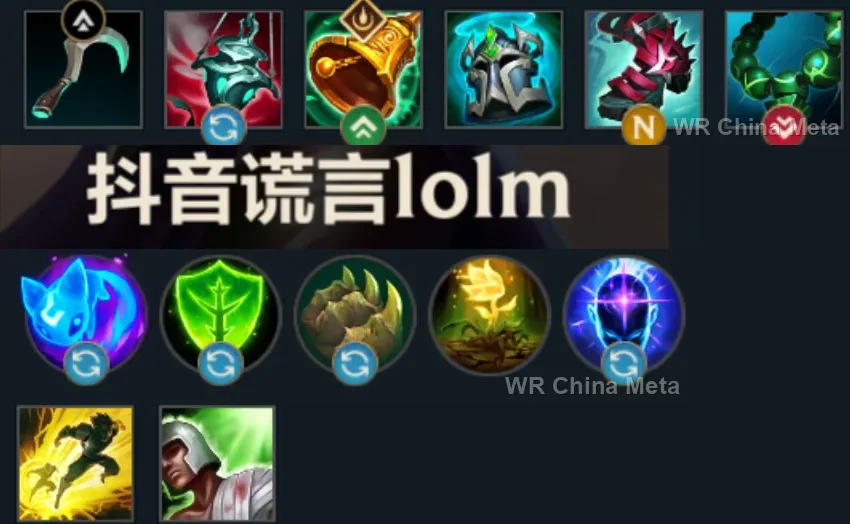
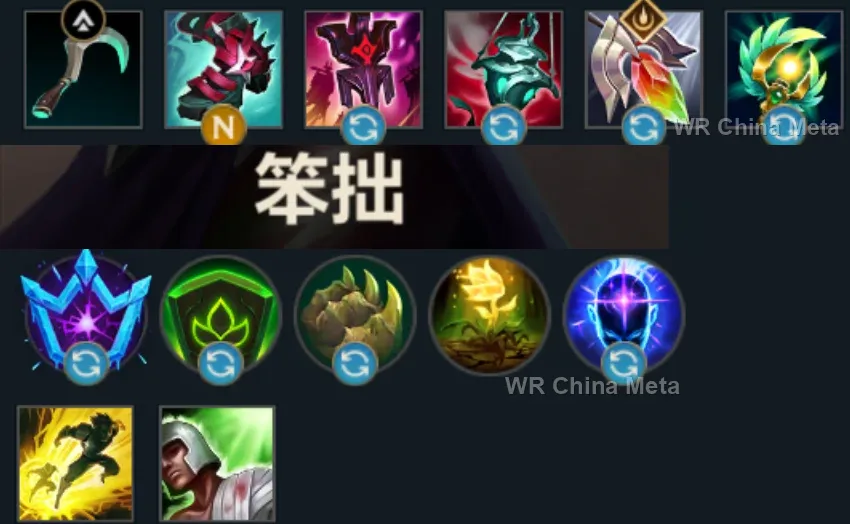
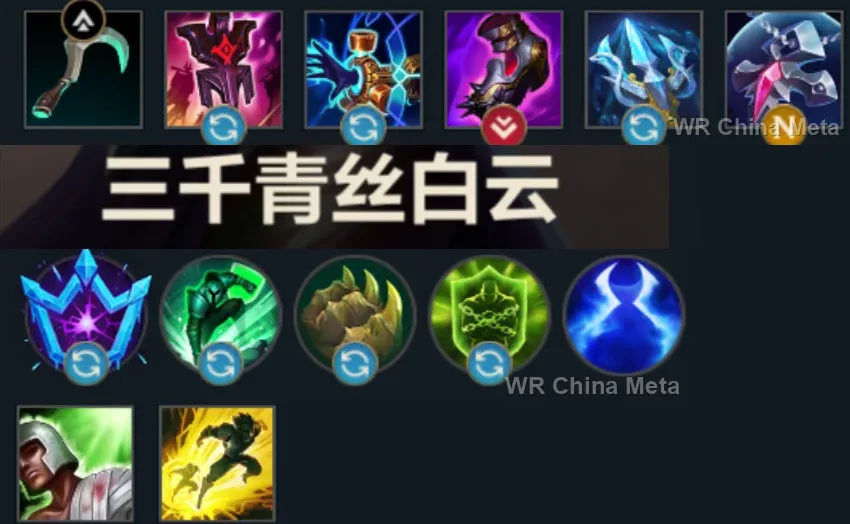
The toughest lane matchups for Karma on the Wild Rift China server, with why each is hard and exactly how to play it.
 Karma vs Blitzcrank Skill matchup
Why Blitzcrank counters Karma: A hook onto your shielded ADC is a wasted hook: you are the insurance policy Blitzcrank hates.
How to play Karma into Blitzcrank: REACTIVE shield while the hook is in flight: you have the time. Mantra plus Q on his entry: poke punishes him every time.
→ Blitzcrank Karma vs Leona Skill matchup
Why Leona counters Karma: If her engage starts clean, it goes straight through your poke: your shields against her CC chain.
How to play Karma into Leona: Root her entry E: you stop the train at the station. Shield with speed on your ADC the moment you see her light up.
→ Leona Karma vs Pyke Skill matchup
Why Pyke counters Karma: He fishes from the dark against your reactive shields: if the hook lands, your utility arrives late.
How to play Karma into Pyke: Vision in the bushes he fishes from, and constant movement-speed shielding. Your Mantra team shield cancels his multi-kill R.
→ Pyke Karma vs Milio Skill matchup
Why Milio counters Karma: An enchanter mirror: his heal against your poke, his cleanse against your root.
How to play Karma into Milio: Win the POKE: Mantra plus Q hits from over twice his range. Use the root as a second wave, after his cleanse is spent.
→ Milio Karma vs Thresh Skill matchup
Why Thresh counters Karma: Hook and Lantern against shield and speed: he creates the openings, you dismantle them one by one.
How to play Karma into Thresh: Shield the hook's target while it is IN FLIGHT. The Mantra W double root punishes him when he walks in for the Flay.
→ ThreshThe champions Karma works best alongside on the Wild Rift China server, lane by lane, with the reason each pairing works.
Poison Trail (Q) never touches anyone faster than he is, and his page admits that gap: Transcendent Embrace (R) shoves them back toward the centre, meaning into the poison, and Focused Resolve (W) ties down whoever Mega Adhesive (W) failed to catch.
Infernal Chains (W) drags back anyone who fails to leave the zone in time, and the slowing field the empowered Inner Flame (Q) leaves behind makes sure nobody leaves it. Focused Resolve (W) meanwhile holds the target on the edge of The Darkin Blade (Q).
His stated limit is that mobile champions stay outside Apprehend (E) range: Focused Resolve (W) ties two of them down from a distance, and Transcendent Embrace (R) shoves them toward the centre, into the outer Decimate (Q) blade, the one that heals him.
His page lists two gaps: no area control and nothing to do once he is being kited. The empowered Inner Flame (Q) field and Transcendent Embrace (R) cover the first, and the big Inspire (E) shield carries The Relentless Storm (P) all the way to five stacks.
Unstoppable Force (R) piles them up and then he has nothing left, because that cast is where all of his damage goes: you drop the empowered Inner Flame (Q) field on the pile. Worth it against teams that really group, far less against a spread one.
Amumu needs them standing close together: spread out, Curse of the Sad Mummy (R) and Despair (W) are wasted cooldowns, and his page says so. Transcendent Embrace (R) packs them into the centre a moment earlier, and instantly refills Mantra (P) for you.
Absolute Zero (R) is beaten by walking out of its radius, and meanwhile he stands still for three seconds taking fire: Transcendent Embrace (R) shoves them back to the centre and slows them, and the empowered Inspire (E) keeps him up until it blows.
Moonfall (R) cannot even be cast with nobody nearby, and while it builds, mobile targets simply walk off: Transcendent Embrace (R) pushes them into the zone and slows them, and the empowered Inspire (E) covers her once Pale Cascade (W) is spent.
A target tied down by Focused Resolve (W) cannot dodge Infinite Duress (R) and has no time to knock him out of the air. And Inner Flame (Q) chips it under 35% health, where Blood Hunt (W) multiplies his movement and attack speed.
Before Cataclysm (R) everything he owns is short-ranged or a skillshot, and his page says a misplaced flag leaves him with no engage at all: Focused Resolve (W) holds the target still, so Demacian Standard (E) and Dragon Strike (Q) never fire into nothing.
Demonic Ascension (R) keeps paying for as long as enemies stay around him: Transcendent Embrace (R) shoves them onto him instead of scattering them. And Vision of Empire (W) adds 50% against anything immobilised, which Focused Resolve (W) just handed over.
Pyroclasm (R) only bounces if somebody else is standing next to the target: Transcendent Embrace (R) packs them onto each other. And his page says he owns no dash and no shield: the empowered Inspire (E) is what keeps him standing there.
Soul Shackles (R) only stuns whoever fails to break the tether: Transcendent Embrace (R) pushes them toward her and slows them, so almost nobody does. And Black Shield (E) blocks the hook your own page calls the thing that kills you.
Nasus has no dash and mobile champions hop in and out before Wither (W) ever lands: Focused Resolve (W) ties them down from range and leaves them standing right in front of him, inside the field the empowered Inner Flame (Q) just lit up.
Anyone paying attention just walks out of the Hero's Entrance (R) zone, telegraphed two and a half seconds before impact: the empowered Inner Flame (Q) field slows that exit and Transcendent Embrace (R) puts them back in the middle as he lands.
Through the three seconds of Bullet Time (R) she cannot move and they can: Transcendent Embrace (R) drives them back toward the middle of the cone and slows them, and the empowered Inner Flame (Q) field pins them under the volleys to the last one.
Deadly Flourish (W) only roots someone an ally has just damaged, and without that condition it is a poke shot and nothing more: Inner Flame (Q) hands him the condition from extreme range, with neither of you stepping toward their team.
Yunara owns no shield and folds to the first dive: the empowered Inspire (E) is the defensive cooldown her kit simply does not have, and Focused Resolve (W) stops the diver halfway, before he reaches the range where she dies.
Essence Flux (W) only pays if the follow-up hit lands, and on a target tied down by Focused Resolve (W) it always does. There is no hard crowd control in his kit: with Arcane Shift (E) on cooldown, his page says he has no answer to a dive.
Enchanted Crystal Arrow (R) gets sidestepped, but not on a target Focused Resolve (W) is already holding. And every Frost Shot (P) hit slows, so the tether that is about to snap almost always survives all the way to the root.
| Lane | Tier | Win% | Pick% | Ban% | Pos. |
|---|---|---|---|---|---|
| Support | A | 50.98% | 5.41% | 0.65% | #11 / 34 |
| Lane | Tier | Win% | Pick% | Ban% | Pos. |
|---|---|---|---|---|---|
| Support | A | 51.01% | 5.51% | 0.68% | #11 / 34 |
| Lane | Tier | Win% | Pick% | Ban% | Pos. |
|---|---|---|---|---|---|
| Support | A | 50.96% | 6.36% | 0.69% | #10 / 33 |
| Lane | Tier | Win% | Pick% | Ban% | Pos. |
|---|---|---|---|---|---|
| Support | S | 51.5% | 9.89% | 0.91% | #4 / 33 |


Karma is a Mage in Wild Rift most often played as an enchanter-style support in the bot lane, and her entire kit revolves around Mantra: every spell she casts builds a stack, and the third cast comes out as a stronger, upgraded version. She trades in steady magic poke rather than burst, and her real power spikes come from timing an empowered shield that can save two allies at once. With no dash or blink anywhere in her kit but a low difficulty rating, Karma rewards patient spell-weaving and positioning far more than mechanical skill.
Skill order: Q > W > E
Lane behind minions and build Mantra stacks by casting Inner Flame whenever it's safe - the poke chips the enemy bot lane down without you ever needing to walk into range. Hold the empowered Inspire for the exact moment your ADC commits to a trade or the enemy goes all-in, since a well-timed shield and speed boost can flip a losing exchange outright. Use Focused Resolve's threat range to zone the enemy off the wave rather than throwing it early for poke, and keep vision stacked in the river or tri-bush - with no escape tools, Karma dies fast to any gank she doesn't see coming. Itemize toward the enchanter path, Bulwark of the Mountain into Ardent Censer and Imperial Mandate, as soon as your lane is stable.
From the mid game on, play Karma as a backline zoning mage rather than a frontline threat: hold max range, punish grouped enemies with empowered Inner Flame for damage and lingering slow, and save Focused Resolve to root whoever dives your carries. Time Transcendent Embrace for the moment three or more enemies are stacked in a chokepoint or your team is forcing a big engage - the area damage, slow, and center knockback can single-handedly break a bad fight, and since it refills Mantra instantly you should chain straight into whichever empowered spell the fight needs next. Positioning matters more than raw damage here: Karma has no mobility, so fight from behind your frontline and never take the first hit of an engage.