
WR China Meta
Meta, tier list & top-player builds from the China server · live
Meta, tier list & top-player builds from the China server · live

莫德凯撒 · 铁铠冥魂 Fighter S+
✅ Patch 7.2e · stats updated 2026-09-12 · real builds of 23 top-ranked China server players captured 2026-09-11
Difficulty Damage Toughness Utility
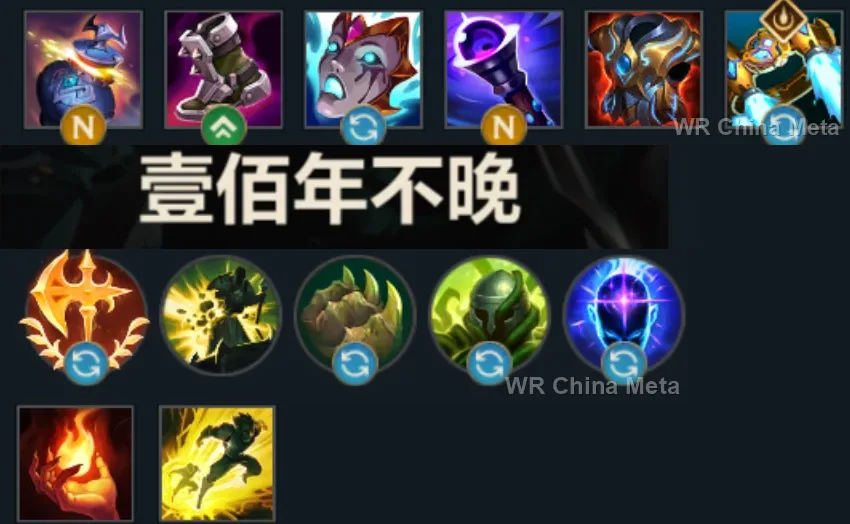
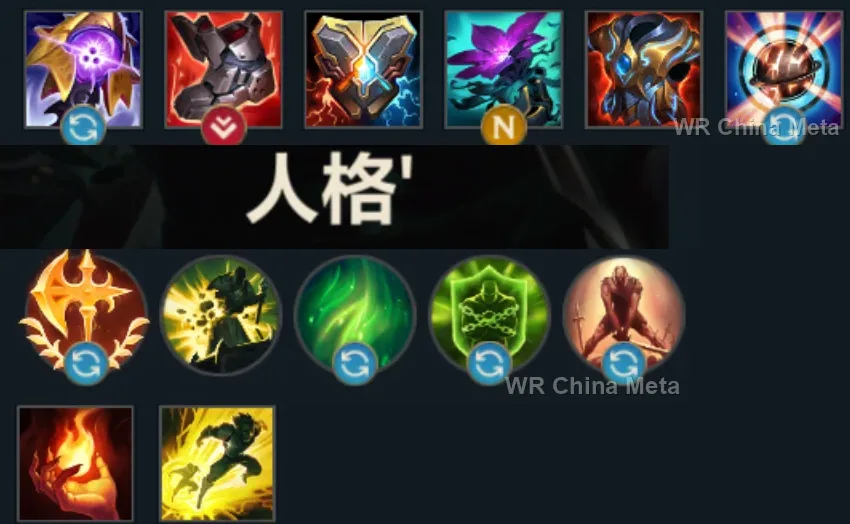
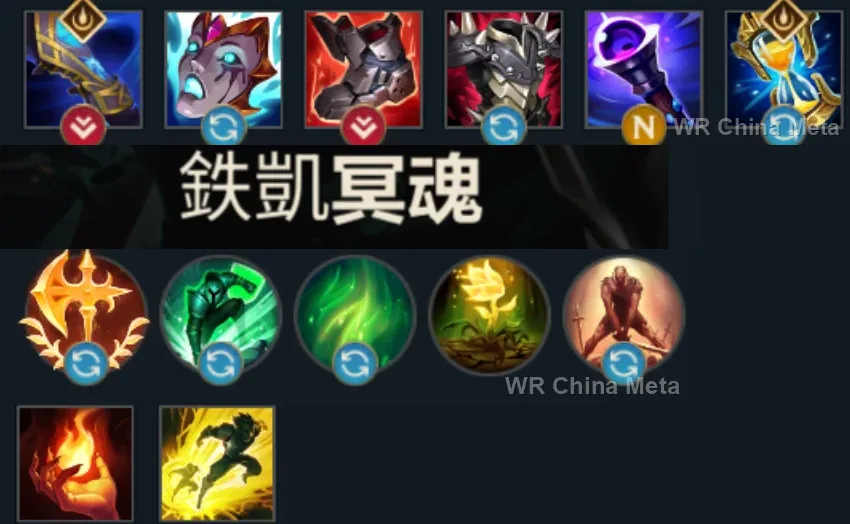
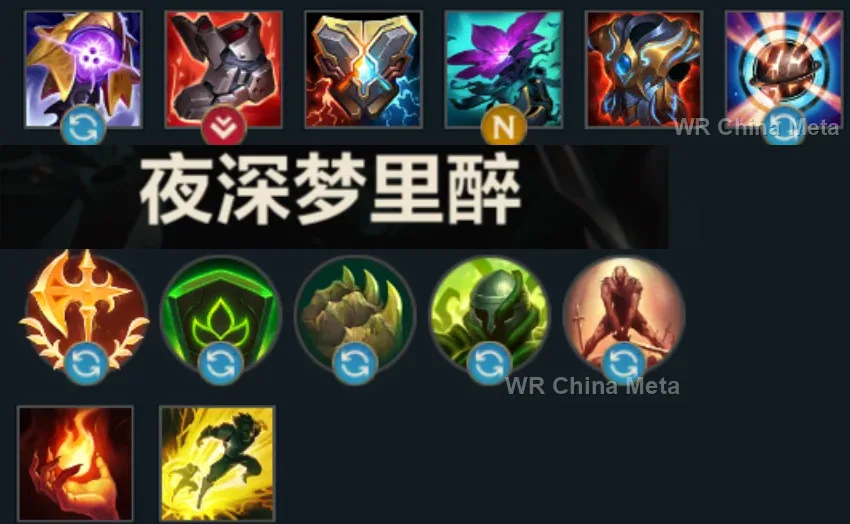
How the strongest players on the Wild Rift China server (国服) build Mordekaiser: live win/pick statistics by rank bracket, the most-used item and rune sets, and the real loadouts of the top ranked Mordekaiser players, captured in-game.
📖 How to play Mordekaiser



Counted on 25 real builds captured from the Chinese client, player by player. Independent from the official API above.


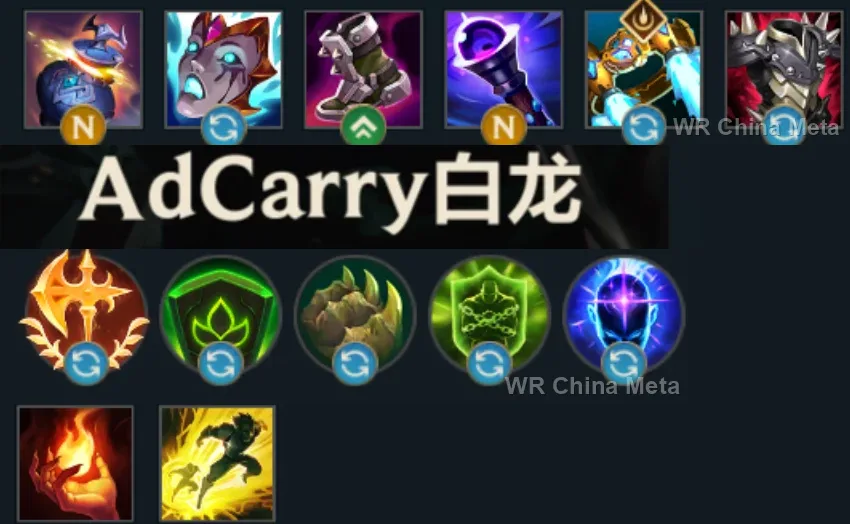
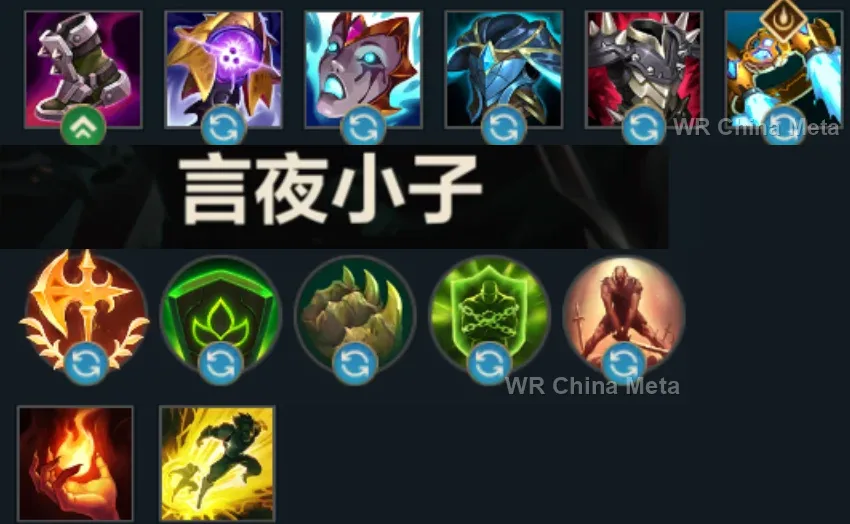
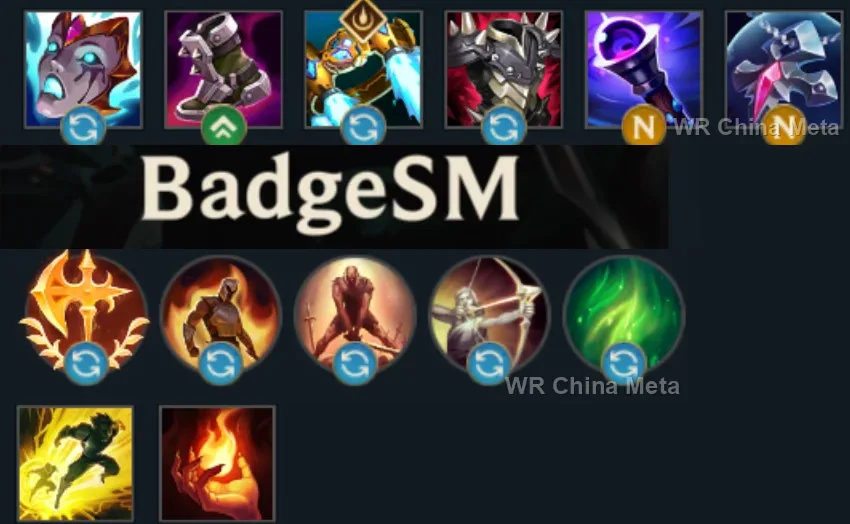
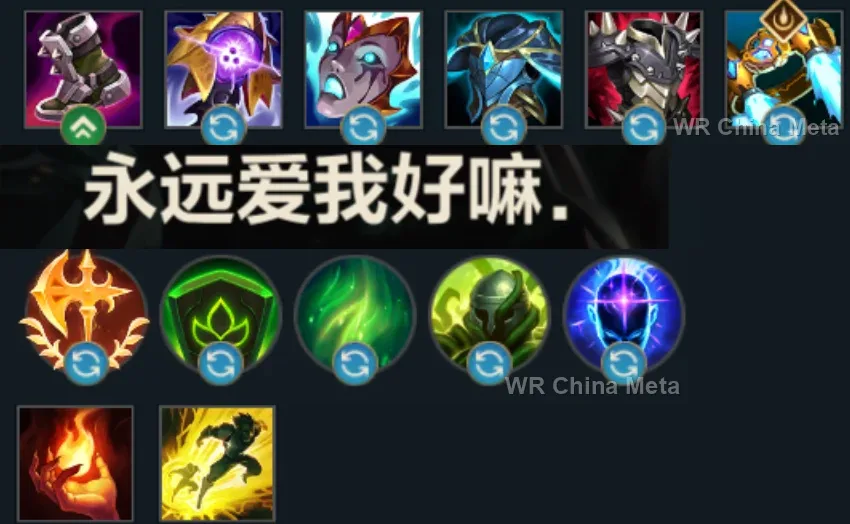
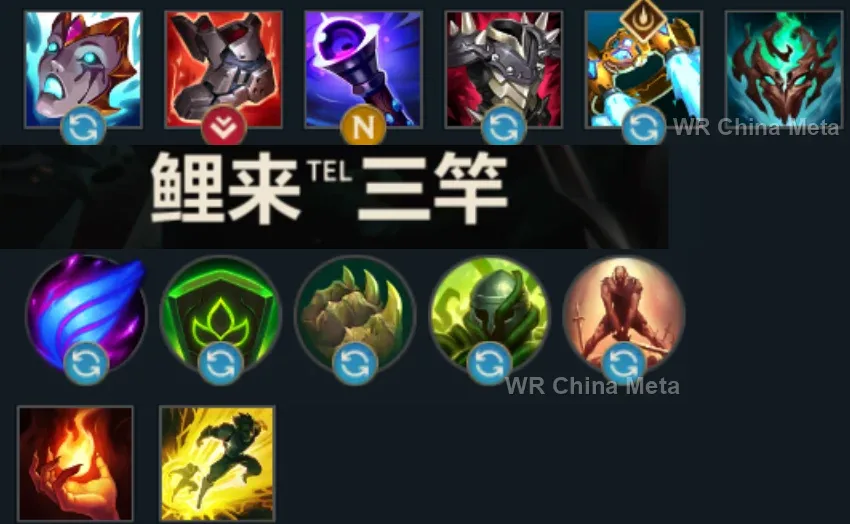
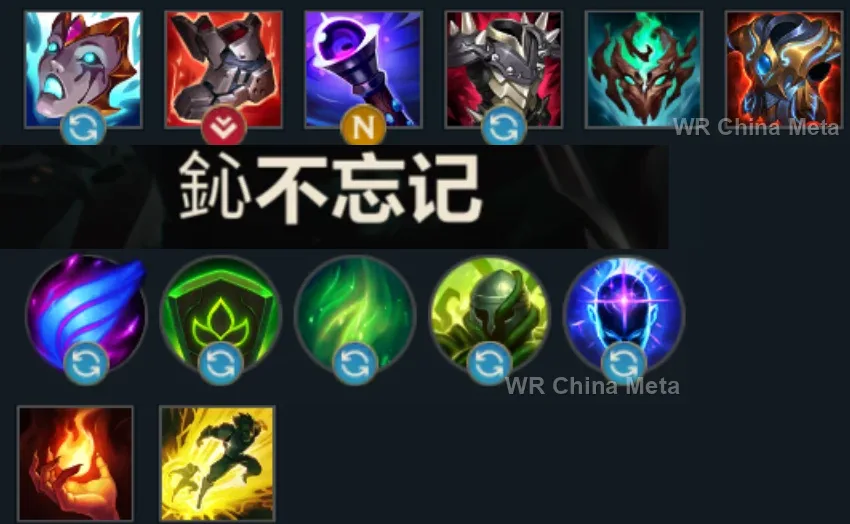
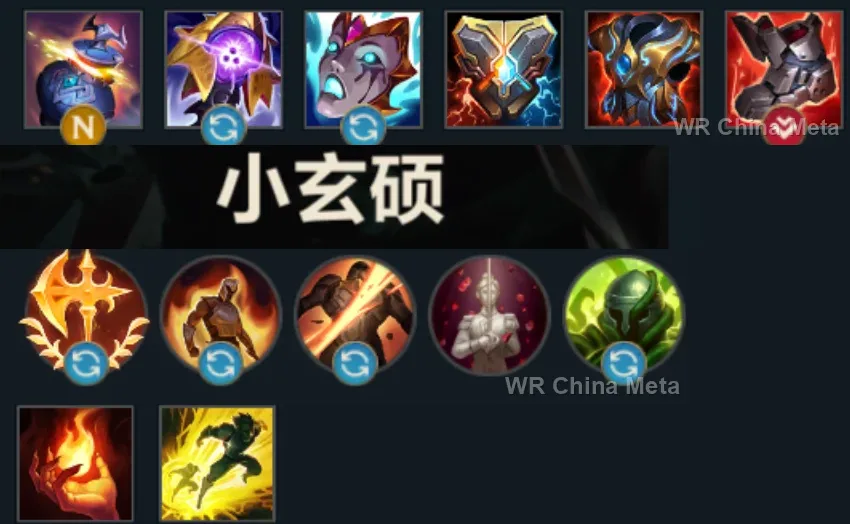
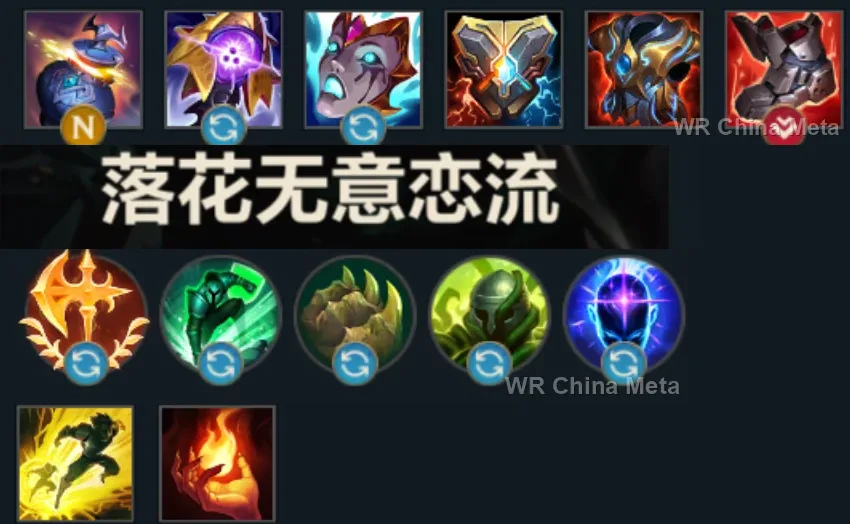
Taken from the official in-game China leaderboard. Spells, runes and items of every public top player.
23 of the top 30 players have a public match history; the others keep theirs private.

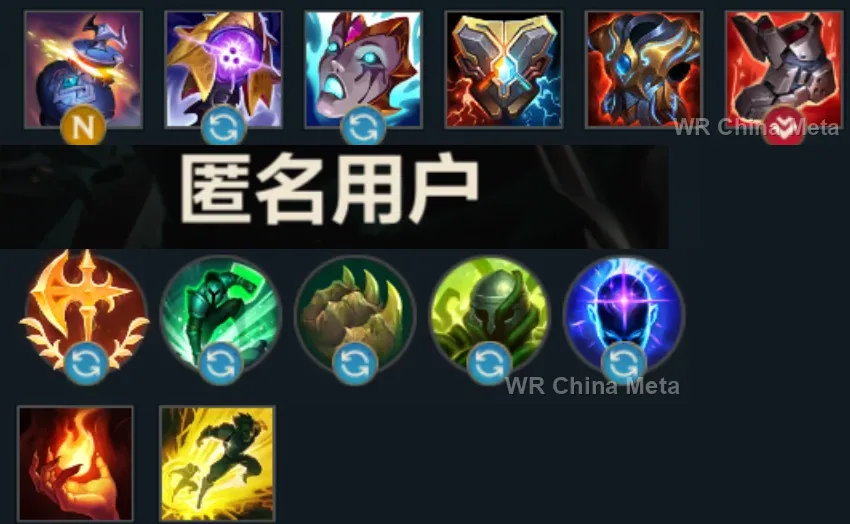

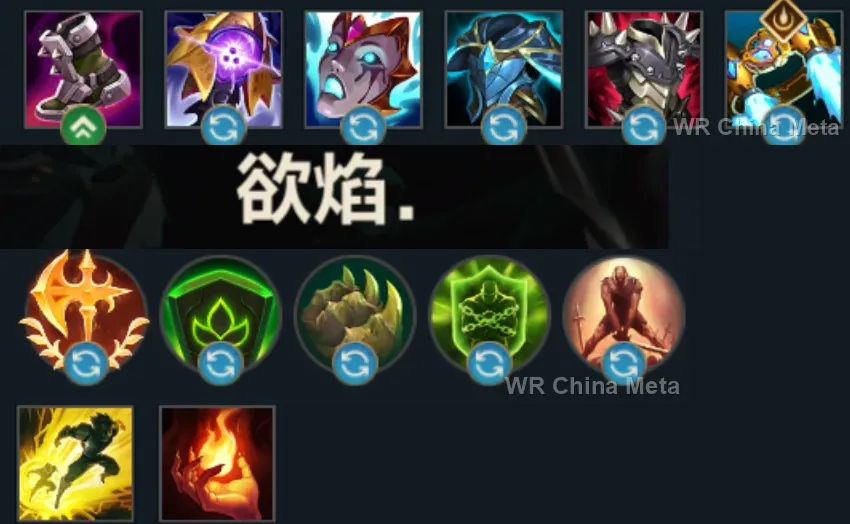
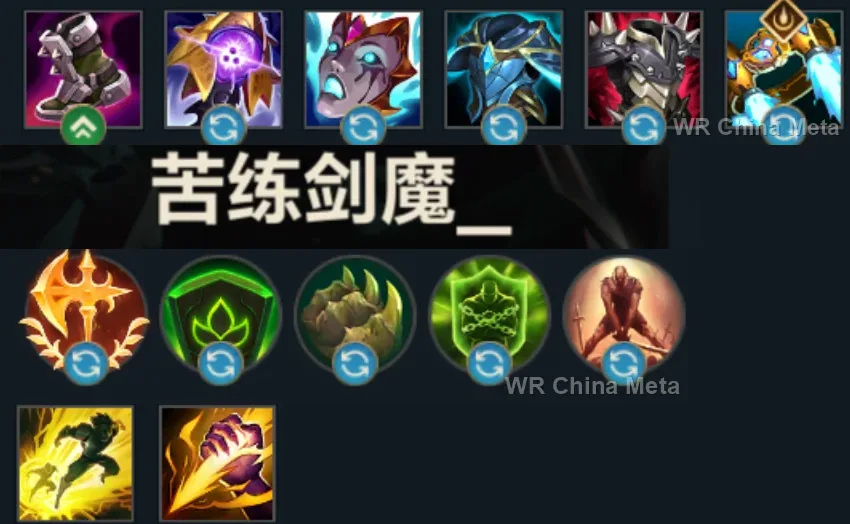
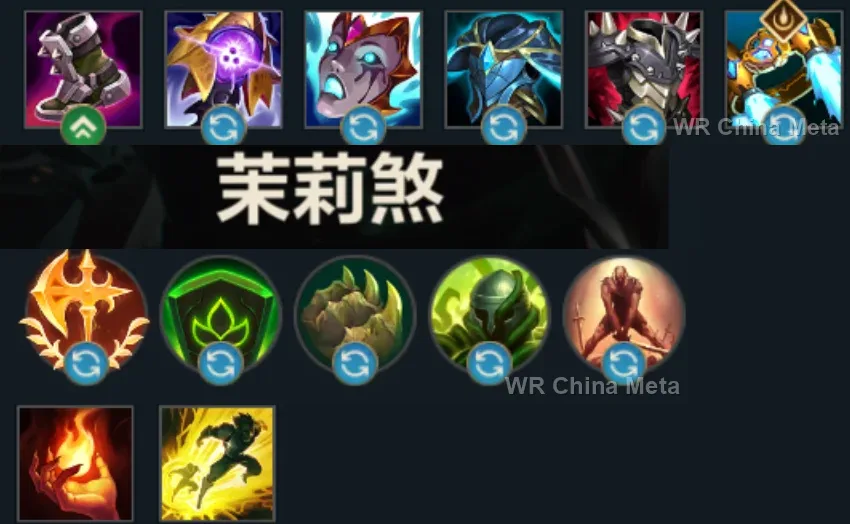




The toughest lane matchups for Mordekaiser on the Wild Rift China server, with why each is hard and exactly how to play it.
 Mordekaiser vs Fiora Hard counter
Why Fiora counters Mordekaiser: She dances inside your Q as an isolated target, parries your E and humiliates you in your own death realm: the duel of duels goes to her.
How to play Mordekaiser into Fiora: NEVER ult Fiora into the realm: take anyone else. Q minions to charge the shield and wait for multi-body fights.
→ Fiora Mordekaiser vs Vayne Unfavorable
Why Vayne counters Mordekaiser: Kiting and percent damage against your slow body: she melts you from outside mace range.
How to play Mordekaiser into Vayne: E-pull on her Tumble cooldown and R the MOMENT she is in range: in the 1v1 death realm you maul her. Take Ghost for the stickiness.
→ Vayne Mordekaiser vs Teemo Unfavorable
Why Teemo counters Mordekaiser: Blind, poison and range: three insults to your slow kit. But your R is the perfect revenge.
How to play Mordekaiser into Teemo: Endure the poke by charging your shield with Q on minions. At 5: R, and the rabbit is caged with the bear. Repeat on every cooldown.
→ Teemo Mordekaiser vs Jax Skill matchup
Why Jax counters Mordekaiser: His Counter Strike does not stop your Q and your realm cuts him off from his power windows: a duel of timing windows.
How to play Mordekaiser into Jax: R him right AFTER his Counter Strike ends: 8 seconds belong to you. Light your passive before every serious trade.
→ Jax Mordekaiser vs Gwen Skill matchup
Why Gwen counters Mordekaiser: The Mist works even inside your R: your private realm gains an untargetable intruder.
How to play Mordekaiser into Gwen: Make her waste the Mist BEFORE the R with a fake engage. If she uses it in the realm, walk around it: the Mist runs out before your passive does.
→ GwenThe champions Mordekaiser works best alongside on the Wild Rift China server, lane by lane, with the reason each pairing works.
Cease and Desist (R) is point-and-click and unstoppable: it hands you their carry, ripped out from behind the front line and alone. That's the one condition where Obliterate (Q) gets its 45% bonus, and you'd never have reached her yourself.
Crescent Guard (R) knocks back everyone except his Challenged target and blocks damage coming from outside: he literally builds the 1v1 your whole kit lives on. You hook in with Death's Grasp (E) and Obliterate (Q) hits a lone champion.
Cataclysm (R) seals a target inside a wall, away from their team: you get the isolation Obliterate (Q) lives on without spending Realm of Death (R), which you keep for the next champion. If you're inside the ring too, it's a 2v1.
You have no dash and they kite you all game: Frenzying Taunt (E) nails their carry down for the seconds you need to walk over, and Powerball (Q) brings the engage in from off-screen while you're still on your way.
Once he marks a target with Cursed Touch (P), every point of magic damage it takes carries bonus true damage with it, and your kit is magic from the first hit to the last, so all of it gets amplified. Curse of the Sad Mummy (R) meanwhile buys you 1.5 seconds to walk in.
Paranoia (R) blacks out their whole team's vision: in those seconds a slow, dashless champion like you can cross the field without being pre-kited. It only counts if you play that moment together, otherwise he dives and you're left behind.
You engage with no exit and no peel: Hero's Entrance (R) arrives from half a map away, knocks up whoever is on you and shields you exactly when you've already spent everything. Before that, Justice Punch (E) and the Shield of Durand (W) taunt hold the target still for you.
Ring of Frost (W) roots and Frozen Tomb (R) stuns on top of it: that's nearly three seconds where the target can't move, exactly the time you need to walk over and land Obliterate (Q) on an isolated champion.
With Pyromania (P) charged, anything she casts becomes a one-second stun, and Summon: Tibbers (R) puts it on a whole group: that's the window where a dashless melee actually gets in, instead of chasing for the entire fight.
Sleepy Trouble Bubble (E) puts an enemy to sleep away from their team: you stroll over and Obliterate (Q) catches them alone, with the 45% bonus. She's also the highest win rate mid on the server, so the synergy costs you nothing in tier.
The gold card from Pick a Card (W) stuns for 1.25 seconds, enough to land Death's Grasp (E). The real reason is Destiny (R), though: seeing the whole map tells you when a target is alone, and that's when Realm of Death (R) isn't wasted.
If she bonds you as her Oathsworn, Fate's Call (R) launches you into their team, knocking up everyone you hit: that's the dash you don't have, and it delivers exactly the bodies Darkness Rise (P) wants around you. The same ability pulls you back out if the dive goes wrong.
Frost Shot (P) slows on every single hit, so the target stops walking away from you; Enchanted Crystal Arrow (R) stuns for up to 3.5 seconds from off-screen. Those are exactly the two things your kit is missing entirely.
Caustic Spittle (Q) shreds the target's magic resist, and every point of damage you deal is magic: all your hits land harder. In exchange, Realm of Death (R) removes the diver for seven seconds, and a diver is the only way Kog'Maw ever really dies.
Dragon Practice (P) only grows if he keeps hitting champions and staying alive: Realm of Death (R) on the assassin hunting him buys seven free seconds, and late in the game those stacks are the damage you don't have.
Deadly Flourish (W) turns into a root on anyone an ally has just damaged: Death's Grasp (E) switches it on every time you pull. And Curtain Call (R) wants targets that can't move, which is exactly who you're already holding down.
Rocket Grab (Q) rips a target out from behind their team and Power Fist (E) knocks them up the moment they land: it hands them over isolated and motionless, the one situation where Obliterate (Q) gets its 45% and Realm of Death (R) is a decided kill.
Black Shield (E) eats the first crowd control aimed at you, and it's crowd control, not damage, that stops a champion with no dash. Dark Binding (Q) does the reverse: two full seconds where the target stands there waiting for you.
Inspire (E) gives you a shield and a big burst of speed: for someone who has to walk there it's the closest thing to a dash, and the empowered version lets a second ally pick it up too. Focused Resolve (W) meanwhile roots whoever is kiting you.
Death Sentence (Q) holds the target still for a second and a half while you walk over, and the Dark Passage (W) lantern is the only exit you'll ever get: your own card says it plainly, outside Death's Grasp (E) you have no peel and no disengage.
Song of Celerity (E) opens a move speed aura for the whole team every time she casts it, and for a dashless melee that's what decides whether you get there at all. Crescendo (R) opens the window, and she's the highest win rate support on the server.
Zenith Blade (E) roots and drags her onto the target, Shield of Daybreak (Q) stuns right after: a chain long enough for you to walk in. It needs her to engage first, though, and in China she sits under a 50% win rate.
| Lane | Tier | Win% | Pick% | Ban% | Pos. |
|---|---|---|---|---|---|
| Baron | S+ | 50.57% | 11.88% | 30.45% | #2 / 41 |
| Lane | Tier | Win% | Pick% | Ban% | Pos. |
|---|---|---|---|---|---|
| Baron | S+ | 50.55% | 11.65% | 31.7% | #2 / 41 |
| Lane | Tier | Win% | Pick% | Ban% | Pos. |
|---|---|---|---|---|---|
| Baron | S | 50.3% | 11.03% | 30.68% | #4 / 41 |
| Lane | Tier | Win% | Pick% | Ban% | Pos. |
|---|---|---|---|---|---|
| Baron | S | 49.58% | 10.88% | 25.39% | #6 / 39 |


Mordekaiser is a magic-damage Fighter in Wild Rift built around isolating one enemy and grinding them down, whether that's a solo trade in lane or his signature Realm of Death, which drags a single champion into a private arena for seven seconds. He deals sustained magic damage through empowered basic attacks and a stacking dark aura, backed by a damage-storing shield that turns punishment into staying power. He's less about flashy teamfight combos and more about winning individual duels that swing the whole game.
Skill order: Q > E > W — max Obliterate first for the hardest-hitting trades and clear, take Death's Grasp second for more frequent pulls and slows, and leave Indestructible for last since one early point already gives a workable shield.
In lane, look for trades where Obliterate can land on a single isolated champion rather than clipping the wave, since the 45% solo bonus makes one clean hit worth more than spreading it. Use Death's Grasp to punish overextensions or to drag a target into Q range, then keep chipping away with your passive's empowered autos every time you connect. Save Indestructible for moments you're actually about to eat real damage, since the shield is weak until it's fed, and recast it for healing once things cool down. Farm honestly until 5, because his power spike hits hard the moment Realm of Death comes online.
Mordekaiser doesn't really fight 5v5, he fights 1v1 five times over: send Realm of Death at the enemy's biggest threat, a fed carry, a diving assassin, or whoever your team can't otherwise handle, and turn the fight into a 4v4 your side should win while he finishes his own duel. Inside the Realm, Obliterate always lands on a lone target, so it hits for full bonus damage every time. In the main fight, hold Indestructible until burst is actually incoming, keep the passive's aura and empowered autos ticking on whoever is closest, and use Death's Grasp to drag priority targets into range rather than to peel. Time the ultimate for a fight you can either win outright or one where simply removing their key piece is enough to swing it.