
WR China Meta
Meta, tier list & top-player builds from the China server · live
Meta, tier list & top-player builds from the China server · live

永恩 · 封魔剑魂 Fighter S
✅ Patch 7.2e · stats updated 2026-09-12 · real builds of 17 top-ranked China server players captured 2026-09-11
Difficulty Damage Toughness Utility
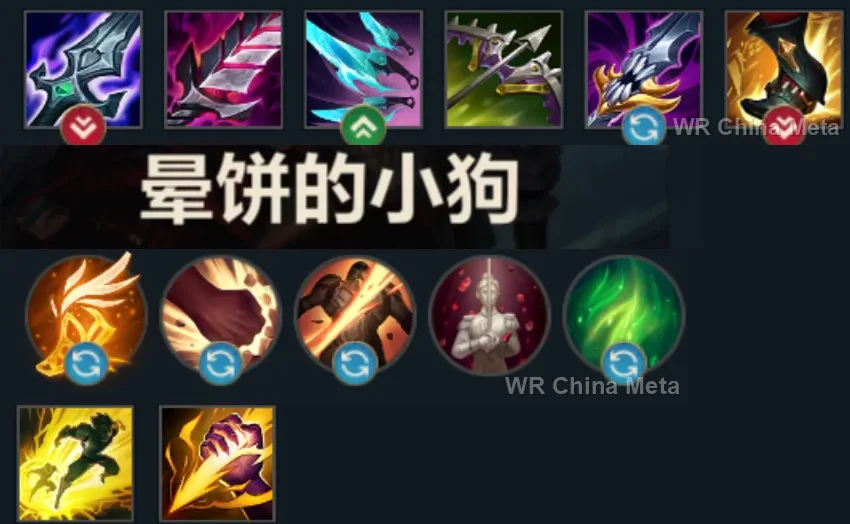
How the strongest players on the Wild Rift China server (国服) build Yone: live win/pick statistics by rank bracket, the most-used item and rune sets, and the real loadouts of the top ranked Yone players, captured in-game.
📖 How to play Yone


Counted on 19 real builds captured from the Chinese client, player by player. Independent from the official API above.


Taken from the official in-game China leaderboard. Spells, runes and items of every public top player.
17 of the top 30 players have a public match history; the others keep theirs private.
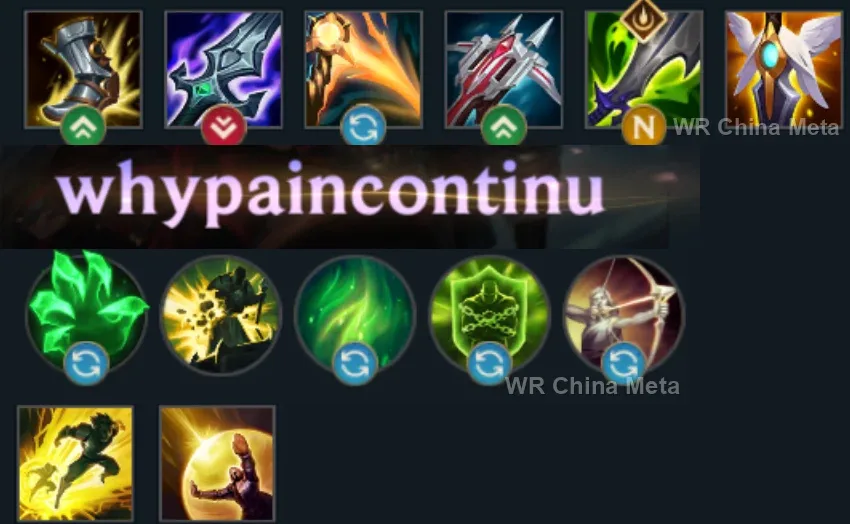
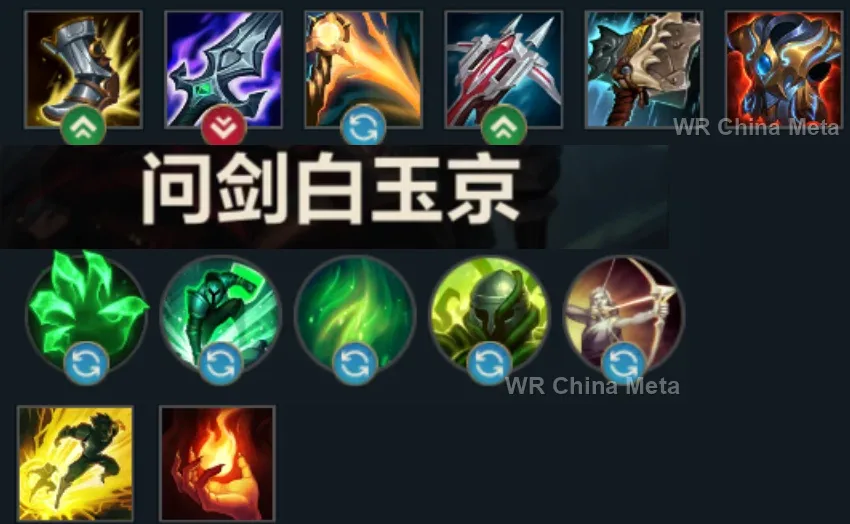
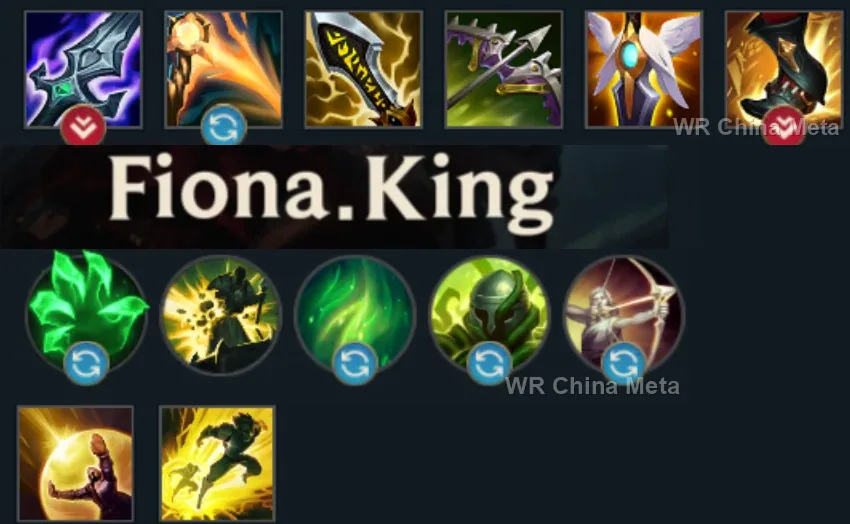
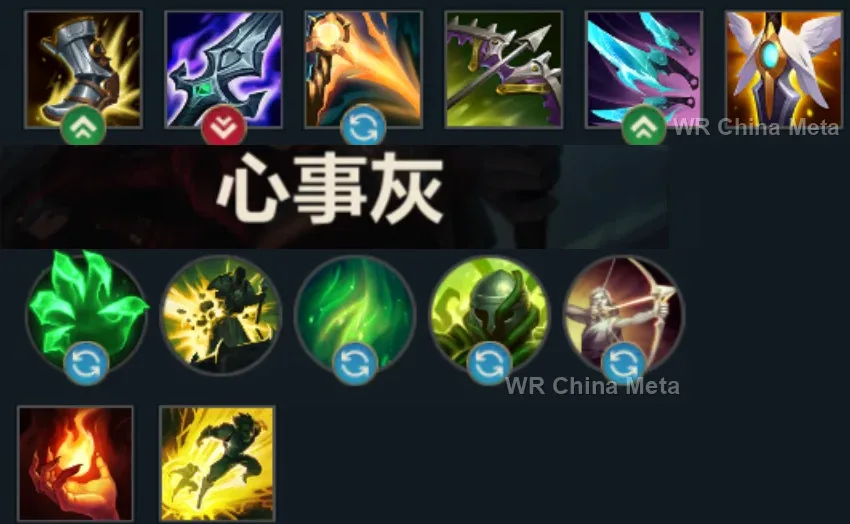
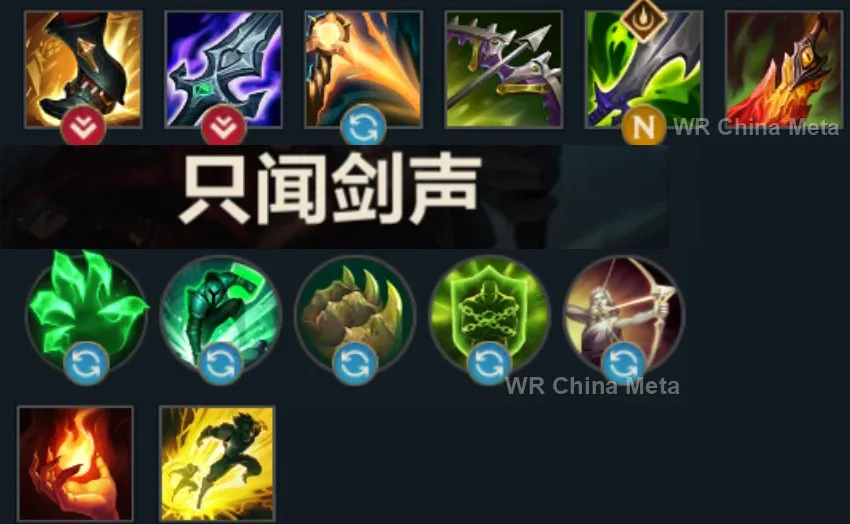
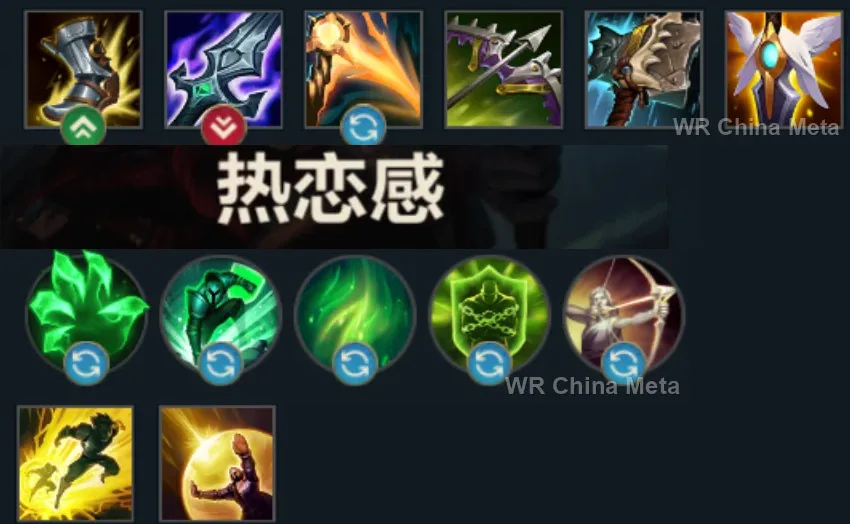
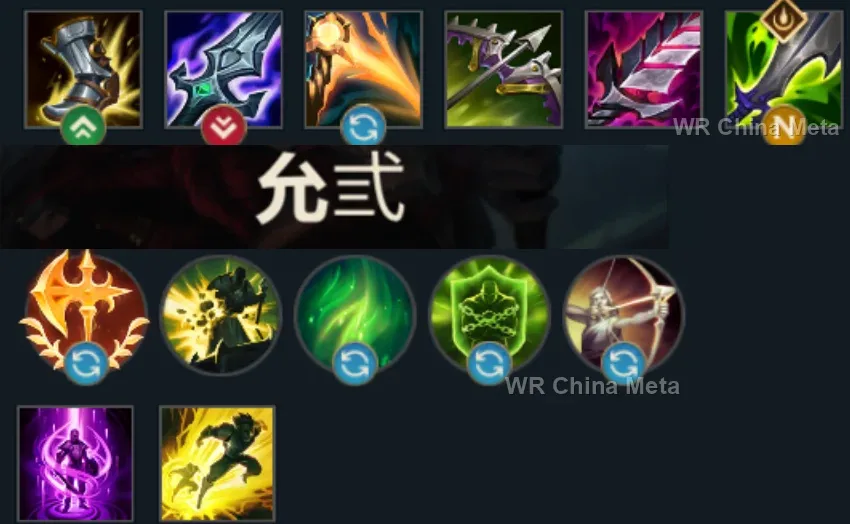
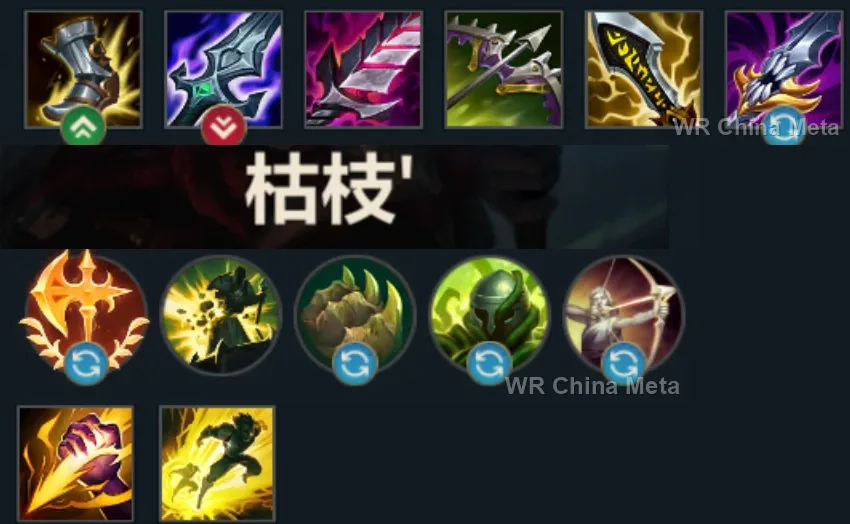
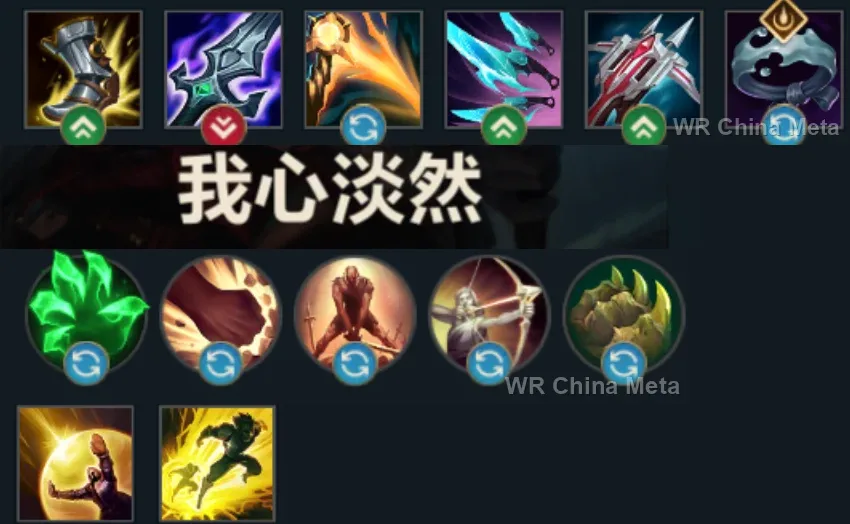
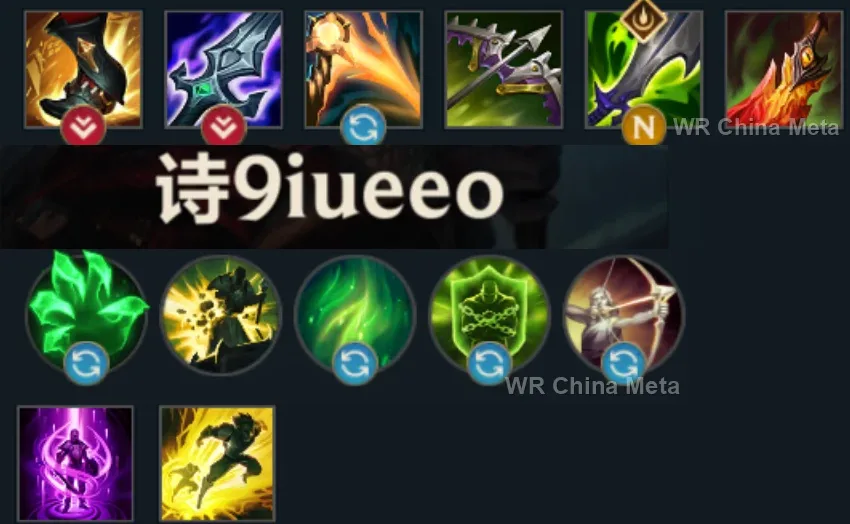
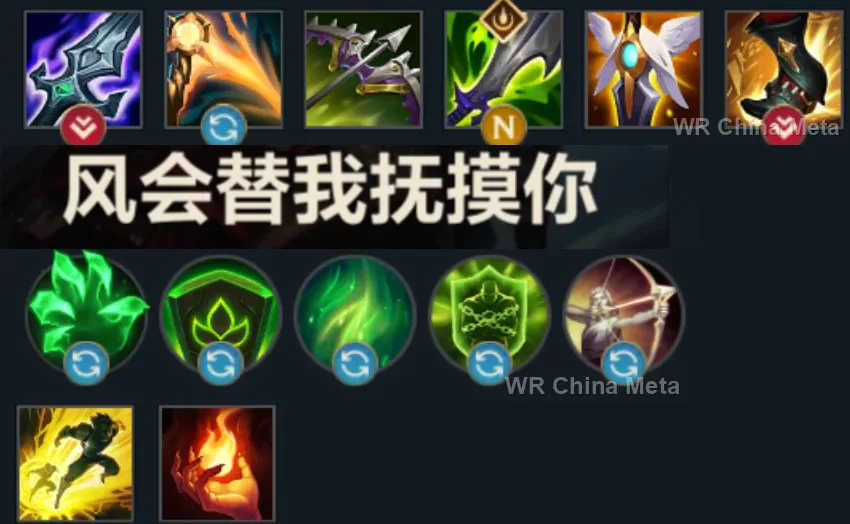
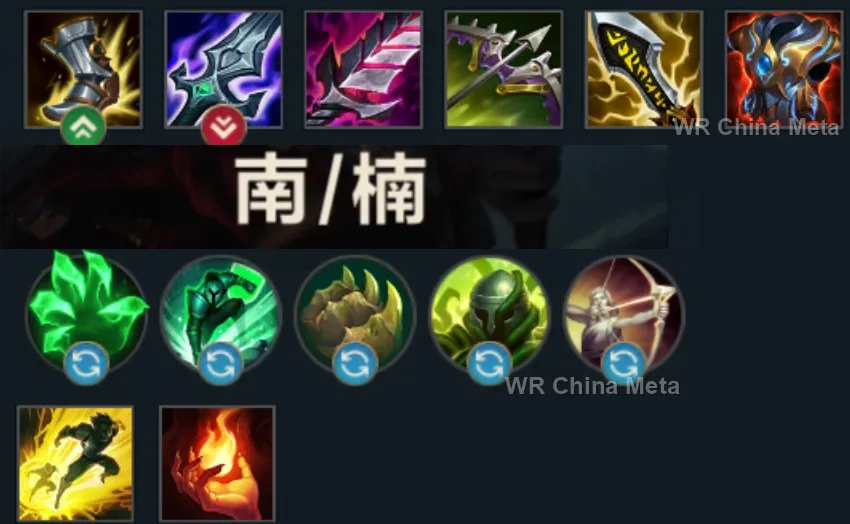
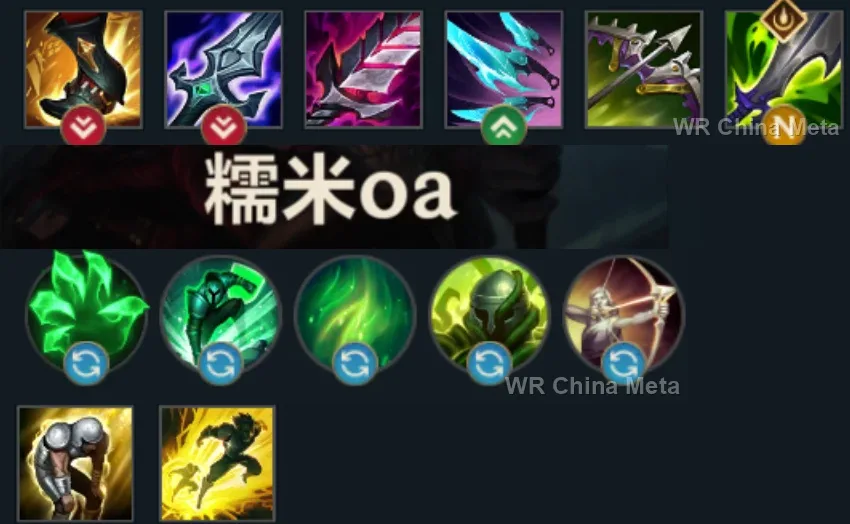
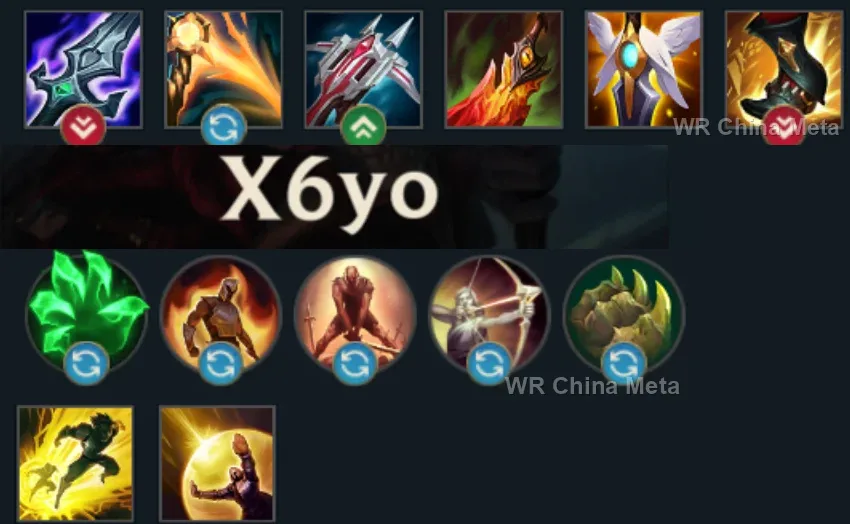
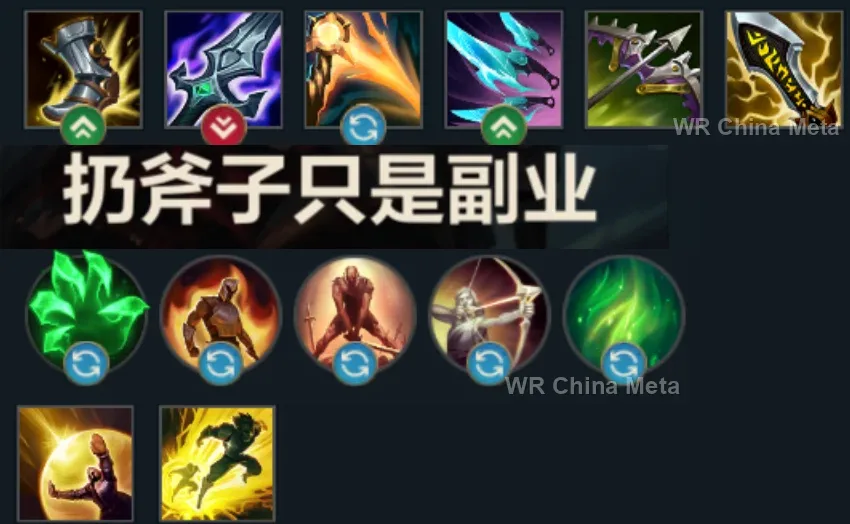
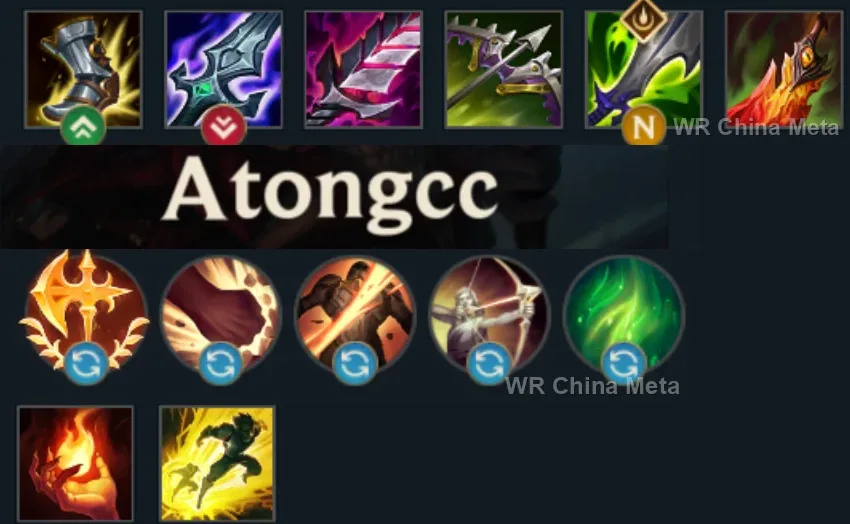
The toughest lane matchups for Yone on the Wild Rift China server, with why each is hard and exactly how to play it.
 Yone vs Malphite Hard counter
Why Malphite counters Yone: Same as with Yasuo: climbing armor, constant poke and an R that flips any all-in. Your E is worthless if the target does not die.
How to play Yone into Malphite: Accept the lost lane: farm, stay full HP to deny his R windows, and build Bloodrazor. In the mid game crack the side lanes instead of chasing the 1v1.
→ Malphite Yone vs Jax Unfavorable
Why Jax counters Yone: His Counter Strike dodges your attacks through your entire E window: every spirit-form trade backfires. And he out-scales you 1v1.
How to play Yone into Jax: Trade ONLY while his Counter Strike is on cooldown. Poke with Q from distance and never commit E while he has everything ready.
→ Jax Yone vs Renekton Unfavorable
Why Renekton counters Yone: The same song as with Yasuo: short fury trades and a guaranteed stun. Worse, your E has a mandatory return he punishes with the all-in.
How to play Yone into Renekton: Do not open with E: keep it to leave. Trade at empty fury. From the second item you pass him: until then, zero risks.
→ Renekton Yone vs Pantheon Unfavorable
Why Pantheon counters Yone: A guaranteed stun plus an E that blanks your frontal damage. He brutally punishes your E's tail: he waits for the snap-back and unloads everything.
How to play Yone into Pantheon: Trade only with the passive shield up and never open with E. Outlast his first items and he becomes a statue: force the long fights after your 2 items.
→ Pantheon Yone vs Darius Unfavorable
Why Darius counters Yone: Long trades mean 5 stacks mean death, and your E drags you back exactly where his E wants you. He wins every extended exchange before 3 items.
How to play Yone into Darius: Poke with Q and W: the W shield wins the mini-trades. Enter E only to finish, not to start. Your scaling doubles his after 2 items.
→ Darius Yone vs Riven Skill matchup
Why Riven counters Yone: A cooldown duel: she has more burst in the short windows, you have shield sustain and scaling. Whoever manages distance better wins.
How to play Yone into Riven: Keep W for her combo's entry. Do not trade inside her active Qs; punish the gap between the third Q and the reset. After 2 items you are favored.
→ RivenThe champions Yone works best alongside on the Wild Rift China server, lane by lane, with the reason each pairing works.
Your own card says never to open the fight yourself: Curse of the Sad Mummy (R) opens it and leaves a tight, motionless pile. Fate Sealed (R) cuts through that whole line and drops you behind the last target hit, right next to their carry.
Cataclysm (R) packs the group into an arena a few metres wide: it is the cleanest line Fate Sealed (R) will ever cut through, and you land inside the wall with them, Soul Unbound (E) already up and ready.
Moonfall (R) only works up close and only if enemies stay around her: that clump is exactly what Fate Sealed (R) needs in order to hit more than one body, and your empowered Mortal Steel (Q) lifts them again right after.
You are the most fragile melee in the lane and Soul Unbound (E) snaps you back on a fixed timer, often straight into their burst: Lamb's Respite (R) is three seconds where nobody can die, which turns your dive from a gamble into a plan.
Biggest Snowball Ever! (W) rolls into the front line and bunches it up, and Absolute Zero (R) holds it there: two reasons for them to stay gathered while you line up Fate Sealed (R). Miss the snowball and nothing is left, and opening falls to you.
Last Breath (R) can only be cast on airborne targets: Fate Sealed (R) knocks up a whole group and your empowered Mortal Steel (Q) adds another one moments later. That is two windows in the same fight, and you open them from their side.
Command: Shockwave (R) drags enemies into a single point: the perfect line for Fate Sealed (R), which hits everything in its path. And Command: Protect (E) parked on you is a shield and resistances on the most fragile body in the team.
Fate Sealed (R) leaves you behind their line, where you have nothing to save yourself with: Hero's Entrance (R) lands right on top of you with a shield and a knock-up on everyone who piled onto you.
Ring of Frost (W) roots everyone around her and Frozen Tomb (R) freezes the most dangerous target: rooted enemies are lined-up enemies, and Fate Sealed (R) is worth exactly as many bodies as it can cut through.
Nevermove (E) pulls the target toward him and Vision of Empire (W) deals 50% more to anything locked down: if he opens, you arrive on a group already gathered. He has no mobility at all, so it pays off around objectives, not in open field.
Fate Sealed (R) drops you behind their carry with no way back: bonded as her Oathsworn, Fate's Call (R) rips you out when the maths goes wrong, and it is the only safety net your dive will ever get.
Fate Sealed (R) knocks the group up and leaves it tight and still for a moment: Bullet Time (R) is twelve waves in three seconds onto enemies that cannot sidestep it, and you are already on the far side finishing whoever breaks off.
Your own card tells you to arrive second, not to open: Enchanted Crystal Arrow (R) opens for you from off-screen, and Frost Shot (P) slows on every hit, so they can't scatter before you line up Fate Sealed (R).
Deadly Flourish (W) roots anyone an ally has just damaged: the mark you plant with Soul Unbound (E) switches it on, so the target cannot walk away before your spirit snaps back and cashes in the true damage.
Chain of Corruption (R) spreads between nearby enemies, and they are nearby the instant Fate Sealed (R) has compacted them: the chain locks the group down while you execute the carry. He has to fire after you, though, never before.
Magnet Storm (R) vacuums the enemy team into a single heap: Fate Sealed (R) hits everything along its path, so that heap is the most your ultimate will ever be worth. And Ferromancy: Crash Down (W) opens the fight instead of you.
Transcendent Embrace (R) knocks enemies toward its centre and slows them: it compacts them onto the Fate Sealed (R) line. And the empowered Inspire (E) is a shield plus movement speed on the body any burst deletes in one second.
Soul Unbound (E) returns your spirit on a fixed timer, and whoever stuns you at that instant kills you for free: Black Shield (E) on you before the snap-back cancels that crowd control, and Dark Binding (Q) holds the target you were marking.
Crescendo (R) stuns the first target it touches and slows everyone else caught in the wave: the group stops spreading out and Fate Sealed (R) finds its line ready. And Aria of Perseverance (W) keeps the most fragile melee on the team standing.
Unbreakable (E) eats the projectiles that delete you the moment you land behind their line, and Glacial Fissure (R) knocks up an entire row of enemies: precisely the row Fate Sealed (R) wants to cut through.
| Lane | Tier | Win% | Pick% | Ban% | Pos. |
|---|---|---|---|---|---|
| Baron | S | 51.76% | 5.83% | 12.85% | #4 / 41 |
| Mid | S | 51.56% | 5.01% | 12.85% | #7 / 39 |
| Jungle | C | 49.71% | 1.94% | 12.85% | #32 / 40 |
| Lane | Tier | Win% | Pick% | Ban% | Pos. |
|---|---|---|---|---|---|
| Baron | S | 51.86% | 5.92% | 13.69% | #4 / 41 |
| Mid | A | 51.62% | 4.98% | 13.69% | #7 / 38 |
| Jungle | C | 49.62% | 1.94% | 13.69% | #32 / 40 |
| Lane | Tier | Win% | Pick% | Ban% | Pos. |
|---|---|---|---|---|---|
| Baron | S | 52.29% | 6.47% | 15.55% | #3 / 41 |
| Mid | A | 51.29% | 5.15% | 15.55% | #9 / 39 |
| Jungle | C | 49.89% | 2.04% | 15.55% | #36 / 42 |
| Lane | Tier | Win% | Pick% | Ban% | Pos. |
|---|---|---|---|---|---|
| Baron | S+ | 51.62% | 8.5% | 20.91% | #2 / 39 |
| Mid | S | 50.86% | 7.61% | 20.91% | #4 / 41 |
| Jungle | B | 48.2% | 2.52% | 20.91% | #28 / 41 |


Yone is a mixed-damage fighter who plays best in the top lane or mid, built entirely around his passive Way of the Hunter: every second basic attack partly converts to magic damage, and his crit chance is doubled, so overflow crit above 100% turns straight into bonus attack damage. In Wild Rift he behaves like a hybrid duelist-assassin, chaining Mortal Steel stacks into a spirit-form dash with Soul Unbound and cashing out extra true damage when the spirit snaps back. He hits hard and picks fights on his own terms, but he is fragile and has almost no way to save a bad engage.
Skill order: Q > W > E (max Mortal Steel first for stacking damage and the knockup, Spirit Cleave second for the shield and wave clear, one early point in Soul Unbound for mobility; take Fate Sealed at every chance)
Poke safely with Mortal Steel from max range to build stacks without committing to a full trade, and treat the 2-stack empowered Q as your real engage tool rather than diving in blind. Respect any lane opponent who can punish a stationary body during your Soul Unbound window - climbing-armor bruisers and guaranteed-stun champions both turn a normal trade into a lost one. Prioritize safe farm and wave management until your first real power spike, usually once Blade of the Ruined King and Essence Reaver come online.
From the mid game onward, Yone plays as a flanking duelist rather than a frontline brawler: let your tank or initiator open first, then look to land Fate Sealed through as many enemies as possible so it also drops you right next to their priority target. Chain straight into Q and E to burst an isolated carry while the rest of your team follows up on the knockups, and pick up Mortal Reminder when the enemy has strong healing so your true-damage payoff actually sticks. Because he has so little survivability, avoid initiating fights yourself - arrive once cooldowns are spent, not before.